This post may contain affiliate links. Please see my full disclosure and privacy policy for details.
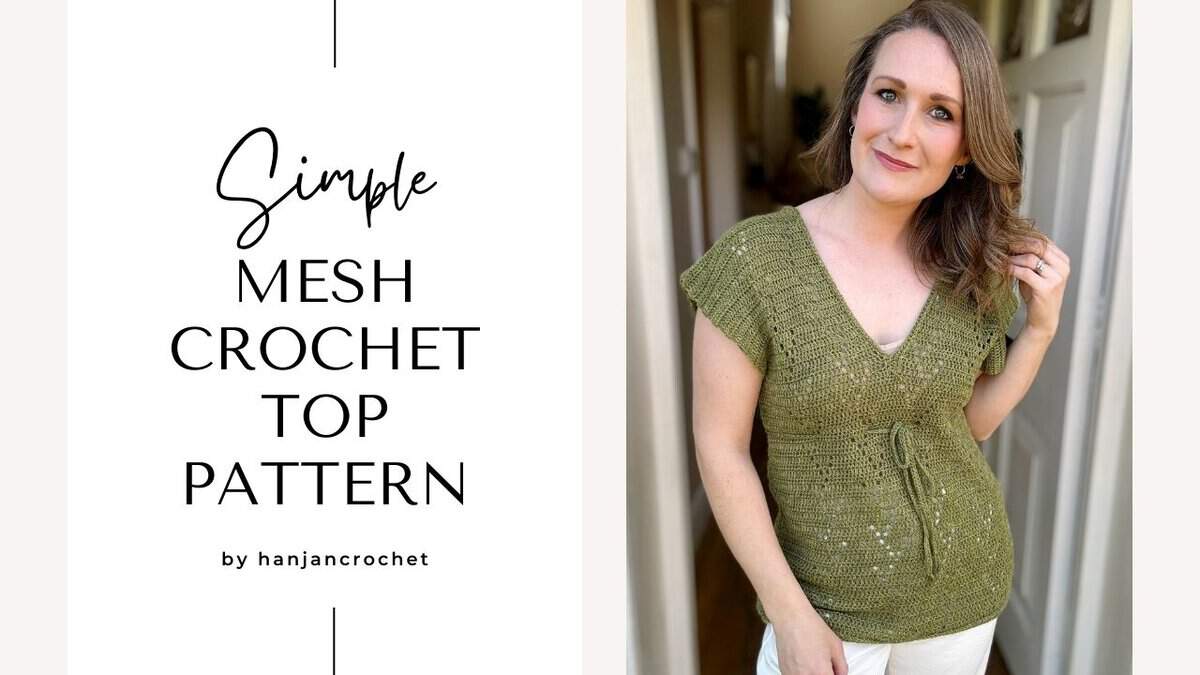
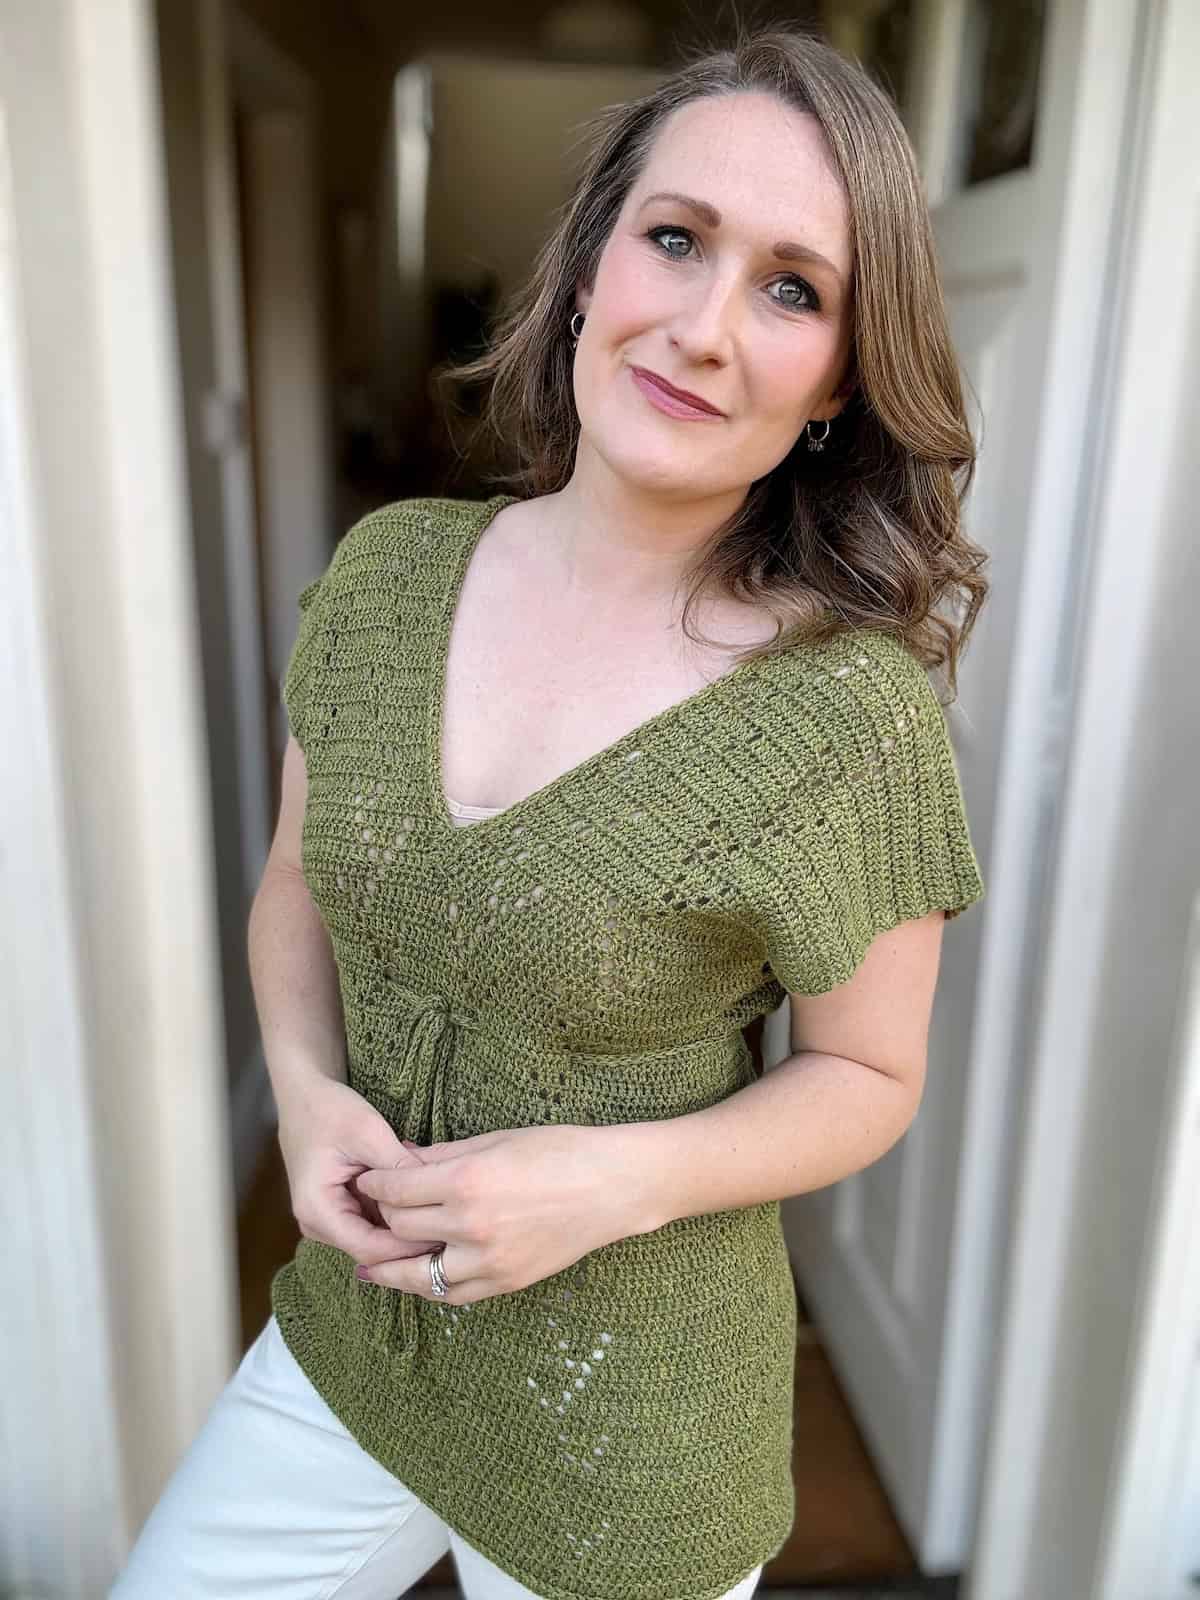
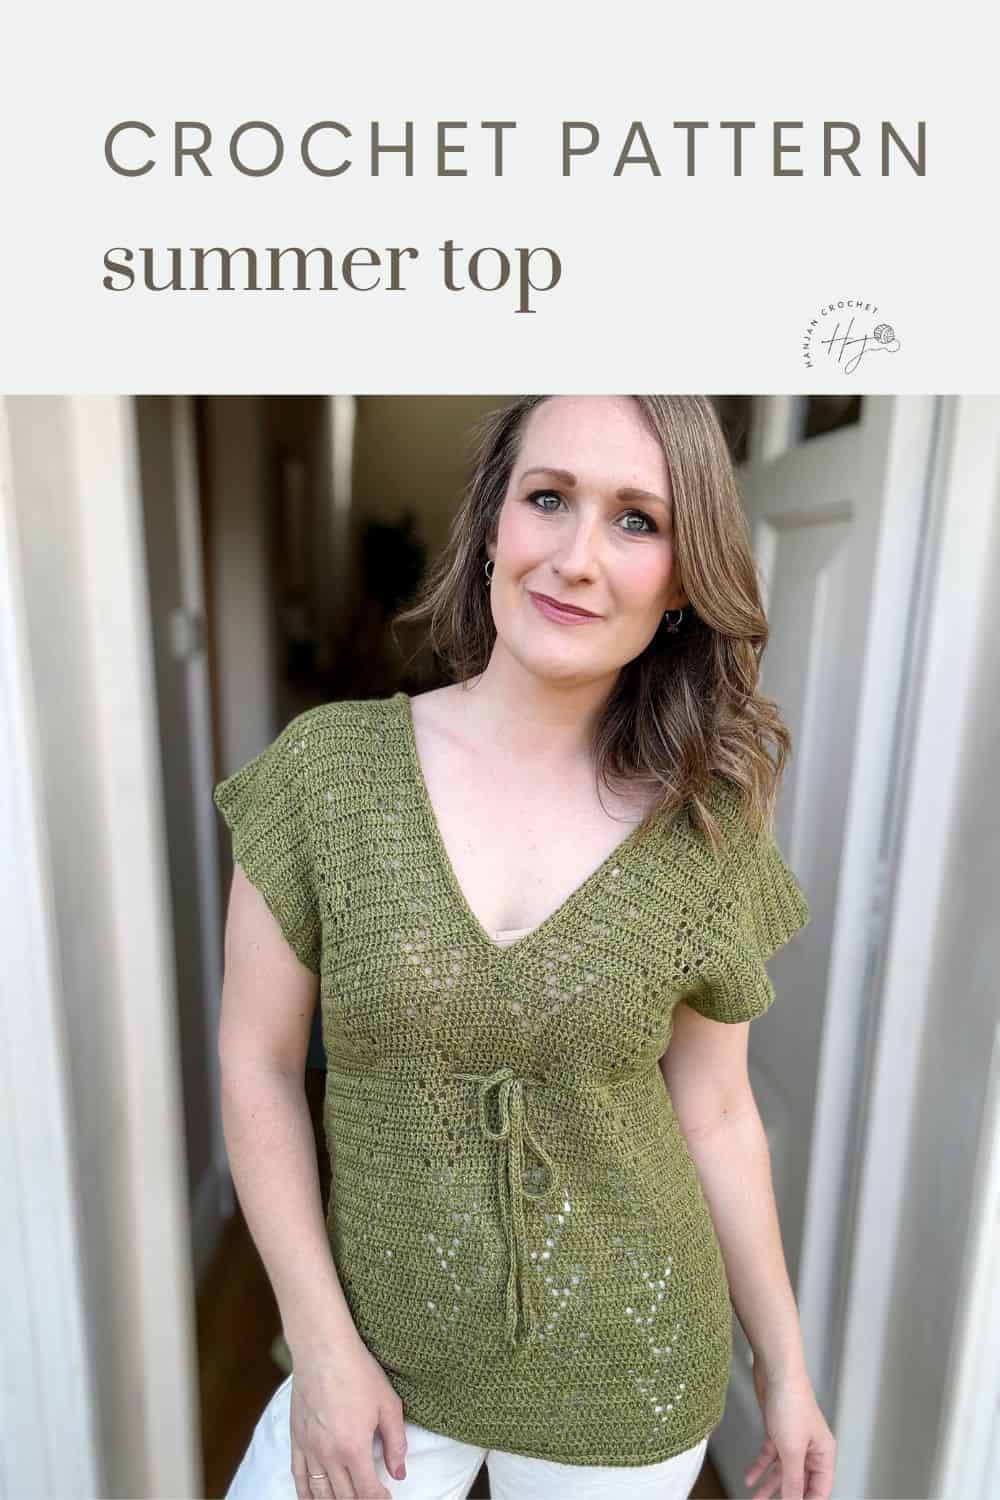
Effortless style shines through in the Verona Tee making it the perfect crochet t-shirt pattern to dress up, dress down and look fabulous however you decide to wear it.
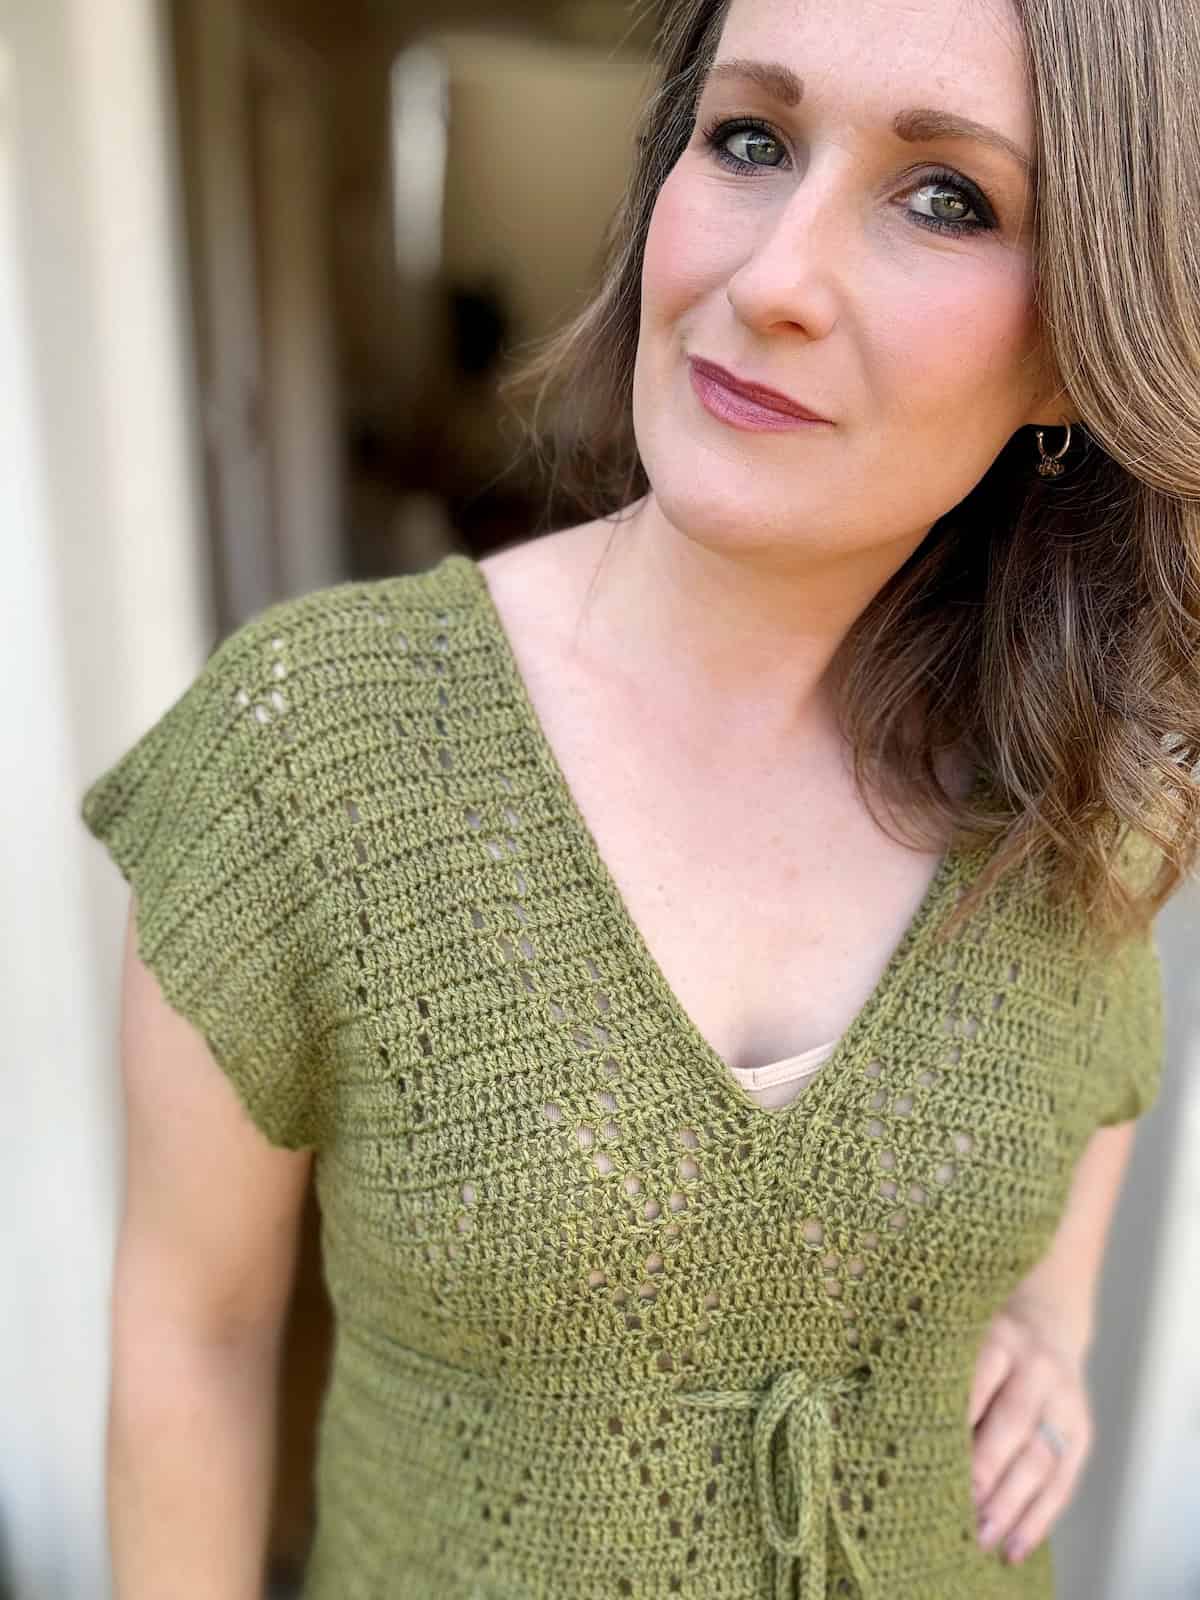
With a simple filet crochet front and back panel, the delicate pattern section climbs its way up the top and the subtle V neck is detailed yet simple.
With no shaping to worry about and only beginner stitches, it’s the perfect garment for those just starting out and for more experienced hands too.
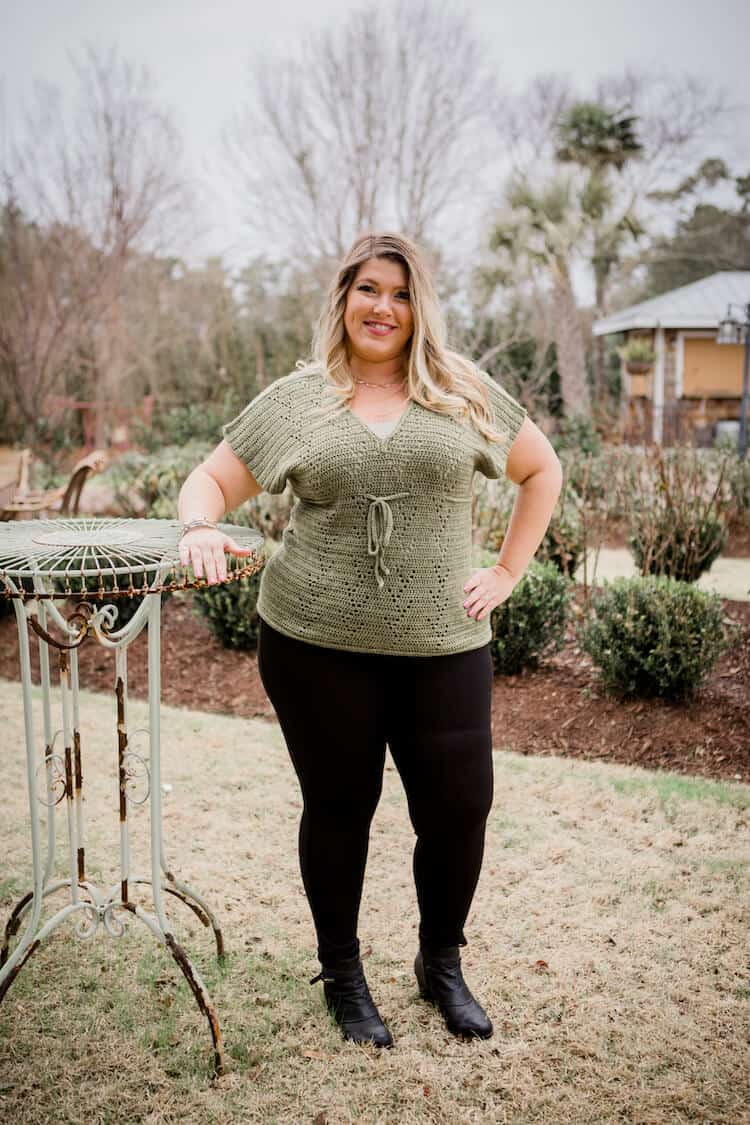
The pattern is size-inclusive from XS-5X and includes a section on customising your top and comes with a free video tutorial too.
Want to remove Ads?
- Get ad-free access on all posts; 200+ patterns & tutorials!
- Member-only resource library with downloadable PDF guides
- Bonus eBook (Worth over $30)
In this post you’ll find everything you need to know how to crochet a summer V neck top like this including materials, stitches, a detailed video tutorial and free written pattern for blog subscribers.
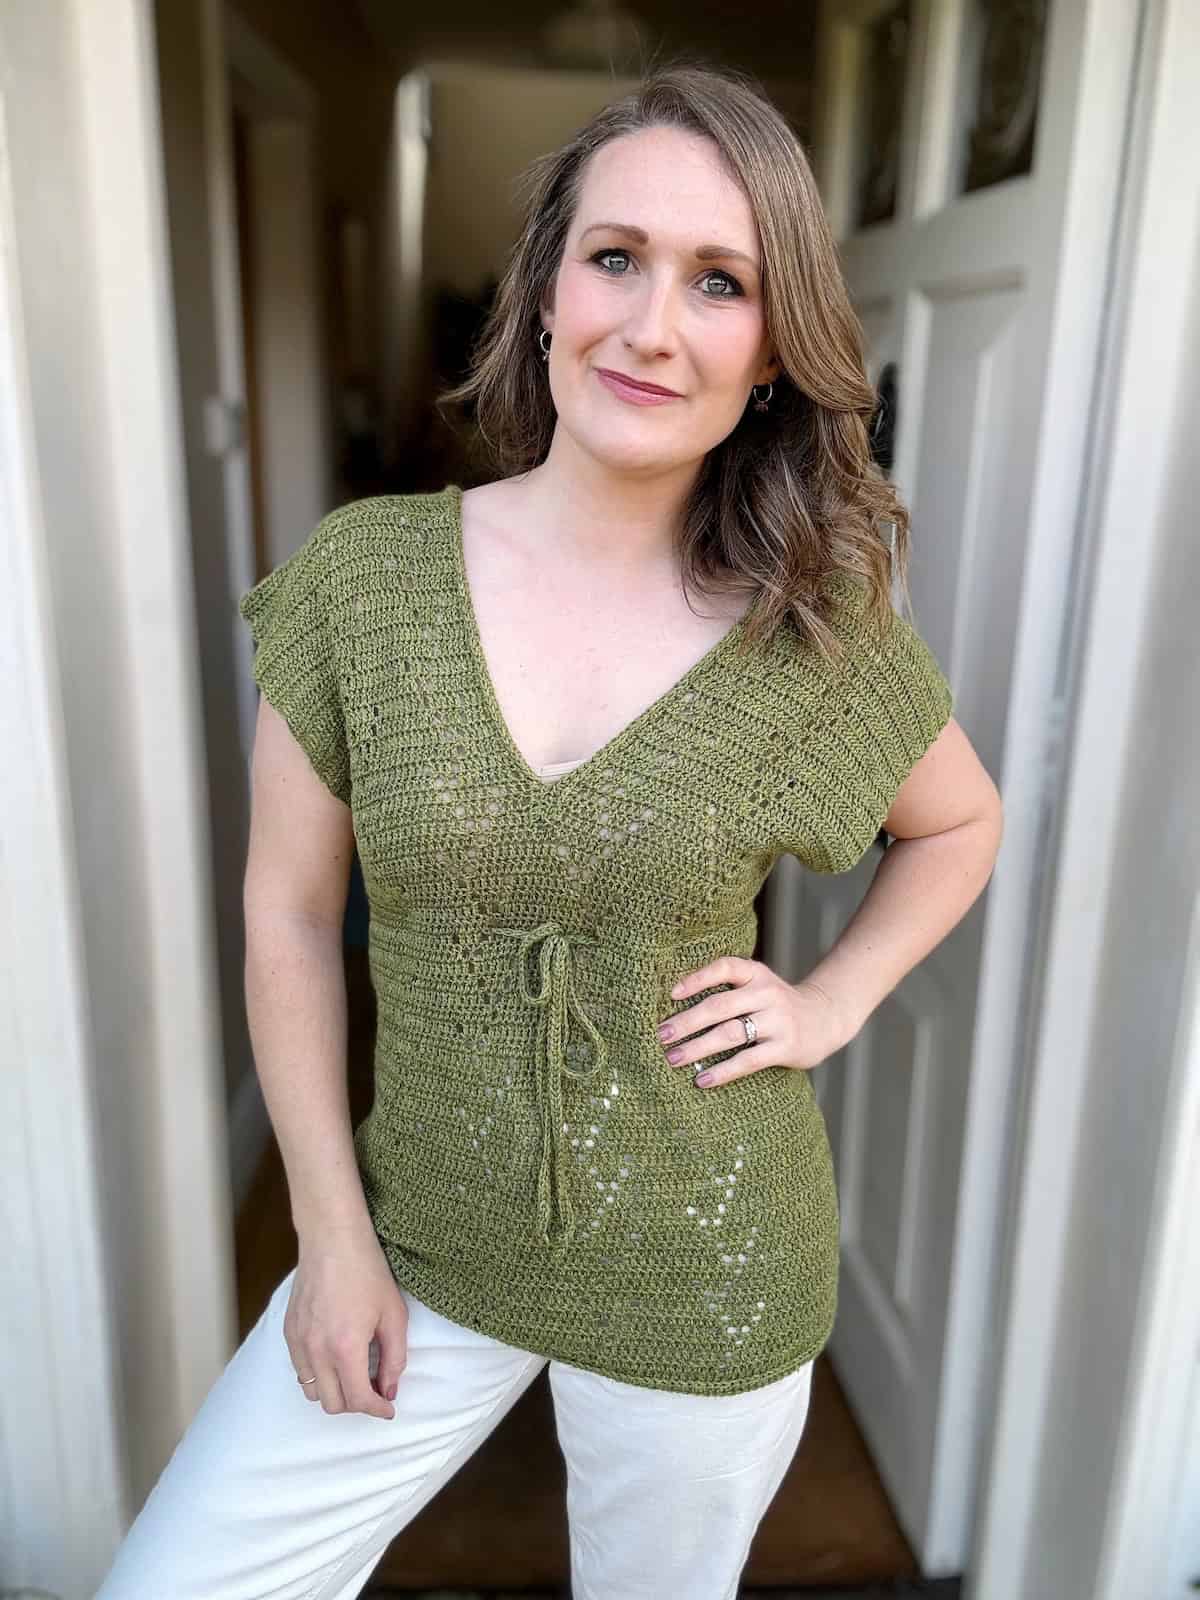
Table of Contents
About the Verona crochet t-shirt pattern
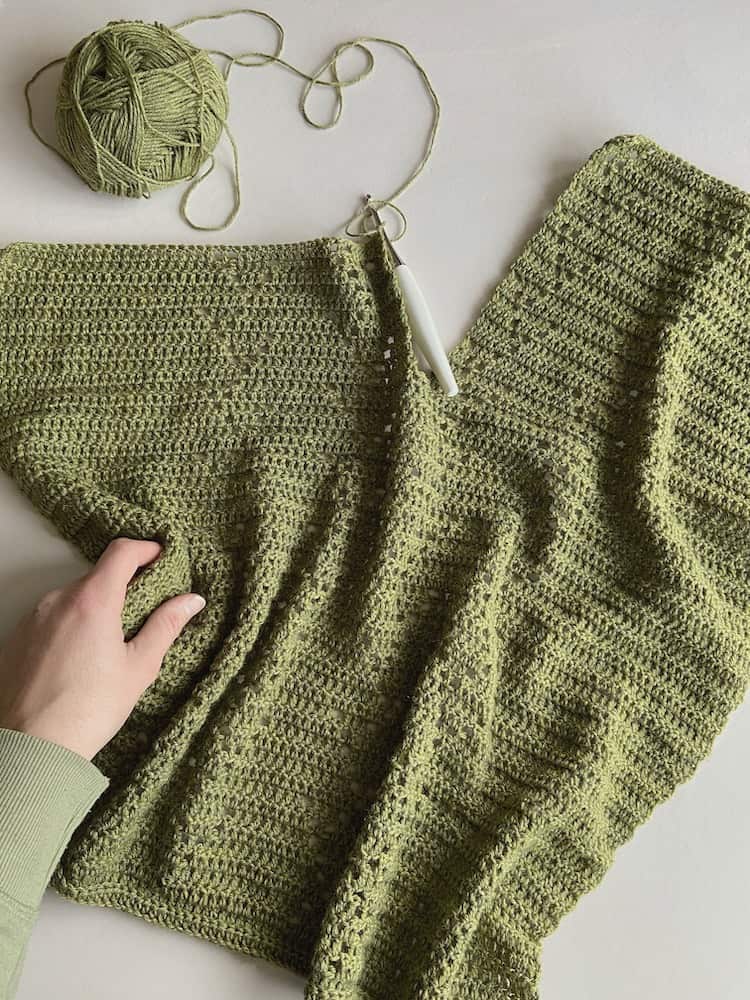
Filet crochet is made up of open meshes and solid meshes. The open meshes are created by working a chain and skipping a stitch, the solid meshes are just worked as regular stitches.
I didn’t want the filet crochet section to be too overwhelming on this simple crochet top so I kept the set pattern the same and just worked repeats of the ‘vine-like’ filet climbing up the top.
The simple style and construction means that it’s quick and easy to make then also lightweight and feels luxurious to wear.

Things you’ll love about this filet crochet top pattern
Getting Started: Materials Needed for Your Crochet Top
Yarn
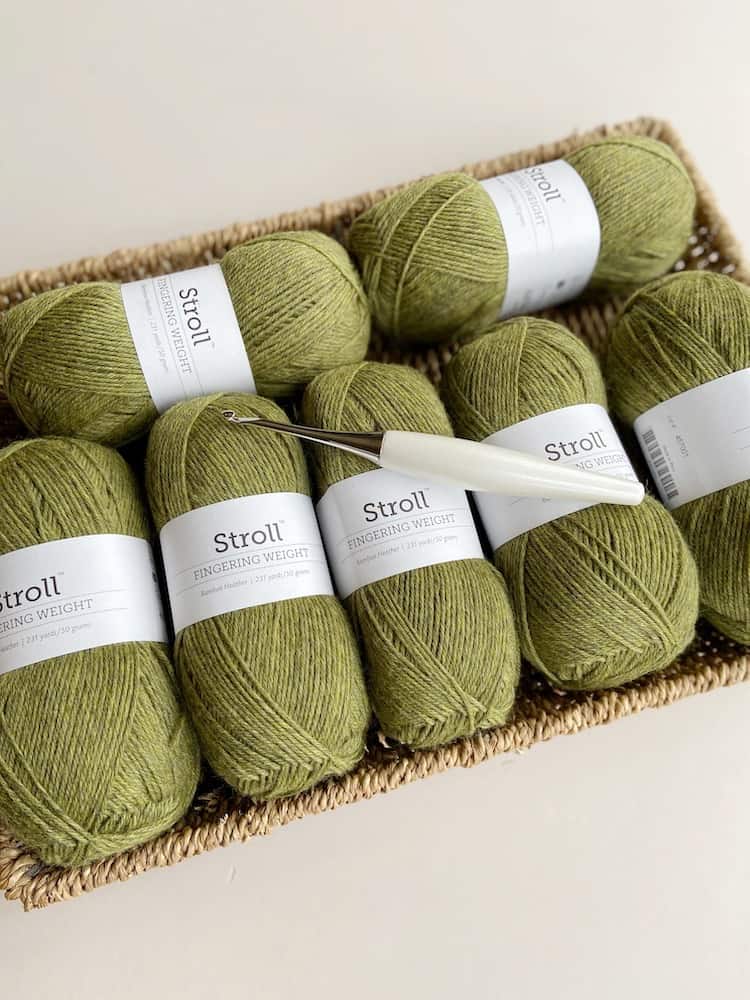
To make this top I used WeCrochet Stroll Fingering Weight Yarn weight 1, 75% Fine Superwash Merino Wool, 25% nylon, 231yds/211m, 50g and I chose to use Bamboo Heather.
Approx balls/yards: 5/988, (5/1106, 6/1223, 6/1356, 7/1474) ( 7/1621, 8/1724, 8/1842, 9/1990)
This is a stunning fingering weight yarn that gives a gentle and soft drape to the crochet making it effortless and comfortable to wear.
A great alternative yarn is WeCrochet Palette Fingering Weight Yarn which is really similar but slightly lighter in feel and comes in such beautiful shades.
I used it to make my Richmond boomerang crochet shawl and really enjoyed working with it.
Using fingering weight yarn for crochet tops is a great idea, especially for summer as it gives you the most amazing drape. Another one you might like to try is my Mystical Tee – a simple crochet top pattern you’ll love.
Gauge and Sizing
Pattern Gauge
17sts and 10 rows = 10cm by 10cm/ 4” by 4” over main double crochet stitch pattern.
Work a gauge swatch of double crochet stitches in rows. Then block it lightly before measuring to make sure you meet the gauge.
Read all about how to make a crochet gauge swatch and why it matters.
The top is in sizes XS, (S, M, L, XL), (2XL, 3XL, 4XL, 5XL) with the following measurements:
To fit bust: (inches) 28-30 (32-34, 36-38, 40-42,44-46) (48-50, 52-54, 56-58, 60-62)
Finished garment bust: (inches) 33 (37, 40, 45, 49) (54, 57, 61, 66)
Length (inches): 26.5 for all sizes but completely customisable.
The tee is really customisable – I suggest choosing the garment bust size that you’d feel most comfortable wearing and then checking ‘customisation’ section below for details of how you can adjust everything else if you’d like to.
Other Materials
Along with your yarn, you will need the following:
- A 4mm/G crochet hook or hook size that meets the pattern gauge
- A 3mm/C crochet hook for the optional tie
- Scissors
- Tapestry needle
- Stitch markers
Don’t forget to join HanJan Crochet to receive regular discount codes (and more free patterns!) and Pin this easy summer crochet top pattern to your Pinterest board!

Video Tutorial: Follow Along to Crochet Your Simple Filet Top
Step by Step Video Tutorial
Come along as I crochet the M size in this step-by-step video tutorial.
Included in the video tutorial:
We begin by creating the front panel of the top with the detailed mesh section worked into it.
Once you have the body the length you would like it we then split ad work for half of the front panel to create one side of the neck opening.
After that is complete we break our yarn and rejoin to create the other side of the neckline.
The back panel is created in exactly the same way before blocking them both and seaming at the sides and shoulder tops to your liking.
Crochet Terms You’ll Need to Know
Glossary and Abbreviations
ch(s) – chain(s)
sp – space
ss – slip stitch
sk – skip
st(s) – stitch(es)
RS – right side
WS – wrong side
rep – repeat
tog – together
blo – back loop only
Crochet Stitches
The pattern is written in standard US terms and uses the following crochet stitches:
hdc – half double crochet (UK htr – half treble crochet)
dc – double crochet (UK tr – treble crochet)
Before you dive into crocheting your top, take a moment to read through the pattern notes—it’s a game-changer!
These handy insights will not only simplify your pattern-reading journey but also ensure a smoother crochet experience. You’ll find helpful tips on deciphering the sizing, transitioning yarn colours, and tips on turning your work.
Trust me, a quick peek at these notes will set you up for crochet success!
Pattern Notes
- A ch1 at the beginning of a row does not count as st.
- Turn at the end of each row.
- Read through the entire pattern before beginning.
- Before you start, go through the pattern and highlight/mark the stitch and row counts that correspond to the size you are making (this will make your life much easier!).
- Make sure that you are familiar with all of the stitches in the abbreviations list before you begin.
- Stitch counts are given in [ ] at the end of each row. If no stitch count is given, then the count is the same as the previous row.
- The count number referring to each size is laid out as follows: XS (S, M, L, XL)(2XL, 3XL, 4XL, 5XL).
- The pattern uses standard US crochet terms.
Customising your crochet top
How to customise your top to suit you:
Ease of fit
The tee has a positive ease of around 3 inches per size but if you’d like to go for a looser, easy fit top, then just either make the size up to add a few inches to your tops width, or add a few extra stitches at either end of your top. You just need to make sure that you have an even number of stitches either side of the pattern detail so that it sits centrally.
Length of tee
With a matching back and front it is really easy to adjust the length of the tee. All you need to do is work more or less repeats of Rows 7-12 before you split for the neckline. Each repeat will add or subtract 2 ¼” from your top. I think it would look awesome either cropped or as a longline tunic or bikini cover!
Neckline
The neckline is the same for all sizes but if you would like a more modest look then just sew up more of the stitches of each side of the neckline to make it as high as you like. You can do this at both the front and the back to change the look of the top as you’d like it.
Armhole Depth
If you prefer to have more room under the arms then simply seam up the sides to wherever feels comfortable for you instead.
Tie
The top looks equally lovely with or without the tie but you can adapt the length of the tie to suit you by working as many or as few foundation hdc as you like. It also looks cute with the tie to the back of the top too, it’s completely up to you!
Construction
Make a matching front and back panel.
The panels are made from the bottom up, splitting for the neckline as instructed.
Once your panels are complete, block them lightly and seam at the shoulders and side as detailed.
Make an optional tie and thread through top, just under the bust and secure.
A ch 1 or ch 2 at the beginning of a row does not count as a stitch.
Turn your work after each row.
Learning to Crochet Garments
If you’re new to crochet garments and worried about all the sizing, seaming, gauge and other things that might seem really daunting, please don’t worry. I used to feel exactly the same! If you can make a blanket, then you can make this garment. I promise!
I’ve written all about my experience with learning to both make and design garments and you can learn about crochet garment making and make sure you explore all of these fabulous easy crochet cardigan patterns too. There are so many options out there for every skill level and style!
We also have an article all about how to make perfect crochet garments which is a great read packed full of experience and tips!
If you’re ready to dive and get all of the garment making info in one place then you will LOVE our Crochet Garments with Confidence Course! You get lifetime access to world class crochet garment designers teaching you everything they know!
Verona Tee Crochet Pattern
There are a few options for you to access and enjoy this crochet pattern:
- View the free pattern on the blog – all blog subscribers will be able to view the patterns supported by ads by logging into their Grow account.
- Purchase the individual pattern on Etsy or Ravelry as a beautifully formatted PDF with extra stitch charts, schematic and colour information page and more!
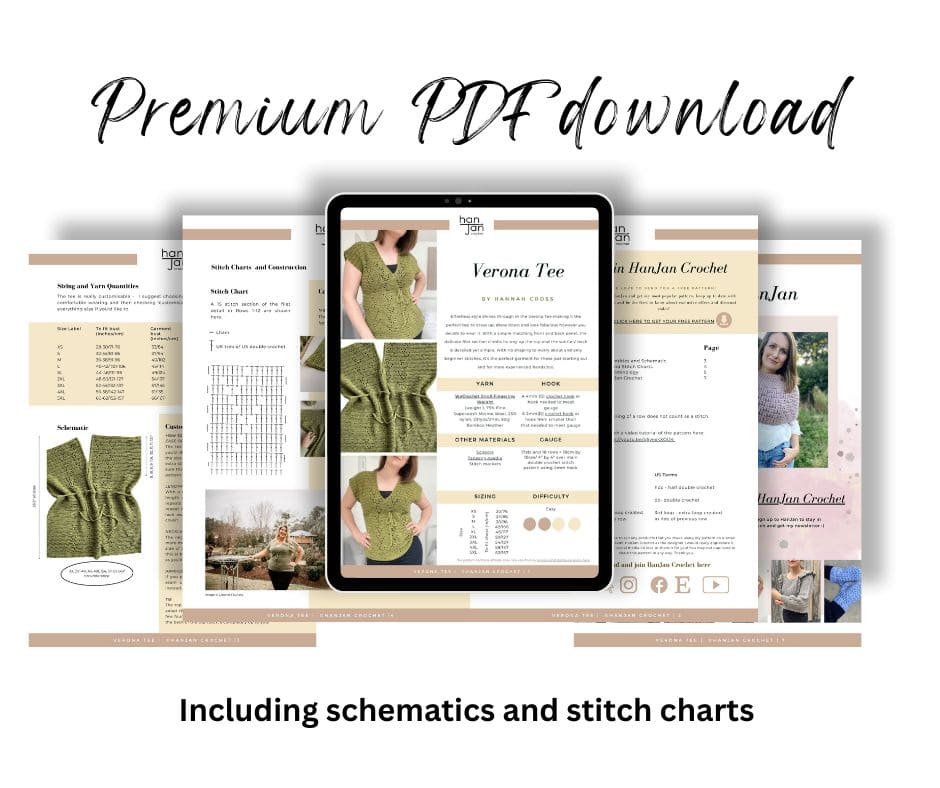
Upgrade to the ad-free PDF download
Perfect to print out or use on any device, with added schematic and charts, colour inspiration and stitch tutorials
Copyright Notice
The Verona Tee Crochet Pattern and its contents are fully owned and copyrighted by HanJan Crochet Ltd., and all rights are reserved.
This pattern is protected by copyright and other intellectual property laws and may not be reproduced, distributed, or transmitted in any form or by any means without the prior written consent of the author (Hannah Cross of HanJan Crochet Ltd).
Unauthorised distribution or reproduction of this pattern or elements of the instructions is strictly prohibited. The free to view crochet pattern is intended for personal viewing only. By accessing this pattern, you acknowledge and agree to comply with these copyright terms and conditions.
Pattern Support
I am delighted to invite you to join the HanJan Crochet Community Facebook Group where we host all pattern support queries and love to see your progress, yarn choices and finished projects!
Crochet Pattern Free for Blog Subscribers to View
US Terminology
To unlock Exclusive Content on the HanJan Crochet Blog, all you need to do is click the box below and the Grow.me app will pop up, allowing you to enter your email and create a password.
Once you’ve created an account, every time you see Exclusive Content on my blog (or any others that use Grow), simply login to your Grow account. Be sure to switch to the login screen to enter your login credentials.
If you forget your password, click the “forgot password” link and follow the prompts. Please note that I’m unable to assist with resetting Grow passwords or accessing your Grow account, so be sure to save your login information in a safe place.
Thank you for subscribing and for joining me at HanJan Crochet! I hope you enjoy the exclusive content available on the site and I can’t wait to see what you create 🙂
Verona Tee Crochet Top Pattern
Standard US Crochet Terms
Front Panel
Row 1 (rs): Foundation hdc 70 (78, 86, 96, 104) (114, 122, 130, 140)
Row 2 (ws): Ch 1, hdc in 3rd loop of each st across.
Row 3: Ch 2, dc in blo of each across.
Row 4: Ch 2, dc in next 5 (9, 13, 18, 22) (12, 16, 20, 25) *dc in next 5, ch 1, skip next st, dc in next 9, rep from * 3 (3, 3, 3, 3) (5, 5, 5, 5) more times, dc in next 5 (9, 13, 18, 22) (12, 16, 20, 25).
Row 5: Ch2, dc in next 5 (9, 13, 18, 22) (12, 16, 20, 25) *dc in next 8, ch 1, skip next st, dc in next 6, rep from *3 (3, 3, 3, 3) (5, 5, 5, 5) more times, dc in next 5 (9, 13, 18, 22) (12, 16, 20, 25).
Row 6: Ch 2, dc in next 5 (9, 13, 18, 22) (12, 16, 20, 25) *dc in next 7, ch 1, skip next st, dc in next 7, rep from * 3 (3, 3, 3, 3) (5, 5, 5, 5) more times, dc in next 5 (9, 13, 18, 22) (12, 16, 20, 25).
Established stitch pattern: Rows 7-12
Row 7: Ch 2, dc in next 5 (9, 13, 18, 22) (12, 16, 20, 25) *dc in next 6, ch 1, skip next st, dc in next st, ch 1, skip next st, dc in next 6, rep from * 3 (3, 3, 3, 3) (5, 5, 5, 5) more times, dc in next 5 (9, 13, 18, 22) (12, 16, 20, 25).
Row 8: Ch 2, dc in next 5 (9, 13, 18, 22) (12, 16, 20, 25) *dc in next 5, ch 1, skip next st, dc in next 3, ch 1, skip next st, dc in next 5, rep from * 3 (3, 3, 3, 3) (5, 5, 5, 5) more times, dc in next 5 (9, 13, 18, 22) (12, 16, 20, 25).
Row 9: Ch 2, dc in next 5 (9, 13, 18, 22) (12, 16, 20, 25) *dc in next 4, ch 1, skip next st, dc in next 5, ch 1, skip next st, dc in next 4, rep from *3 (3, 3, 3, 3) (5, 5, 5, 5) more times, dc in next 5 (9, 13, 18, 22) (12, 16, 20, 25).
Row 10: Ch 2, dc in next 5 (9, 13, 18, 22) (12, 16, 20, 25) *dc in next 3, ch 1, skip next st, dc in next st, ch 1, skip next st, dc in next 9, rep from * 3 (3, 3, 3, 3) (5, 5, 5, 5) more times, dc in next 5 (9, 13, 18, 22) (12, 16, 20, 25).
Row 11: Ch 2, dc in next 5 (9, 13, 18, 22) (12, 16, 20, 25) *dc in next 8, ch 1, skip next st, dc in next 3, ch 1, skip next st, dc in next 2, rep from * 3 (3, 3, 3, 3) (5, 5, 5, 5) more times, dc in next 5 (9, 13, 18, 22) (12, 16, 20, 25).
Row 12: Ch 2, dc in next 5 (9, 13, 18, 22) (12, 16, 20, 25) *dc in next 7, ch 1, skip next st, dc in next 7, rep from * 3 (3, 3, 3, 3) (5, 5, 5, 5) more times, dc in next 5 (9, 13, 18, 22) (12, 16, 20, 25).
Rows 13-42: Repeat the established stitch pattern a further 5 times.
Continue to work in rows for the first side of the top now.
Row 1 (rs): Ch 2, dc in next 5 (9, 13, 18, 22) (12, 16, 20, 25) *dc in next 6, ch 1, skip next st, dc in next st, ch 1, skip next st, dc in next 6, rep from * 0 (0, 0, 0, 0) (1, 1, 1, 1) times, dc in next 6, ch 1, skip next st, dc in next st, ch 1, skip next st, dc in next 5.
Row 2: Ch 2, dc in next 4, ch 1, skip next st, dc in next 3, ch 1, skip next st, dc in next 5, *dc in next 5, ch 1, skip next st, dc in next 3, ch 1, skip next st, dc in next 5, rep from * 0 (0, 0, 0, 0) (1, 1, 1, 1) times, dc in next 5 (9, 13, 18, 22) (12, 16, 20, 25).
Row 3: Ch 2, dc in next 5 (9, 13, 18, 22) (12, 16, 20, 25) *dc in next 4, ch 1, skip next st, dc in next 5, ch 1, skip next st, dc in next 4, rep from * 0 (0, 0, 0, 0) (1, 1, 1, 1) times, dc in next 4, ch 1, skip next st, dc in next 5, ch 1, skip next st, dc in next 3.
Row 4: Ch 2, dc in next 2, ch 1, skip next st, dc in next st, ch 1, skip next st, dc in next 9, *dc in next 3, ch 1, skip next st, dc in next st, ch 1, skip next st, dc in next 9, rep from * 0 (0, 0, 0, 0) (1, 1, 1, 1) times, dc in next 5 (9, 13, 18, 22) (12, 16, 20, 25).
Row 5: Ch 2, dc in next 5 (9, 13, 18, 22) (12, 16, 20, 25) *dc in next 8, ch 1, skip next st, dc in next 3, ch 1, skip next st, dc in next 2, rep from * 0 (0, 0, 0, 0) (1, 1, 1, 1) times, dc in next 8, ch 1, skip next st, dc in next 3, ch 1, skip next st, dc in next st.
Row 6: Ch 2, dc in next 6, ch 1, skip next st, dc in next 7, *dc in next 7, ch 1, skip next st, dc in next 7, rep from * 0 (0, 0, 0, 0) (1, 1, 1, 1) times, dc in next 5 (9, 13, 18, 22) (12, 16, 20, 25).
Rows 7-24: Repeat rows 1-6 three more times for the first side of the top front. Fasten off.
Second side of the Front
With RS facing of Row 42, skip 2 sts from where first side of the top front ends, join to next st on Row 42. ( You should have 2 unworked stitches in Row 42 of main body).
Row 1: Ch 2, dc in next 5, ch 1, skip next st, dc in next st, ch 1, skip next st, dc in next 6, *dc in next 6, ch 1, skip next st, dc in next st, ch 1, skip next st, dc in next 6, rep from * 0 (0, 0, 0, 0) (1, 1, 1, 1) times, dc in next 5 (9, 13, 18, 22) (12, 16, 20, 25).
Row 2: Ch 2, dc in next 5 (9, 13, 18, 22) (12, 16, 20, 25) *dc in next 5, ch 1, skip next st, dc in next 3, ch 1, skip next st, dc in next 5, rep from * 0 (0, 0, 0, 0) (1, 1, 1, 1) times, dc in next 5, ch 1, skip next st, dc in next 3, ch 1, skip next st, dc in next 4.
Row 3: Ch 2, dc in next 3, ch 1, skip next st, dc in next 5, ch 1, skip next st, dc in next 4, *dc in next 4, ch 1, skip next st, dc in next 5, ch 1, skip next st, dc in next 4, rep from * 0 (0, 0, 0, 0) (1, 1, 1, 1) times, dc in next 5 (9, 13, 18, 22) (12, 16, 20, 25).
Row 4: Ch 2, dc in next 5 (9, 13, 18, 22) (12, 16, 20, 25) *dc in next 3, ch 1, skip next st, dc in next st, ch 1, skip next st, dc in next 9, rep from * 0 (0, 0, 0, 0) (1, 1, 1, 1) times, dc in next 3, ch 1, skip next st, dc in next st, ch 1, skip next st, dc in next 8.
Row 5: Ch 2, dc in next 7, ch 1, skip next st, dc in next 3, ch 1, skip next st, dc in next 2, *dc in next 8, ch 1, skip next st, dc in next 3, ch 1, skip next st, dc in next 2, rep from * 0 (0, 0, 0, 0) (1, 1, 1, 1) times, dc in next 5 (9, 13, 18, 22) (12, 16, 20, 25).
Row 6: Ch 2, dc in next 5 (9, 13, 18, 22) (12, 16, 20, 25) *dc in next 7, ch 1, skip next st, dc in next 7, rep from * 0 (0, 0, 0, 0) (1, 1, 1, 1) times, dc in next 7, ch 1, skip next st, dc in next 6.
Rows 7-24: Repeat rows 1-6 three more times for the second side of the top. Fasten off and block to measurements.
Back Panel
Make as for front.
Weave in ends and block to measurements.
Seaming: Join shoulder seams with a slip stitch seam with RS facing out..
With WS facing out, whip stitch from Rows 1- 46 (46, 43, 43, 41) (41, 38, 38, 36) to form side seams. The remaining un-seamed rows create the armholes.
Add neckline: The neckline is the same for all sizes, you will have 24 rows on the front and back making a total of 48 rows each side of the neckline. Choose a front of your work and with RS facing out, join yarn to the side of the first row of one side of the neckline starting at the V of the top.
Row 1: working in the sides of the 48 rows, ch1, work 2 hdc in the side of each row (96 sts) slip stitch into 2nd skipped stitch of the neckline (Row 42 of main body) and turn to continue working in rows.
Row 2: Ch 1, hdc in 3rd loop of each stitch across, slip stitch into 2nd skipped stitch of the neckline (Row 42 of main body)
Other side of neckline – Repeat Rows 1 and 2 above, working the slip stitches across the front of the 2 rows you have just worked.
Complete the neckline by sewing together 6 stitches of the neckline overlap together on both the front and the back.
Tie
Using the 3mm hook, foundation hdc 300, (325, 350, 375, 400) (425, 450, 475, 500) sts for the tie.
Block lightly and weave in ends to complete. Thread through the top at the point just under the bust and tie to secure.
Join HanJan and Share Your Crochet!
It’s an honour to be able to create and share my free crochet patterns with you. I’d love to stay connected and send you regular discount codes and free patterns! Please sign up for my subscriber list to get a free gift right now!
I look forward to seeing your finished crochet projects, especially this easy crochet pattern, so please share them with me in the HanJan Crochet Facebook group or on Instagram and tag #hanjancrochet.
Purchase and Print
Get the ad-free, printable PDF with added stitch chart and schematic in my pattern stores:

Looking for pattern support?
Not only will you find pattern support in the HanJan Crochet Facebook Community Group but we have over 16,200 like minded crocheters eager to chat with you!
It is a fun, supportive and educational group where we all support each other to be the best we can be. Everyone is always happy to share their knowledge and experience so do come and join us!
Congratulations on completing your crochet top! 🌟 Now that you’ve crafted this stunning piece I hope you’re ready for more! Dive into my other fun adult crochet garment patterns, each waiting to be transformed into your next crochet masterpiece.
Here are a few other easy summer crochet garment patterns you might like to try out next:
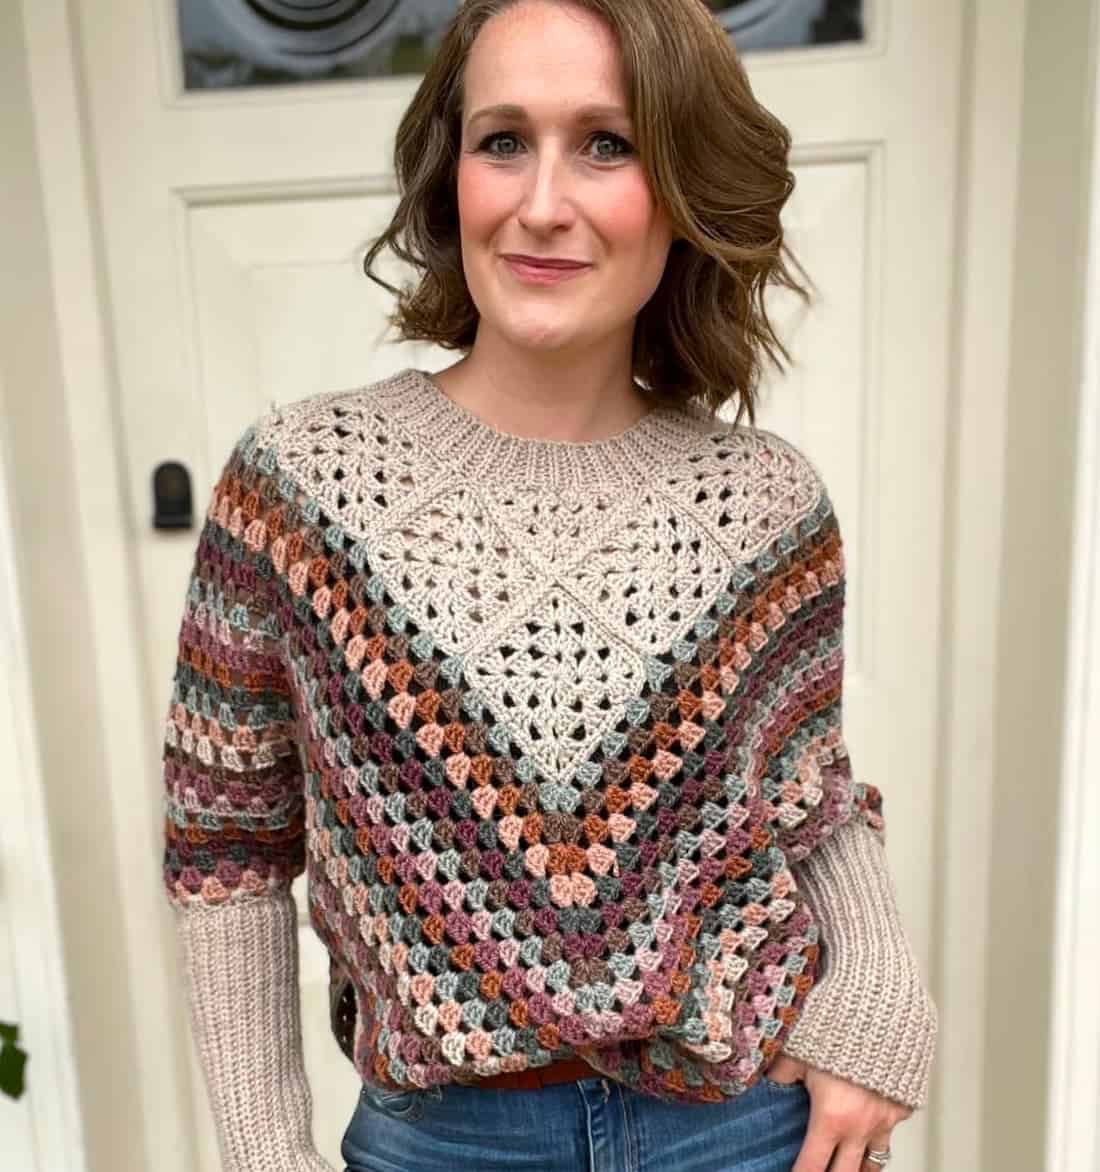
- Crochet Crop Top Pattern – using fun granny squares
- Sleeveless Crochet Top Pattern – a fitted and flattering summer top
- Lace Crochet Dress – leave it as a top or turn it into a dress!
- V Neck Lace Top – a short sleeved summer top
Don’t forget to share your creations with me on social media—I love seeing your unique twists and colourful creations! Join our community of crochet enthusiasts, where we share tips, tricks, and plenty of crafting inspiration. So, grab your hooks, explore more patterns, and let’s continue this crochet adventure together! Happy stitching! 🧶✨