This post may contain affiliate links. Please see my full disclosure and privacy policy for details.
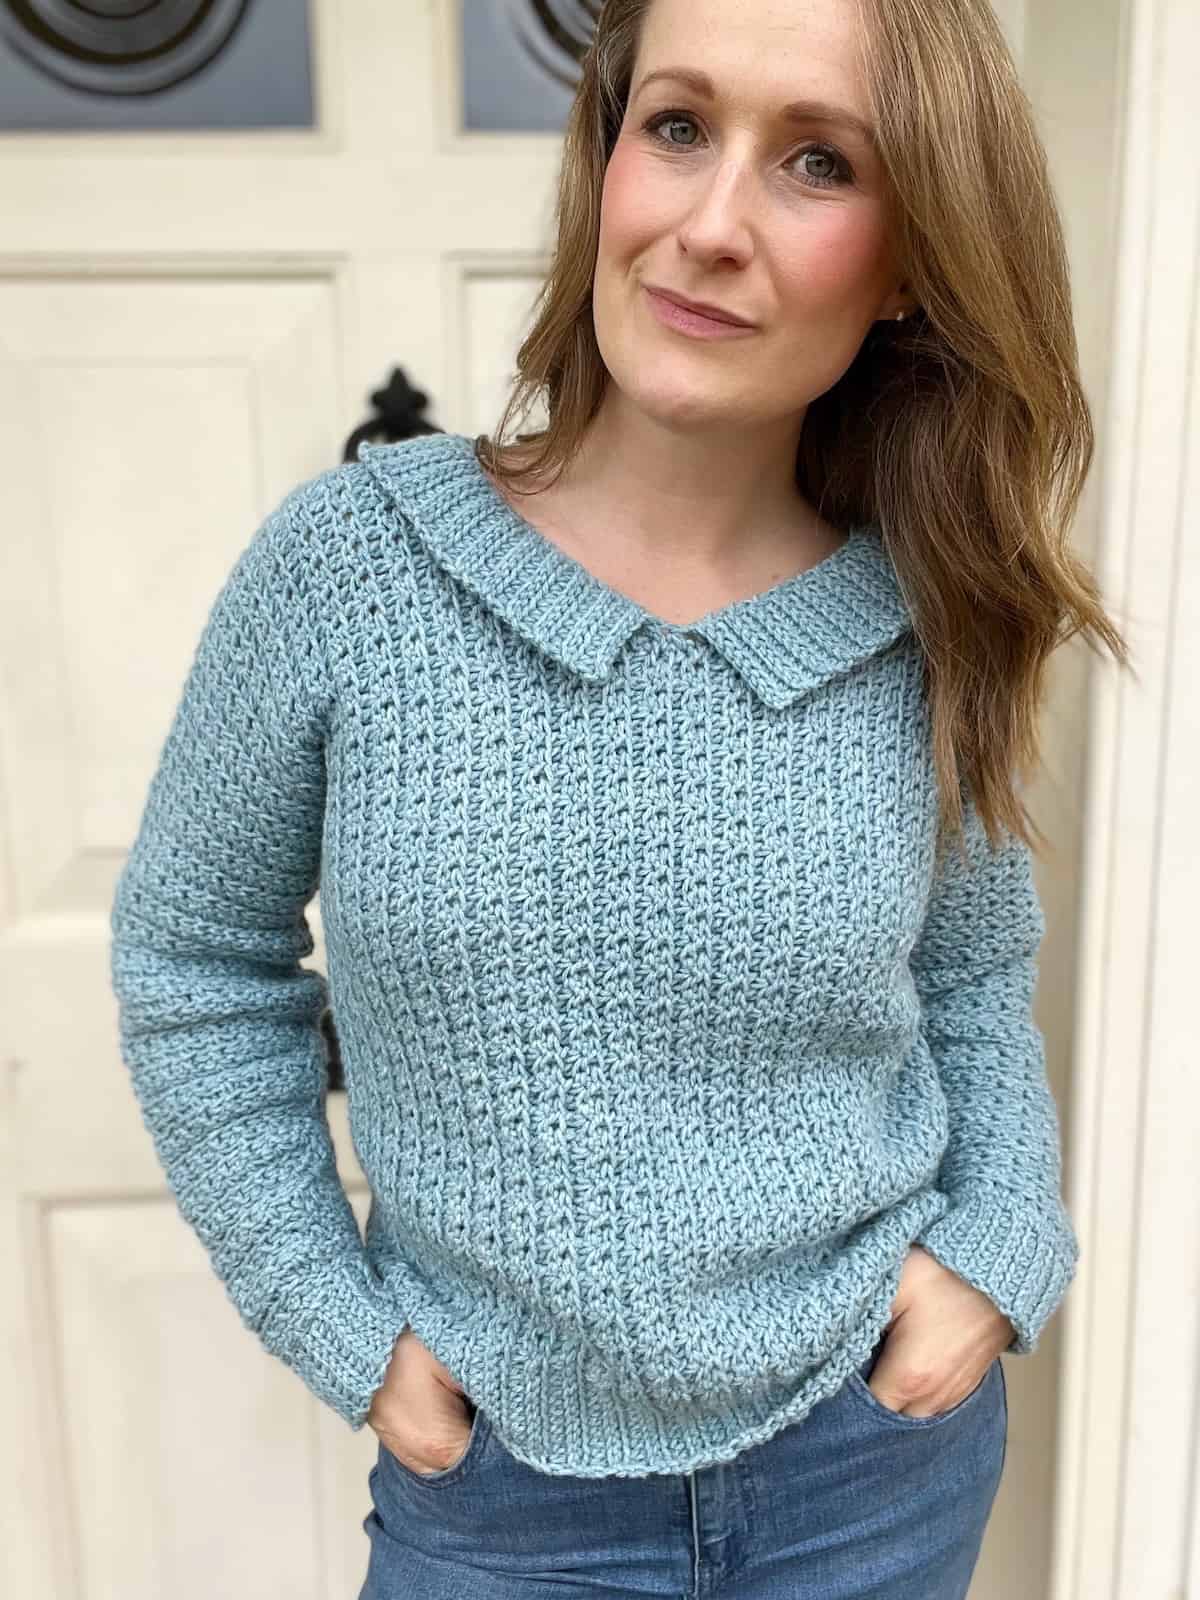
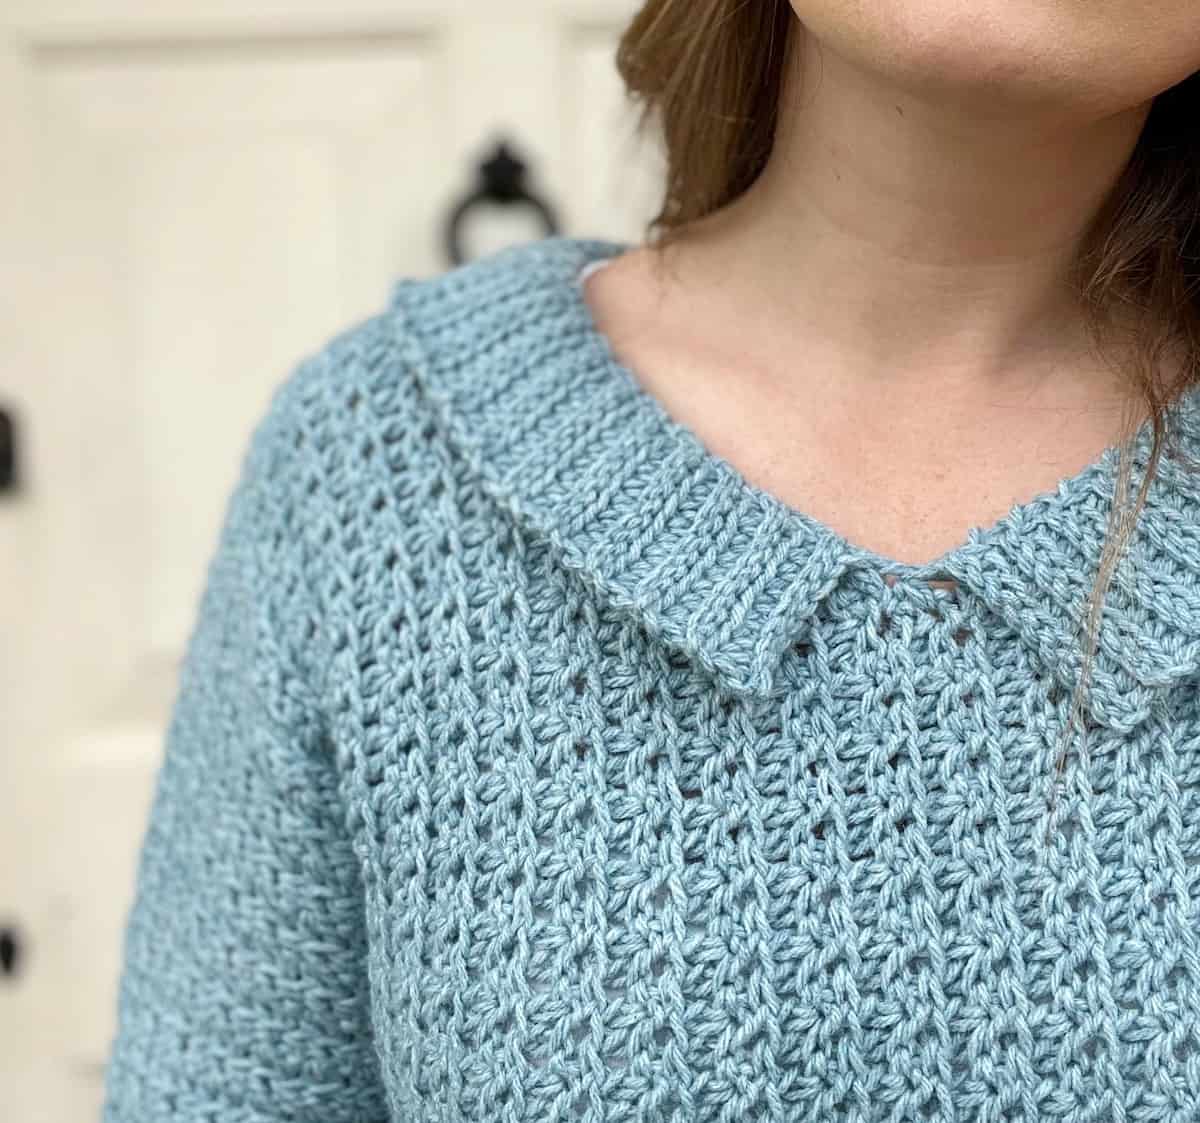
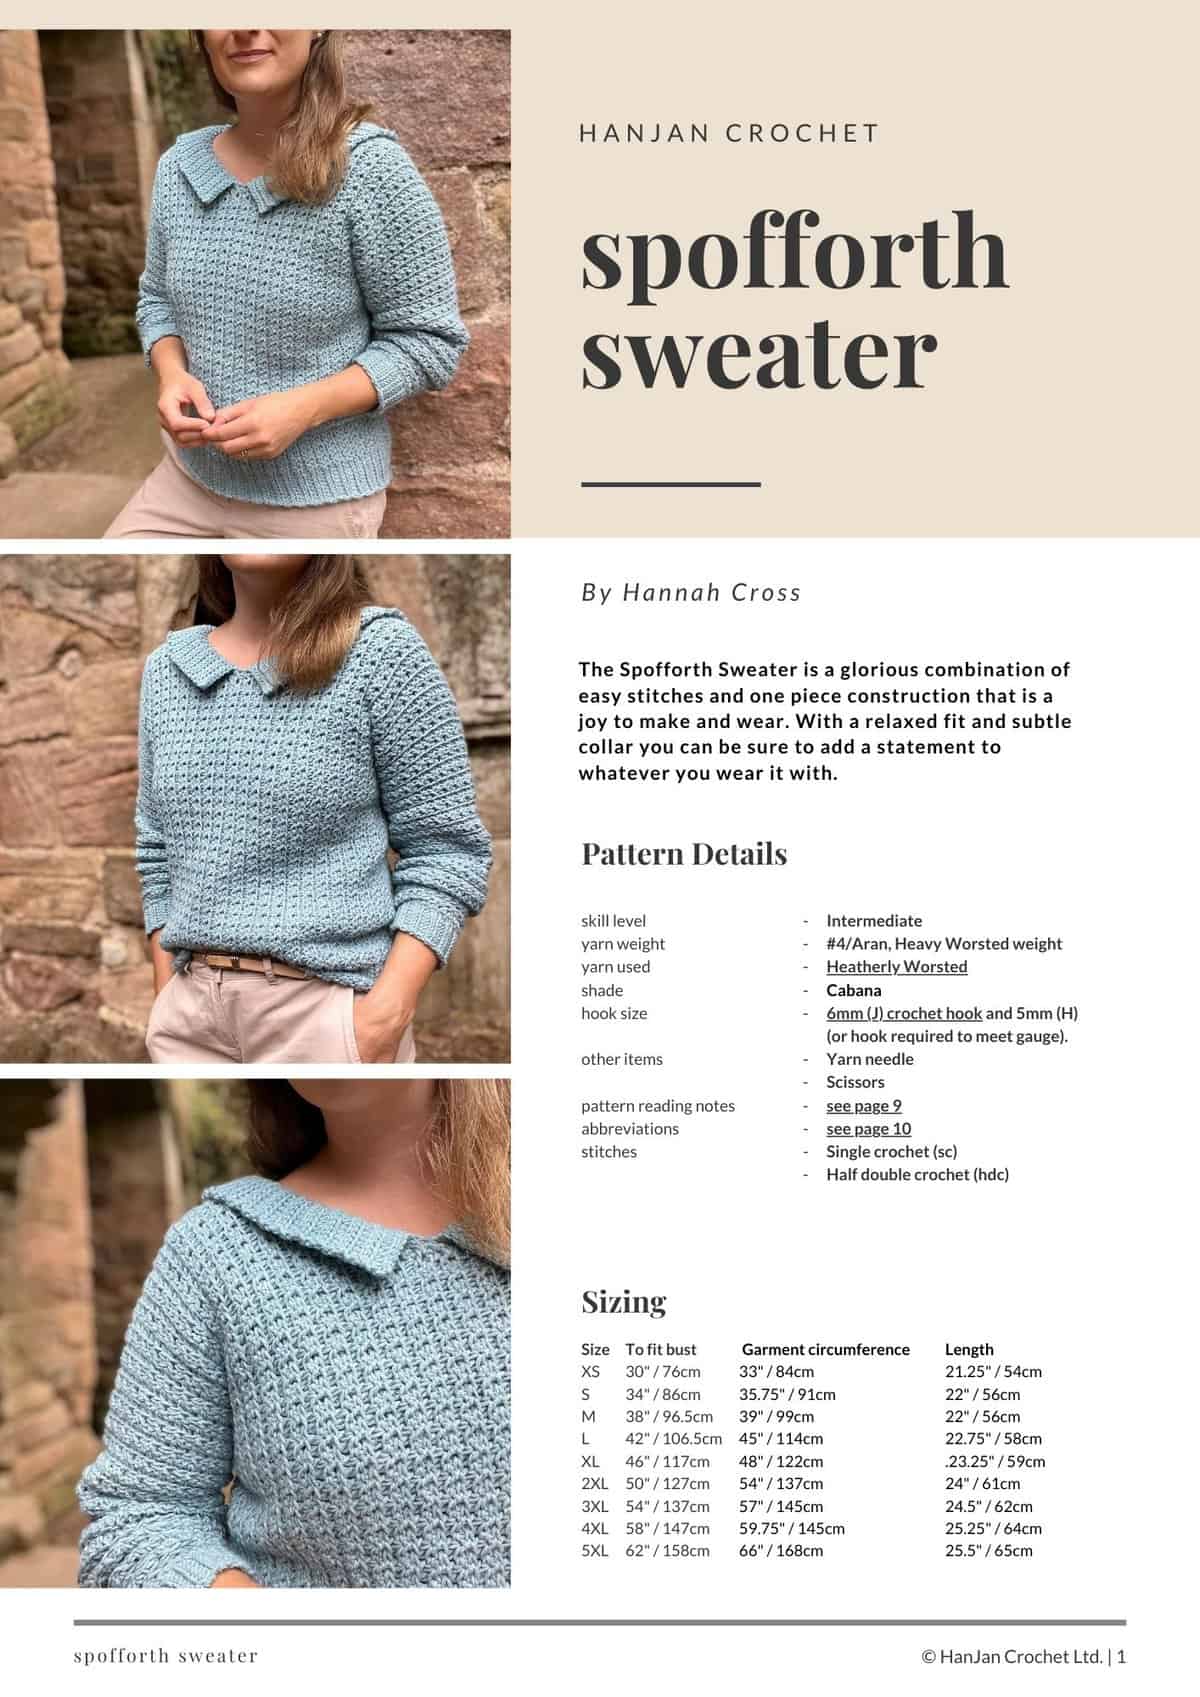
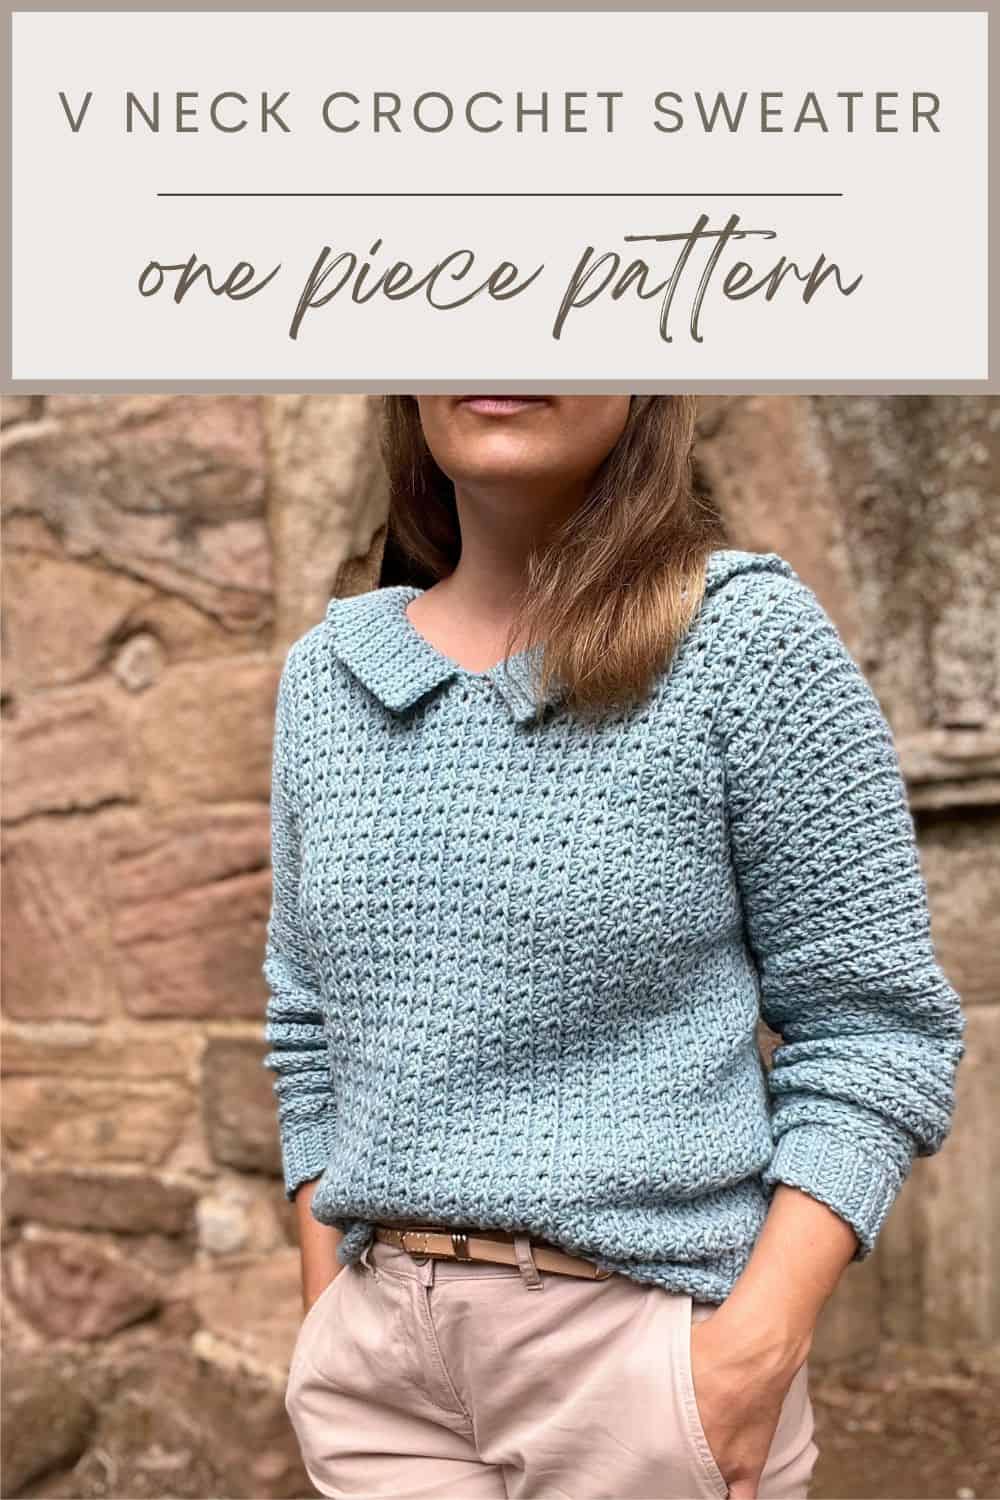
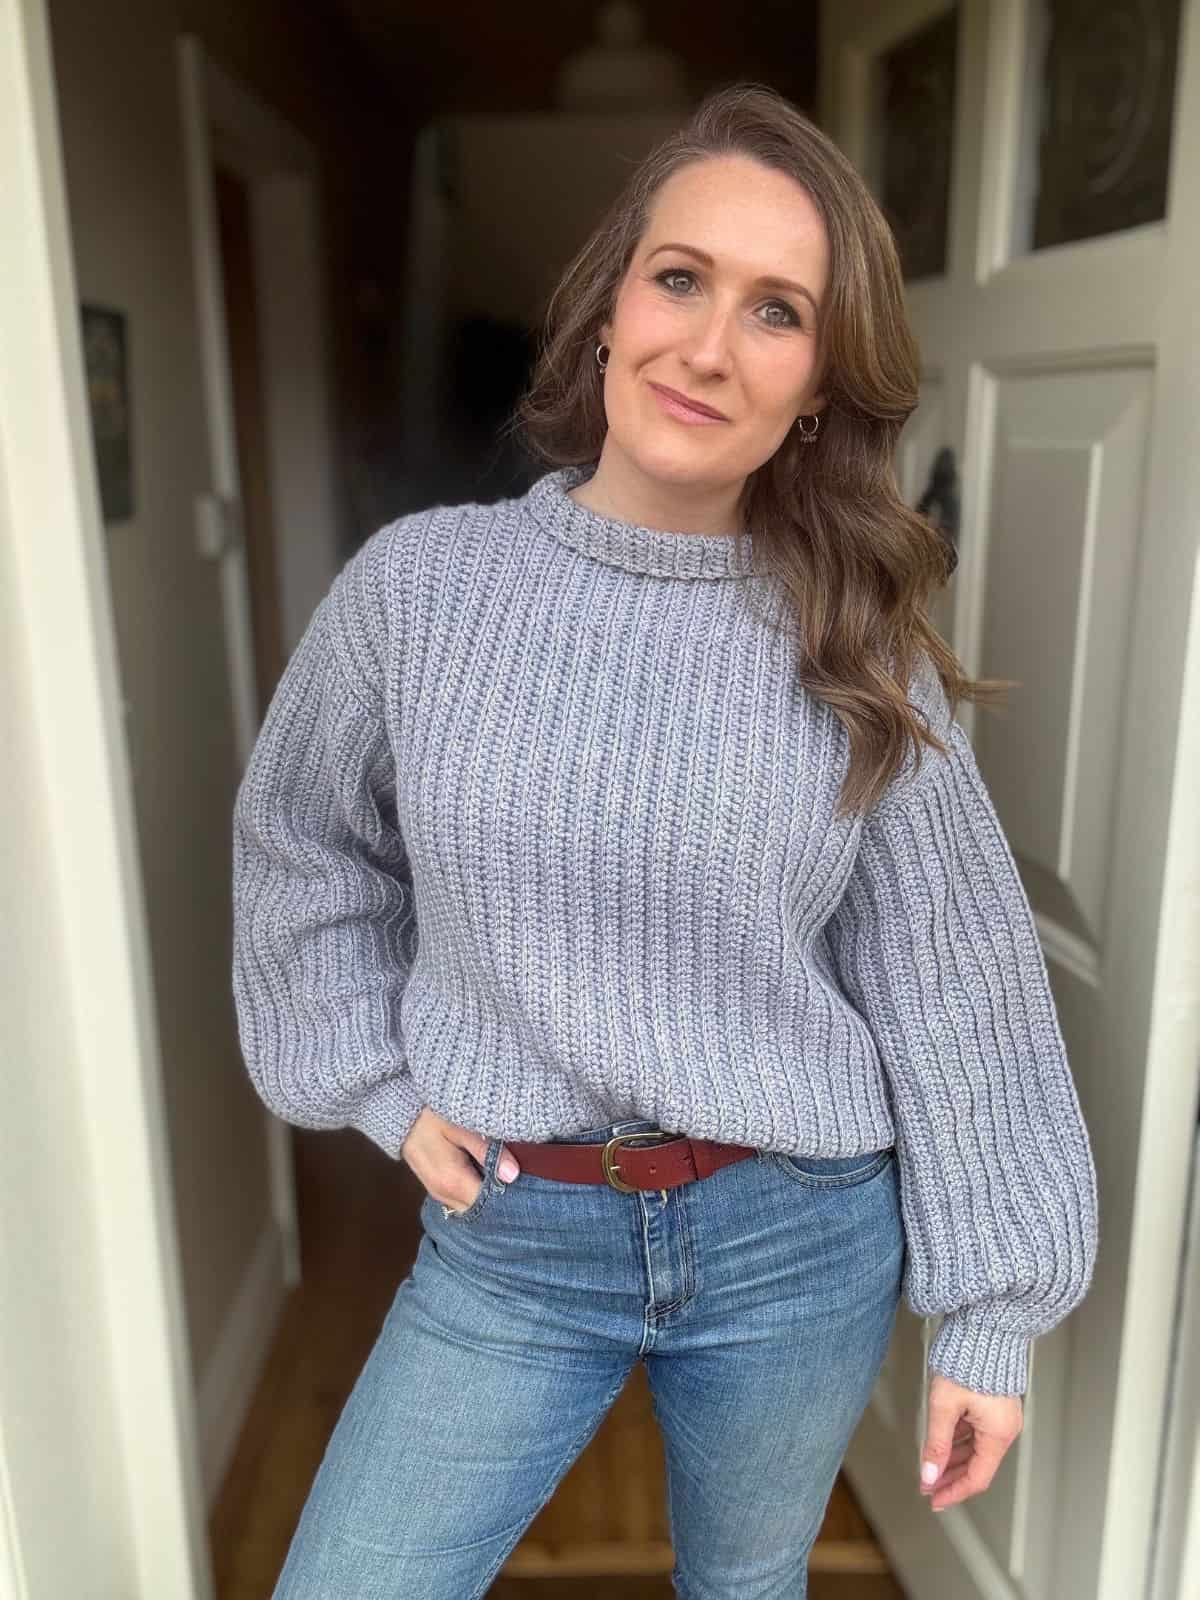
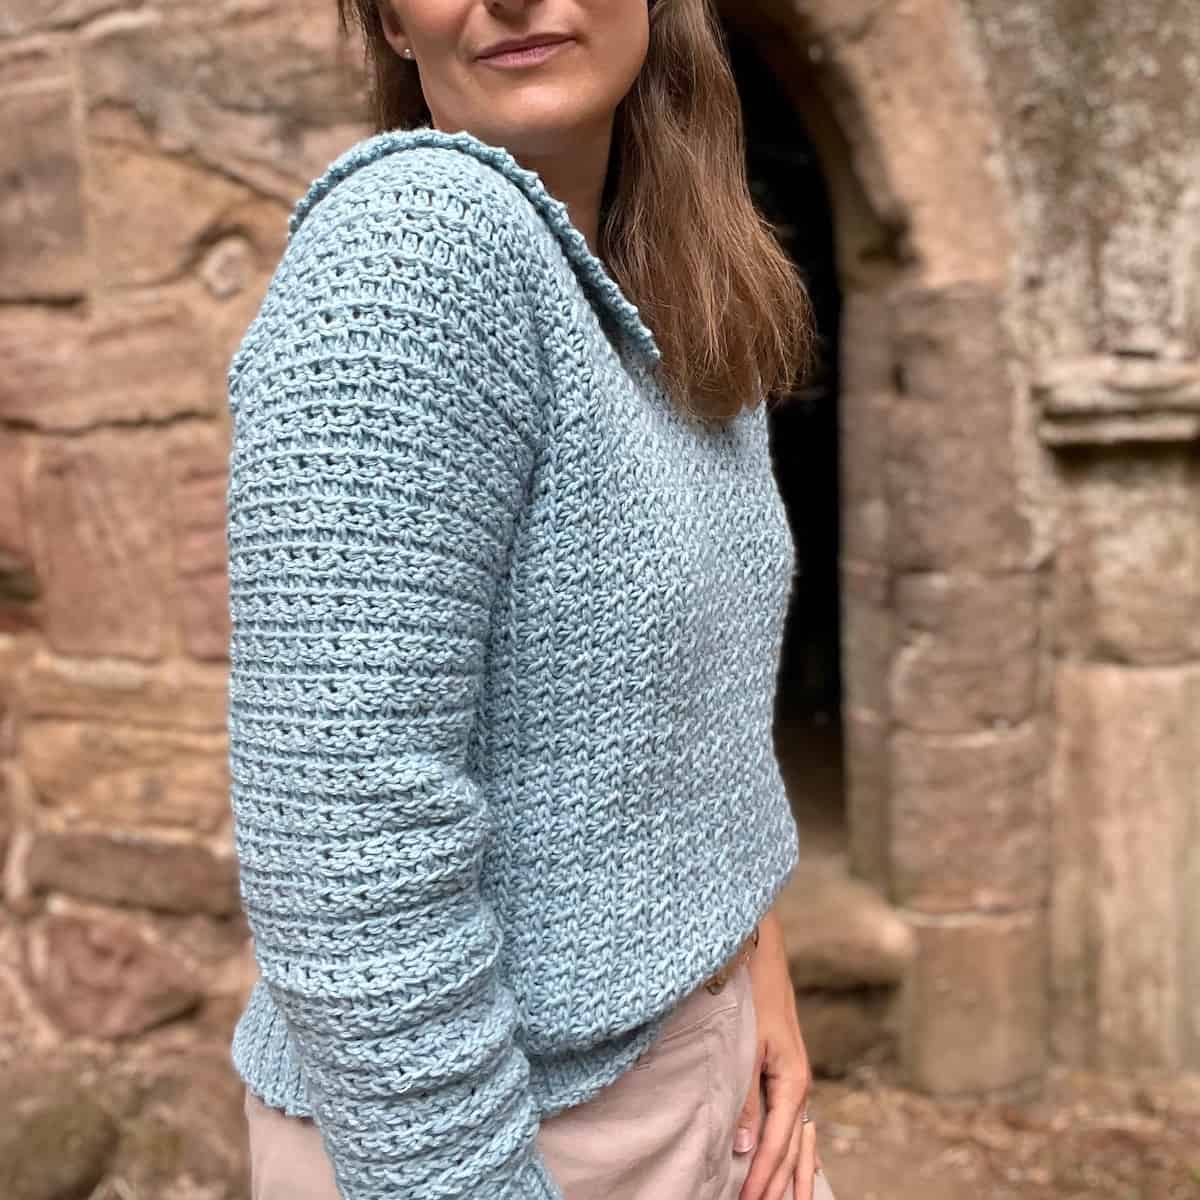
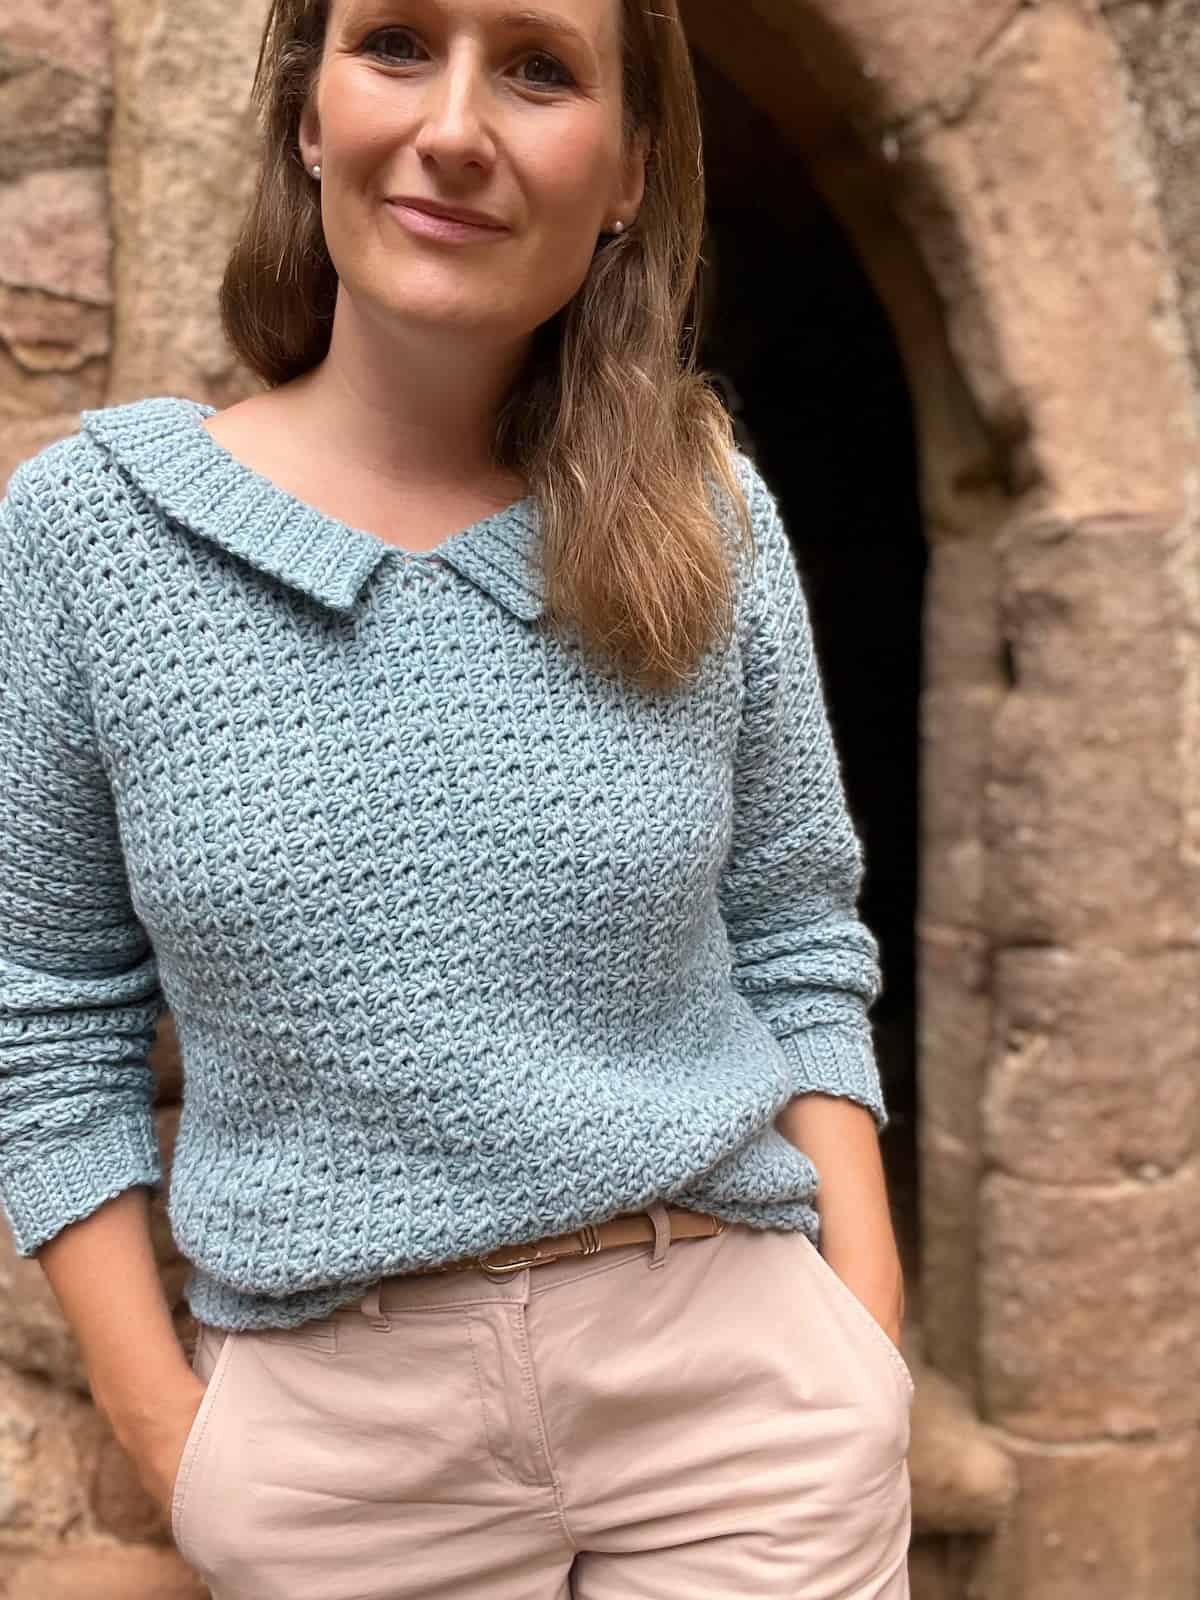
The Spofforth Sweater is a glorious combination of easy stitches and one piece construction that is a joy to make and wear. This v neck crochet sweater pattern puts together both class and minimalism to give any outfit something extra.
With a relaxed fit, long sleeves and subtle collar you can be sure to add a statement to whatever you wear it with.
This one piece crochet sweater pattern comes in sizes XS to 5XL so if you want to change the ease and size up or down you can! It can be a tight, ribbed top or an oversized sweater depending on the size you choose to make. Oh, and did I say it’s really easy to crochet too?!
Scroll down and sign in to find the V neck crochet sweater pattern with collar, or purchase an ad-free, printable PDF version here:
Want to remove Ads?
- Get ad-free access on all posts; 200+ patterns & tutorials!
- Member-only resource library with downloadable PDF guides
- Bonus eBook (Worth over $30)
Table of Contents
More about this easy crochet sweater with collar
Tucked in or out, with jeans or a skirt, this sweater can be smart, casual or in between! I’ve given you the option to choose between different sizes so you can choose what’s best for you or whoever you’re making this sweater for.
The sizes have between 1″ and 4″ of positive ease. Before jumping into the pattern, I would definitely recommend that you read through everything first and make a gauge swatch.
I know it can be a bit tedious especially when you’re excited to try out a pattern but by doing so, you’ll keep yourself from having the unravel your beautiful project in between.
A gauge swatch is especially important for a side to side crochet garment pattern like this because you’ll be making an entire sleeves and side before you can try it to see if it fits ok.
How do you crochet a side to side crochet sweater like this?
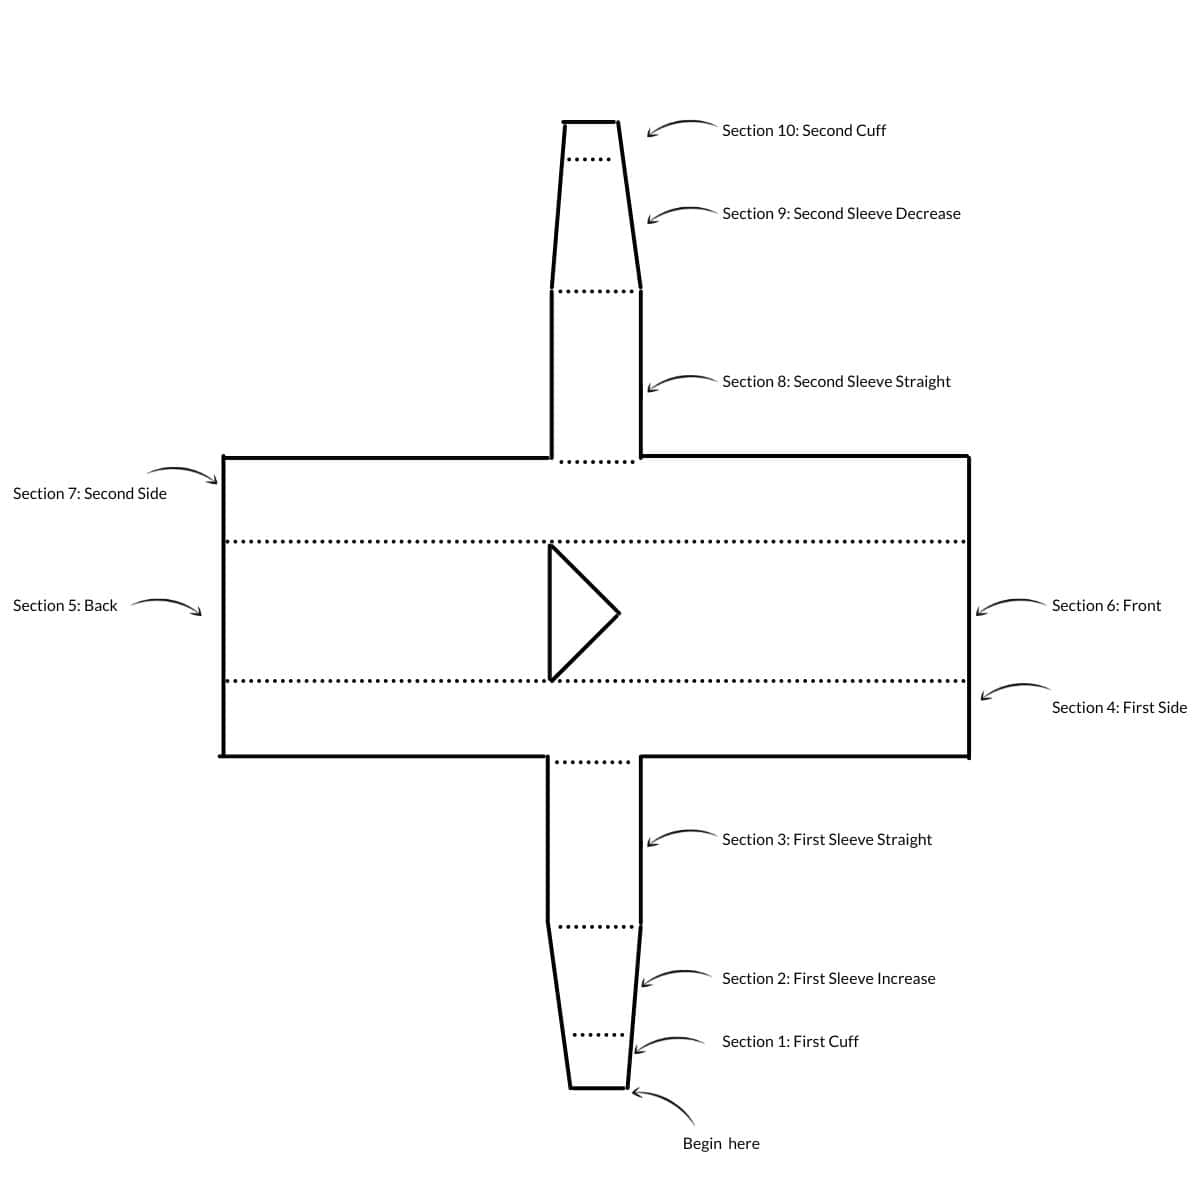
The v neck crochet sweater pattern is laid out in sections for the Cuff, First Sleeve Body, Body (First Side, Back, Front, Second Side) Second Sleeve Body, Second Cuff. The Collar is added once the main piece is complete in join as you go rows around the neckline.
You will crochet the whole sweater in one piece starting at the first sleeve cuff, working in vertical rows all the way across to the second sleeve cuff. The flat piece can then be blocked and joined at the sides and underarms to create the sweater.
The count number referring to each size is laid out as follows: Adult: XS (S, M, L, XL), (2X, 3X, 4X, 5X). I’ve given all of the details regarding measurements and yarn yardage down below.
Yarn
To crochet this easy sweater, I used the softly shaded Heatherly Worsted (4/Aran, Heavy Worsted weight) in the color Cabana.
Any #4/Aran/Worsted weight yarn will work great for this project. Alternatively, you can try a #3/DK/Lightweight yarn as long as you can match the gauge. Here are some other options:
- Heartland by Lion Brand (100% Acrylic; 252yds / 230m/140g)
- Swish Worsted by WeCrochet (100% Superwash Merino Wool; 110yds / 100m /50g)
- Color Theory by Lion Brand (100% Acrylic; 246yds / 225m / 100g)
According to the size you are making, you’ll increase/decrease the number of balls you use.
Size Label: XS (S, M, L, XL) (2X, 3X, 4X, 5X)
Balls of yarn: 5 (6, 6, 7, 8) (9, 10, 10, 12)
Yarn required (m/yds): 960/1050 (1070/1170, 1145/1250, 1330/1455, 1470/1605) (1670/1825, 1800/1970, 1940/2120, 2330/2545)
Sizing
This sweater comes in nine different sizes including: XS (S, M, L, XL)(2X, 3X, 4X, 5X). The sizes in this pattern are based on the body measurements as laid out by the Craft Yarn Council.
Size Label: XS (S, M, L, XL) (2X, 3X, 4X, 5X)
To fit Bust: 30″ / 76cm (34″ / 86cm, 38″ / 96.5cm, 42″ / 106.5cm, 46″ / 117cm) (50″ / 127cm, 54″ / 137cm, 58″ / 147cm, 62″ / 158cm)
Garment circumference: 33″ / 84cm (35.75″ / 91cm, 39″ / 99cm, 45″ / 114cm, 48″ / 122cm) (54″ / 137cm, 57″ / 145cm, 59.75″ / 155cm, 66″ / 168cm)
Length: 21.25″ / 54cm (22″ / 56cm, 22″ / 56cm, 22.75″ / 58cm, 23.25″ / 59cm) (24″ / 61cm, 24.5″ / 62cm, 25.25″ / 64cm, 25.5″ / 65cm)
Before you start, go through the pattern and highlight/mark the stitch and row counts that correspond to the size you are making (this will make your life much easier!).
Gauge
The gauge is 13 sts x 10.5 rows = 4″ x 4″ / 10 cm x 10 cm measured over main set pattern (blocked). To determine your gauge, I would recommend a gauge swatch.
Gauge Swatch
The gauge swatch needs to be worked in the Main Set Pattern of the Body of the sweater.
This is done as follows:
ch25 (or more if you would like to see the drape of your fabric better)
Row 1: ch1, *Exhdc in next, Exhdc in blo of next; rep from * to end.
Row 2: ch1, *ss in flo of next, sc in 3rd loop of next; rep from * to end.
Rows 1 -2 create Main Set Pattern.
Repeat the Main Set Pattern until you are happy you have enough to measure and make sure you like the drape of your fabric.
Materials
Along with your yarn, you will need the following:
- 6mm (J) crochet hook and 5mm (H) (or hook required to meet gauge)
- Scissors
- Tapestry needle
Pattern Options
Get this v neck crochet sweater pattern free in this blog post in US terms – just scroll down to find it in the exclusive members area! You can also purchase an ad-free, printable PDF with added extras in my pattern stores:
Purchase and Print
Get the ad-free, printable PDF with added extras in my pattern stores:
Don’t forget to join HanJan Crochet to receive regular discount codes (and more free patterns!) and Pin this pattern to your crochet Pinterest board!
Glossary and Abbreviations
ch(s) – chain(s)
beg – beginning
sp – space
ss – slip stitch
RS – right side
WS – wrong side
sk – skip
rep – repeat
yoh – yarn over hook
bl – back loop only
fl – front loop
Stitches
The sweater uses the following crochet stitches:
sc – single crochet (UK dc – double crochet)
hdc – half double crochet (UK htr – half treble crochet)
Special Stitches
This sweater is made side to side with the rows sitting vertically when worn.
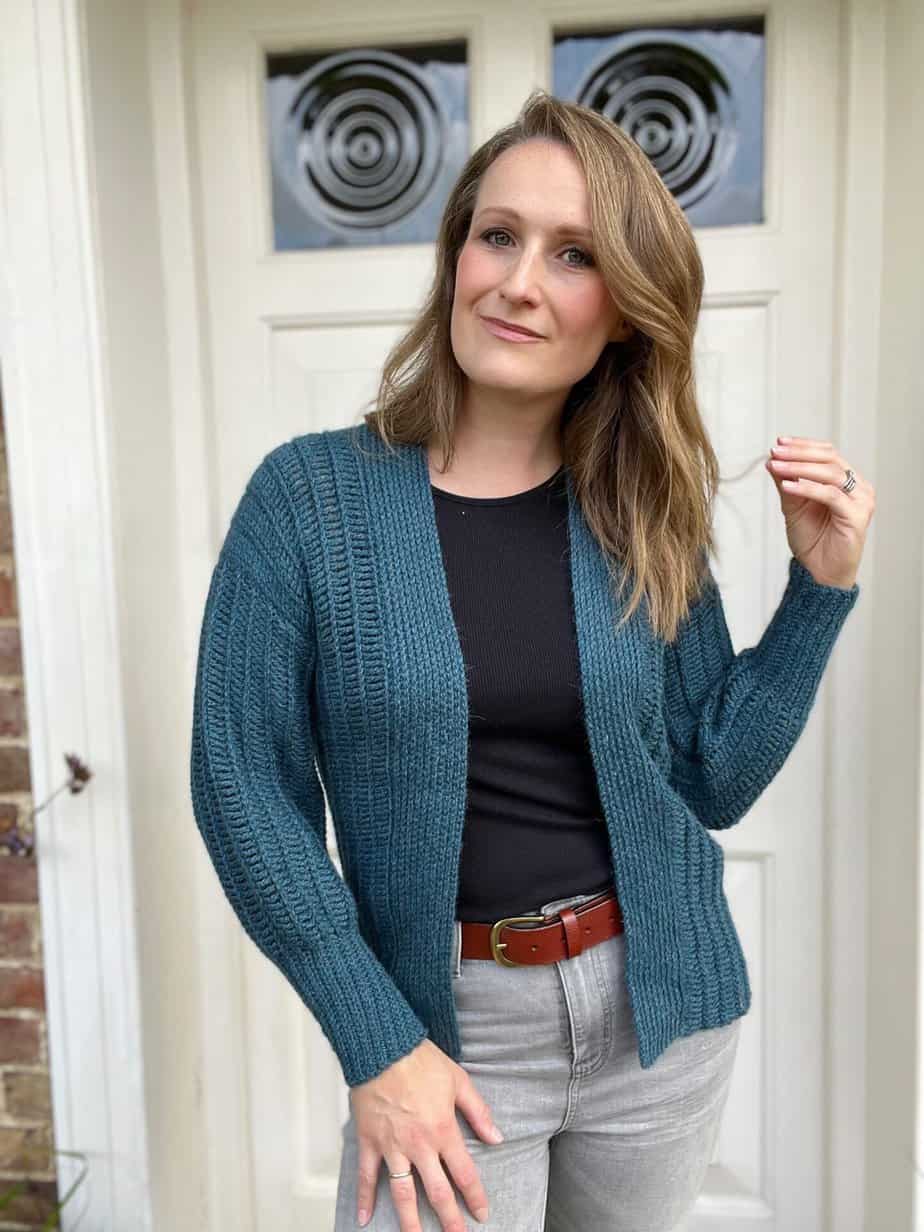
If you want to make more crochet garments using the side to side construction methods, I’ve got a few suggestions for you (and you can search my blog for more patterns too):
- Sydney Cardigan (a beautiful ribbed wardrobe staple)
- Chloe Tabard Top (great for warmer months!)
- Wetherby Cardigan (comes with different length options)
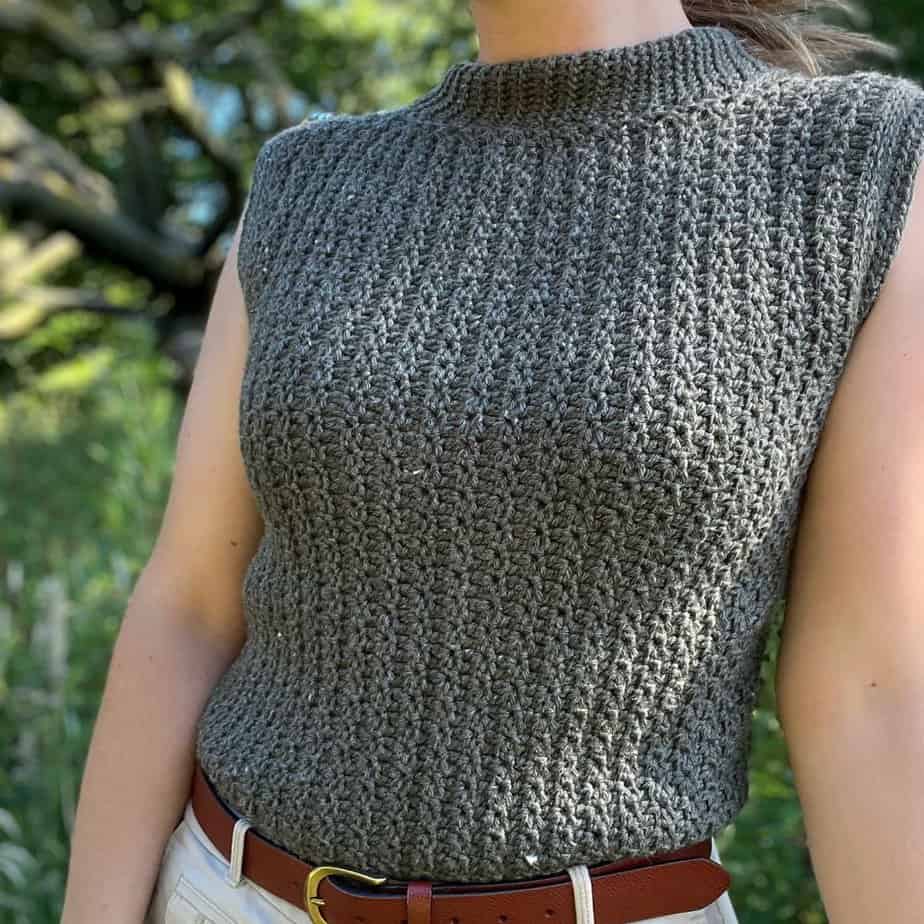
Check out the crochet ribbed sweater pattern using the half double crochet stitches too for a knit look garment!
The special stitches used in this crochet sweater are given below:
3rd loop
Extra loop created on hdc from the yarn over. When working in rows this will be the first loop you come to when looking at the stitch.
Extended Half Double Crochet: Exhdc
yoh, insert your hook, yoh and pull up a loop, yoh and pull through one loop, yoh and pull through remaining three loops.
Learning to Crochet Garments
If you’re new to crochet garments and worried about all the sizing, seaming, gauge and other things that might seem really daunting, please don’t worry. I used to feel exactly the same! If you can make a blanket, then you can make this garment. I promise!
I’ve written all about my experience with learning to both make and design garments and you can learn about crochet garment making with 12 free summer top patterns.
I also had my lovely friend Fran (who is a really talented crochet garment pattern designer) write all about how to make perfect crochet garments which is a great read packed full of experience and tips!
Pattern Notes
Ch 1 at the start of a row does not count as a st.
Turn at the end of every row.
Instructions are given for the smallest size, with larger sizes in parentheses ( ) e.g. XS (S, M, L, XL) (2X, 3X, 4X, 5X).
If an instruction does not apply to a size, it will appear in the sizing sequence as a dash (-). Here is an example for something that does not apply to sizes S, L and 4X: 89 (-, 89, -, 89)(89, 89, -, 89).
Stitch counts are given in [ ] at the end of each row. If no stitch count is given, then the count is the same as the previous row.
Customisation
Body Length
You can easily customise the body length by adding or subtracting stitches when you split from the first sleeve to work the body. Just be careful to make sure you have the same number of stitches for the front and the back.
Sleeve Length
You can work more or less rows for your sleeves as you’d like. Make sure to make a note of what you do for the first sleeve and repeat it for the second.
Cuffs and Collars
You can adjust the size of your cuffs and collar by experimenting with the amount of chains that you begin with.
The collar is especially easy to adapt as you can try it on by this point and measure where you would like it to come to.
Construction Notes and Diagram
The sweater is made in one piece beginning at the sleeve cuff, working the sleeve, body, splitting at the neck, rejoining for the body, sleeve and final cuff.
The garment is made side to side with the rows sitting vertically when worn.
The collar is added to finish.
Each section shown in the diagram is labelled exactly the same in the written pattern.
Free V Neck Crochet Sweater Pattern with Collar
To unlock Exclusive Content on the HanJan Crochet Blog, all you need to do is click the box below and the Grow.me app will pop up, allowing you to enter your email and create a password.
Once you’ve created an account, every time you see Exclusive Content on my blog (or any others that use Grow), simply login to your Grow account. Be sure to switch to the login screen to enter your login credentials.
If you forget your password, click the “forgot password” link and follow the prompts. Please note that I’m unable to assist with resetting Grow passwords or accessing your Grow account, so be sure to save your login information in a safe place.
Thank you for subscribing and for joining me at HanJan Crochet! I hope you enjoy the exclusive content available on the site and I can’t wait to see what you create 🙂
All sizes: XS (S, M, L, XL) (2X, 3X, 4X, 5X)
SLEEVES AND BODY
Section 1: first cuff – using smaller hook
Foundation chain: ch 10
Row 1: RS: hdc in 2nd ch and each across. [9]
Row 2: ch1, ss in flo of each.
Row 3: ch1, hdc in blo of each.
Row 4: Rep Row 2.
Rows 3 and 4 create the Cuff set pattern.
Rows 5-20 (24, 24, 28, 28) (32, 32, 36, 36): Repeat the Cuff set pattern.
Continue to First Sleeve Body. Change to 6mm hook (or the hook that met the gauge).
Section 2: sleeve body; increase section –
Rotate to work into side of rows of the Cuff.
Row 1: WS: sc in side of each row. [20 (24, 24, 28, 28) (32, 32, 36, 36) sts]
Row 2: increase: ch1, 2Exhdc in first st, Exhdc in each st to last st, 2Exhdc in last st. [22 (26, 26, 30, 30)(34, 34, 38, 38) sts]
Row 3: ch1, *ss in flo of next, sc in 3rd loop of next; rep from * to end.
Row 4: increase: ch1, 3 Exhdc in 1st st, Exhdc in blo of next, *Exhdc in next, Exhdc in blo of next; rep from * to end. [24 (28, 28, 32, 32) (36, 36, 40, 40) sts]
Row 5: Rep Row 3.
Row 6: Increase: ch1, Exhdc in first st, *Exhdc in blo of next, Exhdc in next; rep from * to last st, 3 Exhdc in last st. [26 (30, 30, 34, 34) (38, 38, 42, 42) sts]
Row 7: Rep Row 3.
Rows 4-7 create Sleeve Increase Pattern.
Rep rows 4-7 another 4 (4, 4, 4, 5) (5, 6, 6, 7) times more. [42 (46, 46, 50, 54), (58, 62, 66, 70) sts]
Section 3: sleeve body; straight section –
Row 1: ch1, *Exhdc in next, Exhdc in blo of next; rep from * to end.
Row 2: ch1, *ss in flo of next, sc in 3rd loop of next; rep from * to end.
Rows 1 -2 create Straight Sleeve Pattern.
Work 18 (18, 18, 18, 16) (16, 12, 12, 8) rows more in Straight Sleeve pattern, (ending on WS row).
Do not break yarn.
Section 4: main body; first side –
Create the following additional chain to set the length for the body with a new ball of yarn: With RS facing, join yarn to last st, ch 52, break yarn.
With WS facing, continue with yarn joined to last st of sleeve, ch53, turn.
Row 1: RS: hdc in 2nd ch from hook and each of next 9 ch, Exhdc in each ch to sleeve (52) *Exhdc in next, Exhdc in blo of next; rep from * to end of sleeve [42 (46, 46, 50, 54) (58, 62, 66, 70)], Exhdc in each ch of next 42 additional chain, hdc in last 10 ch to end (52). [146 (150, 150, 154, 158) (162, 166, 170, 174) sts]
The first and last 10 sts of the Body pattern create the Bottom Cuff of the sweater. If you would like a tighter bottom cuff then switch to using the smaller hook for these stitches and use the larger hook for the main stitch pattern of each row.
Row 2: WS: ch1, ss in flo of next 10, *ss in flo of next, sc in 3rd loop of next; rep from * to last 10 sts, ss in flo of each to end.
Row 3: ch1, hdc in blo of next 10, *Exhdc in next, Exhdc in blo of next; rep from * to last 10 sts, hdc in blo of each to end.
Row 4: Repeat Row 2.
Rows 3 and 4 create the Set Body Pattern.
Work 10 (10, 12, 14, 16) (16, 20,20, 22, 26) rows more in Body Pattern. (end on WS).
Continue for Back.
Section 5: main body; back –
Row 1: RS: ch1, hdc in blo of next 10, *Exhdc in next, Exhdc in blo of next; rep from * 30 (31, 31, 32, 33), (34, 35, 36, 37) times in total to st 70 (72, 72, 74, 76) (78, 80, 82, 84), turn.
Leave rem [76 (78, 78, 80, 82), (84, 86, 88, 90) sts] unworked.
Row 2: ch1, *ss in flo of next, sc in 3rd loop of next; rep from * to last 10 sts, ss in flo of each to end. [70 (72, 72, 74, 76) (78, 80, 82, 84) sts.]
Rows 1 and 2 create Main Back Pattern.
Work 14 (18, 18, 22, 22) (22, 26, 26, 26) rows more in Main Back Pattern. (end on WS).
Break yarn.
Section 6: main body; front –
With RS facing, skip 6 sts, rejoin to 77th (79th, 79th, 81st, 83rd), (85th, 87th, 89th, 91st) st of last row of First Side (the same row that the Back begins on).
Dec Row 1: ch1, *Exhdc in next, Exhdc in blo of next; rep from * to last 10 sts, hdc in blo of each to end. [70 (72, 72, 74, 76) (78, 80, 82, 84) sts].
Dec Row 2: decrease row: ch1, ss in flo of next 10, *ss in flo of next, sc in 3rd loop of next; rep from * to last 2 sts, leave 2 sts unworked. [68 (70, 70, 72, 74) (76, 78, 80, 82) sts].
Dec Rows 1 and 2 create the Neck Decrease Shaping Pattern.
Work 6 (8, 8, 10, 10) (10, 12, 12, 12) rows more in Neck Decrease Shaping Pattern. (ending on WS) [62 (62, 62, 62, 64) (66, 66, 68, 70) sts].
Inc Row 1(RS): ch1, *Exhdc in next, Exhdc in blo of next; rep from * to last 10 sts, hdc in blo of each to end.
Inc Row 2: increase row: ch1, ss in flo of next 10, *ss in flo of next, sc in 3rd loop of next; rep from * to last 2 sts, ss in flo of next, 3 sc in 3rd loop only of last st. [64 (64, 64, 64, 66) (68, 68, 70, 72) sts].
Inc Rows 1 and 2 create the Neck Increase Shaping Pattern.
Work 6 (8, 8, 10, 10) (10, 12, 12, 12) rows more in Neck increase Shaping Pattern. (ending on WS).
[70 (72, 72, 74, 76) (78, 80, 82, 84) sts].
Continue to join for Second Side.
Ch 6, ss to last st of Back.
Break yarn.
Section 7: main body; second side –
With RS facing, join yarn to 1st st of Back.
Row 1: ch1, hdc in blo of next 10, *Exhdc in next, Exhdc in blo of next; rep from * to last 10 sts, hdc in blo of each to end. [146 (150, 150, 154, 158) (162, 166, 170, 174) sts].
Row 2: ch1, ss in flo of next 10, *ss in flo of next, sc in 3rd loop of next; rep from * to last 10 sts, ss in flo of each to end.
Rows 1 and 2 create the Second Side Pattern.
Work 12 (12, 14, 16, 18) (22, 22, 24, 28) rows more in Second Side Pattern (ending on WS).
Break yarn.
Section 8: sleeve body; straight section –
With RS facing join yarn to 53rd st of last row.
Row 1: RS: ch1, *Exhdc in next, Exhdc in blo of next; rep from * for 42 (46, 46, 50, 54) (58, 62, 66, 70) sts, turn. [42 (46, 46, 50, 54) (58, 62, 66, 70) sts]
Row 2: ch1, *ss in flo of next, sc in 3rd loop only of next; rep from * to end.
Rows 1 and 2 create the Straight Second Sleeve Pattern.
Work 17 (17, 17, 17, 15) (15, 15, 11, 11, 7) rows more in Straight Second Sleeve pattern.
Section 9: sleeve body; decrease section –
Row 1: WS: ch1, ss3tog in flo, sc in 3rd loop only of next, *ss in flo of next, sc in 3rd loop only of next; rep from * to end. [40 (44, 44, 48, 52) (56, 60, 64, 68) sts]
Row 2: ch1, *Exhdc in next, Exhdc in blo of next; rep from * to end.
Row 3: ch1, ss in flo of next, *sc in 3rd loop only of next, ss in flo of next; rep from * to last 3 sts, sc3tog in 3rd loop only. [38 (42, 42, 46, 50) (54, 58, 62, 66) sts]
Row 4: Rep Row 2
Rows 1-4 create the Second Sleeve Decrease Pattern.
Rep rows 1-4 another 4 (4, 4, 4, 5) (5, 6, 6, 7) times more. [22 (26, 26, 30, 30) (34, 34, 38, 38) sts]
Next Row: ch1, sc2tog, *ss in flo of next, sc in 3rd loop only of next; rep from * to last 2 sts, sc2tog. [20 (24, 24, 28, 28) (32, 32, 36, 36) sts]
Next Row: ch1, sc in each to end.
Section 10: second cuff –
Change to 5mm hook and rotate to work in join as you go rows now.
Ch10
Row 1: ss in 2nd ch from 2nd ch from hook and each to end, ss in next 2 sts of the last row of the sleeve. [9]
Row 2: hdc in blo of each to end.
Row 3: ch1, ss in flo of each, ss in next 2 sts of the last row of the sleeve.
Row 4: Rep Row 2.
Rows 3-4 create the Second Cuff pattern.
Rows 5-20 (24, 24, 28, 28) (32, 32, 36, 36): repeat the Second Cuff pattern. Fasten off.
Block to measurements.
Seam underarm and sides of sweater with a whip stitch or ss seam.
COLLAR
Using the smaller hook with RS facing, join yarn to side of first row of the Back.
Round 1: ch1, hdc in side of each row of Back Neckline 16 (20, 20, 24, 24) (24, 28, 28, 28) hdc in next 6 sts (side of neck), working along decrease side of neckline: *hdc in next, hdc2tog over 2 skipped sts; rep from * to centre (8 (10, 10, 12, 12) (12, 14, 14, 14), hdc in end of each row along increase side of neckline (8 (10, 10, 12, 12) (12, 14, 14, 14), hdc in next 6 sts (side of neck), ss to join. [44 (52, 52, 60, 60) (60, 68, 68, 68) sts].
Break yarn.
With RS facing, join yarn 1 st to the side of the centre of the Front neckline.
Ch 10.
Row 1: ss in 2nd ch from 2nd ch from hook and each to end, ss in next 2 sts of Round 1.
Row 2: hdc in blo of each to end.
Row 3: ch1, ss in flo of each, ss in next 2 sts of Round 1.
Rows 2 -3 create the Collar Pattern.
Repeat the Collar Pattern around until you reach the centre again.
Break yarn.
Weave in all ends to finish.
Blocking
Blocking a project, especially one like this one piece crochet garment, can really transform it into something really spectacular.
It makes the stitches sit really evenly by ‘opening them out’ and shapes the item to exactly the size it should be.
There are a few ways to block things but these are my favourites:
- Steam block – set your iron to steam and lightly steam over the project (you can do it through a protective cloth if you’re worried), then pin to measurements and allow to dry.
- Spray block – pin the project pieces out to desired dimensions and lightly spray with water and allow to dry naturally.
- Dry block – simply pin the pieces out on a flat surface and leave for a few days to encourage the shape.
However you choose to do it, block all pieces of the garment flat to measurements before seaming together.
Join HanJan and Share Your Crochet!
It’s an honour to be able to create and share my free crochet patterns with you. I’d love to stay connected and send you regular discount codes and free patterns! Please sign up for my subscriber list to get a free gift right now!
I look forward to seeing your finished crochet projects, especially this easy crochet pattern, so please share them with me in the HanJan Crochet Facebook group or on Instagram and tag #hanjancrochet.
Purchase and Print
Get the ad-free, printable PDF with added extras in my pattern stores:
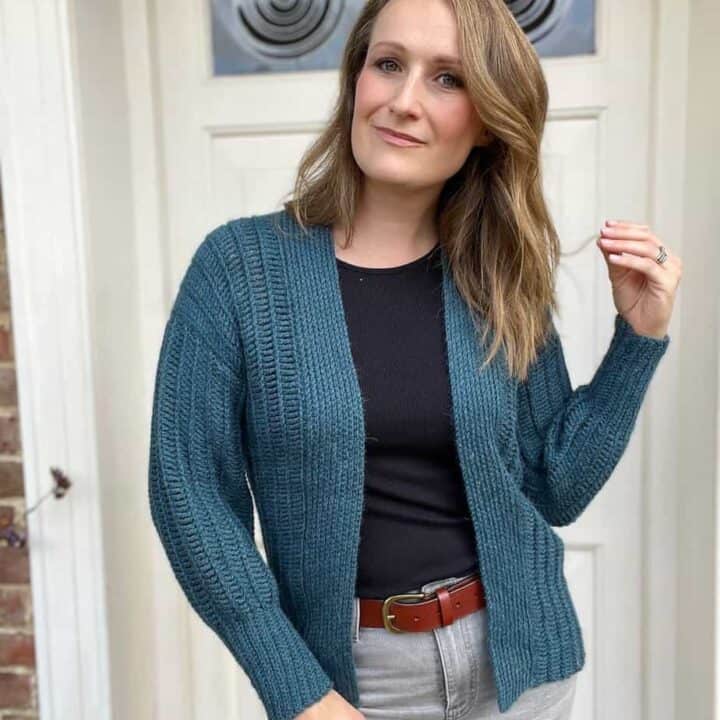
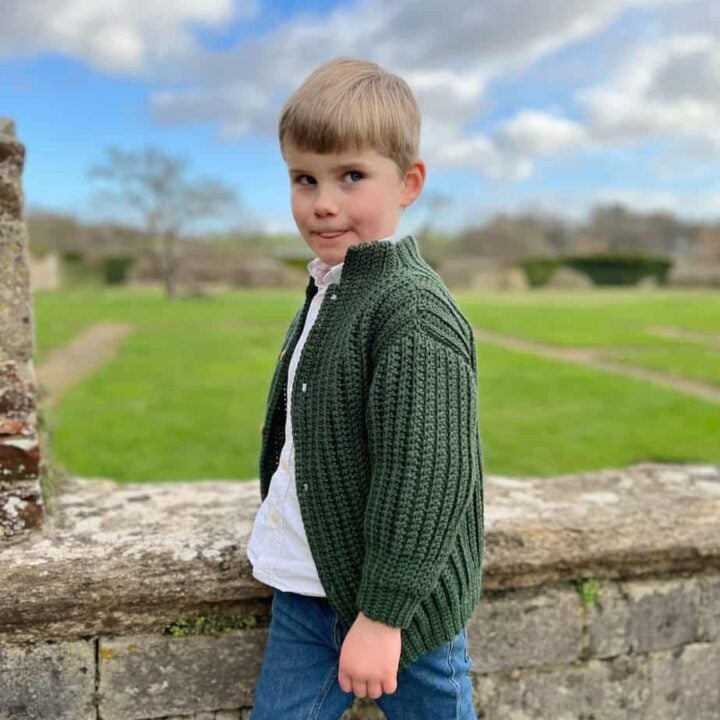
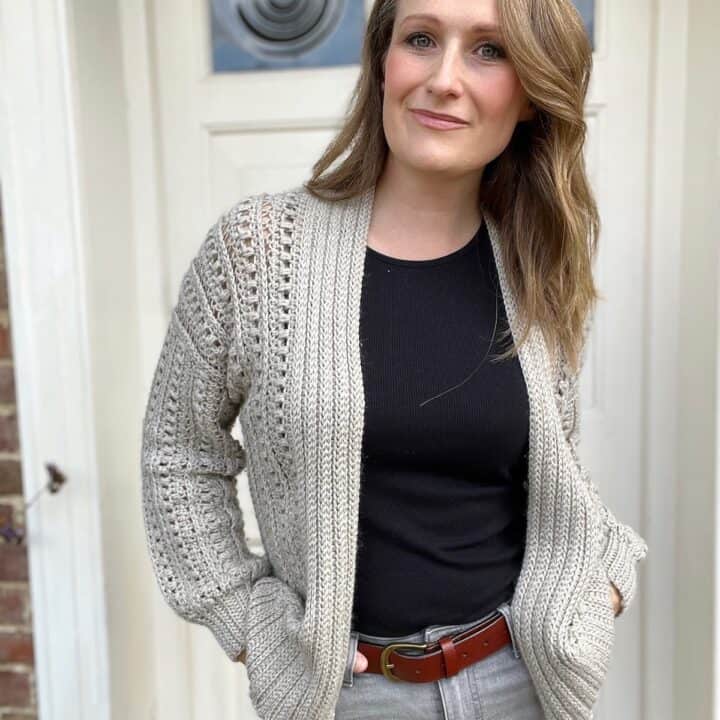
More Sweater Patterns You Might Enjoy
If you enjoy crocheting sweaters and cardigans, here are a few more you might want to make!