This post may contain affiliate links. Please see my full disclosure and privacy policy for details.
I’m sure you will all have heard of the slip stitch! It’s one of the first stitches you would have learnt as a crocheter. But have you heard of the yarn over slip stitch? This stitch is a wonderful adaptation of the regular slip stitch, with an incredible texture.
The yarn over slip stitch (often abbreviated to yo slst) is a great stitch for creating a knit-like ribbing on garments, but also works well for borders and anywhere you’d like to add extra texture.
This crochet tutorial will take you through step by step instructions and pictures to show you how to work this awesome stitch, as well as explaining how it can be used in ribbing.
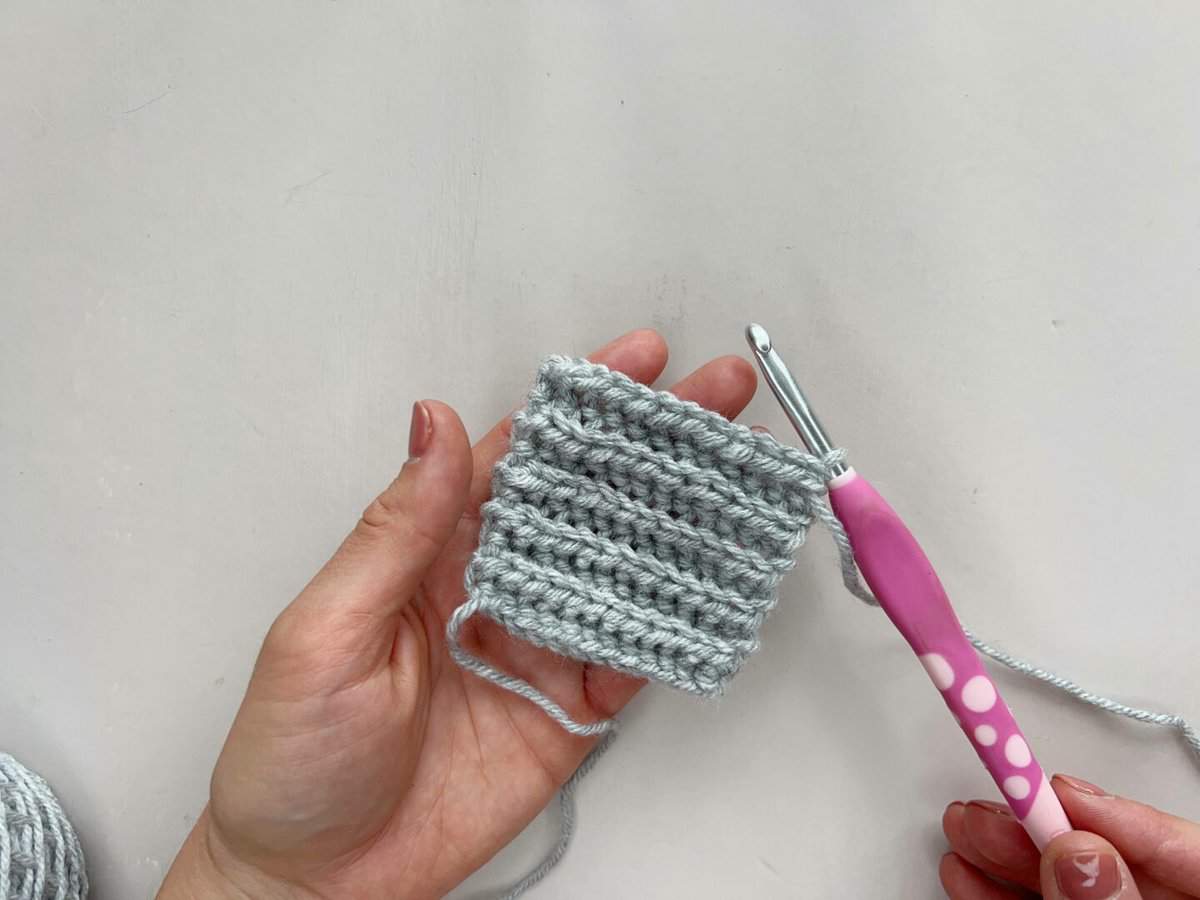
Table of Contents
What is the yo slst used for?
This easy but clever little stitch can be used to create texture and decorative detail in any project, such as stripes in a baby blanket or sweater. The beautiful ridge made by the yarn over slip stitch is perfect for emulating a knitted ribbing, like the ones you get on garment cuffs or hat rims.
Want to remove Ads?
- Get ad-free access on all posts; 200+ patterns & tutorials!
- Member-only resource library with downloadable PDF guides
- Bonus eBook (Worth over $30)
There are some ideas of projects that use this stitch for you to try further down the page.
It is a super easy stitch to create, and is often used in combination with other stitches to create beautiful patterns. For example, you might have one row of yo slst, followed by one row of single crochet. When repeated, this will create your rib effect.
What is the difference between a slip stitch and a yarn over slip stitch?
There is only one small difference in the formation of the slip stitch vs the yarn over slip stitch. That is, before you start a regular slip stitch, you simply yarn over hook first. This simple action adds a third loop to the stitch, much like in a half double crochet. It also means that the stitch is slightly taller than a slip stitch.
It is really amazing, though, that one extra yarn over can create such a great stitch for texture. The slip stitch is used to join stitches or to move your position in a project and it is often almost invisible in a project.
The yarn over slip stitch, on the other hand, is used for effect!!
How do you crochet a yarn over slip stitch?
Let’s get to it now and look at how to work the crochet yarn over slip stitch.
Firstly, let’s look at the simple steps of the process and then we’ll have a closer look with some pictures. Remember that this tutorial is in US terms.
Terminology in patterns
Yarn over slip stitch is usually abbreviated to yo slst. It can also be yoslst or yost. I’ve also seen it called the half double slip stitch too, so look out for this in your pattern, and read the definitions carefully!
How to make a yarn over slip stitch
- Start with a row of regular single crochet stitches (or whatever stitch you’re currently using).
- Yarn over hook and locate the stitch you want to work into.
- Insert hook into stitch.
- Yarn over hook.
- Pull loop through stitch.
- Continue to pull same loop through the two remaining loops.
- You have a completed yarn over slip stitch.
- Continue repeating across the row.
Step by step yarn over slip stitch with pictures
Supplies you’ll need
I used Paintbox Simply Aran for the tutorial photos which is a lovely soft, but durable aran (worsted) weight yarn, 100% acrylic, 201yds/100g. However, you can use any yarn that you like really. If you’re a beginner, I’d recommend using a smooth category 4 or 5 weight yarn so you can see your stitches easily.
You’ll need a corresponding crochet hook for the yarn you choose. I’m using a Dots crochet hook in the pictures and it’s a 6mm size.
The only other things you might need are a pair of sharp scissors and a tapestry needle to weave in your ends if you’d like to save your swatch.
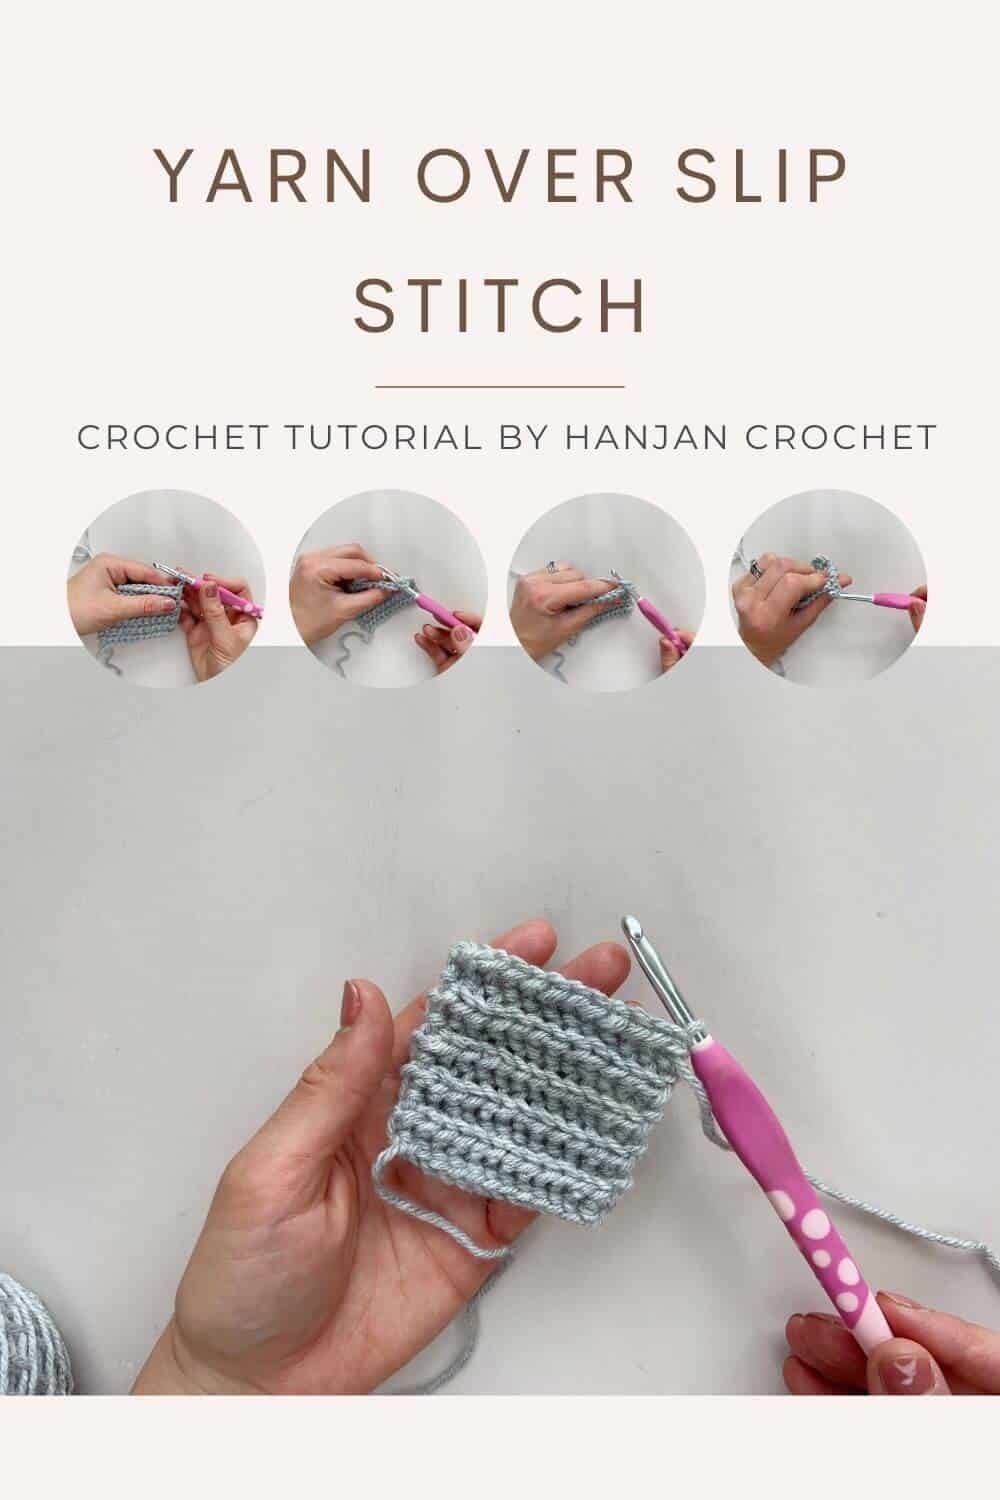
1. Begin with a row of single crochet
Before you can begin the yarn over slip stitch, you will need some stitches to work into. If you are adding this stitch for decorative detail, then you can just start at the beginning of the next row. However, I would suggest you do a quick swatch to practice the stitch first.
The easiest way to try the yo slst would be to do a foundation chain followed by a row of single crochet. For a good practice swatch, I’d recommend starting with at least 20 single crochet stitches, but probably more.
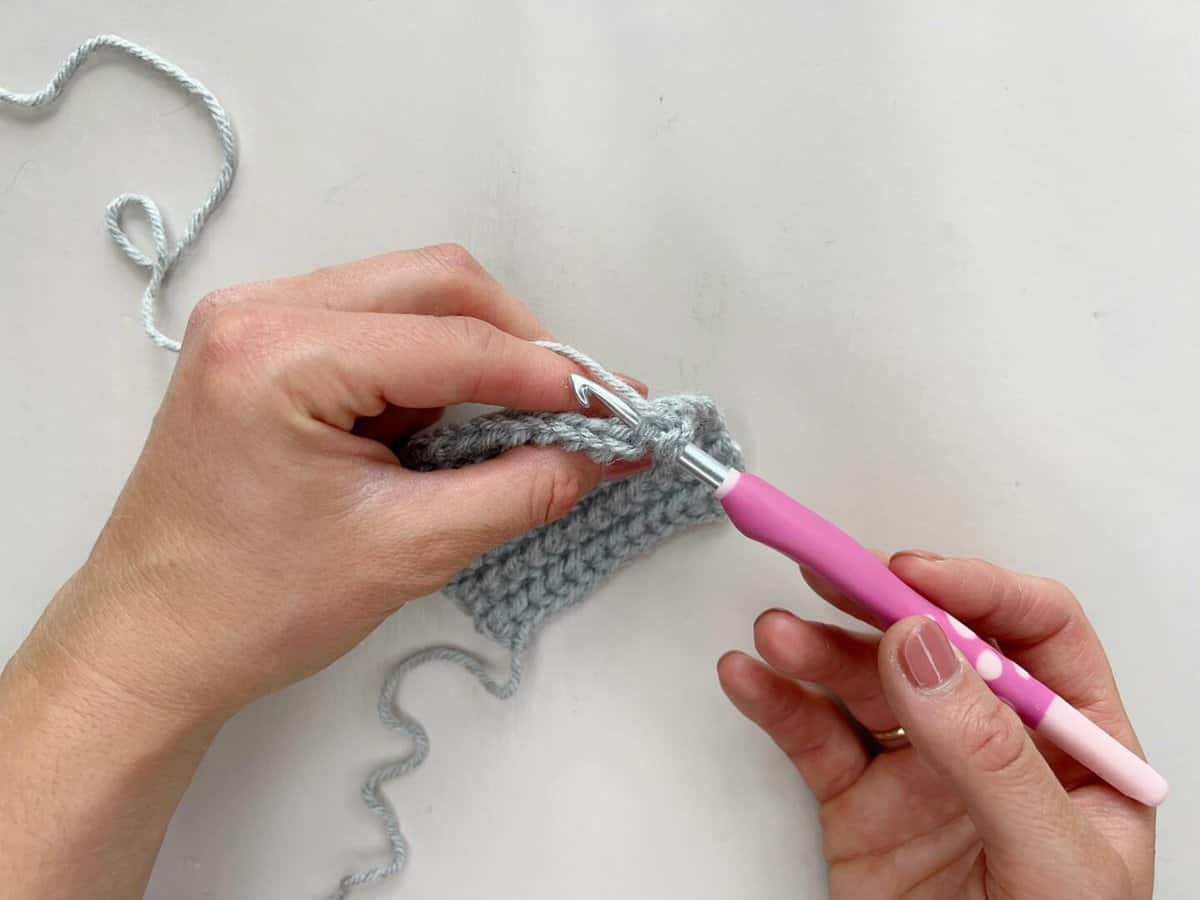
2. Yarn over hook and locate the stitch to work into
Once you have a row of stitches to work with, wrap your yarn over your hook and identify the first stitch you are going to work into.
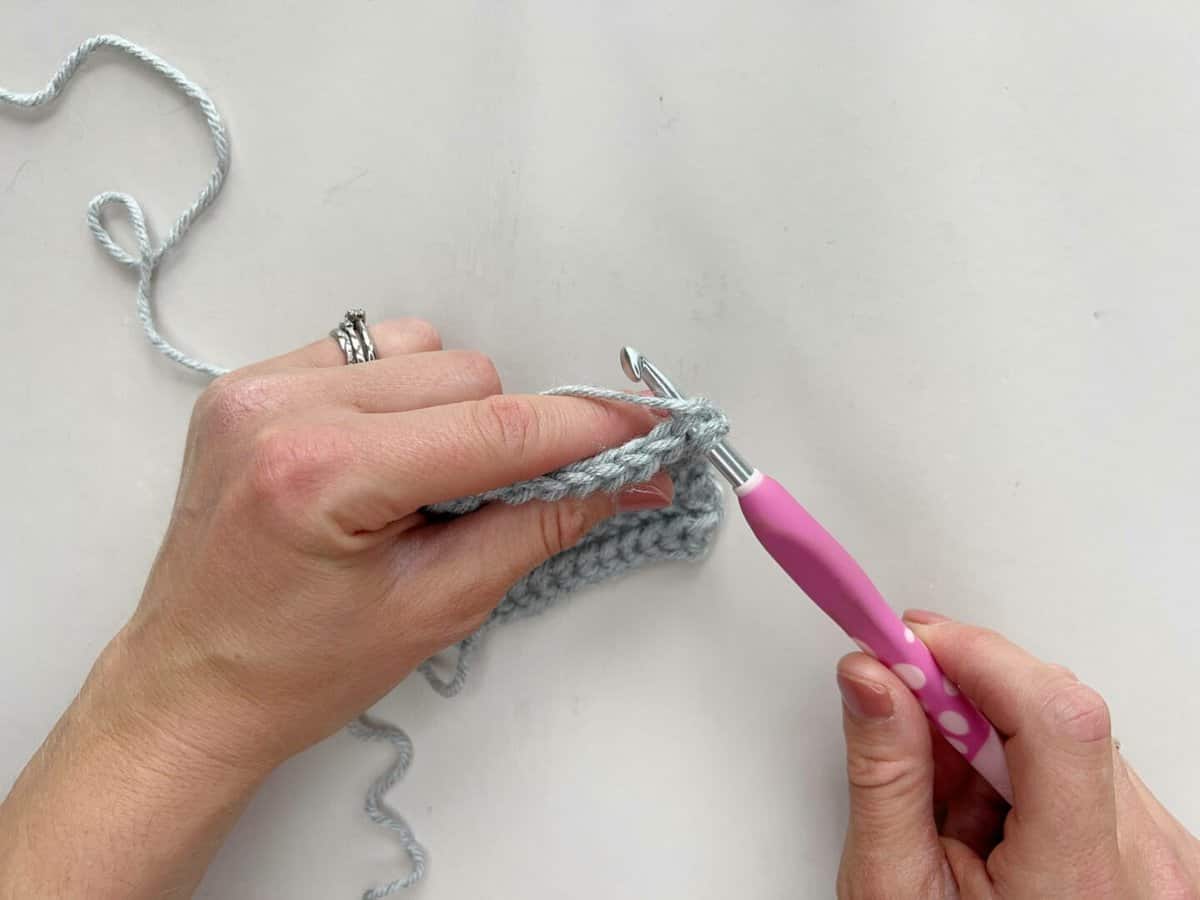
3. Insert hook into stitch
Insert your hook into the identified stitch from front to back.
4. Yarn over hook
Wrap your yarn over the hook.
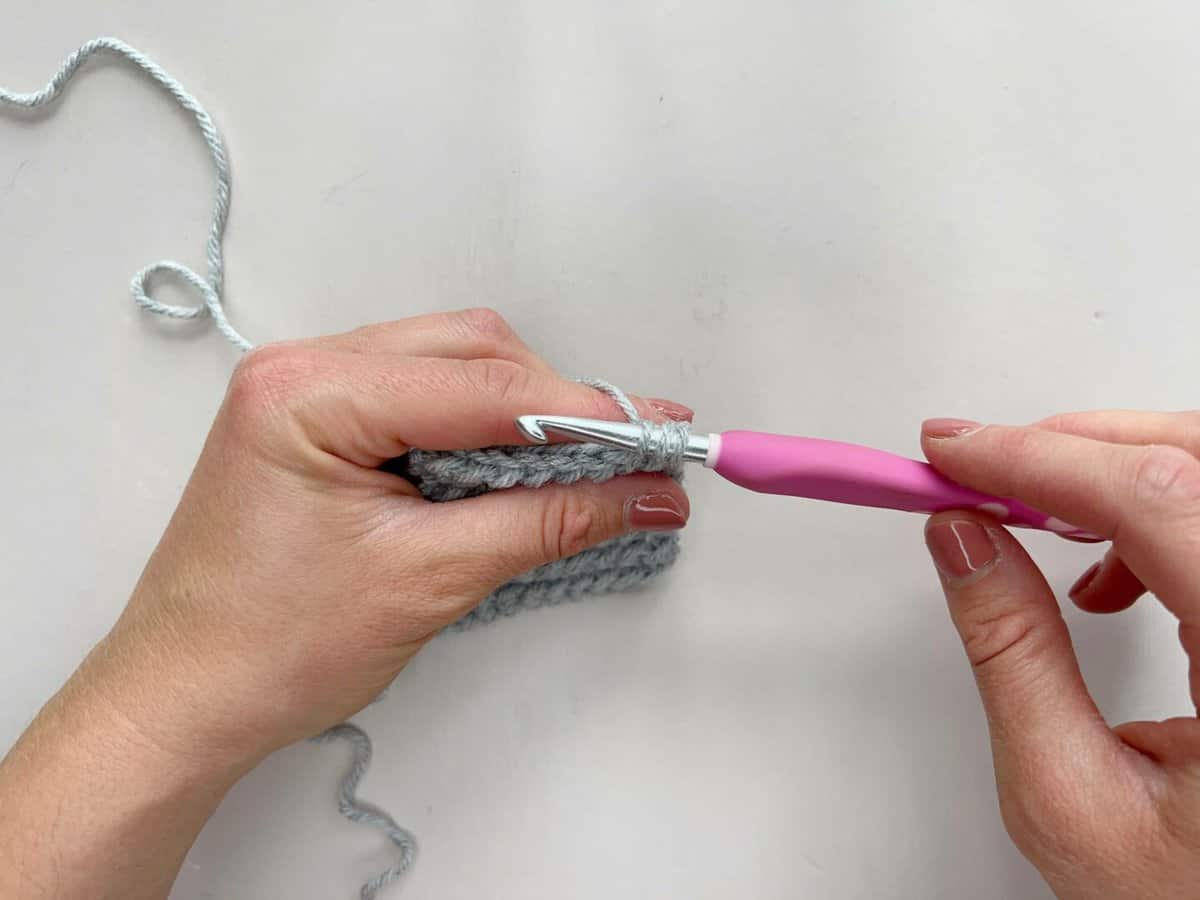
5. Pull loop through stitch
Pull the loop you have just wrapped around your hook through the stitch.
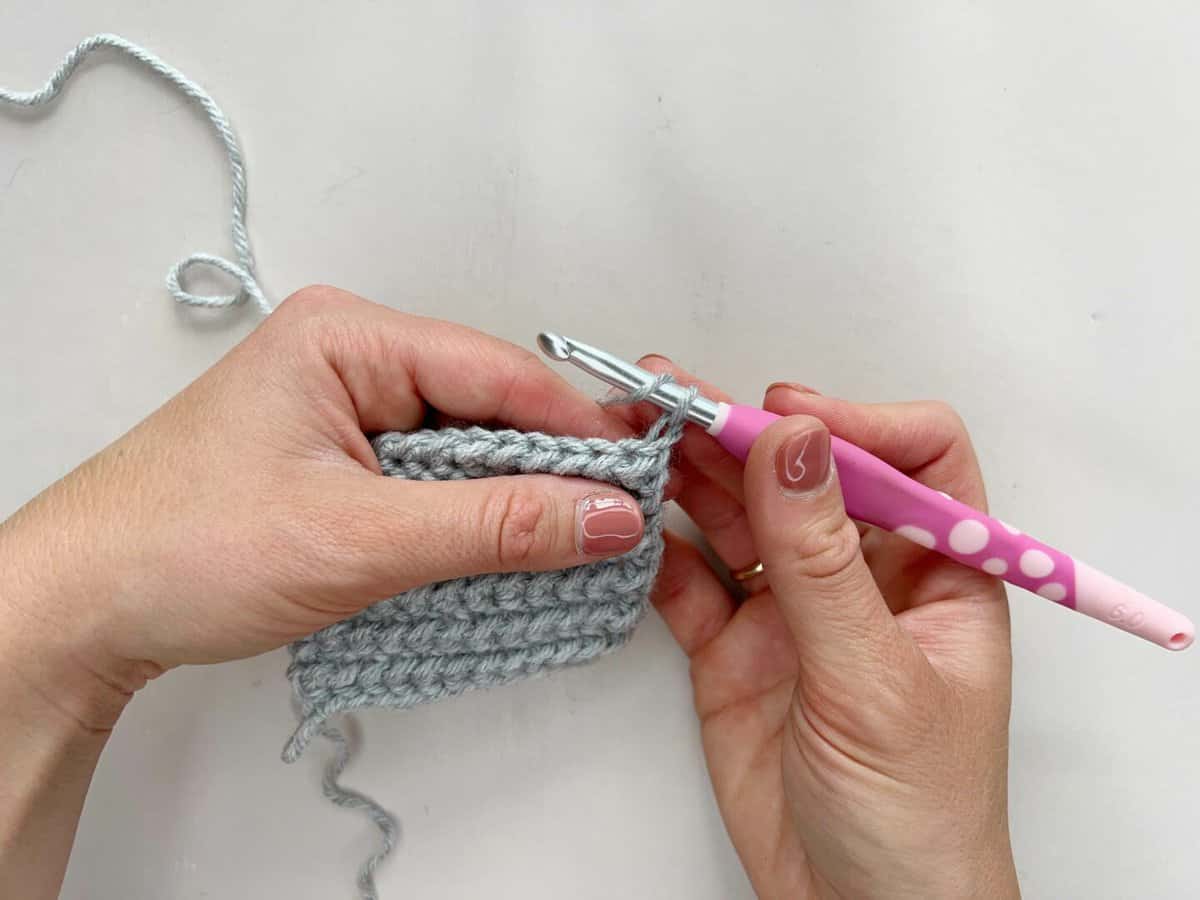
6. Continue to pull same loop through the two remaining loops
Without yarning over, continue to pull that same loop on your hook through the two remaining loops.

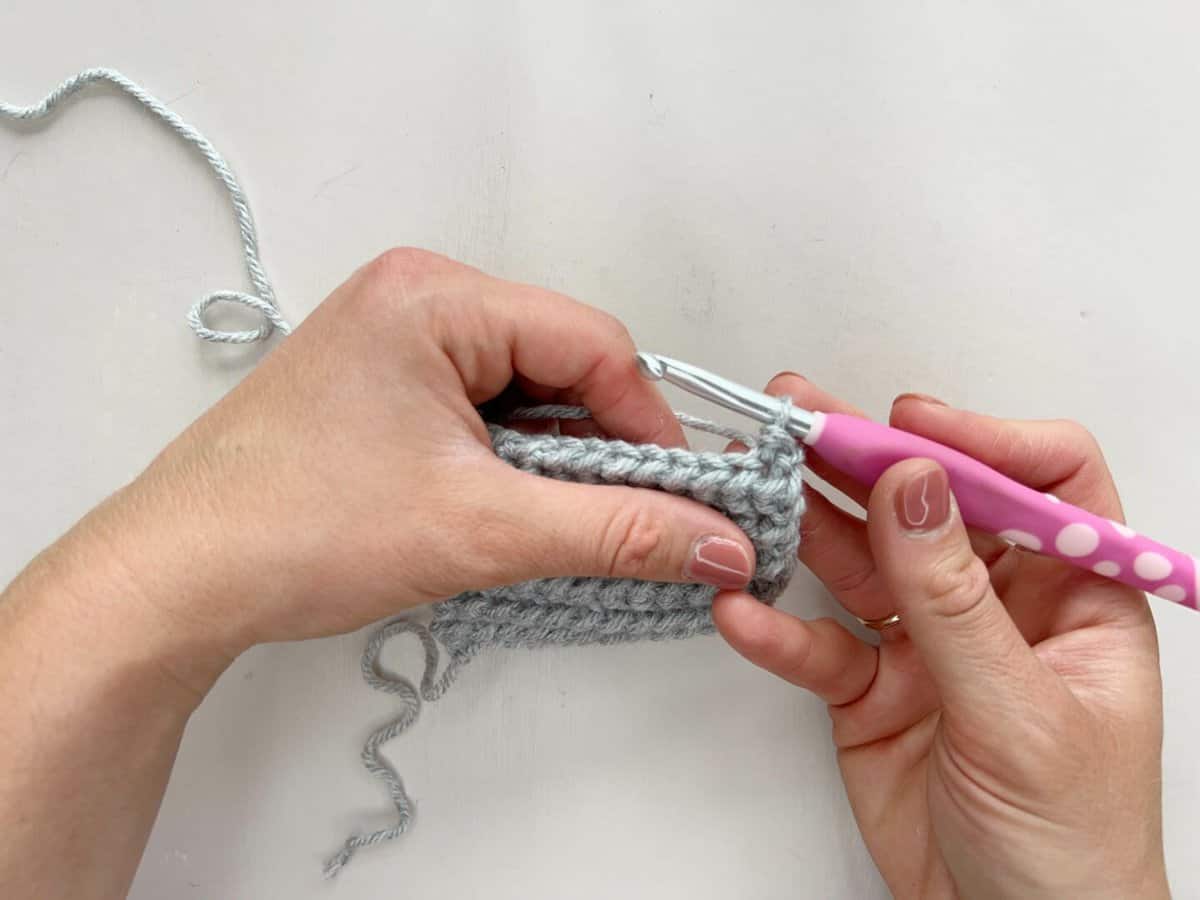
7. Completed yarn over slip stitch
You now have one completed yarn over slip stitch. You can see the extra loop there below the hook! Continue in this way across the row.
How to use Yarn Over Slip Stitch in Ribbing?
Yarn over slip stitch can be used to create a beautiful rib for hat bands, cuffs, neckbands etc. There are a number of different ways to do this, which are briefly explained below.
Yarn Over Slip Stitch in the Back Loop Only
By working your yarn over slip stitch into the back loop only, you will create the lovely tight rib as you go up and down your rows. By turning your work, you are changing the side that the stitches are worked into, and this is what creates the rib effect.
Yarn Over Slip Stitch in combination with Other Stitches
Recently, I’ve really liked to work my yarn over slip stitches on every other row, but still in the back loops. On the alternate rows, I like to do single crochet in the back loops. I find this creates a really nice texture with plenty of stretch for a hat or sleeve cuff. You will see that on one side the yarn over slip stitch is pushed right to the front, but the other side does not have this. So make sure you work it the right way round to keep the pretty ribbing on the front of your work.
Yarn Over Slip Stitch in the Third Loop
Another option is to do your yarn over slip stitches into the third loop. So when you have completed a row of yo slst and turned, you will then be able to see a third loop beneath the front loop and it is this that you crochet into. This technique pushes the ribs so they are really sticking forward. It creates a looser ribbing with a definitive right and wrong side, but it is very pretty.
Why not have a play and see which version you prefer?
What projects can I use the yarn over slip stitch for?
Now that we’ve learnt the stitch, let’s find some projects to make with it!!
Here are a few patterns using the yarn over slip stitch that you might like to try:
- My easy crochet stocking pattern is a great chance to try out the yarn over slip stitch. It uses alternating split stitches and yarn over slip stitches to create that wonderful knit-look cuff.

- Sticking with the granny stitch theme, how about my Crochet Granny Hat Pattern? The main body of the hat is made using the granny stitch, whilst the cuff uses a combination of yarn over slip stitch and single crochet.
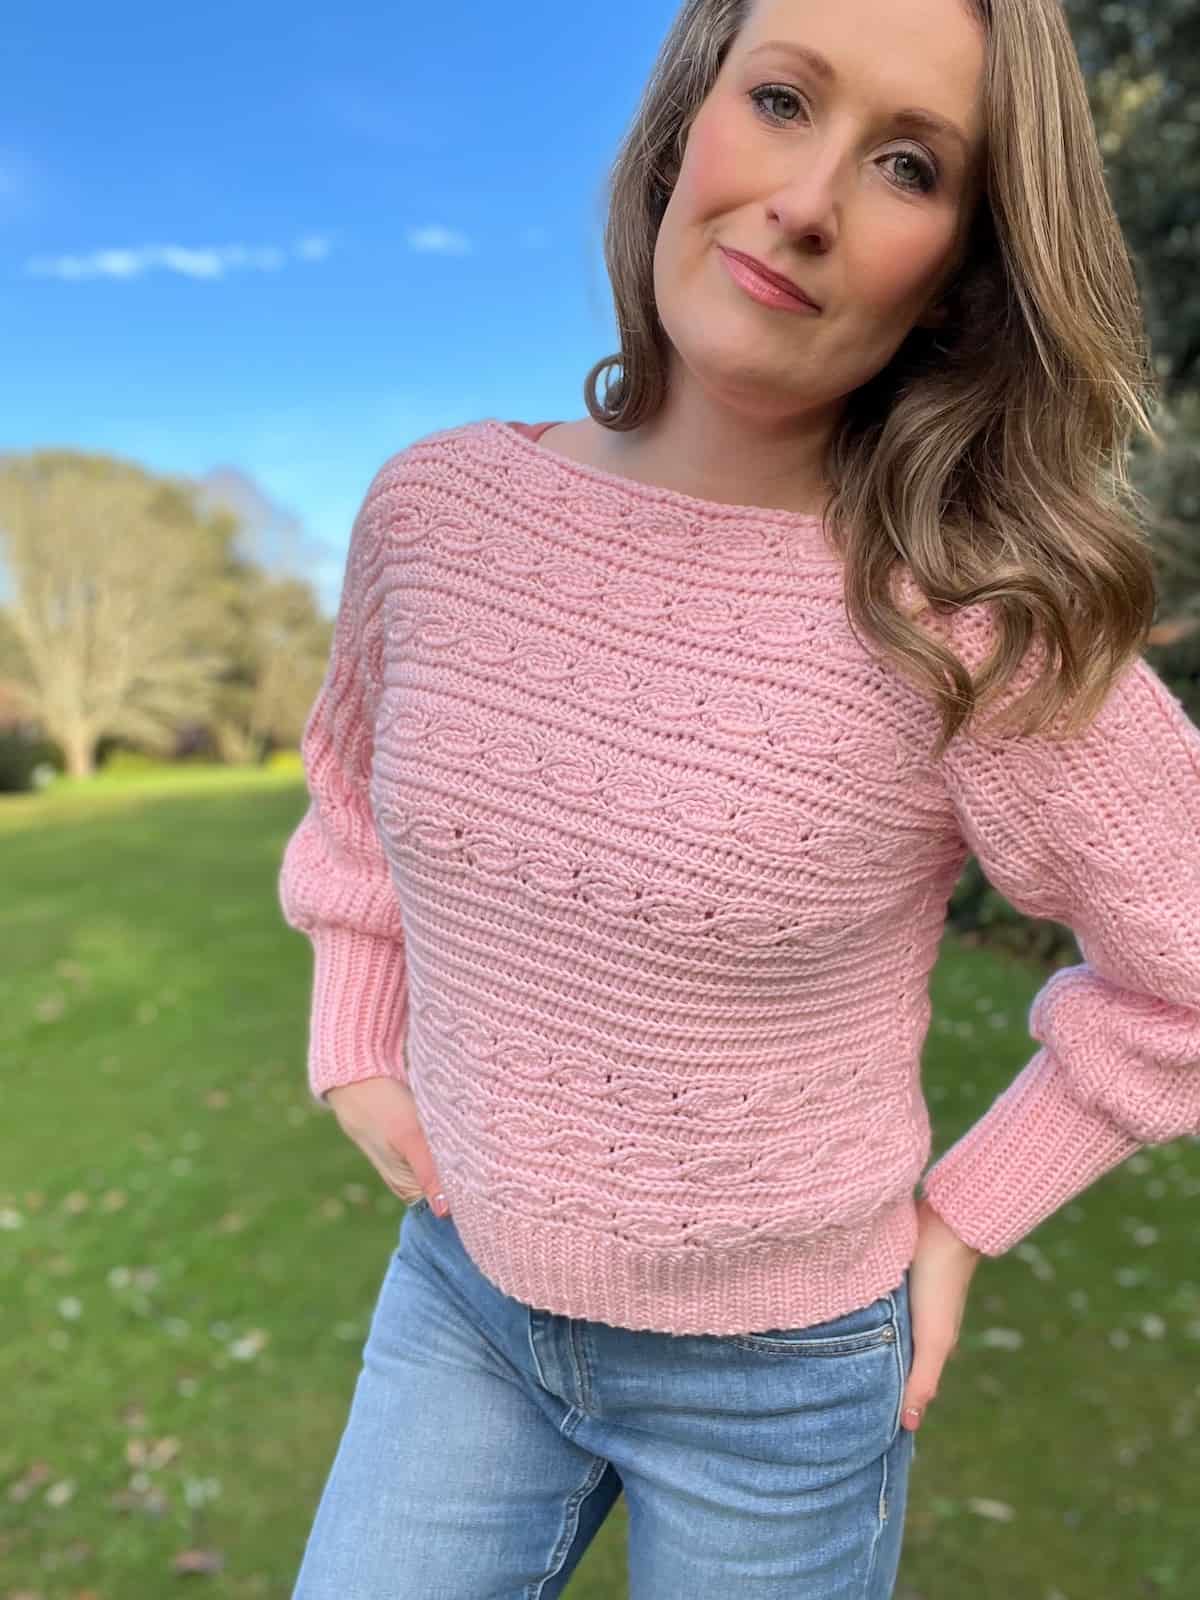
- Fancy having a go at making a garment? This crochet crop sweater uses the yo slst on the sleeves, but it also has a wonderful cable pattern to to get to grips with.
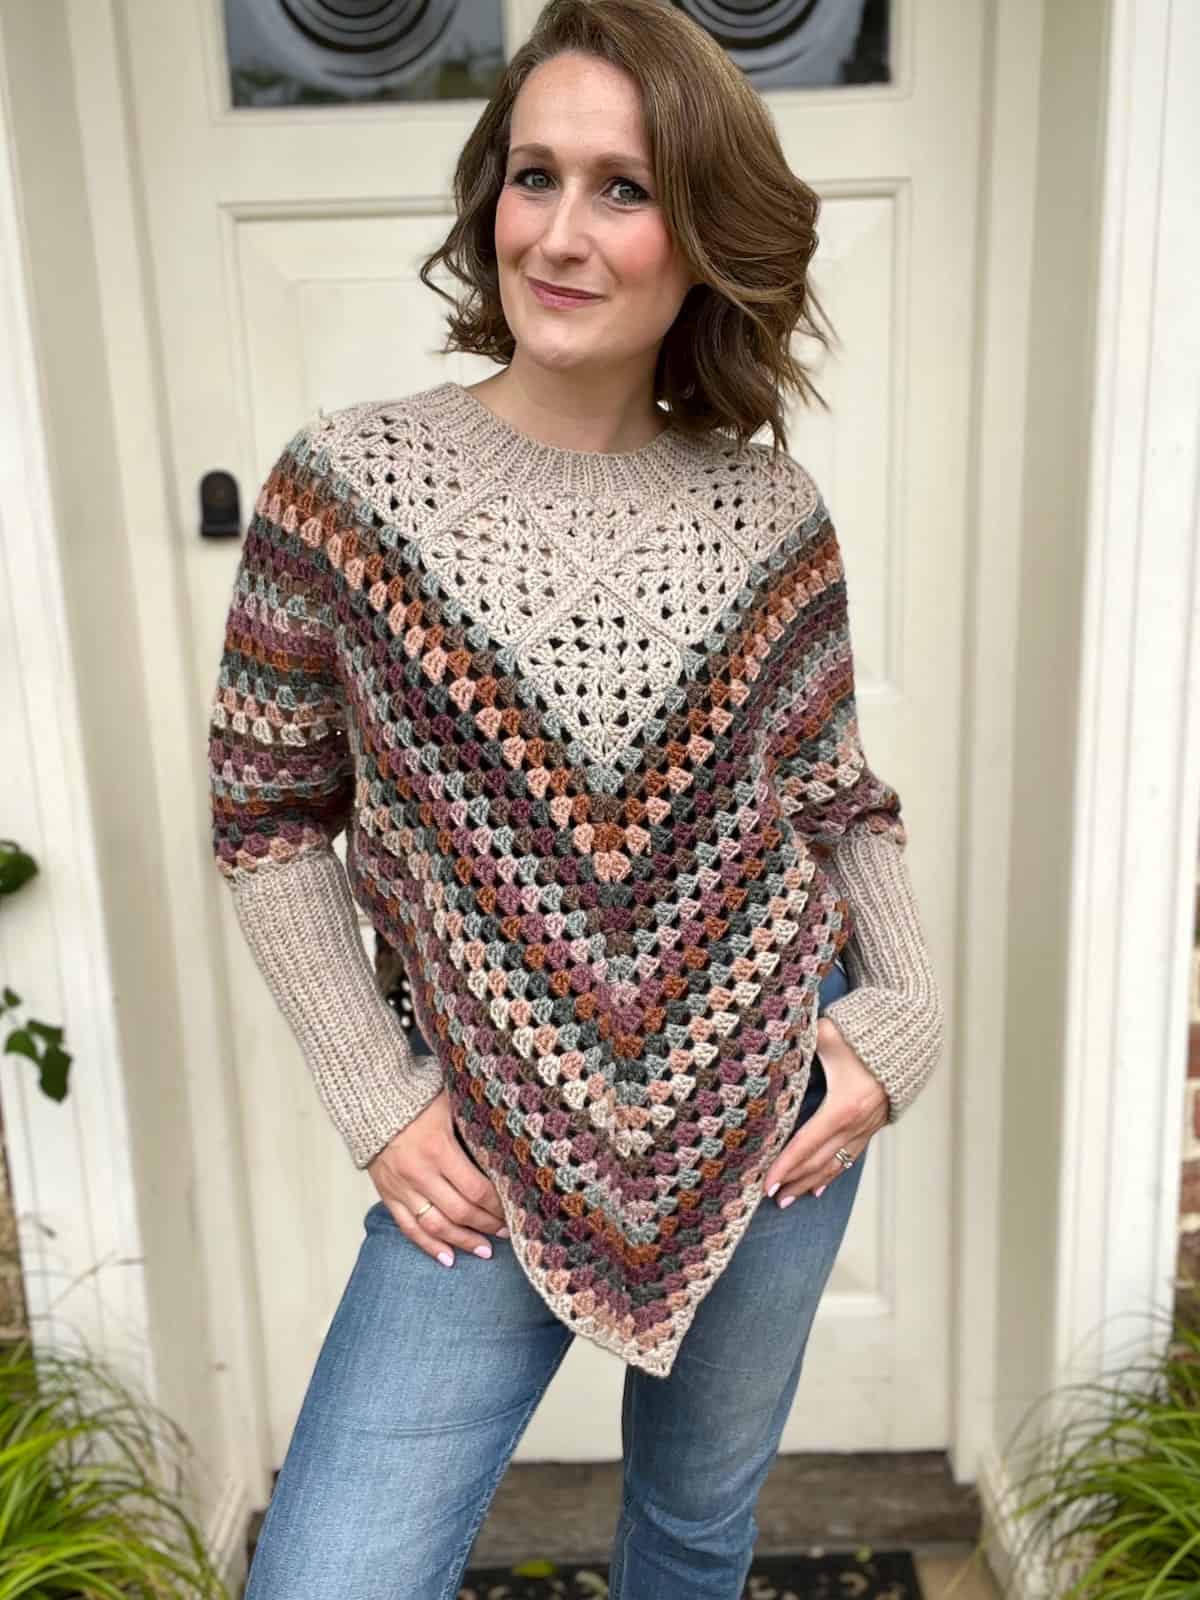
- The Granny Square Poncho pattern has an option for ribbed sleeves, which again use the yarn over slip stitch. This is a beautiful and timeless pattern, with so many options to choose from.
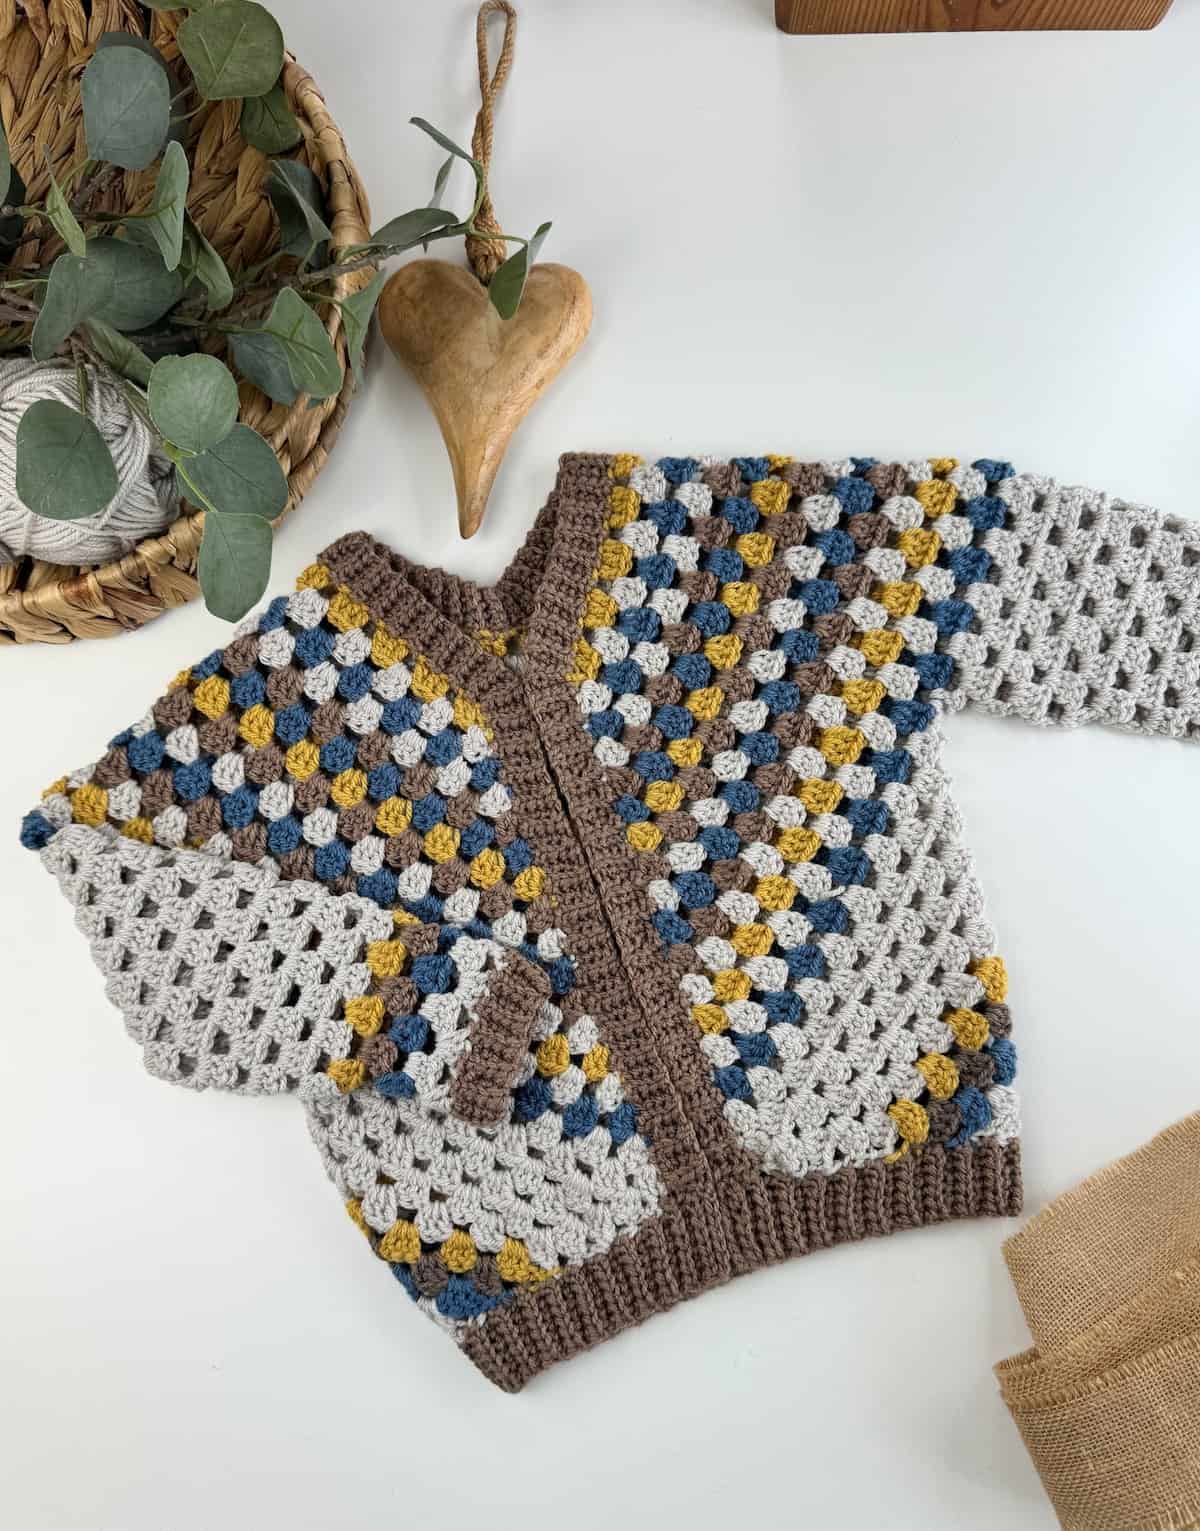
- This Child Granny Stitch Cardigan uses the yo slst combined with a single crochet in the sleeve cuff, neckband and bottom band giving a fabulous finish to the whole project don’t you think?
- I also used this same fabulous yarn over slip stitch rib for my granny stitch kids hoodie and co-ordinating granny sweater too!
What yarn should I use for the yarn over slip stitch?
Any weight yarn would work here, but you’ll want to use a smooth yarn to see those ridges showing through. I’d recommend a worsted weight to see the pattern in all its glory. Some of the recommended patterns also use DK yarn, and that will work great too.
As the yo slst is so versatile, the yarn that you choose will depend largely on the project you’re using it for, or what you can find in your stash!
Obviously if you are following a pattern, you’ll want to use the recommended yarn, or a yarn of the same weight to ensure you end up with the same sized item. You’ll then need to remember to select a crochet hook that works with the weight of yarn you choose.
So what are you waiting for, let’s get crocheting!
I hope you’ve enjoyed learning how to work the yarn over slip stitch (yo slst) with me!
I’d love to know if you decide to make any of the patterns using it or if you create your own! You can sign up to become a member of HanJan Crochet and I’ll let you know about all the fabulous crochet adventures, offers, lives and more too!
See you there!
Learn Some More Crochet Stitches With Me
If, like me, you’re eager to learn all the crochet stitches and techniques you possibly can then I’d love you to take a look at my crochet stitch tutorials – here are some of my favourites though:
- Waistcoat Crochet Stitch – this one really looks like knitting
- Lemon Peel Stitch – this stitch uses different heights to create a wiggly lemon peel effect
- Double Crochet Moss Stitch – a great stitch for easy colour work
- Crochet V Stitch – a fun little stitch for blankets
Pin It For Later