This post may contain affiliate links. Please see my full disclosure and privacy policy for details.
Are you a crocheter who actually loves the look of knitting? I’ll admit it, I do! The regular, even look of a knit definitely has its appeal, but I am a crocheter, not a knitter! And so, I’d like to introduce to you the waistcoat crochet stitch!
Also known as the knit stitch, split crochet stitch, or centre post stitch, this stitch will create a beautifully uniform, dense fabric, which is perfect for garments, baskets, dishcloths and bags alike.
It can be worked in rows or rounds, although it does look slightly different in each.
This tutorial will take you through step by step instructions and pictures to show you how to work the waistcoat crochet stitch.
Want to remove Ads?
- Get ad-free access on all posts; 200+ patterns & tutorials!
- Member-only resource library with downloadable PDF guides
- Bonus eBook (Worth over $30)
We will then look at the split extended single crochet stitch too. I will also share some tips and tricks, as well as some ideas of what you can make with these stitches.
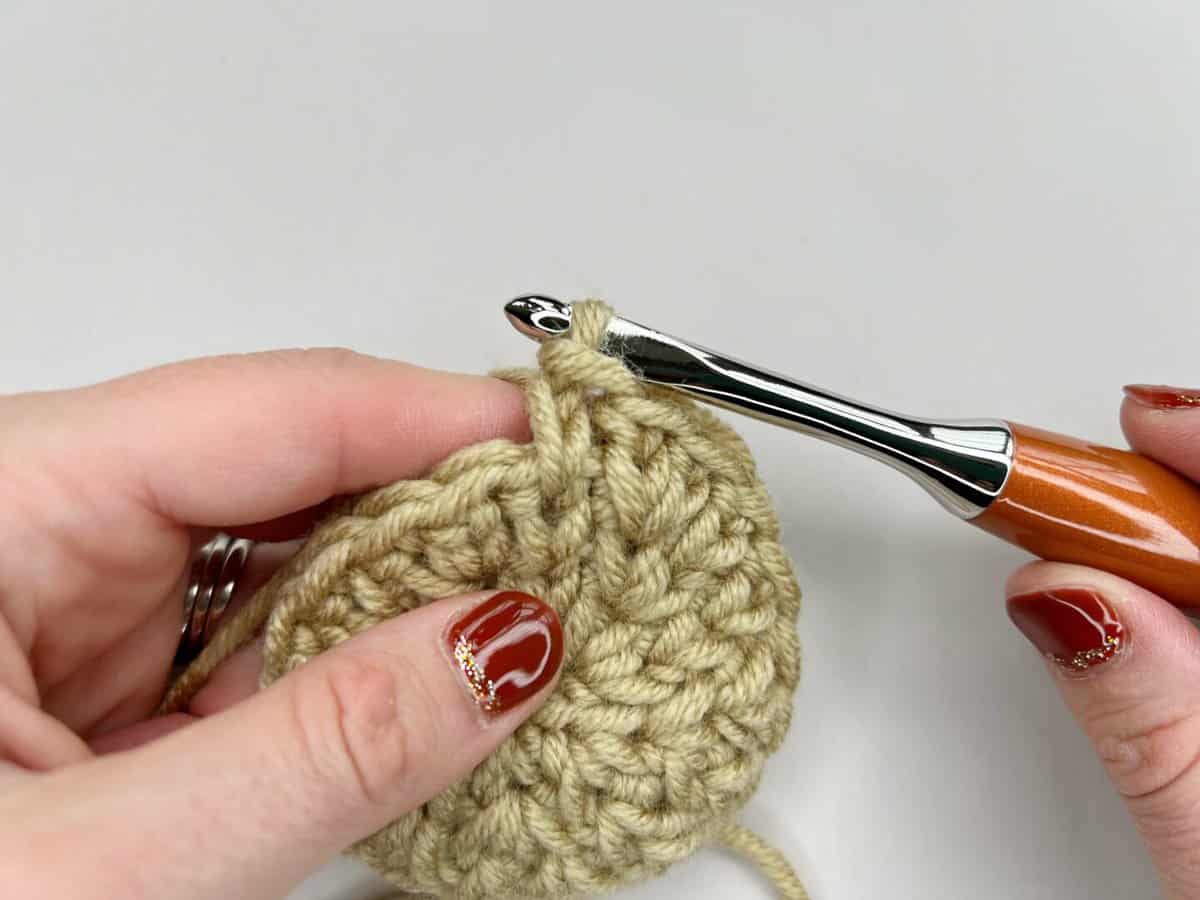
Table of Contents
Is there a crochet stitch that looks like knitting?
Yes!!
The crochet knit stitch (waistcoat stitch) is so named because it looks like knitting, a massive bonus if you love the look, but prefer to crochet rather than knit! The knit effect is created solely by where you insert your hook into each stitch.
It is a super easy stitch to create, however please take note of the tips and tricks below, as it can be tricky to get your hook into the right place otherwise.
What is the difference between single crochet and waistcoat stitch?
The waistcoat stitch is essentially the same as a US single crochet. The only difference is that you insert your hook into the centre of the post, between the legs of the stitch below.
So once you have got to grips with the placement of your hook, you will just yarn over, pull through the stitch, yarn over and pull through two, as you would with a normal single crochet stitch.
Because of where you are inserting your hook in the centre of the stitch, this split crochet stitch does work up slower than the single crochet, but it will create a thicker fabric, that looks almost identical to knitting.
How do you crochet a waistcoat stitch?
Let’s get to it now and look at how to work the crochet knit stitch.
Firstly, let’s look at the description of the process and then have a closer look at some pictures. Remember that this tutorial is in US terms.
Abbreviation in patterns
Waistcoat stitch is usually abbreviated to Wc. I’ve also seen split single crochet abbreviated to ssc or split sc, so look out for this in your pattern!
How to make a waistcoat crochet stitch in rows
- Start with a row of regular single crochet stitches.
- Chain 1 and turn your work.
- Single crochet in the first stitch.
- Insert your hook through the post of the next stitch, going under the horizontal bar and between the legs of the ‘v’, straight through to the other side.
- Yarn over and pull through 1 loop (2 loops on the hook).
- Yarn over and pull through the 2 loops on your hook.
- Continue repeating the waistcoat stitch across the row, ending in another single crochet.
When working in the round, you can either work in continuous rounds like amigurumi, in which case you can just carry on the waistcoat stitch throughout. Or you can work in joined rounds by chaining 1 at the start, and slip stitching into the first stitch at the end, of each round.
Tips and tricks
- When you pull through the loop after you have inserted your hook into the post, it can be helpful to pull up a taller loop than usual. This is because the stitches sit lower down, and it is very easy for your work to get very tight.
- Consider using a bigger hook than normal to help keep the fabric looser.
- Using a hook with a point will help you to get into that space too.
- Try to work as loosely as you can, particularly if you are a tight crocheter naturally. The space where you need to insert your hook can get very tight otherwise and it will make crocheting the waistcoat stitch hard work on your hands.
- It can be tricky to see where to insert your hook, particularly when working in rows, as the Right Side and Wrong Side will look different. It can help to look from the other side to see where your hook is coming through.
Step by step waistcoat crochet stitch in the round
Supplies you’ll need
I used Color Theory by Lion Brand for the tutorial photos which is a lovely easy care worsted weight yarn, 100% acrylic, 246yds/100g but you can use any yarn that you like. If you’re a beginner I’d recommend using a smooth category 4 or 5 weight yarn so you can see your stitches easily.
You’ll need a corresponding crochet hook for the yarn you choose. I’m using an ergonomic crochet hook here and it’s a 5mm size.
The only other things you’ll need is a pair of sharp scissors and a tapestry needle to weave in your ends if you’d like to save your swatch.
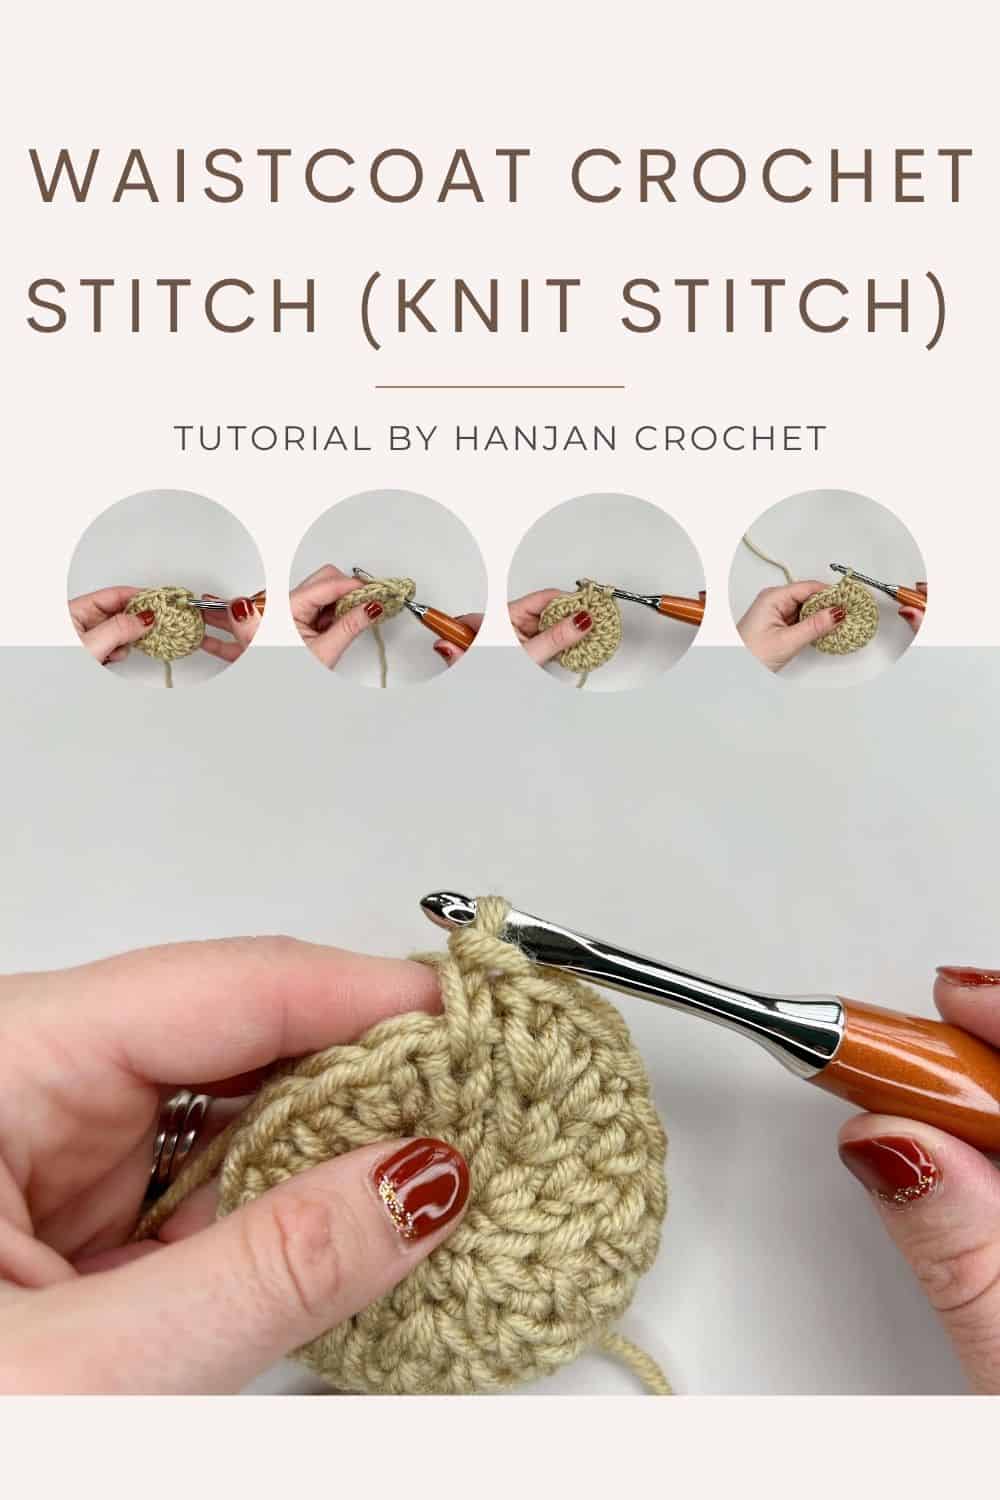
1. Begin with a round of single crochet
Before you can begin the waistcoat crochet stitch, you will need a row or round of single crochet. In this tutorial, we are working in the round, so we have started with a magic ring, and then made six single crochets into the magic ring.
You can also work in rows by making a foundation chain and then a row of single crochet. For a practice swatch, I’d recommend starting with around 20 single crochet stitches.
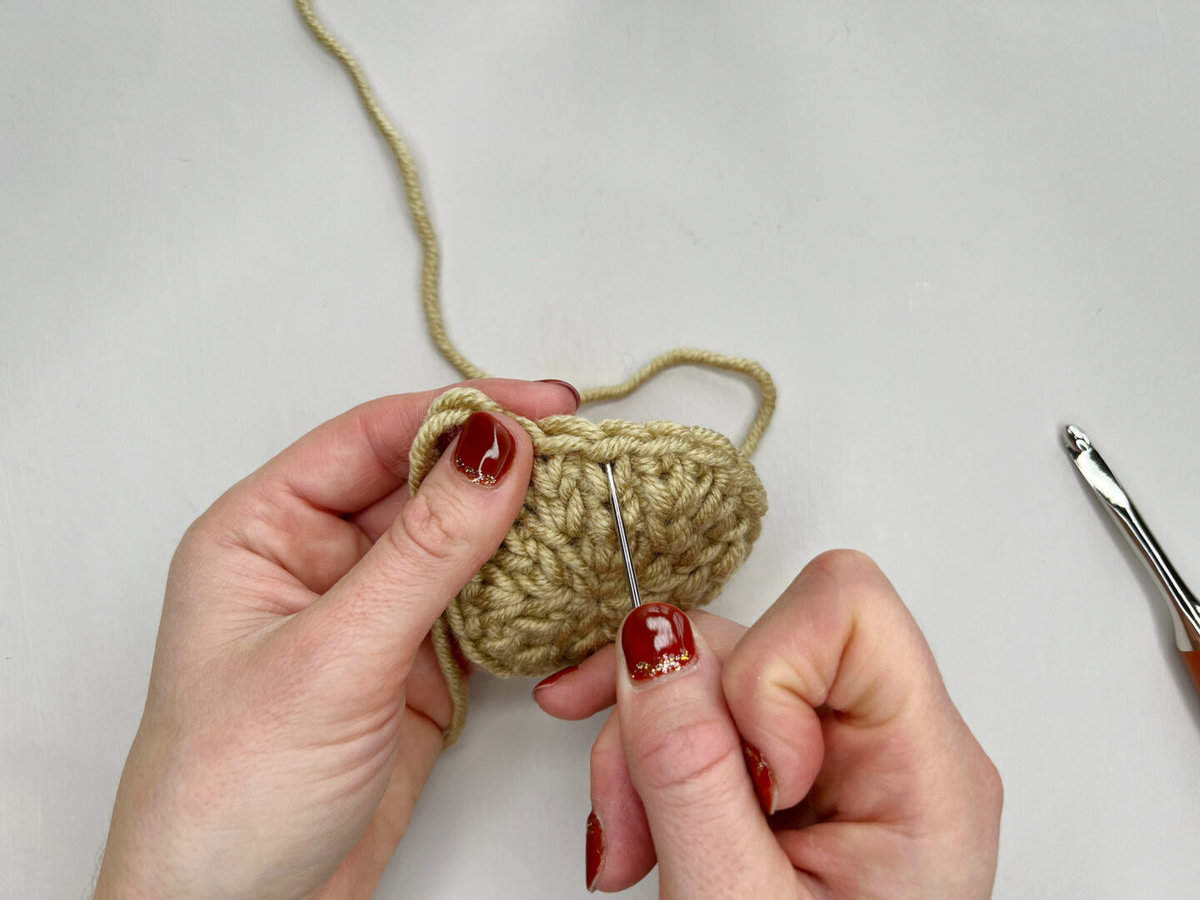
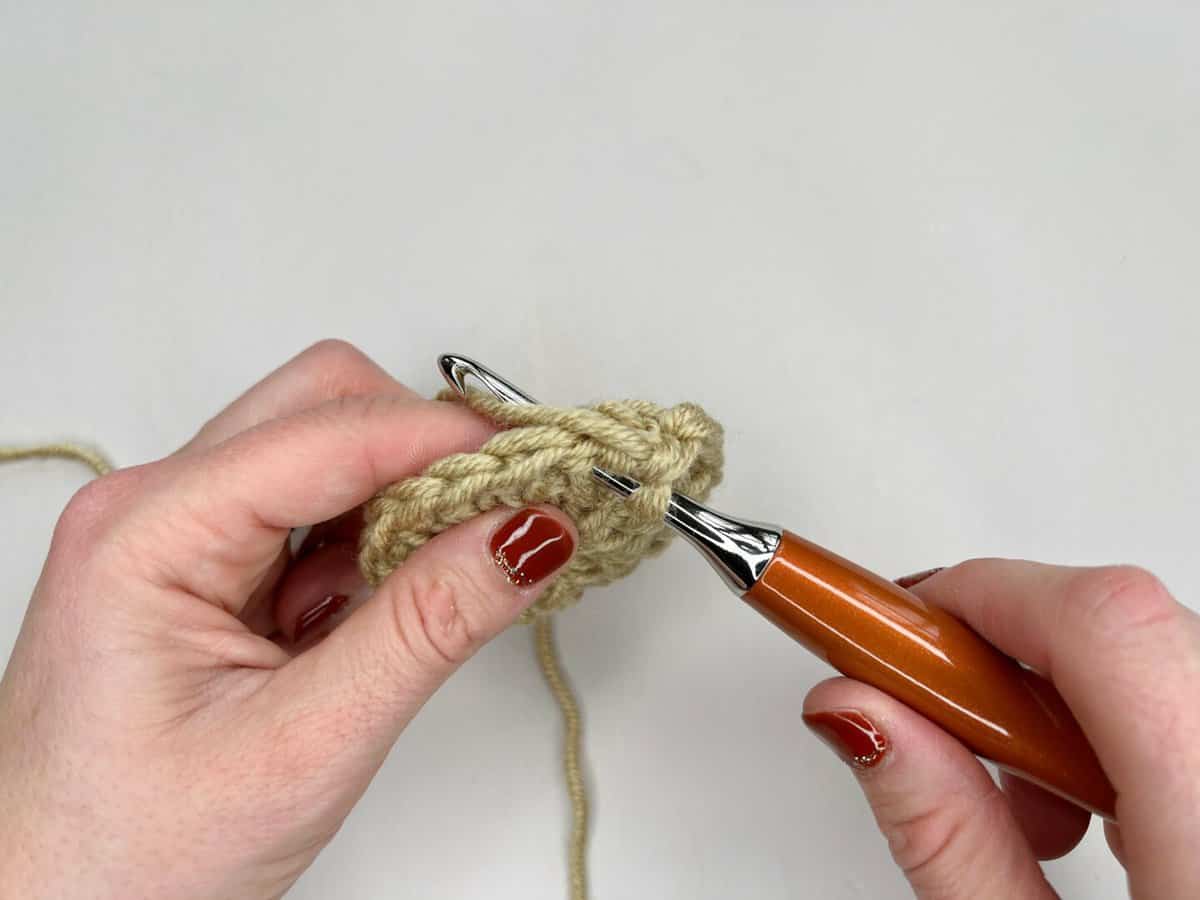
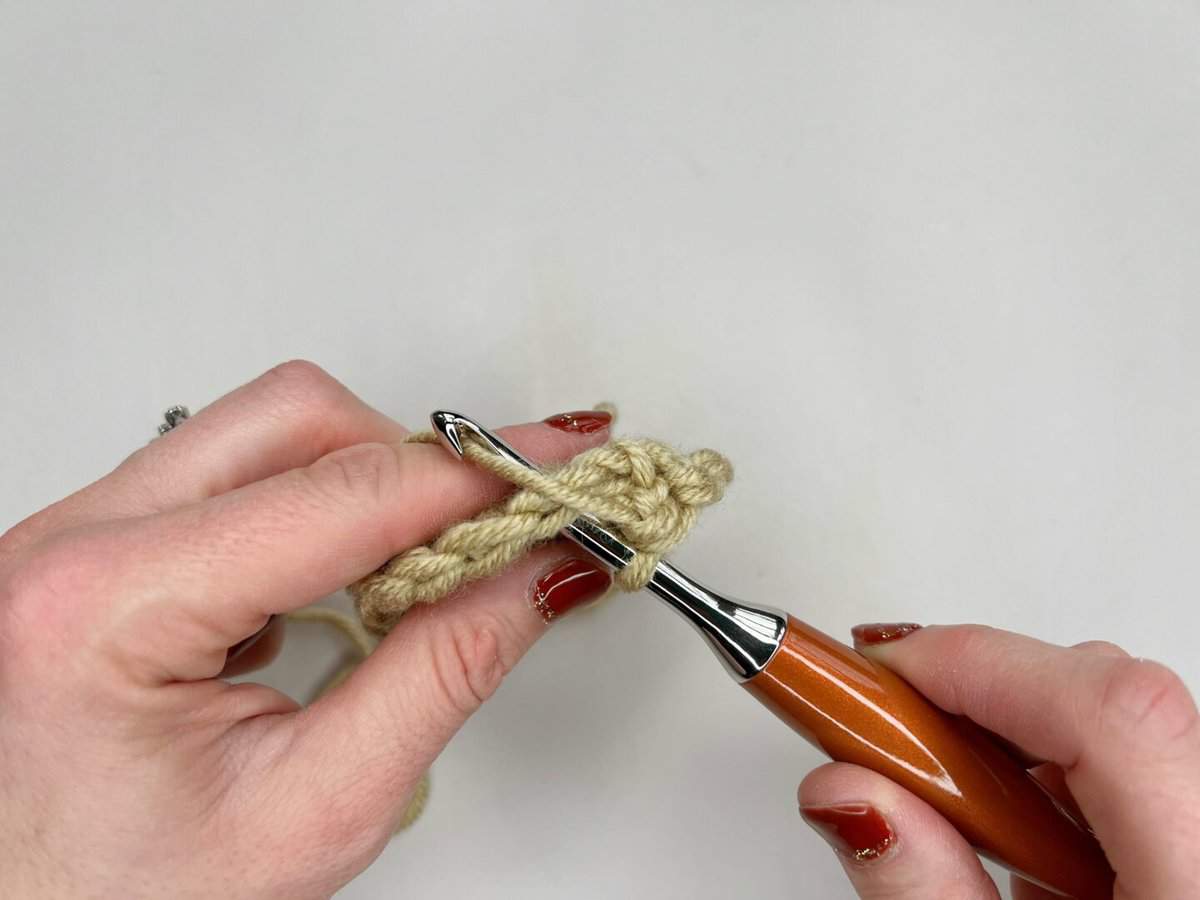
2. Insert hook into the centre of the stitch, between the legs of the ‘v’
When you are ready to start your waistcoat stitch, insert the hook into the centre of the stitch, between the legs of the ‘v’ shape.
This is lower down than you would normally insert your hook for a single crochet.

If you are still struggling to find where to insert your hook, have a look at the image below, where I am showing the location with a needle:
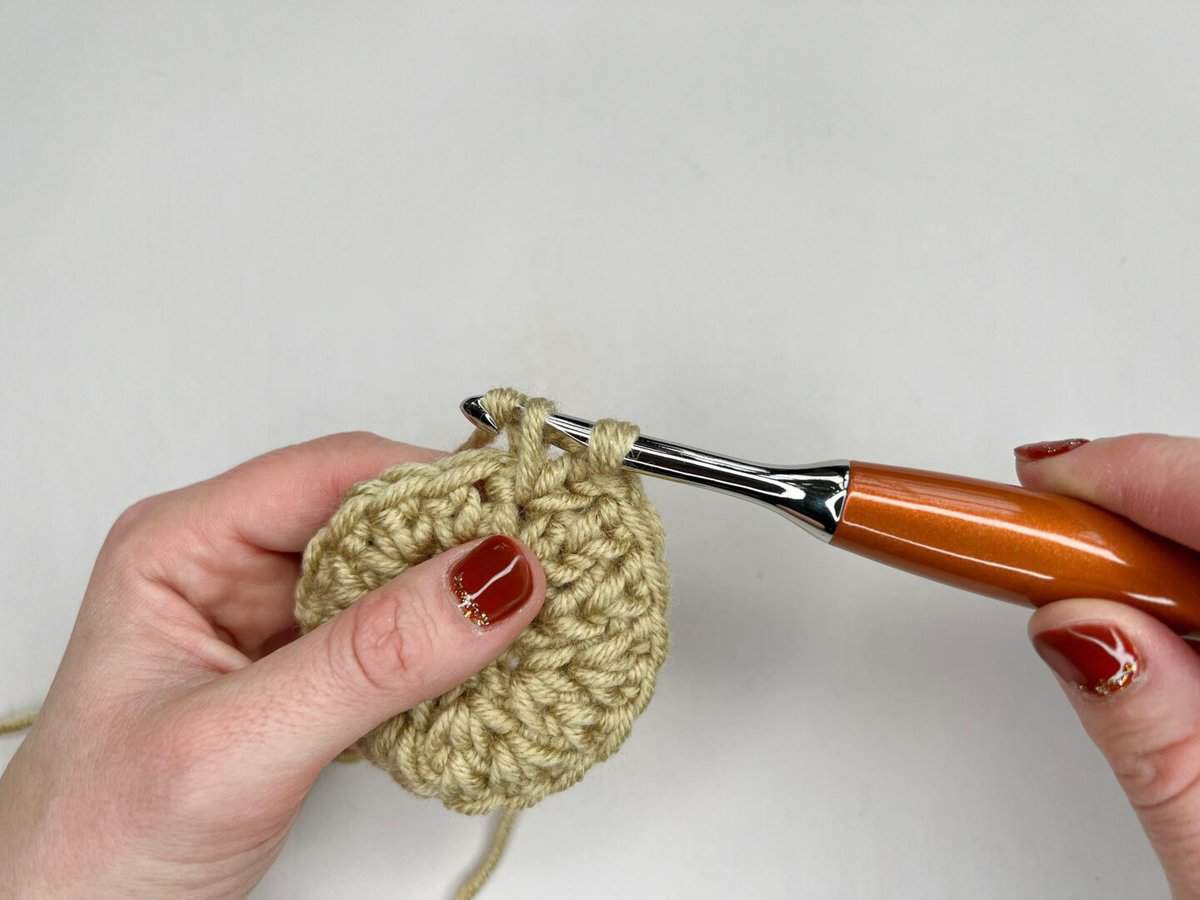
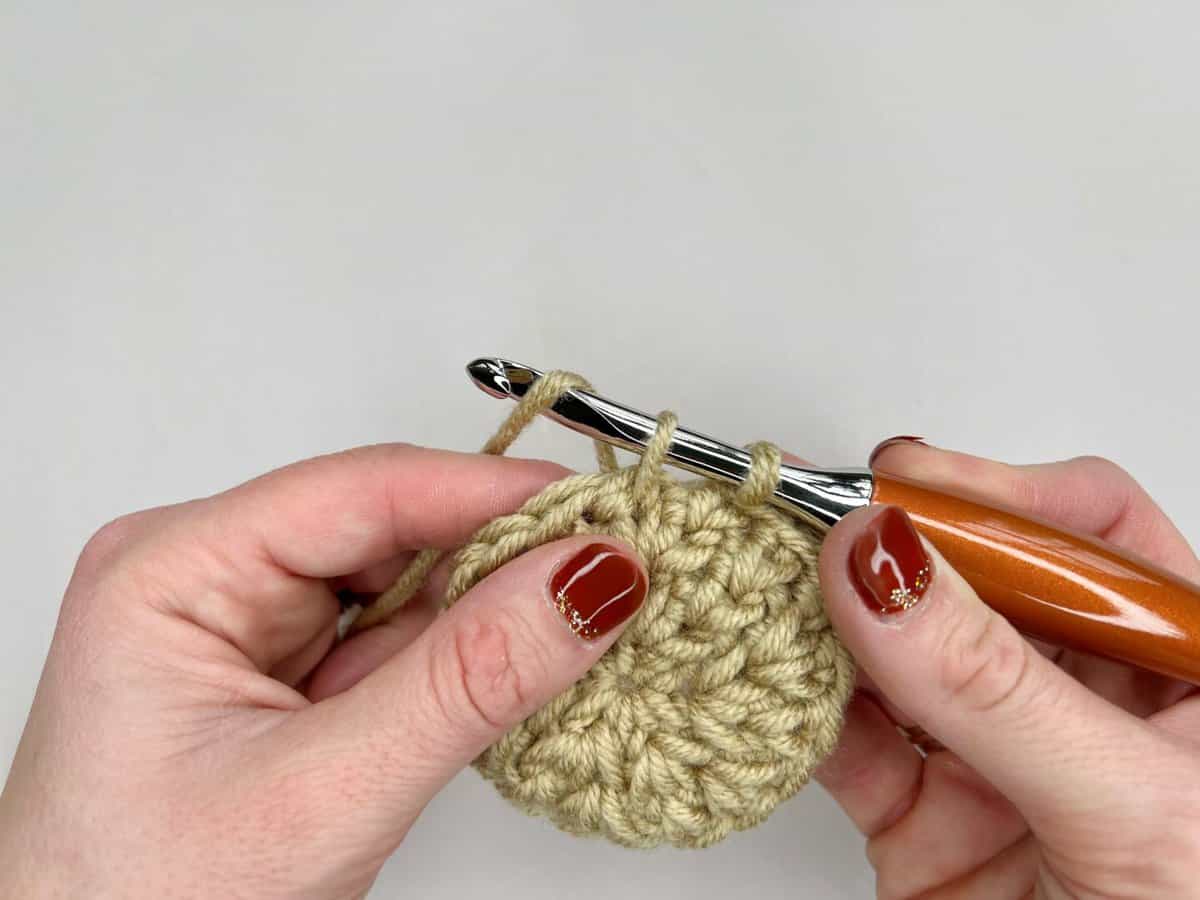
3. Yarn over and pull through a loop
Wrap the yarn over the hook in the usual way and pull through a loop.
At this point, make sure that you pull up a long enough loop to bring the stitch in line with the row/round. Otherwise, you will end up with very tight stitches.
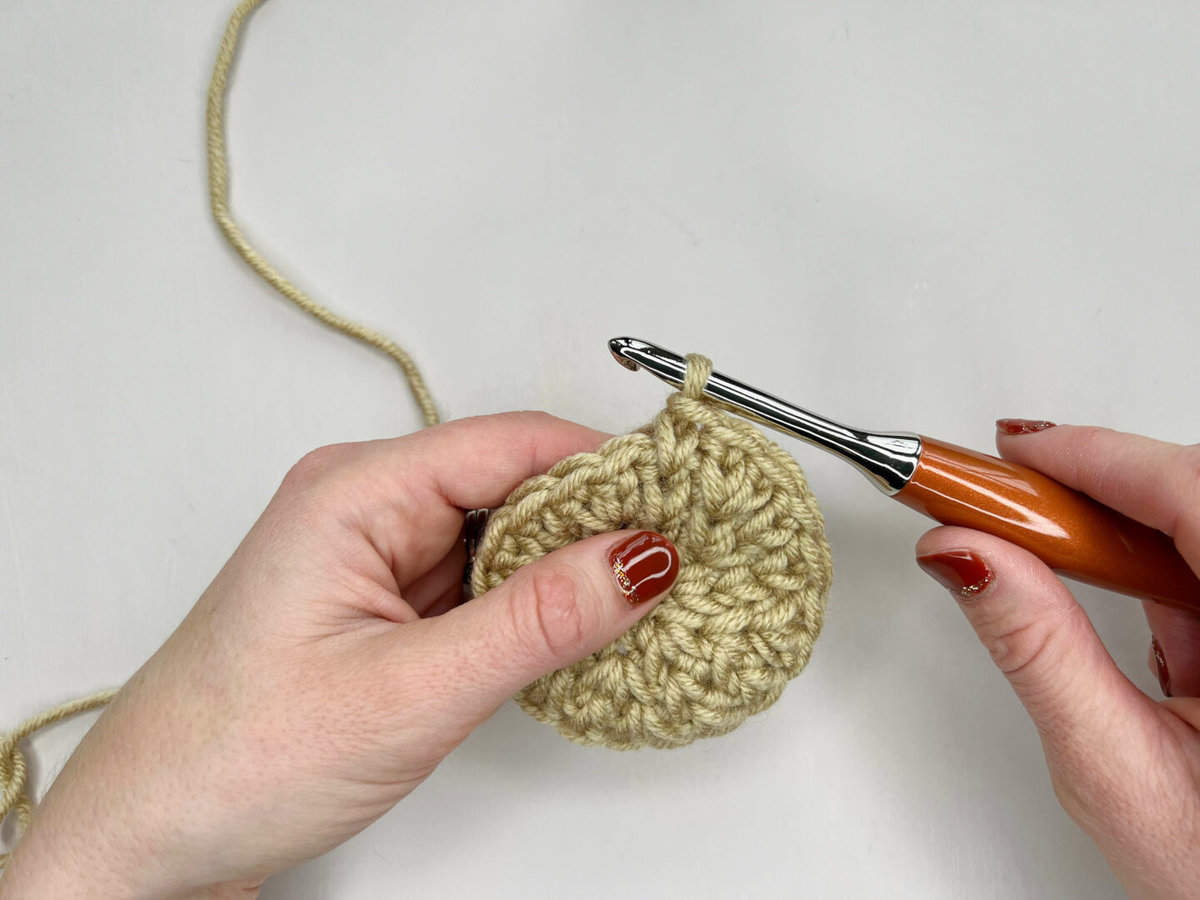
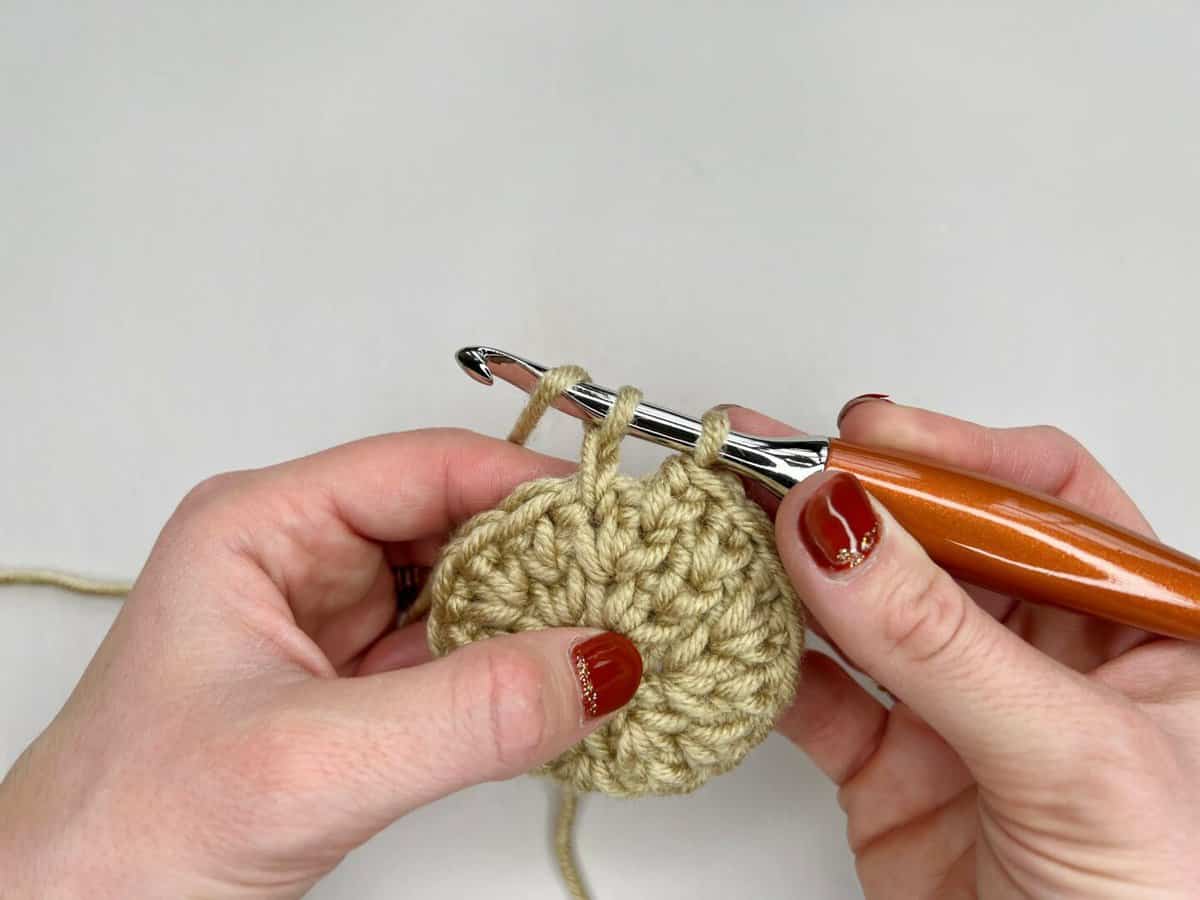
4. Yarn over and pull through both loops on the hook
Just like the single crochet, wrap your yarn over the hook, and pull through both the loops on the hook.
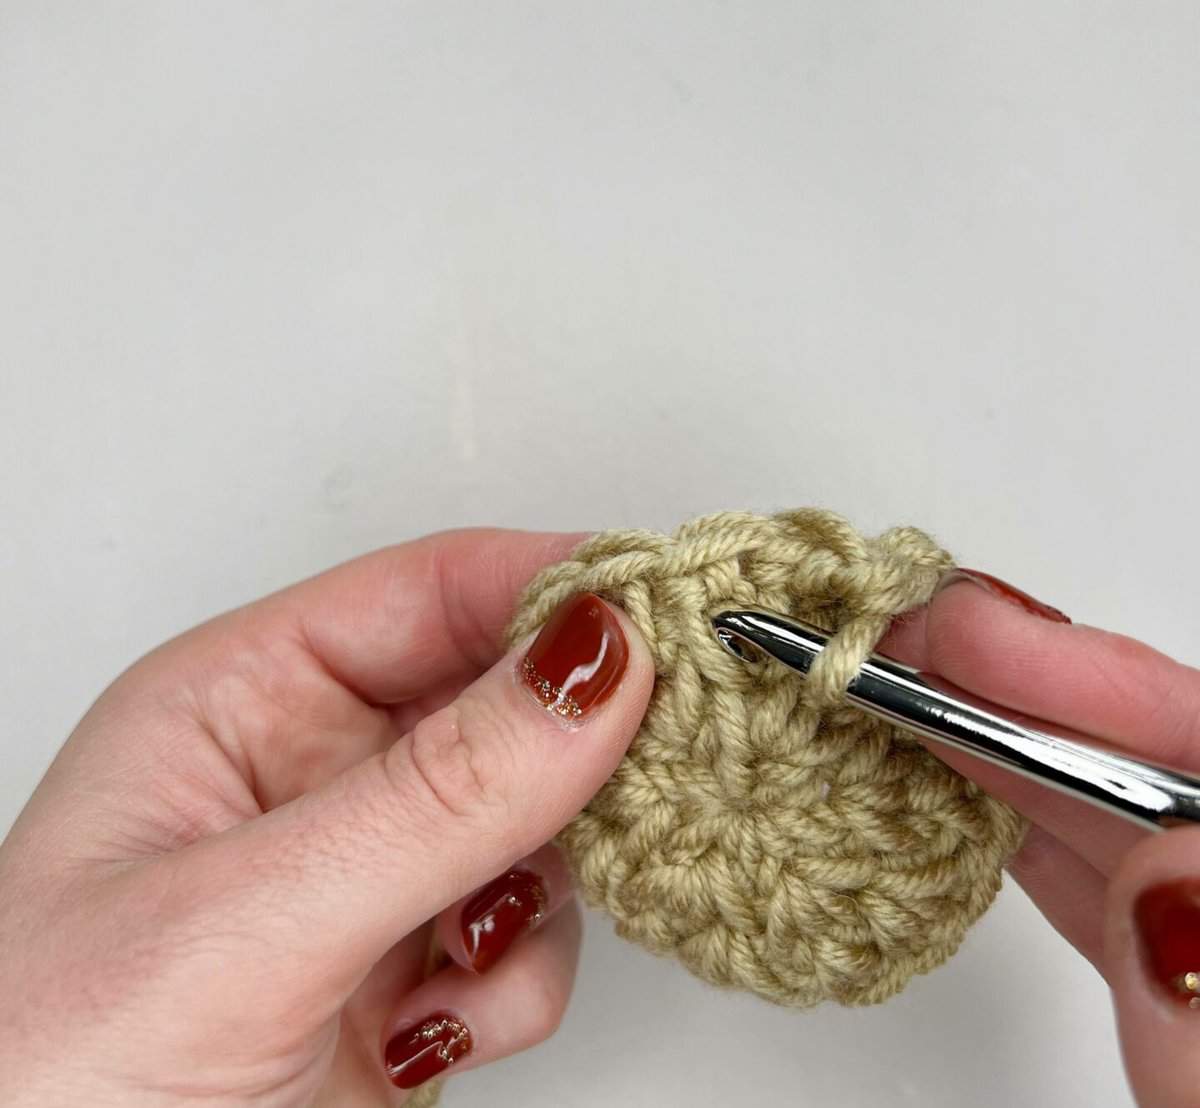
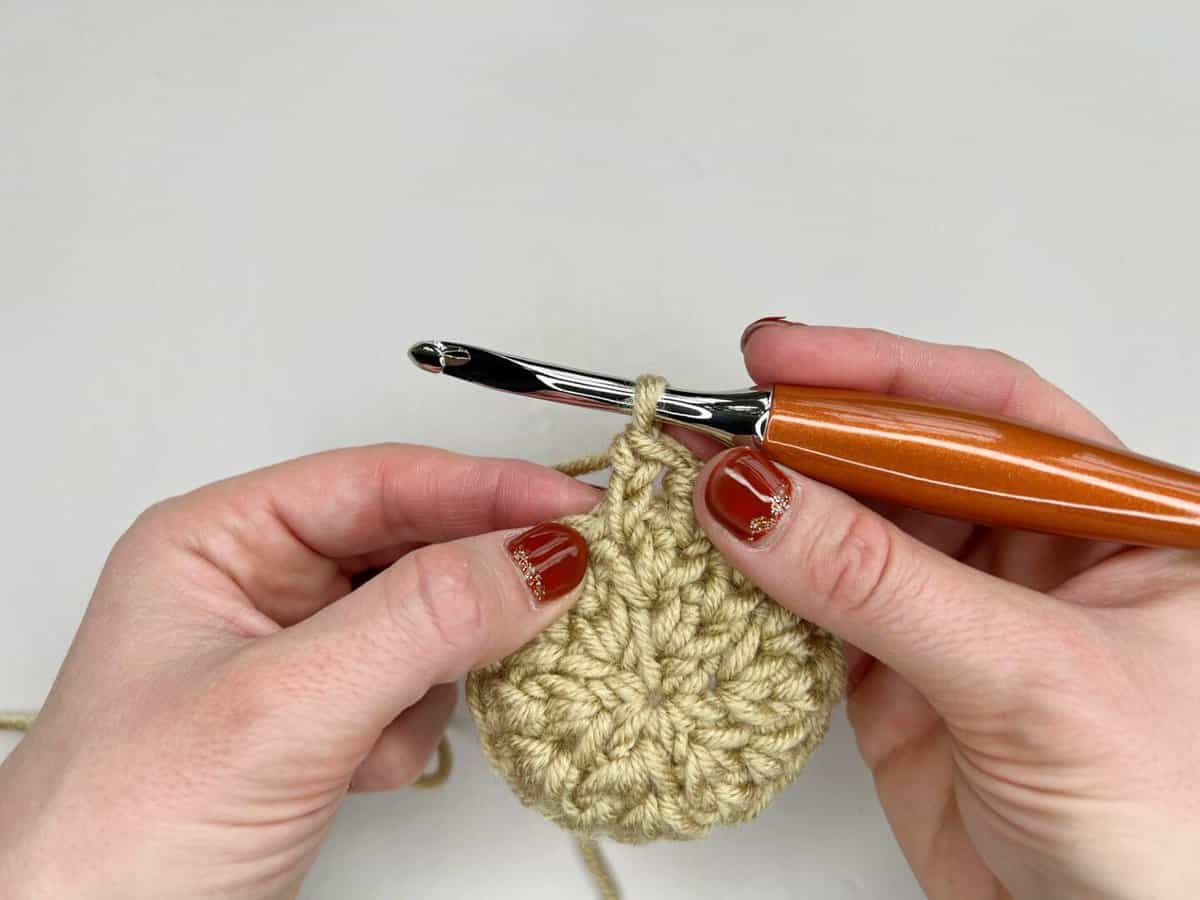
5. Complete stitch
This is what your completed waistcoat stitch will look like.
The split extended single crochet
I also wanted to share with you a short tutorial on the split extended single crochet.
This stitch is very similar to the waistcoat stitch, still working through that centre part of the stitch, but we are adding an extra chain in the middle of the single crochet, which makes it a little bit taller.
1. Insert hook into the centre of the stitch, between the legs of the ‘v’
Insert the hook into the centre of the stitch, between the legs of the ‘v’ shape. This is lower down than you would normally insert your hook for a single crochet.
2. Yarn over and pull through a loop
Wrap the yarn over the hook in the usual way and pull through a loop.
At this point, make sure that you pull up a long enough loop to bring the stitch in line with the row/round. Otherwise, you will end up with very tight stitches.
3. Yarn over and pull through one loop on the hook
Yarn over and pull through only one loop on the hook. This is the extended part – effectively creating a chain stitch in the middle of the waistcoat stitch.
4. Yarn over and pull through both loops
To finish the stitch, yarn over again and pull through both loops on the hook.
5. Complete stitch
This is what your completed split extended single crochet stitch will look like. You can see the extra loop compared to the waistcoat stitch.
What projects can I use the waistcoat crochet stitch (knit stitch) for?
Now that we’ve mastered the stitch, we had better find something to make with it!!
Here are a few patterns using the waistcoat stitch and the split extended single crochet that you might like to try:
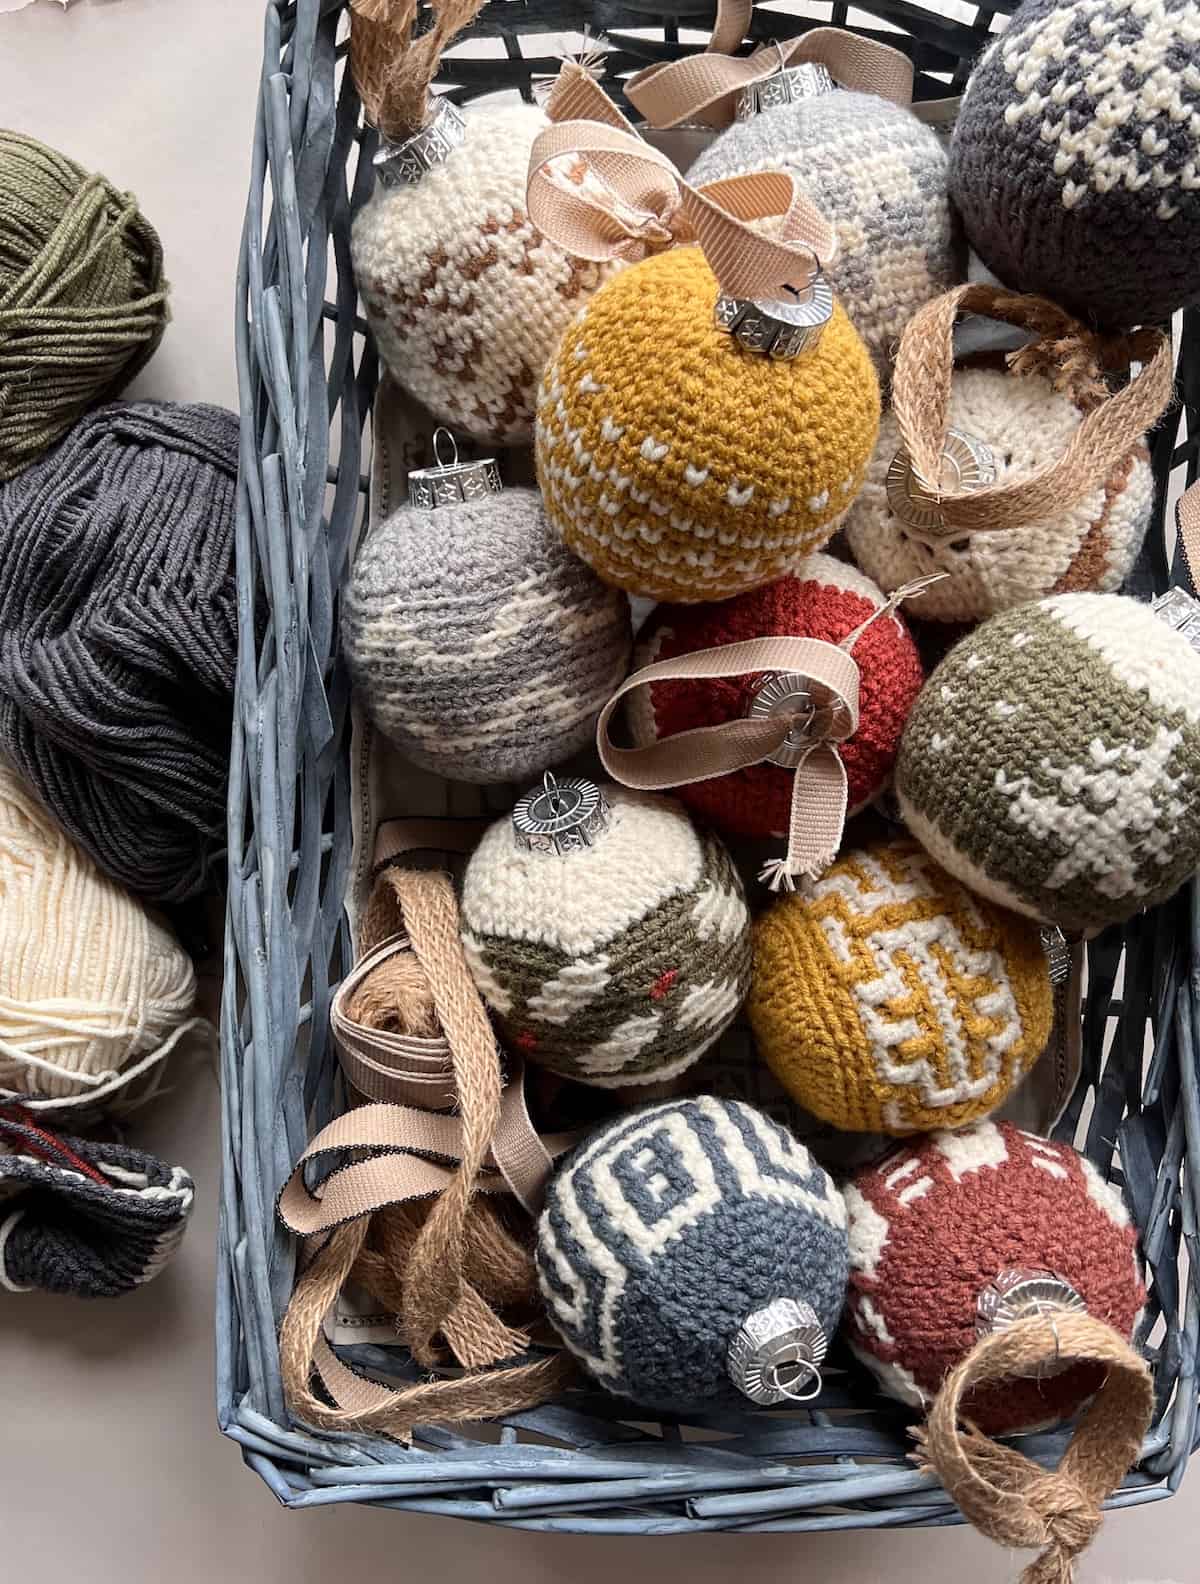
- I have a fantastic collection of baubles, which all use the waistcoat stitch and the split extended single crochet. Each bauble uses the Fair Isle technique to create an intricate looking design.
- Another fun project to try out the split extended single crochet is my easy crochet stocking pattern. It uses the stitches in the round in the toe and heel to create a really great knitted look.

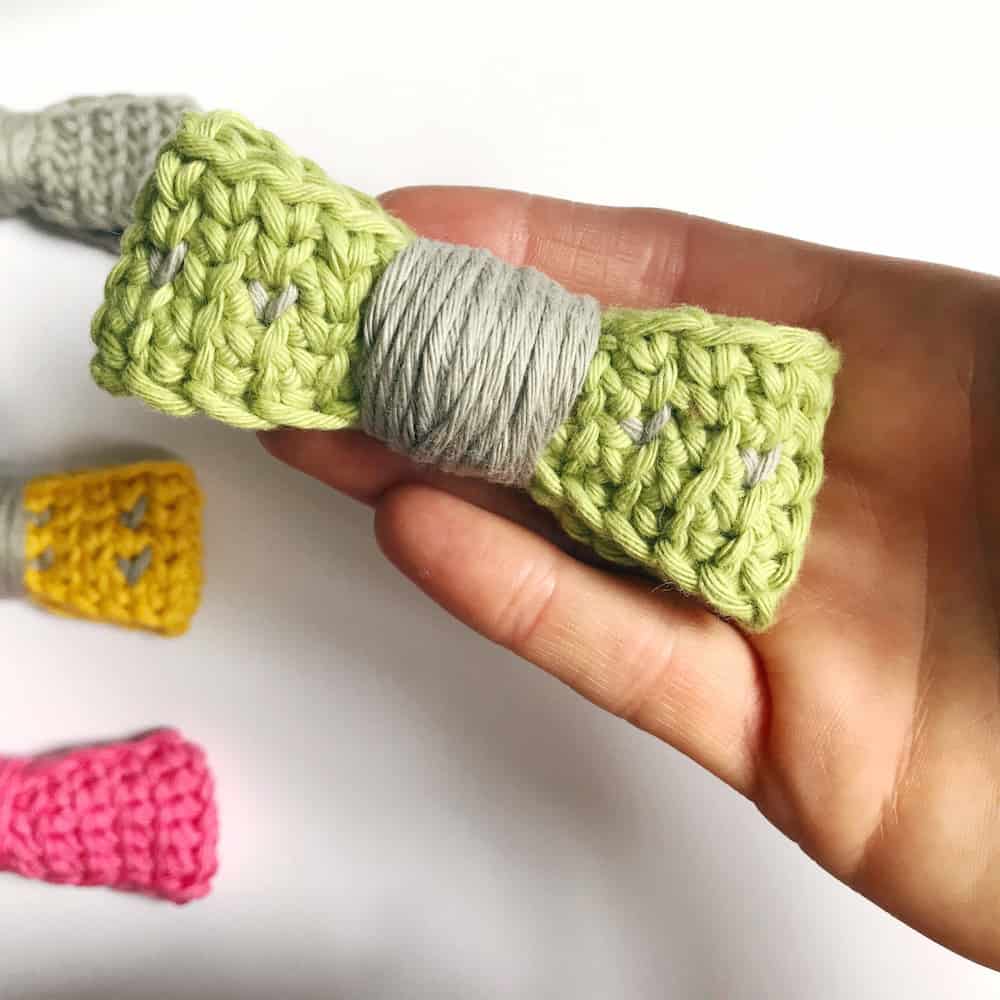
- If it’s not Christmas time, how about trying this fun and quick bow tie project? These are perfect for kids to help them look the part at a fancy dinner or party, whilst also teaching you a new stitch.
- The Traveler Sweater is an excellent pattern for getting to grips with colorwork. It really does look like a knitted fair isle sweater, but it’s crochet, honest! The effect is stunning and looks so intricate and detailed. The waistcoat stitch is of course the star here.
- Another fantastic pattern using the split single crochet (waistcoat stitch) and fair isle colorwork is the Forest Brooks Crochet Beanie. With a beautiful design and gorgeous autumnal colours, this could be a great option to improve your crochet skills.
What yarn should I use for the waistcoat crochet stitch?
Any weight yarn would work here, but you’ll want to use a smooth yarn to see that knit effect and also to be able to pull through those tight stitches. I’d recommend a worsted weight to see the pattern in all its glory. Some of the recommended patterns also use DK yarn, and that will work great too. Find out more about yarn weights and a handy yarn weight conversion chart.
Obviously if you are following a pattern, you’ll want to use the recommended yarn, or a yarn of the same weight to ensure you end up with the same sized item.
You’ll then need to remember to select a crochet hook that works with the weight of yarn you choose.
I hope you’ve enjoyed learning how to work the waistcoat crochet stitch (aka knit stitch, split crochet stitch, or centre post stitch) with me!
I’d love to know if you decide to make any of the patterns using it or if you create your own! You can sign up to become a member of HanJan Crochet and I’ll let you know about all the fabulous crochet adventures, offers, lives and more too!
See you there!
Learn Some More Crochet Stitches With Me
If, like me, you’re eager to learn all the crochet stitches and techniques you possibly can then I’d love you to take a look at my crochet stitch tutorials – here are some of my favourites though:
- Herringbone Half Double Crochet Moss Stitch – great for cosy garments and accessories
- Twisted Cable Stitch – perfect for texture and has a slanted look like herringbone too.
- Double Crochet Moss Stitch – a great stitch for easy colour work
- Ripple Stitch – great fun for blankets especially!
Pin It For Later