This post may contain affiliate links. Please see my full disclosure and privacy policy for details.
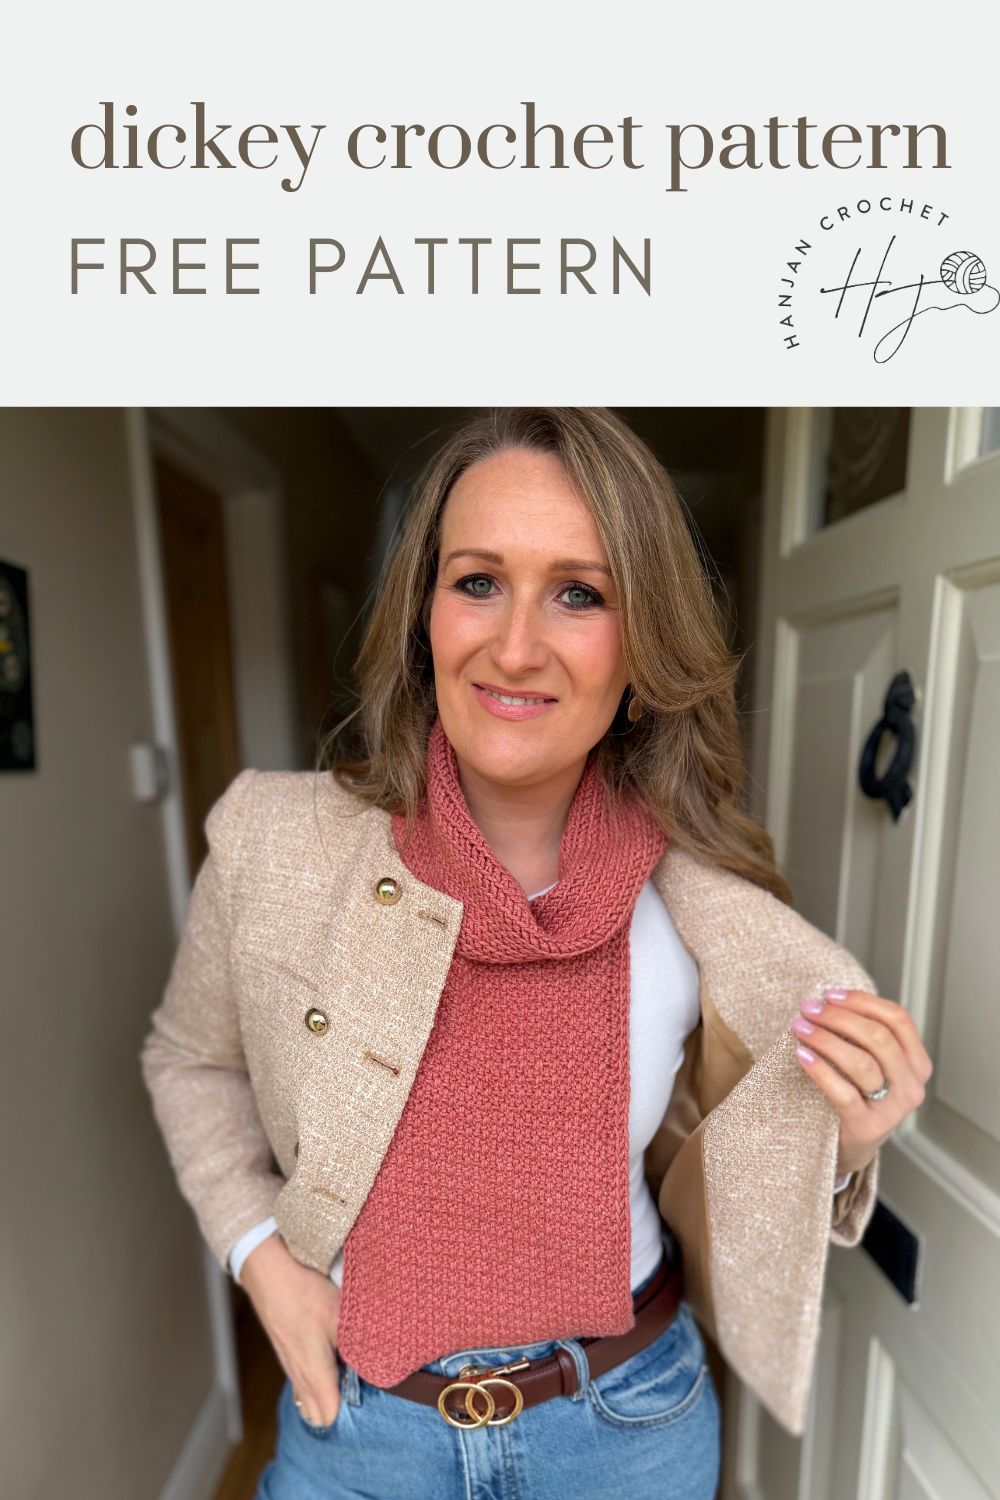
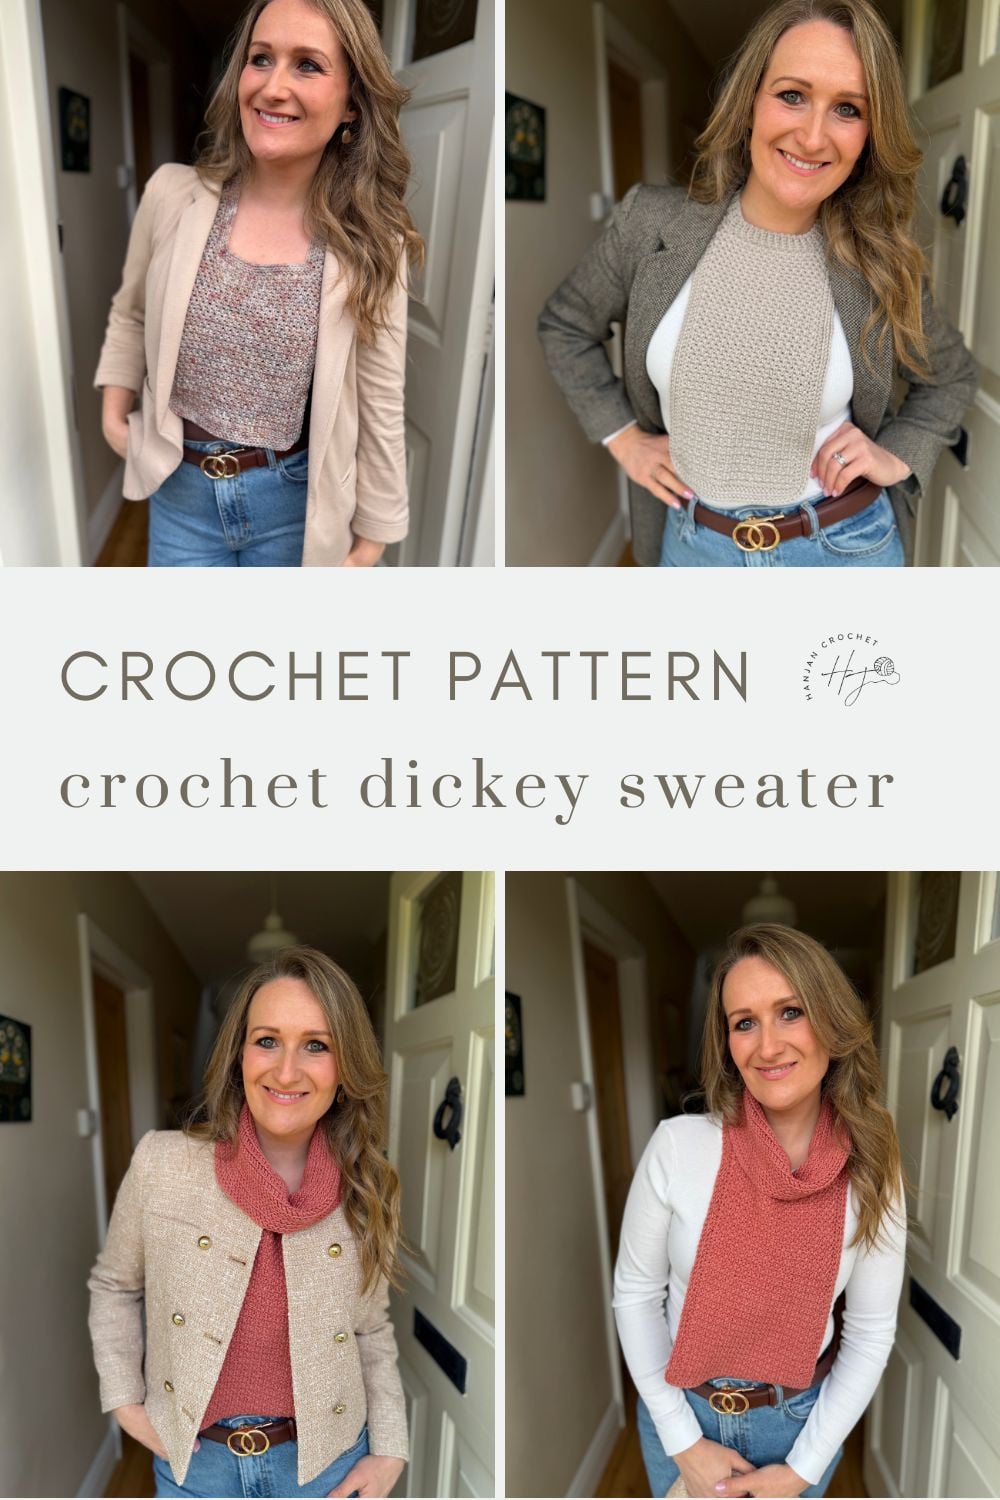
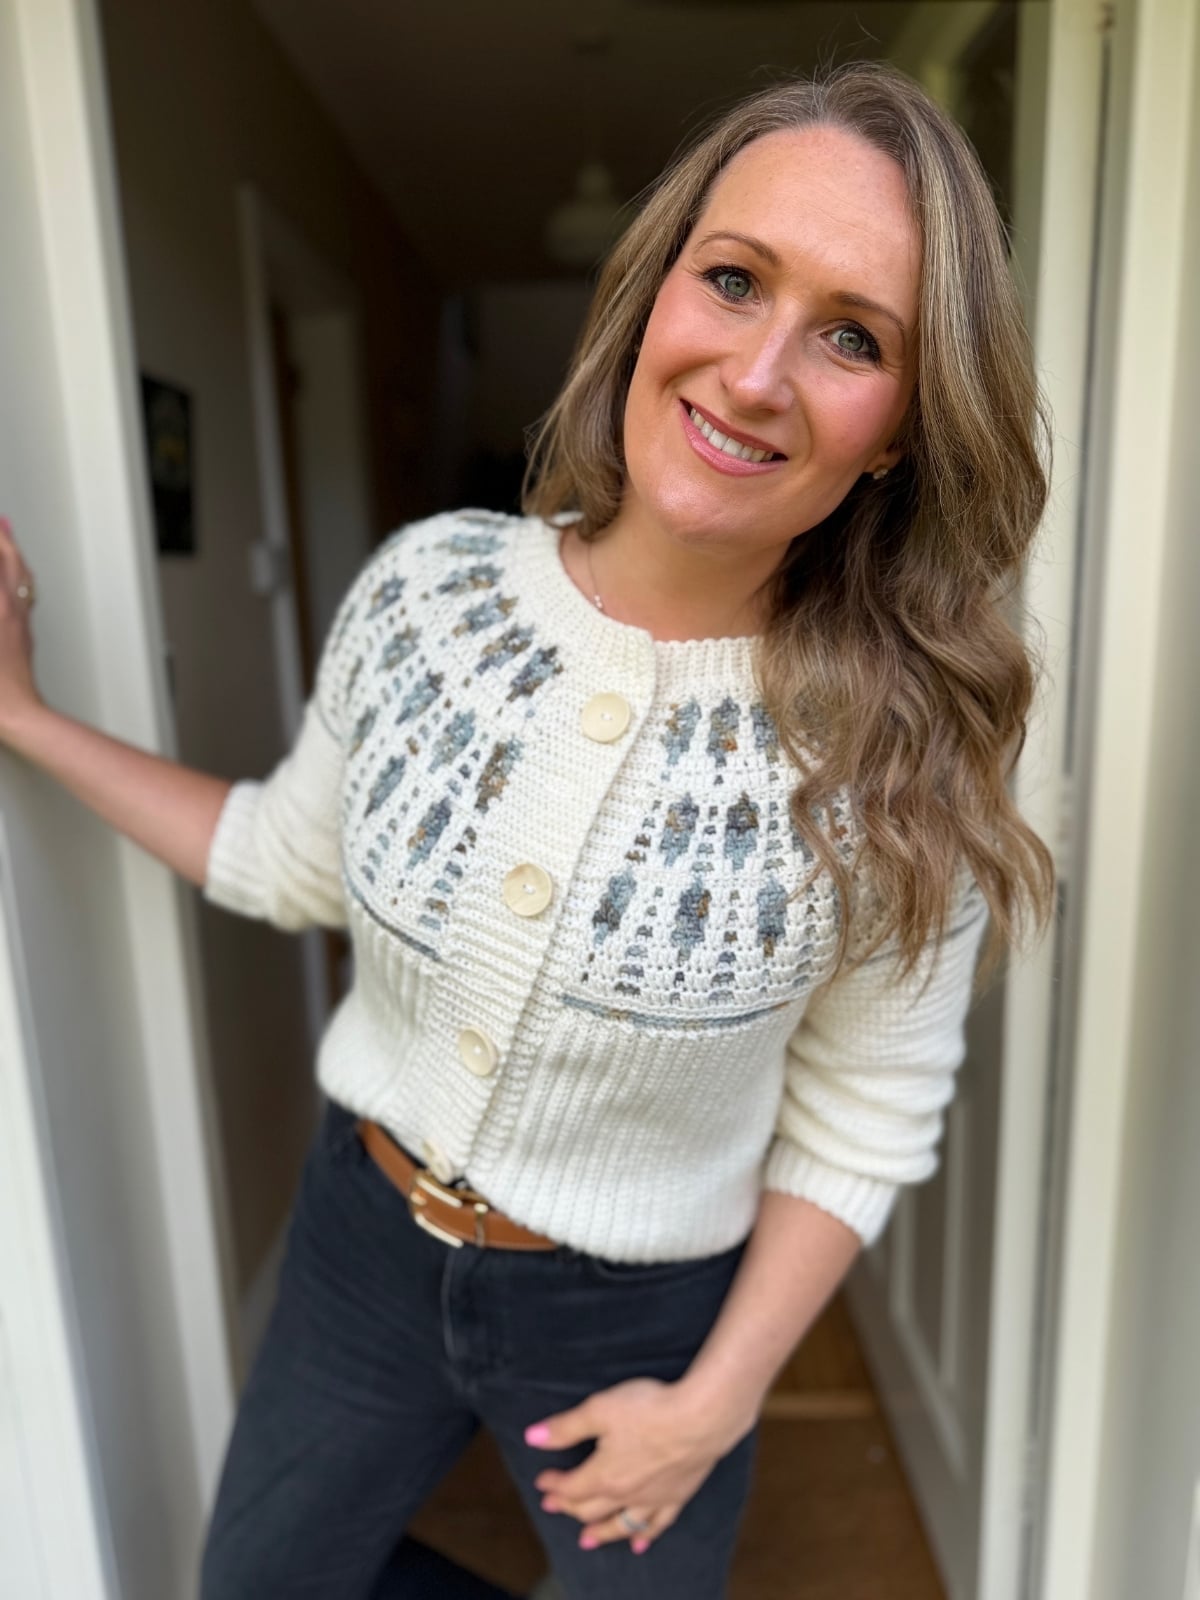
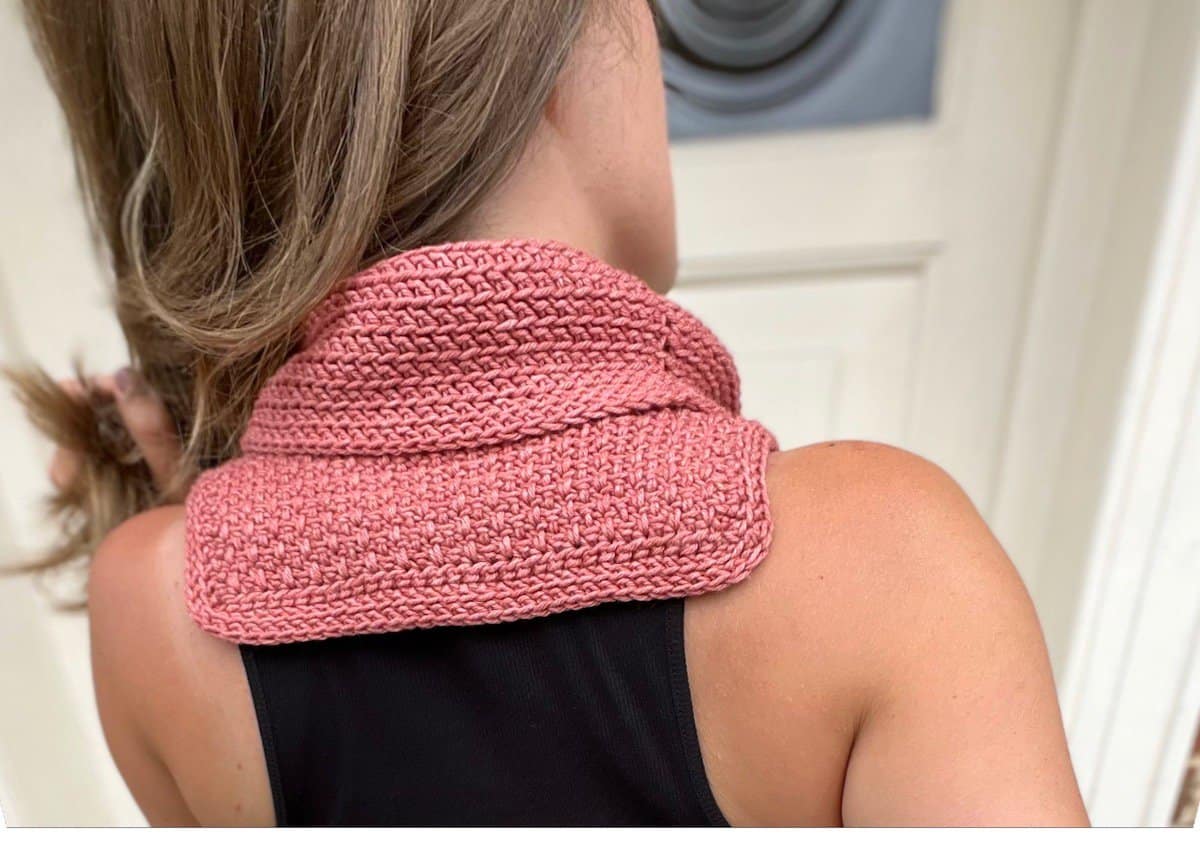
This fun and easy crochet dickie pattern is the perfect neck warmer that looks just like a sweater without making you too hot! Pop it on under your favourite jacket or coat for those days when you want to keep your neck warm but don’t want the weight of a bulky sweater.
A dickie cowl is a great alternative to a lengthy scarf or a full sweater. Perfect for layering, looks stunning under a V neck coat and is trendy too! Plus – this one comes with three neckline options for you to choose from!
Crochet Dickie Pattern Overview
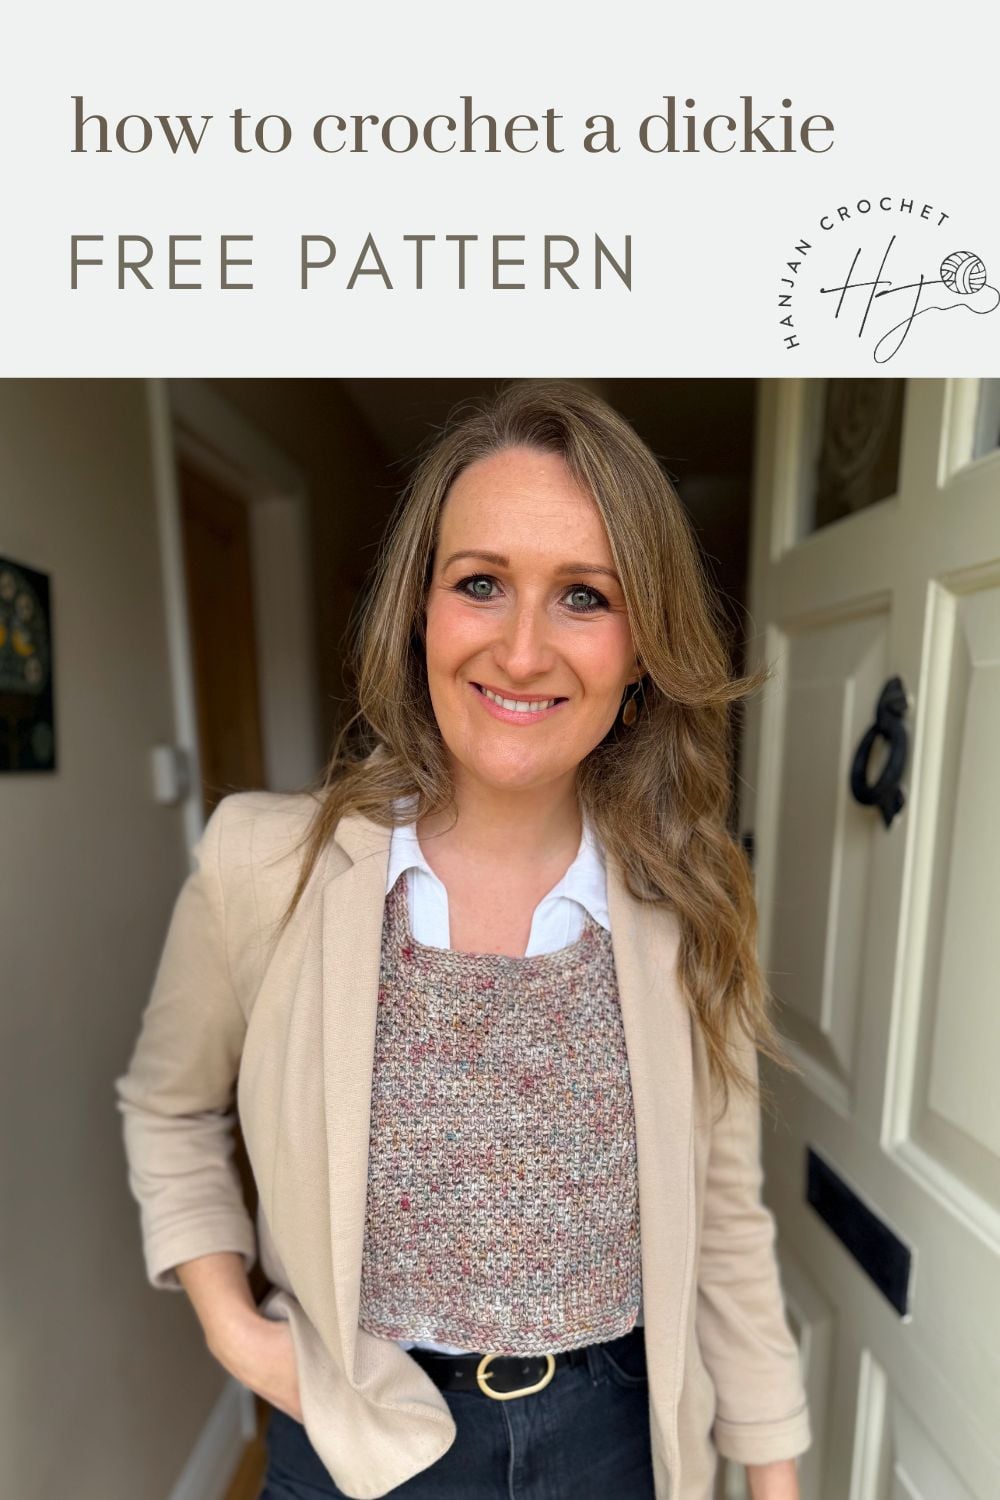
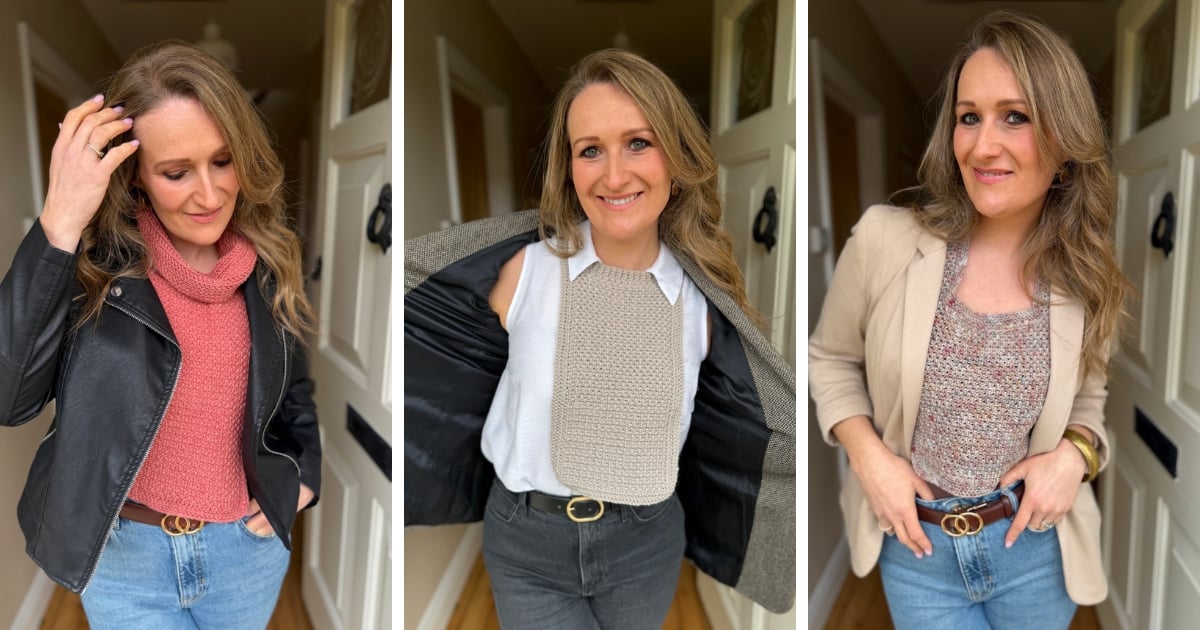
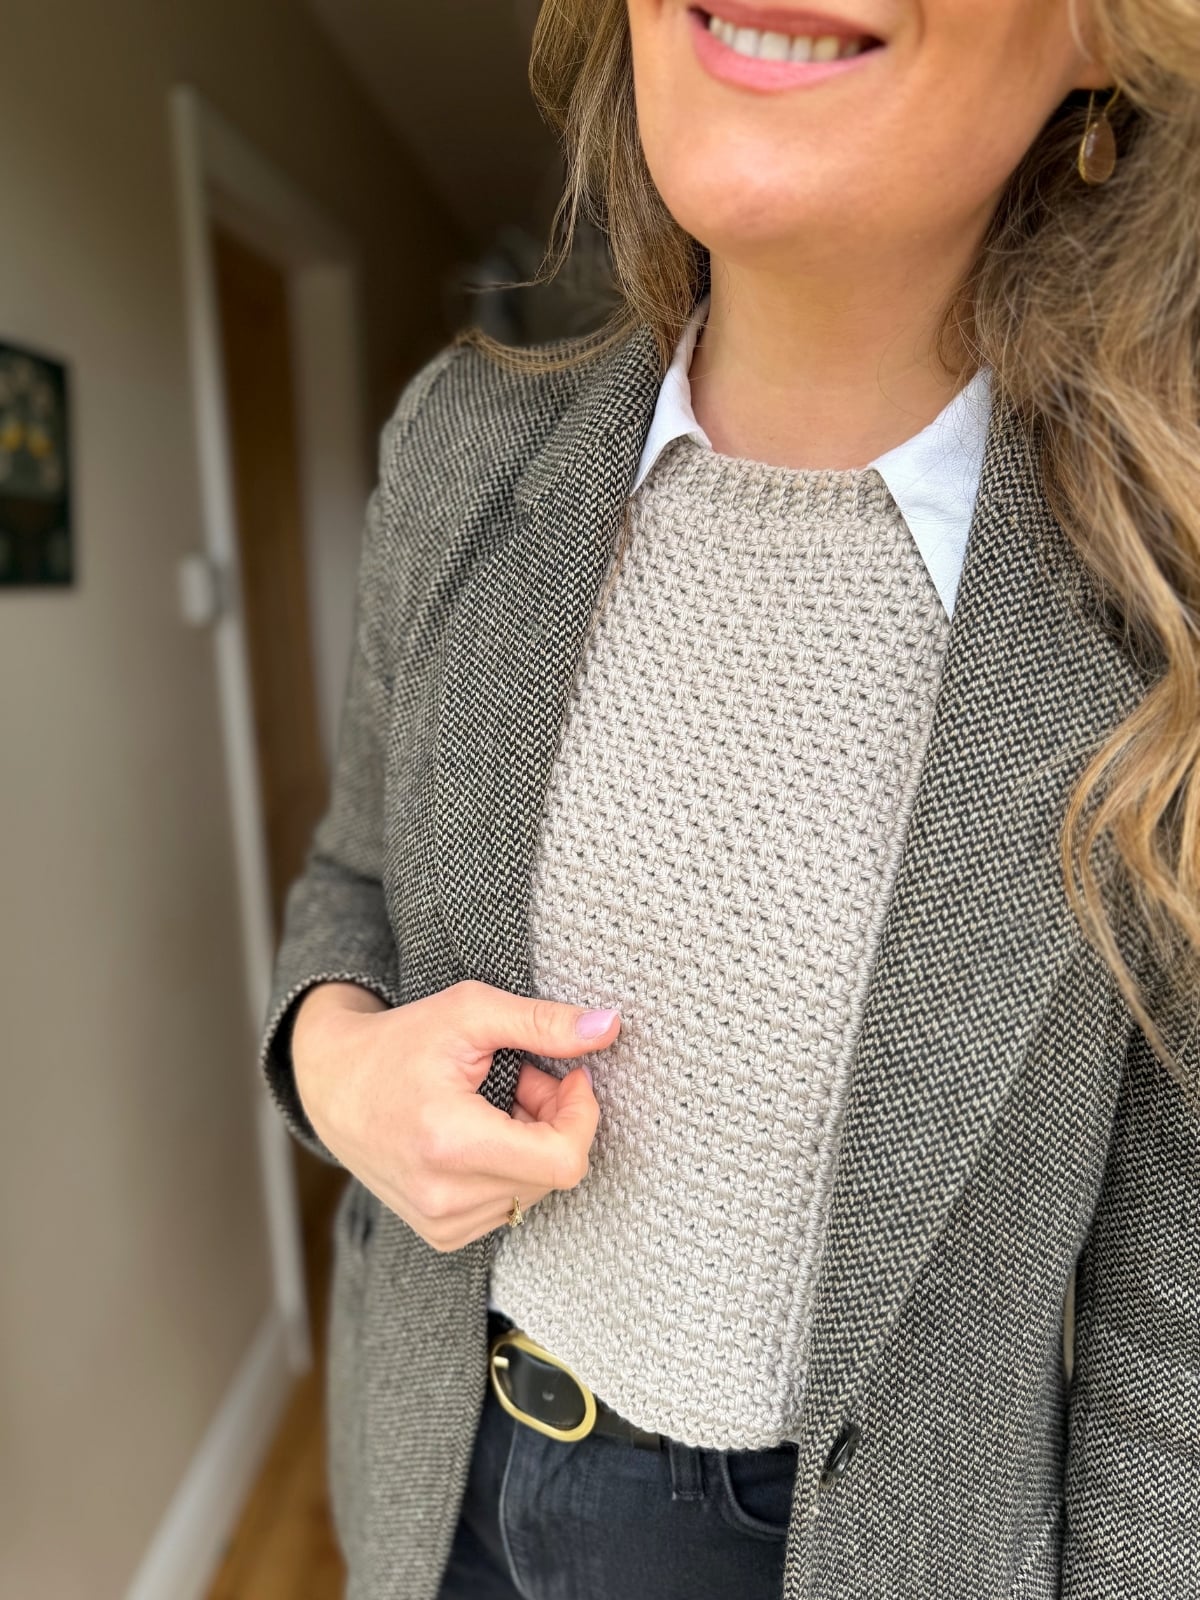
Create the look of a cosy layered sweater without the bulk with this versatile crochet dickie pattern — a modern sweater insert designed for effortless styling and comfort. I’ve styled it with as many different jackets as I can to show you just how versatile and easy to wear it is!

⭐⭐⭐ Difficulty level: Intermediate
💬 Hook Size: 4 and 4.5mm
📏 Sizes: One Size 9.75 x 16.5” at front but easy to adjust
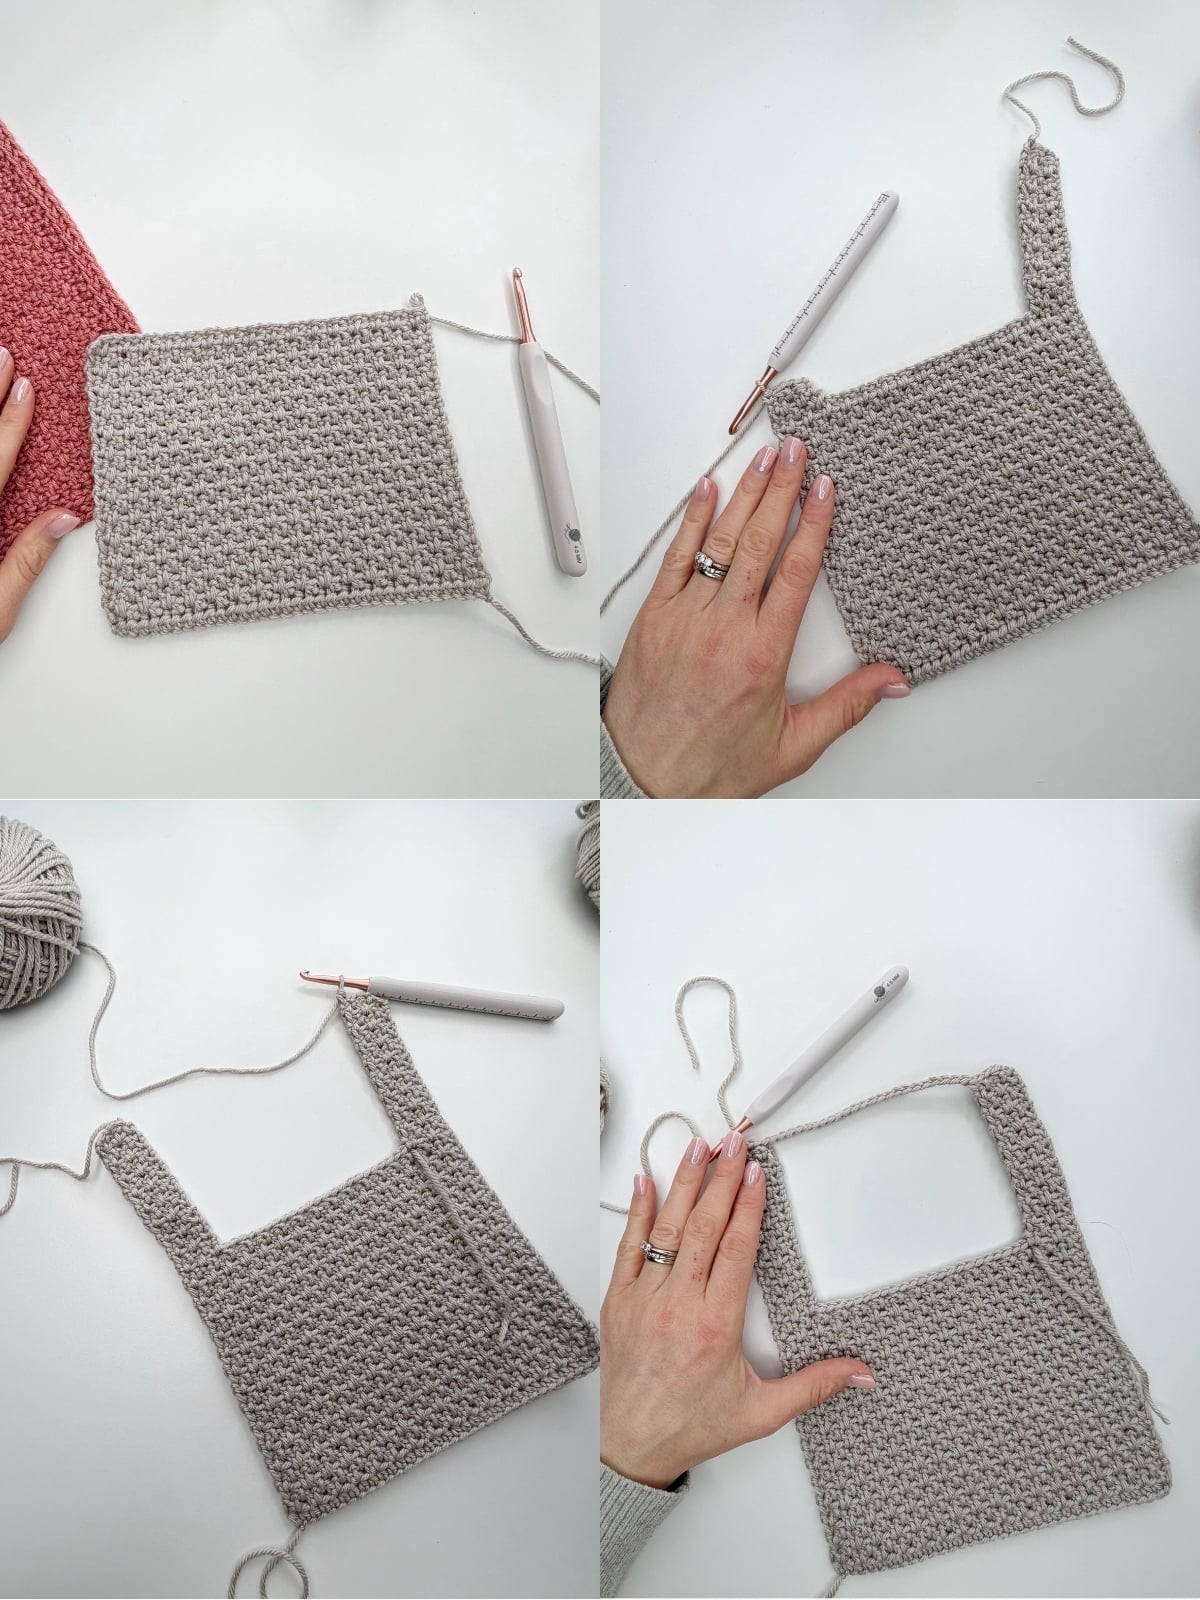
✨ Crochet Technique: Made in one piece from one simple rectangle – just leave a space for the head.
⚖️ Yarn Weight: Double Knit Yarn (category 3)
🧶 Yarn Used: Gloss DK
🕐 Approx Crochet Time: 6-8 hours depending on your pace
👍 Perfect For: A simple crochet wardrobe staple that you can throw on with anything.
Summarise and Save For Later:
Table of Contents
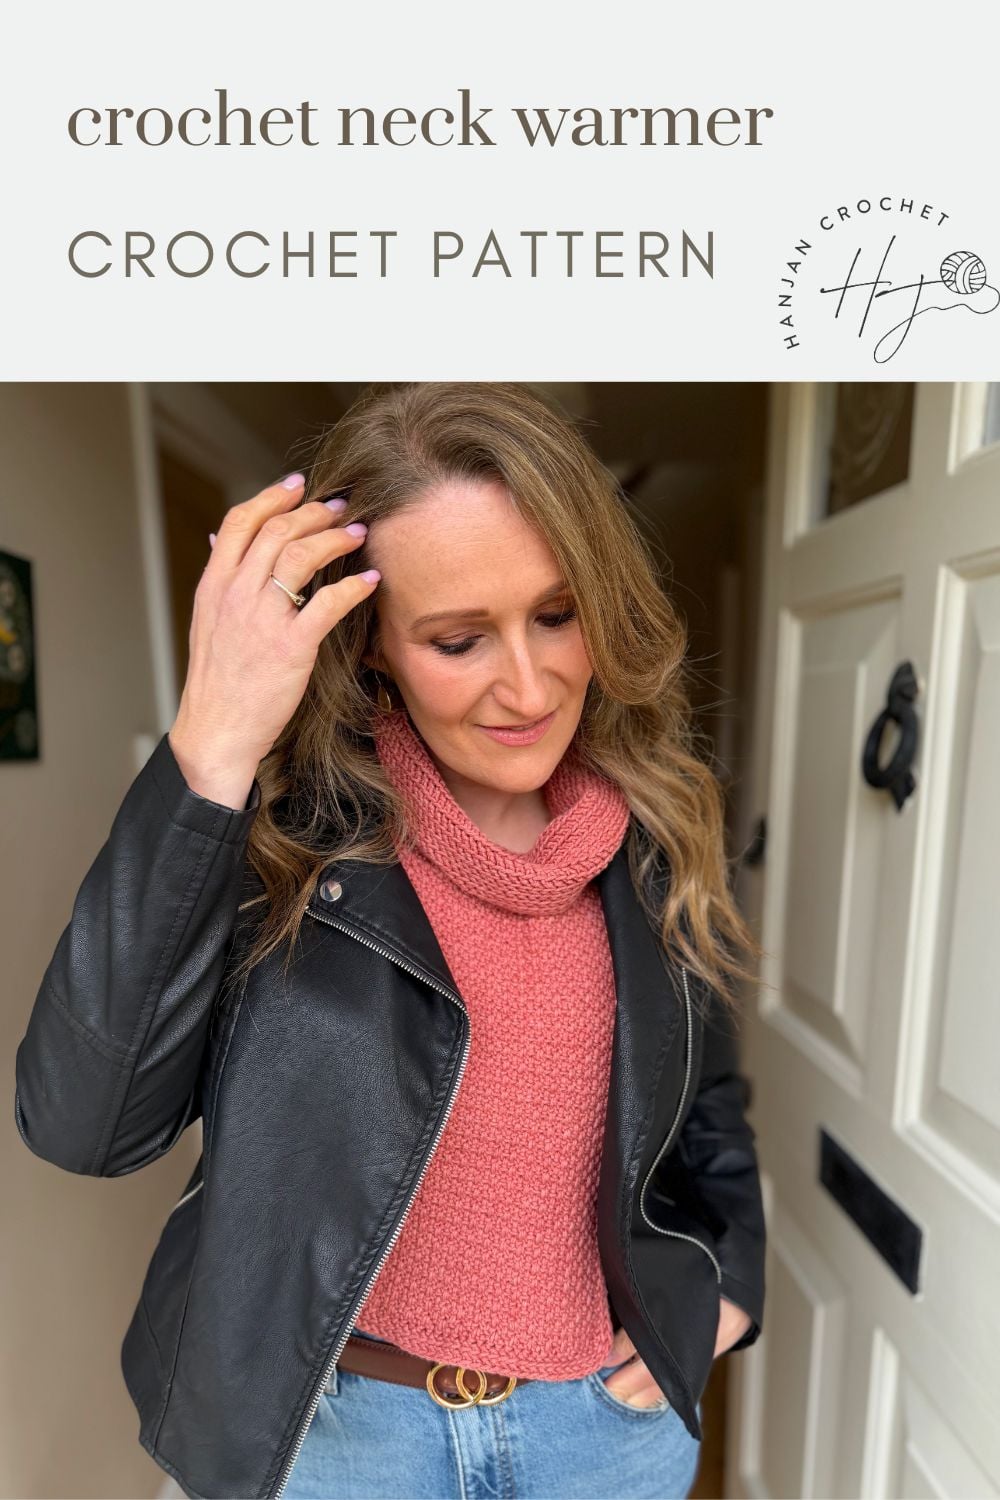
💫 Neckline Options For The Herringbone Moss Dickie
The pattern includes three interchangeable neckline options, allowing you to customise your look:
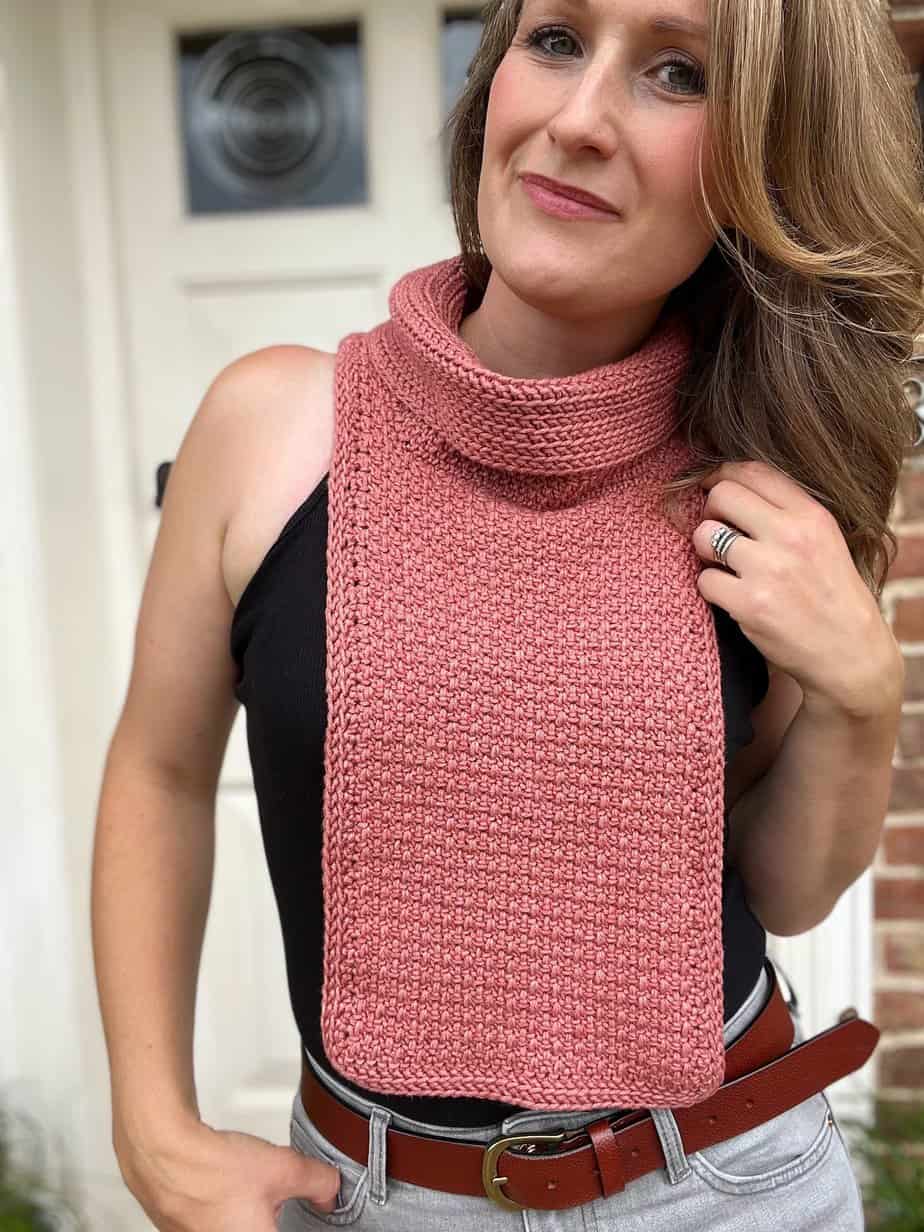
- Classic roll neck / turtleneck for maximum warmth
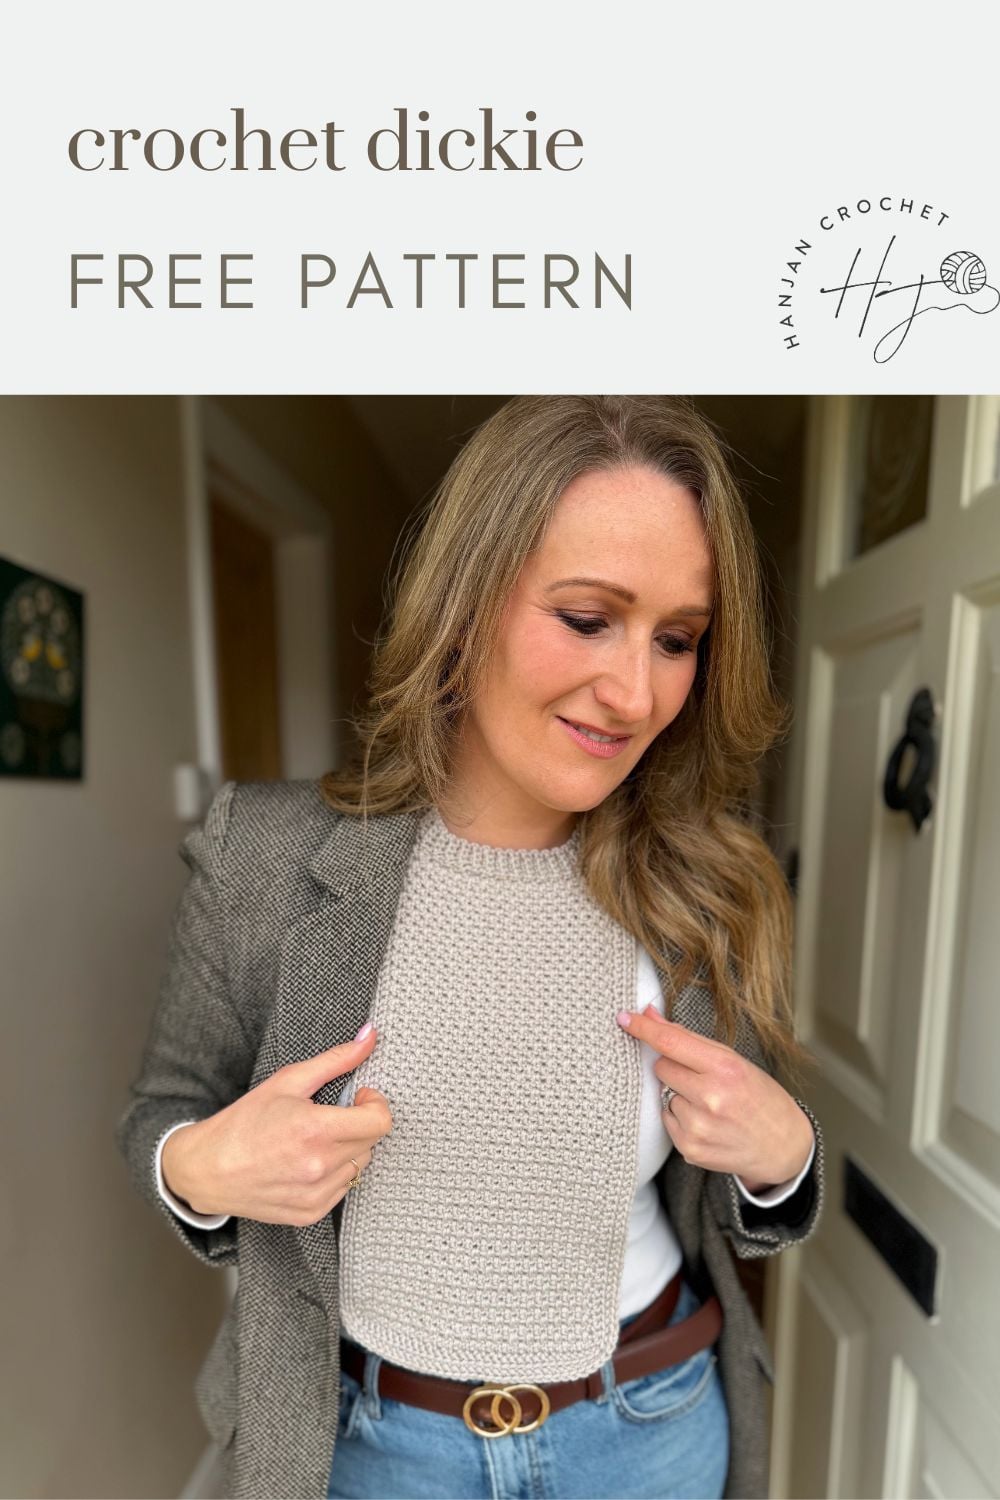
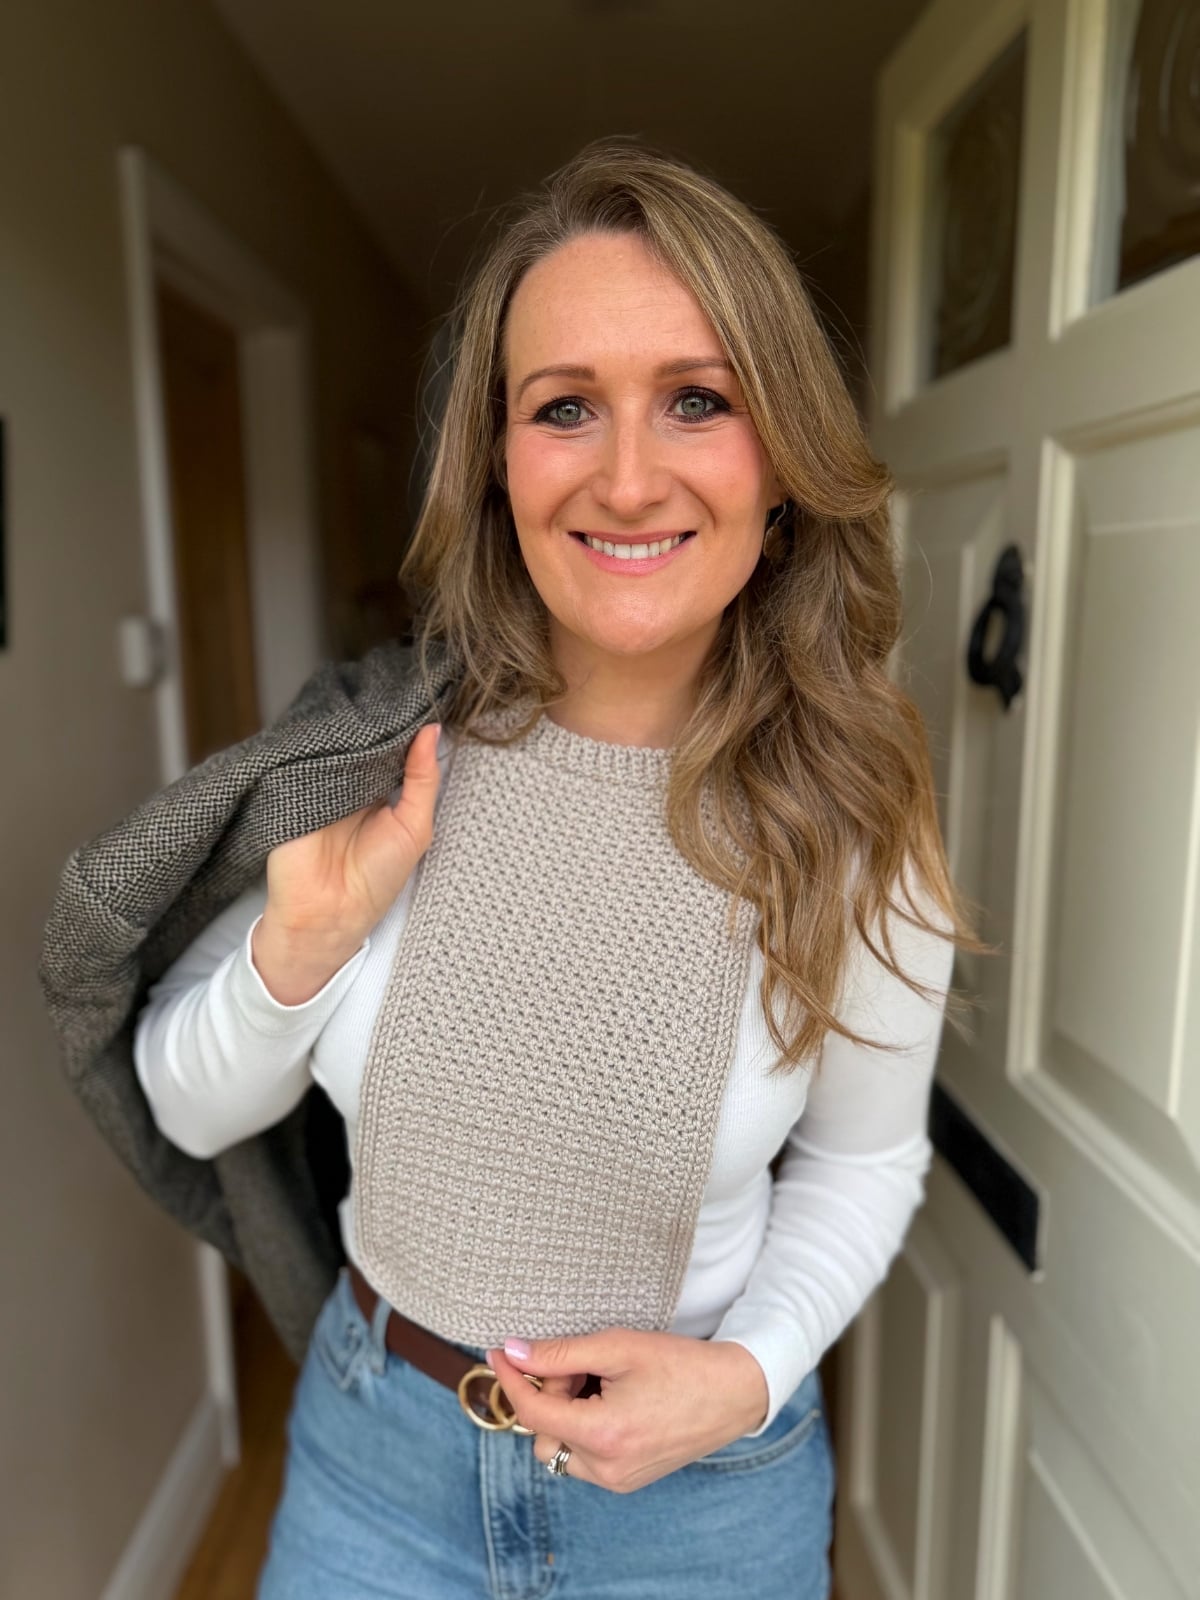
- Neat ribbed crew neck for everyday layering
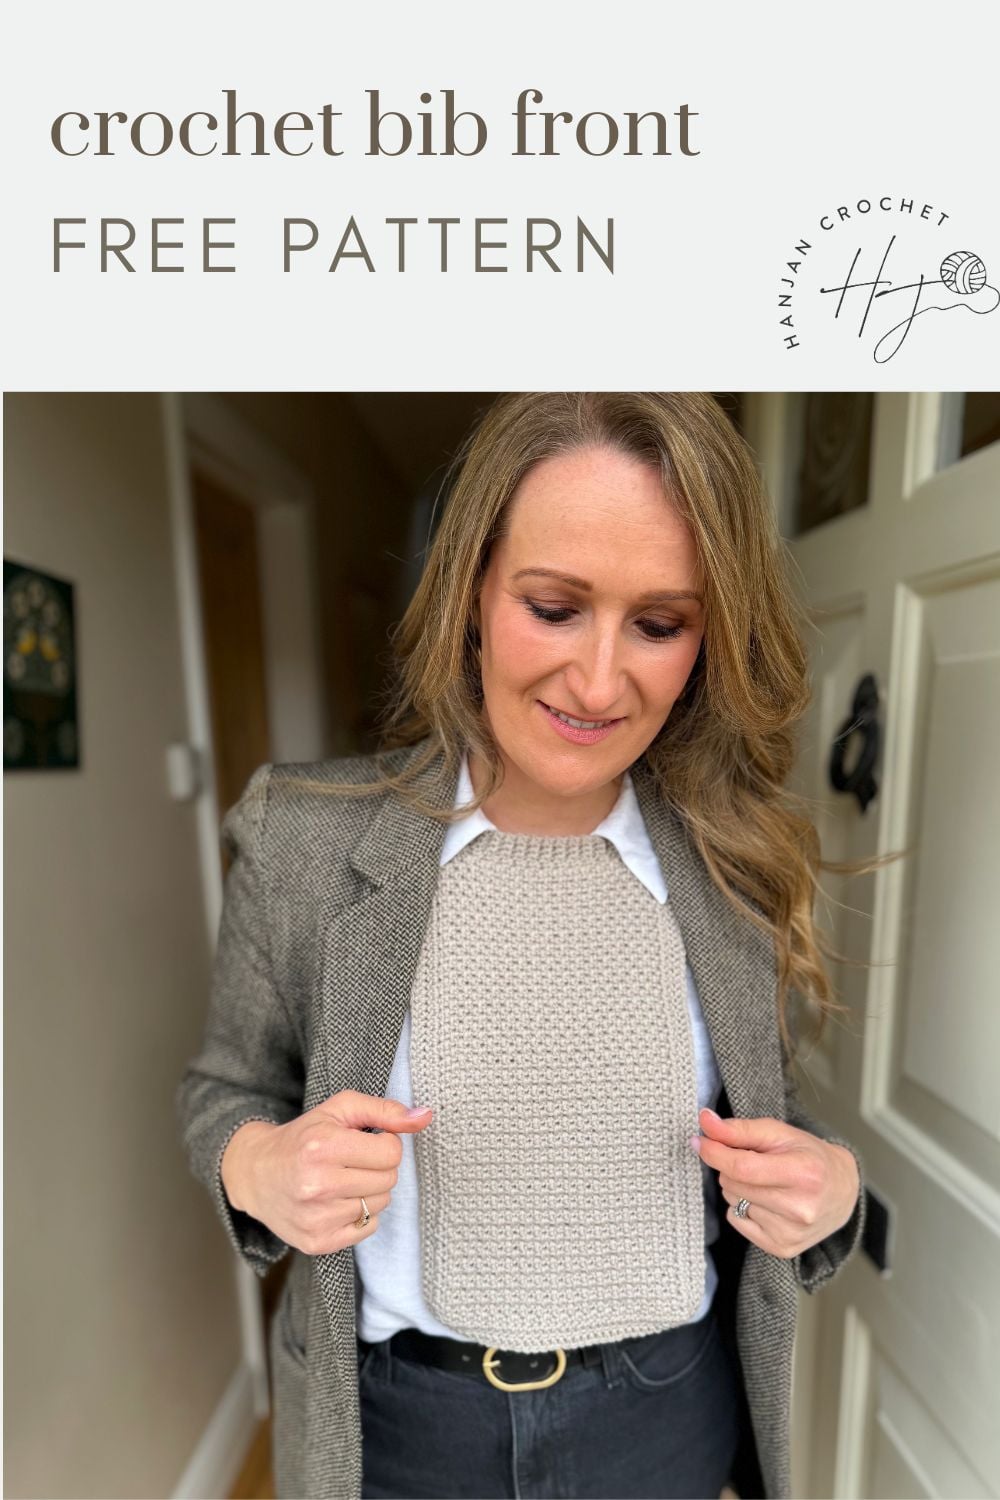
- Relaxed open neck for a more casual, modern finish
What is a crochet dickie pattern?
If I’m honest I didn’t know what a crochet dickie pattern was until I designed this one!
I had this idea of creating a cowl neck sweater front without sleeves or a back so that you could pop it on under a coat and not get too hot but still look like you had a fabulous handmade top on.
After I made it I realised that they are actually called crochet dickies (or dickeys) and have been around for years!
So this one is a breeze to make and you can add or subtract length to it, plus make the neckline as you like to really make it your own.
Want to remove Ads?
- Get ad-free access on all posts; 200+ patterns & tutorials!
- Member-only resource library with downloadable PDF guides
- Bonus eBook (Worth over $30)
How do you crochet a neckwarmer like this?
Although it might look tricky the construction of this pattern is actually quite simple ad works in the same way as my oversized crochet sweater pattern does.
The dickie cowl is worked in rows from the lower edge of the back up. Then the work splits into 2 pieces for the neckline shaping before joining to work the front from the top down.
The edging and neckline are added in rounds at the end.
Herringbone Dickie Materials
- A 4.5mm (G+) and 4mm (G) crochet hook or hook needed to meet gauge
- Scissors
- Tapestry needle
- Stitch markers
Along with the above you will need the following yarn for your collar:
Grey Version: Gloss DK, 70% Merino Wool, 30% Silk, 112m/123yds/50g, shown in Moonlight.
Pink Version: Swish DK by WeCrochet, 100% Fine Superwash Merino Wool; 123yds/50g, shown in Rose Heather.
Variegated Version: from my hand dyed yarn stash 🙂
Approx yarn amounts for scoop neck (ribbed crew, turtleneck): 235 (310, 340) yds.
These are a category 3 worsted weight yarns which are perfect for this project to make it quick and easy. Check out our handy yarn weight chart and guide to find out more about yarn weights and categories.
Here are some alternative yarns that I think would work really well for this pattern:
- Katia Merino 100%: 100% Merino, 110yds/50g
- Capra DK by WeCrochet: 85% fine merino, 15% cashmere, 123yds/50g
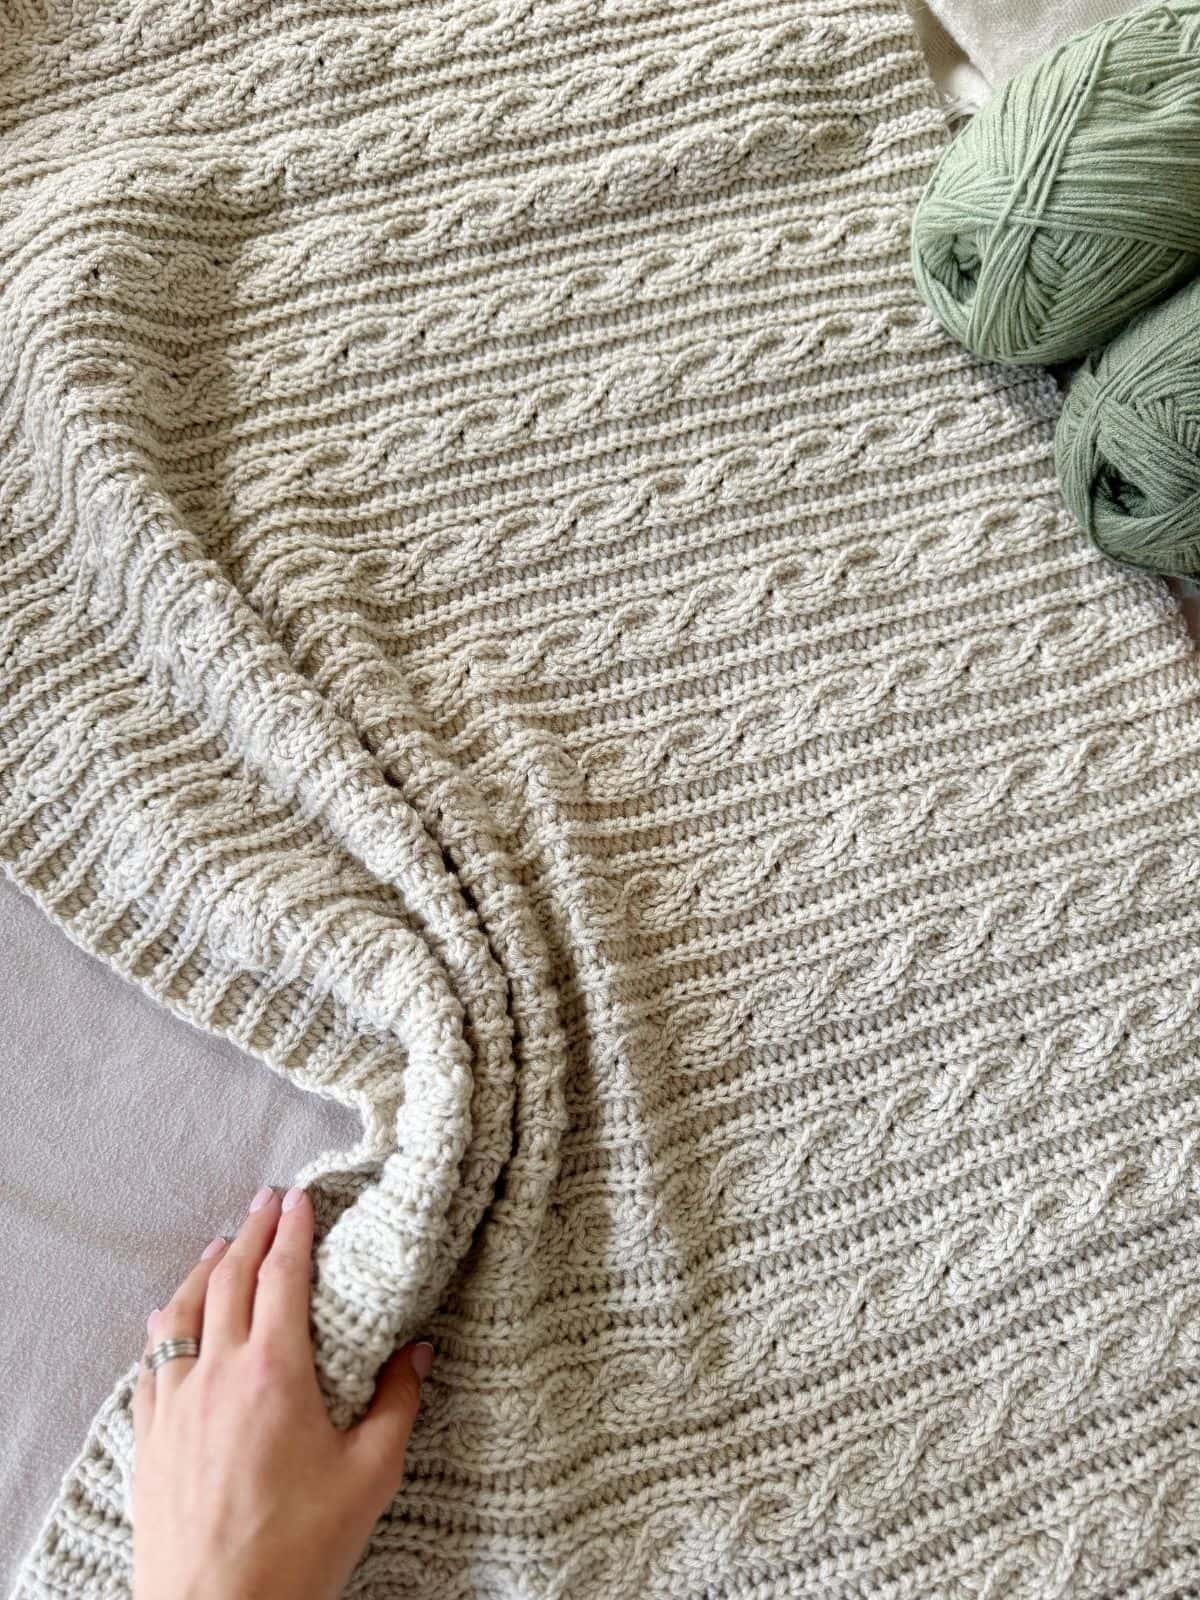
It’s also really important to look for a yarn that gives great stitch definition for this pattern. The herringbone moss stitch that it uses looks at its best when the yarn shows it off.
Gauge & Sizing
The free crochet dickie pattern is one size fits all – approx 25 x 42cm (9.75 x 16.5″) at Front but is really easy to adapt and make as long as you like.
17 sts and 19 rows measure 10cm x 10cm (4″ x 4″) over herringbone half double crochet using a 5mm hook, or size needed to obtain correct tension.
Glossary and Abbreviations
- beg – beginning
- ch(s) – chain(s) (chain stitch tutorial)
- ch-sp(s) – chain space(s)
- rep – repeat
- RS – right side
- sp – space
- ss/sl st – slip stitch (how to crochet a slip stitch)
- st(s) – stitch(es)
- WS – wrong side
- Yoh – yarn over hook
Stitches
The pattern is written in standard US terms and uses the following crochet stitches:
sc – single crochet (how to single crochet stitch)
hdc – half double crochet (how to crochet a half double crochet)
Special Stitches
If the herringbone moss stitch is new to you then make sure to check out my video tutorial or my herringbone half double crochet moss stitch step by step tutorial.
The moss stitch (often known as the granite or linen stitch too) is by far one of my favourites. It has such a lovely texture, delicate drape and works so well for all sorts of designs.
I love working with this stitch and have used it to create all sorts of designs so far with it:
- The herringbone moss stitch mittens and herringbone winter crochet hat pattern use exactly the same style of stitch and make a great set.
- The herringbone crochet headband pattern is a fun and quick make.
- If you want to make another chic accessory, there’s the crochet backpack pattern which features this gorgeous stitch too.
- There’s also a child raglan crochet sweater and a matching adult top down sweater using it too!
If you love them then you can get them in my Herringbone Moss Stitch Ebook that has 6 stunning patterns using this stitch!
Here are the written instruction for each of the special stitches you’ll need for the dickie crochet pattern –
Herringbone half double crochet: Hhdc
Yarn over, insert hook into next stitch, yarn over and pull up a loop (3 loops on hook). Pull first loop straight through the second loop (similar to a slip stitch to leave 2 loops on the hook). Yarn over, pull through two remaining loops on hook.
Back loop only herringbone half double crochet moss stitch: Hhdc-moss
Work as for Hhdc but insert hook into back loop only of unworked stitch 2 rounds below. Work over the chain 1 space on the previous round.
If you love the look of the moss stitch then you might also like to have a go at the double crochet moss stitch – I have a tutorial and lots of patterns featuring that too!
Crochet Dickey Pattern – FAQs
A crochet dickey (also called a sweater insert or modesty panel) is a small, sleeveless layering piece worn under clothing to give the look of a full sweater. It typically covers the chest and neckline, adding warmth and style without the bulk of wearing an entire jumper.
A crochet dickey is incredibly versatile and can be worn with:
Coats and jackets for added warmth
Blazers for a smart, layered look
Cardigans for a cosy outfit
V-neck or open-front coats to highlight the neckline
Dresses or tops that need extra coverage
It’s perfect for creating a layered outfit without overheating.
Styling a crochet dickey is all about layering:
Pair a turtleneck dickey with structured coats for a polished winter look
Wear a crew neck version under casual jackets or denim
Choose an open neck style for a relaxed, modern outfit
Match neutrals for a minimal wardrobe or use contrast colours to make it stand out
It’s a simple way to elevate everyday outfits.
Yes! A crochet dickey provides warmth exactly where you need it—around the neck and chest—without the bulk of a full sweater.
Using wool or wool-blend yarns makes it ideal for colder weather, while lighter yarns work well for transitional seasons.
DK weight yarn works beautifully for a crochet dickey.
For best results:
Use merino wool for warmth and softness
Try cotton blends for lighter, breathable layering
Choose smooth yarns to highlight stitch texture
Pattern Notes
A ch1 at the beginning of a row or round does not count as a stitch.
Turn at the end of each row.
Free Crochet Dickie Pattern
There are a few options for you to access and enjoy this crochet pattern:
- View the free pattern on the blog – all blog subscribers will be able to view the patterns supported by ads by logging into their Grow account.
- Purchase the individual pattern on Etsy or Ravelry as a beautifully formatted PDF with extra stitch charts, schematic and colour information page and more!
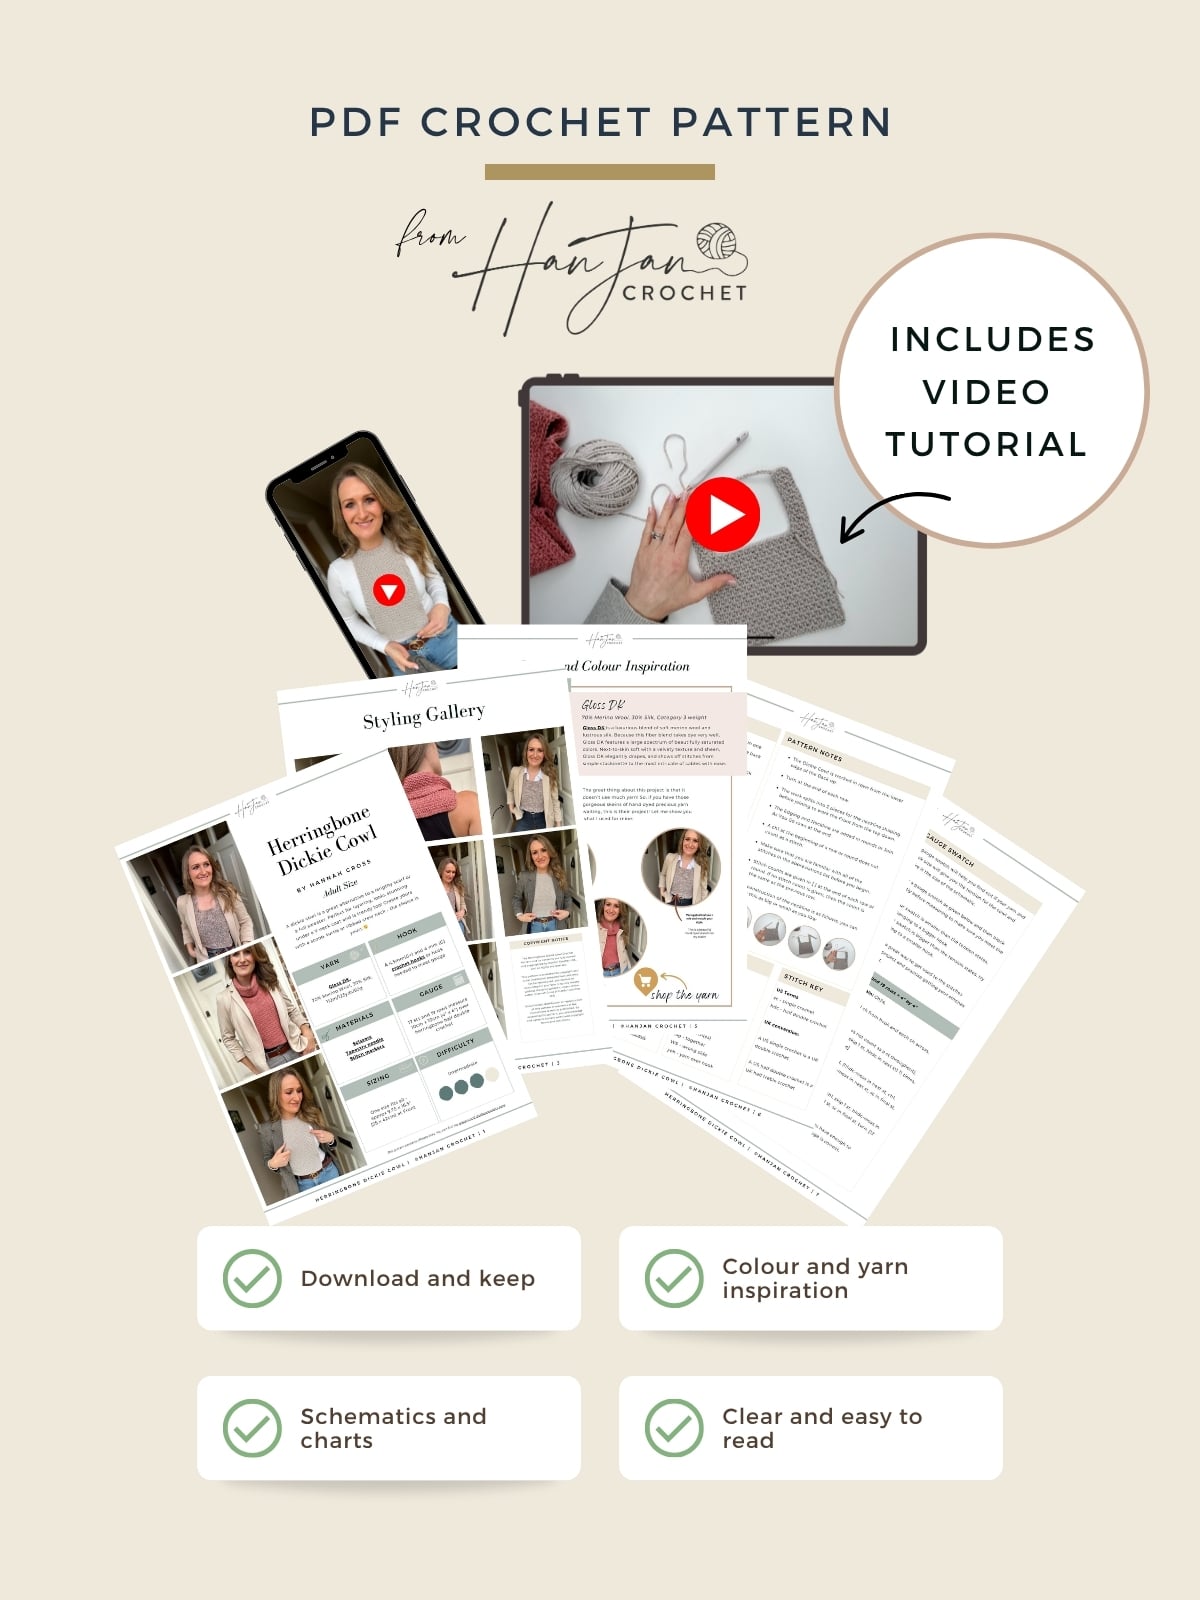
Get the PDF Pattern!
Perfect to print out or use on any device, with schematic, colour inspiration and stitch tutorials.
Pattern Support
I am delighted to invite you to join the HanJan Crochet Community Facebook Group where we host all pattern support queries and love to see your progress, yarn choices and finished projects!
Video Tutorial for the Dickie Cowl
Come along as I crochet this dickey and see just how easy it is in our step-by-step video tutorial.
US Crochet Terminology
To unlock Exclusive Content on the HanJan Crochet Blog, all you need to do is click the box below and the Grow.me app will pop up, allowing you to enter your email and create a password.
Once you’ve created an account, every time you see Exclusive Content on my blog (or any others that use Grow), simply login to your Grow account. Be sure to switch to the login screen to enter your login credentials.
If you forget your password, click the “forgot password” link and follow the prompts. Please note that I’m unable to assist with resetting Grow passwords or accessing your Grow account, so be sure to save your login information in a safe place.
Thank you for subscribing and for joining me at HanJan Crochet! I hope you enjoy the exclusive content available on the site and I can’t wait to see what you create 🙂
LEFT NECK SHAPING
Row 1 (RS): ch1, sc in first st, ch1, sk 1 st, hhdc-moss in next st, ch1, sk 1 st, sc in next ch-1 sp, turn. [3 sts, 2 ch-1 sps]
Row 2 (WS): ch1, sc in first st, hhdc-moss in next st, ch1, sk 1 st, hhdc-moss in next st, sc in next st, turn. [4 sts, 1 ch-1 sp]
Row 3: ch1, sc in first st, ch1, sk 1 st, hhdc-moss in next st, ch1, sk 1 st, sc in next st, turn. [3 sts, 2 ch-1 sps]
Rows 4-17: Repeat Rows 2-3 another 7 times.
Fasten off.
RIGHT NECK SHAPING
With RS facing, join yarn in second to last ch-1 sp from Row 15 of Back.
Row 1 (RS): ch1, sc in same sp, ch1, sk 1 st, hhdc-moss in next st, ch1, sk 1 st, sc in final st, turn. [3 sts, 2 ch-1 sps]
Rows 2 – 17: As Rows 2-17 of Left Neck Shaping.
Row 18: ch1, sc in first st, hhdc-moss in next st, ch1, sk 1 st, hhdc-moss in next st, sc in next st, do not break yarn, continue for Front. Ch23 (for neck opening), into the Left neck Shaping: ch1, sk next st, hhdc-moss in next st, ch1, sk 1 st, hhdc-moss in next st, sc in next st, turn. This has now created the neck hole space.
FRONT
Row 1 (RS): ch1, sc in first st, ch1, sk 1 st, hhdc-moss in next st, ch1, sk 1 st, hhdc-moss in next st, (ch1, sk 1 ch, hhdc in next ch) 11 times, ch1, sk last ch, hhdc in next st, ch1, sk 1 st, hhdc-moss in next st, ch1, sk 1 st, sc in final st, turn. [17 sts, 16 ch-1 sps]
Row 2 (WS): ch1, sc in first st, (hhdc-moss in next st, ch1, sk 1 st) 15 times, hhdc-moss in next st, sc in final st, turn. [18 sts, 15 ch-1 sps]
Row 3: ch1, sc in first st, (ch1, sk 1 st, hhdc-moss in next st) 15 times, ch1, sk 1 st, sc in final st, turn. [17 sts, 16 ch-1 sps]
Rows 4-63: Rep Rows 2-3.
Row 64: Rep Row 2.
Row 65: .ch1, sc in first st, (sc in next st, hhdc-moss in next st) 15 times, sc in last 2 sts. Fasten off.
EDGING
With RS facing, join yarn in any corner at Back.
Round 1 (RS): ch1, *hhdc in each st across short edge, hhdc along the long edge working 1 st per side of a row; rep from * around, ss in first st to join.
Round 2 (RS): ch1, hhdc in blo of each st around, ss in first st to join. Fasten off.
Finish your Dickie Cowl here or add one of the following Neck options.

ROLL NECK
The Neck is worked with WS facing throughout.
With WS facing and the smaller hook, join yarn to first unworked st of Row 15 of Back.
Round 1 (WS): ch1, 23hhdc across Back, 18hhdc in row-ends of Neck Shaping, 23hhdc across Front, 18hhdc in row-ends of Neck Shaping, ss in first st to join. [82 sts]
Round 2 (WS): ch1, hhdc in blo of each st around, ss in first st to join.
Rounds 3- 17: Rep Round 2 another 15 times.
Fasten off.
RIBBED CREW NECK
If you would like to add a ribbed Neck Band then this can be done as follows.
With the RS facing, join yarn to the first unworked st of Row 15 of Back.
Using the smaller hook:
Row 1: ch5, sc in 2nd ch from the hook and in each along, ss into next st of the Neck opening, turn. [4]
Row 2: sc in blo of each st, turn.
Row 3: ch1, sc in blo of each st, ss in next 2 sts of the Neck opening, turn.
Rep Rows 2 and 3 along the Neck opening.
If you would like a tighter neckline then slip stitch in more stitches/ends of rows when you complete a Row 3 repeat.
Once complete, join the First Row to the Last Row of the Ribbed Neck with a slip stitch seam.
Fasten off.
TO FINISH
Weave in ends and block to measurements.
Fold the Neck over so the RS is facing if you have chosen the roll neck.
Join HanJan and Share Your Crochet With Us!
I’d love to hear from you and see your HanJan Crochet project! Here’s where you can do that:
📌 PIN THIS POST – save it to your Pinterest crochet board so you can come back to it again and make more!
↗️ SHARE – Share your yarn choices, progress pics, and finished projects on Facebook or Instagram (make sure to use the hashtag) #hanjancrochet
🧶 JOIN – Join thousands of amazing crafters in the HanJan Crochet Community Group on Facebook ready to cheer you on!
✉️📩📬 SUBSCRIBE – It’s an honour to be able to create and share my free crochet patterns with you. I’d love to stay connected and send you regular discount codes and free patterns! Please sign up for my subscriber list to get a free gift right now!
More Crochet Neck warmer and Cowl Patterns You Might Enjoy
If you enjoy crochet cowl patterns or neck warmers then here are a few more of my designs you might enjoy crocheting!
- Pretty crochet collar pattern (baby to adult sizes)
- Chunky crochet cowl pattern – beginner friendly
- Seaglass Bandana Cowl – light and airy for summer