This post may contain affiliate links. Please see my full disclosure and privacy policy for details.
If you’ve ever wondered about how to go about joining crochet hexagons together then this step by step guide is perfect for you!
I love creating blankets, bags and all sorts of garments from motifs but the most often asked question I get is ‘how do I join them together?’. There are so many options for joining them, especially crochet hexagons (with all those sides!) so I thought it best to break down the process and show you how to create a lightweight and quick seam.
I took these tutorial photos as part of my Time to Bloom Blanket which creates a central rectangle out of full, half and quarter hexagons so is the perfect place for learning the flat slip stitch seam that I love! If you are ready to make the blanket then check the hexagon crochet blanket pattern post to find the links to the different sections.
This post may contain affiliate links. Please see my full disclosure and privacy policy for details.
Want to remove Ads?
- Get ad-free access on all posts; 200+ patterns & tutorials!
- Member-only resource library with downloadable PDF guides
- Bonus eBook (Worth over $30)
Table of Contents
Different options for joining crochet hexagons
As with joining crochet squares together, there are lots of options for either crocheting or sewing your hexagons together.
Which method you decide on will depend on the look and feel that you want to achieve for the fabric that you’re creating (which we’ll talk about in a minute).
My preferred option that I’ll be showing you here is the flat slip stitch seam. This is a great seam to use for any motif but I think it works especially well for crochet hexagons.
Here are some other options you could try for joining crochet hexies together:
Joining Hexagons with a Whip Stitch Seam
A whip stitch seam is a great option if you really don’t like crocheting seams. It is neat, tidy and offers a lovely flexibility to blankets.
Joining Hexagons with a Single Crochet
This method is really similar to the flat slip stitch seam I’m showing you today but you insert your hook from a different angle making the slip stitch sit differently on the top of the hexagon. It creates a little more texture but is still a really nice and flexible join that I love using.
Joining Hexagons with Single Crochet
Using a single crochet to join hexagons together on either the front or back of your work gives you a really textured and tactile join. This options is bulkier than sewing or slip stitches but that can be perfect if you are making bags or bigger blankets!
Join As You Go Hexagons (JAYGH)
Using the join as you go method to seam your hexagons together is great fun and not as tricky as it sounds! You can use a variety of stitches for the method including single crochet and slip stitches or working the final round in a granny stitch style for example. The bonus is that there are no ends to weave in!
Joining Hexagons with a Flat Braid Join
Just like the join as you go method, the flat braid join is continuous so no ends to deal with! It does require a bit more knowledge but is completely doable once you get the hang of it!
How to Prepare Your Hexagons Before Joining
There are a few simple things you can do before attaching your crochet hexagons with whichever seam you choose. I promise the whole piece will look so much better for it!
- Block all of your motifs before you join your crochet hexies together – this will make sure they are all the same size and keep them from becoming ‘wobbly’.
- Check your stitch counts – make sure you have the same amount of stitches on each motif so they match up nicely.
- Lay all of your hexagons out and decide how you want them – there’s nothing worse than joining lots and then realising you did one wrong a few motifs back!
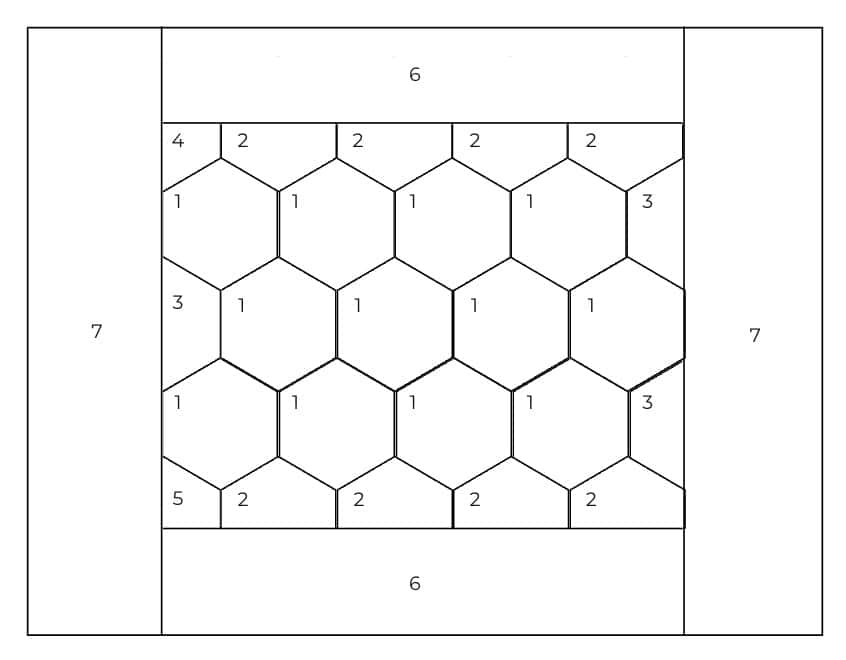
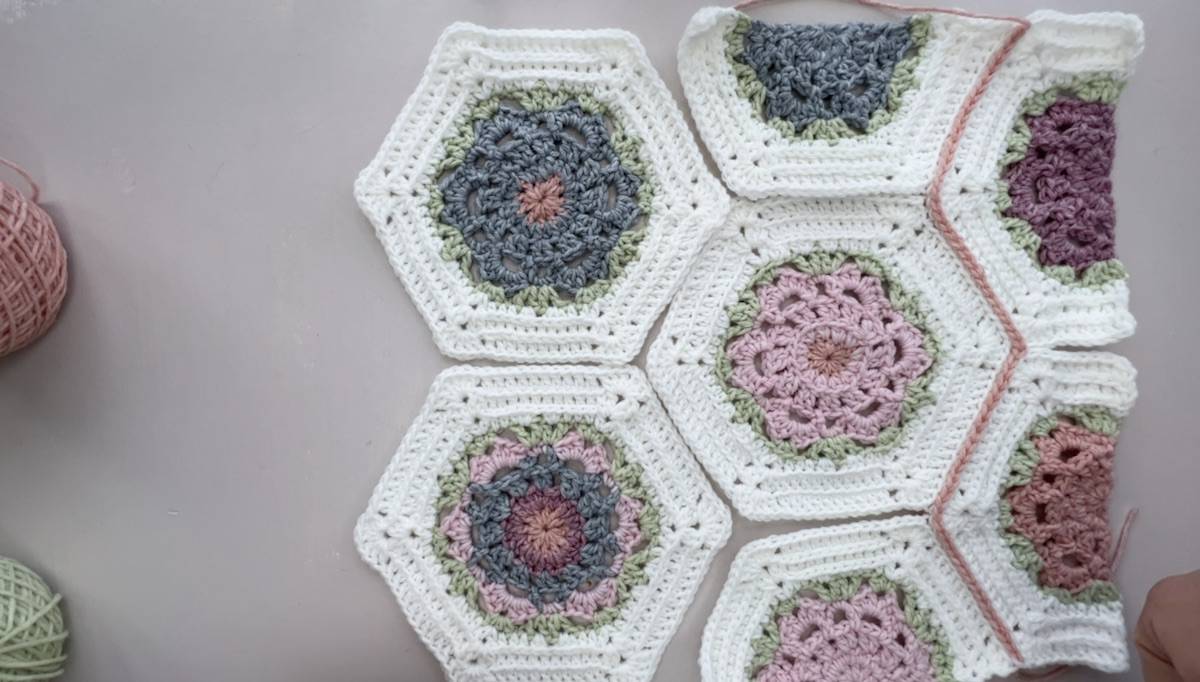
Layout of crochet hexagons ready to join
The following diagram shows the hexagons laid out as they need to be joined in my Time to Bloom Blanket. However, most hexagon blanket patterns will follow this same format!
Make sure to lay them out and take a quick photo to refer back to and when joining them try to sit at a desk or table so that they are all at hand and ready for you.
Join the crochet along!
I am thrilled to be hosting a crochet along for this blanket in July 2023! Thousands of people have signed up already and have their yarn good to go but please don’t worry if you have’t got your ticket yet – there is still plenty of time to join!
If you choose to view the pattern for free on the blog throughout the CAL then you’ll find a new section released each week from 3rd July. There will be 4 weeks of releases and then you can work on your blanket as you’d like to.
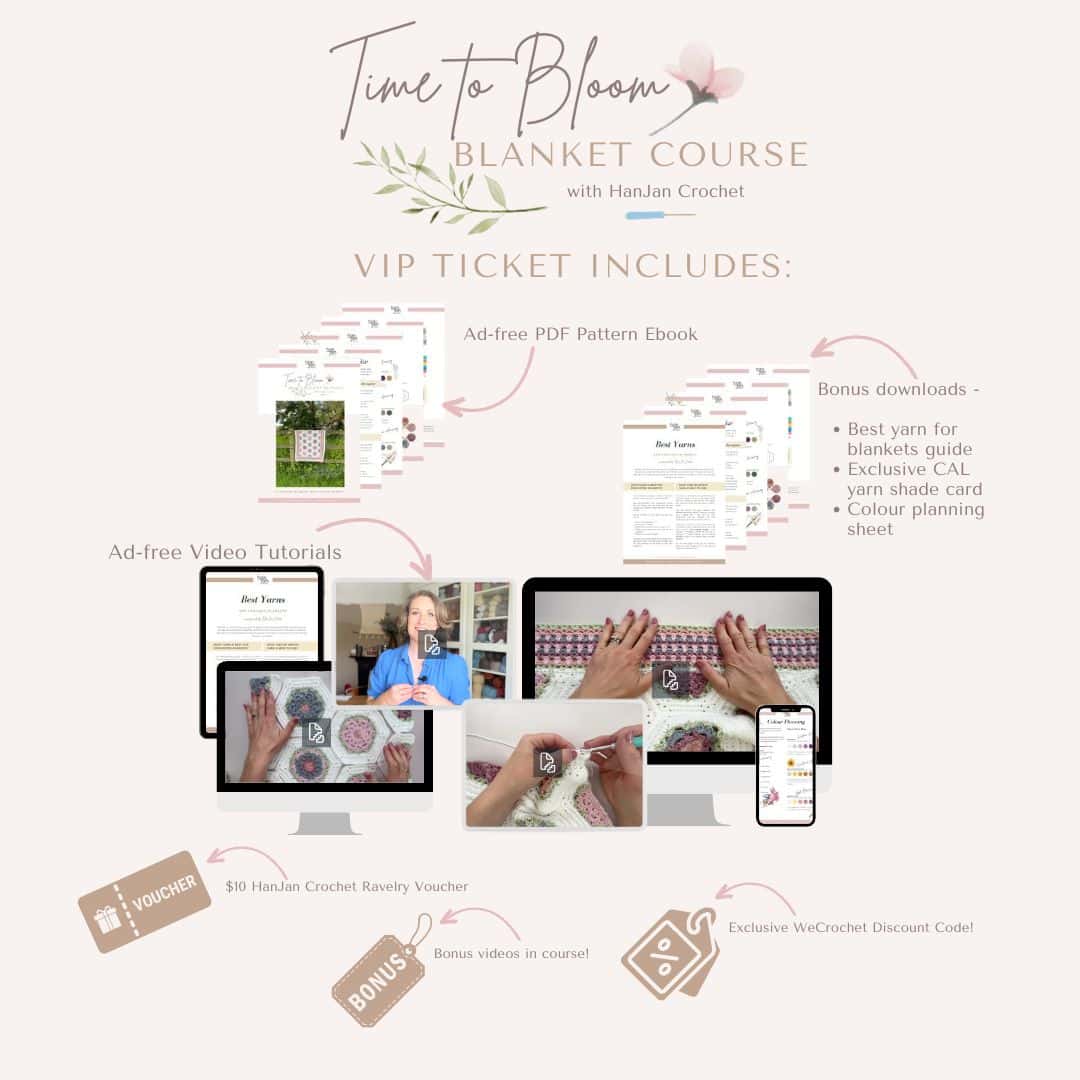
Join the Time to Bloom CAL!
Find out about the free and paid VIP options here:
If you have already signed up for your free ticket then read on to find the instructions for joining the hexagons for Week 3.
Can I find everything all in one place?
Absolutely. I know that the free to view version doesn’t work for everyone so I’ve created an entire ad-free course that you can purchase and enjoy lifetime access to. All in one place, forever.
Upgrade to VIP today!
Yarn and Materials
All of the yarn, materials and pattern notes are included in the main crochet along information page for the Time to Bloom Blanket: Crochet Hexagon Blanket Pattern.
Don’t forget to join HanJan Crochet to receive regular discount codes (and more free patterns!) and Pin this crochet tutorial to your crochet Pinterest board!
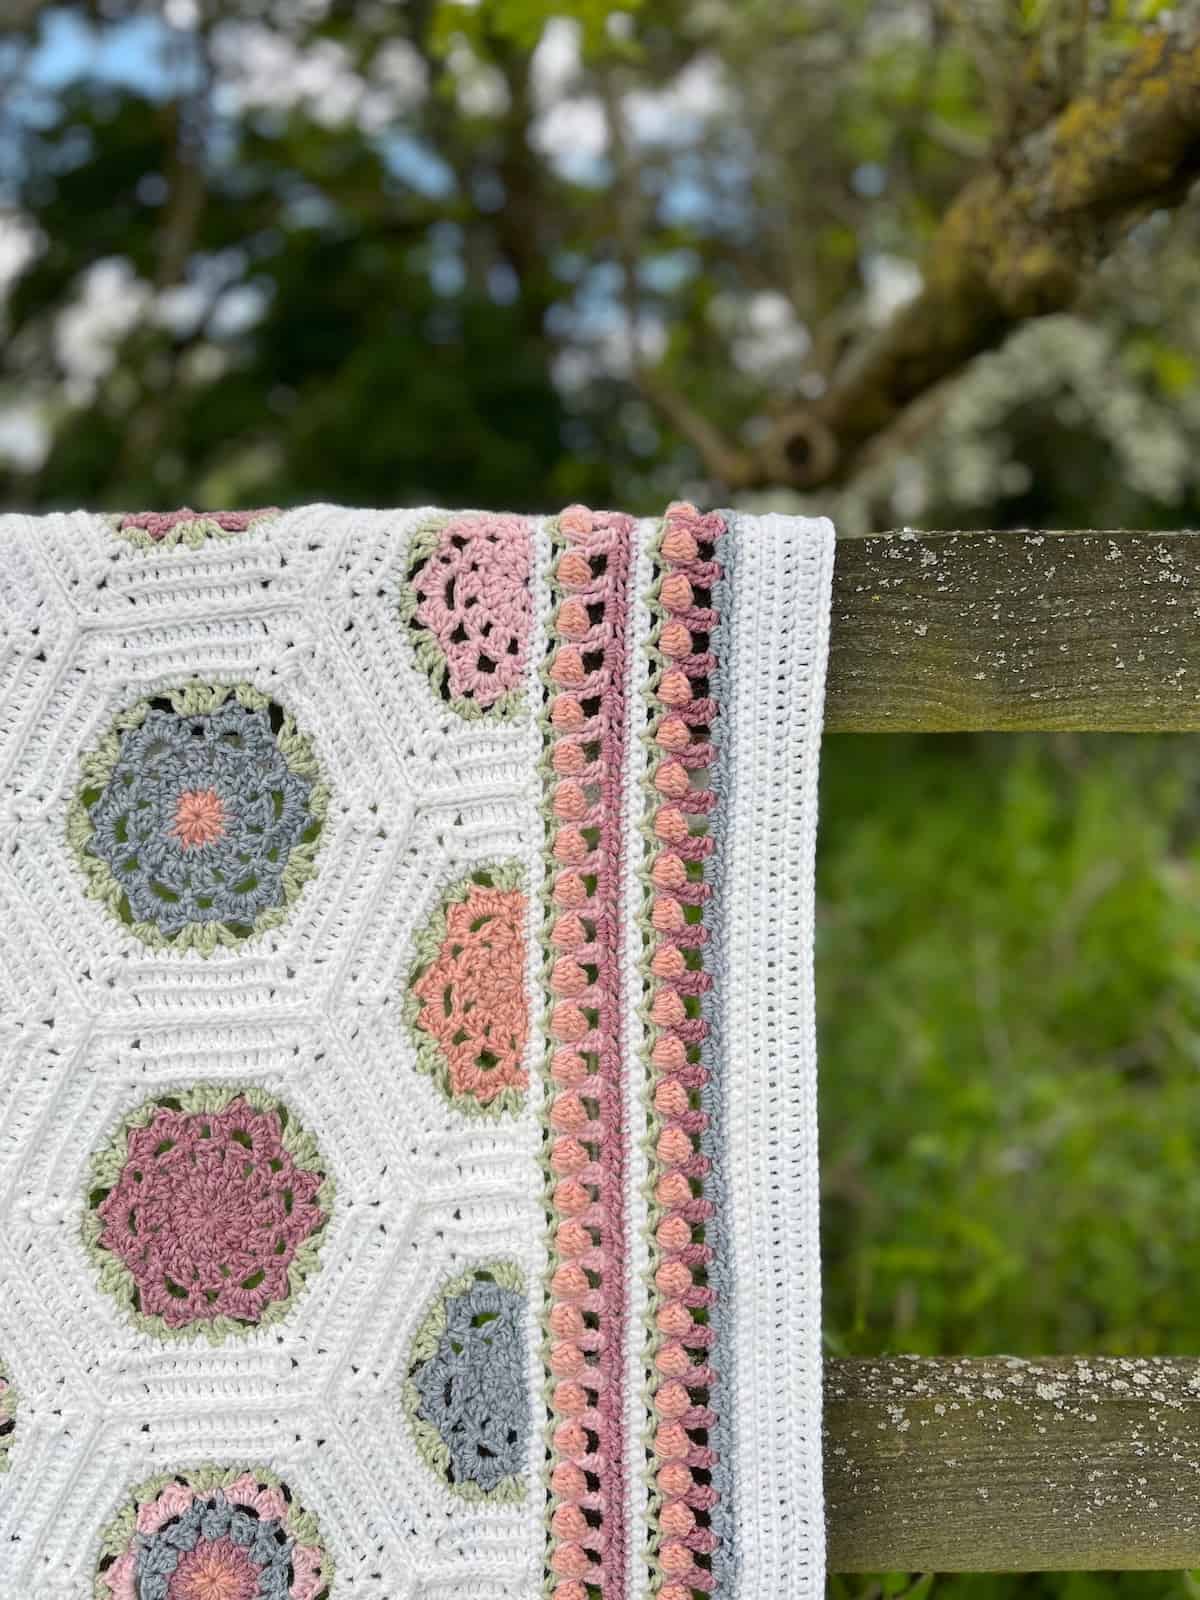
How to join crochet hexagons – step by step photos
Now that you have decided on your layout we are ready to join the hexagon shapes!
For the slip stitch seam we are using you will always need to have the right side of your working facing up at you as you join them.
1. Lay your hexagons out in the order you would like them
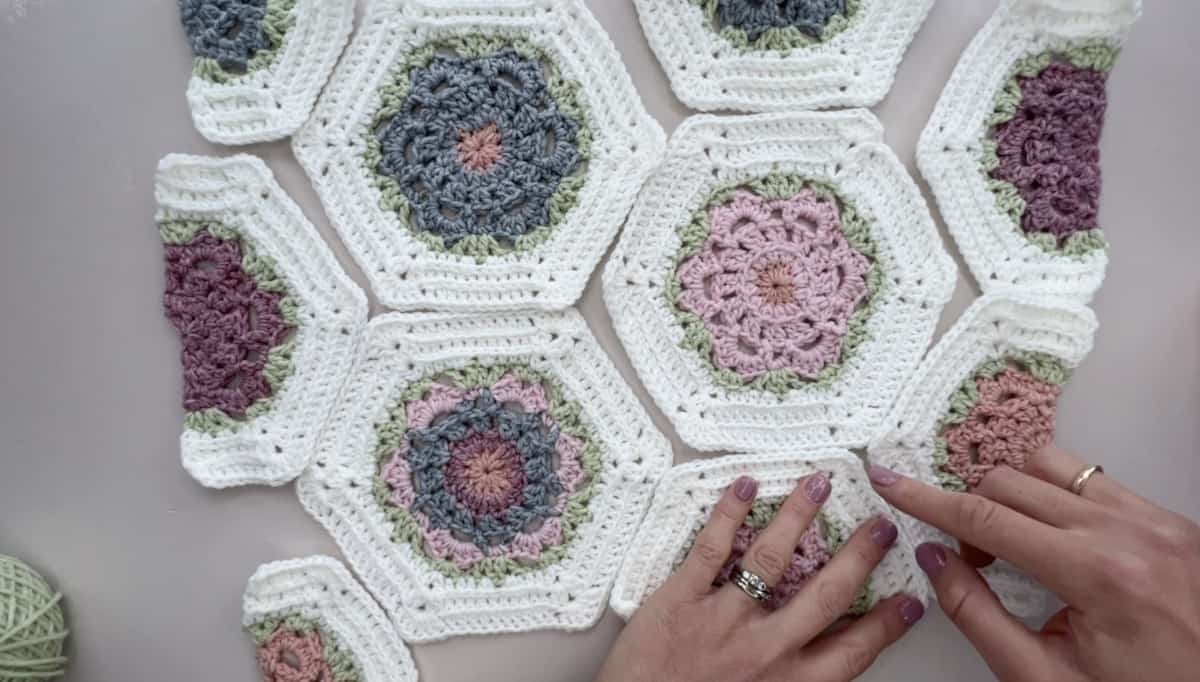
If you don’t have space for all of your hexagons while you are working then make sure to take a photo of them to refer back to.
2. Select your first hexagons to crochet together.
Select the first two hexagons that you need to crochet together. I started at the bottom right hand corner and worked my vertical joins first before then adding the horizontal ones but you can do it in whichever order you prefer.
TOP TIP – make sure that for a flat slip stitch seam you work in the same direction for all of the joins. This will give you a much neater and more professional looking join.
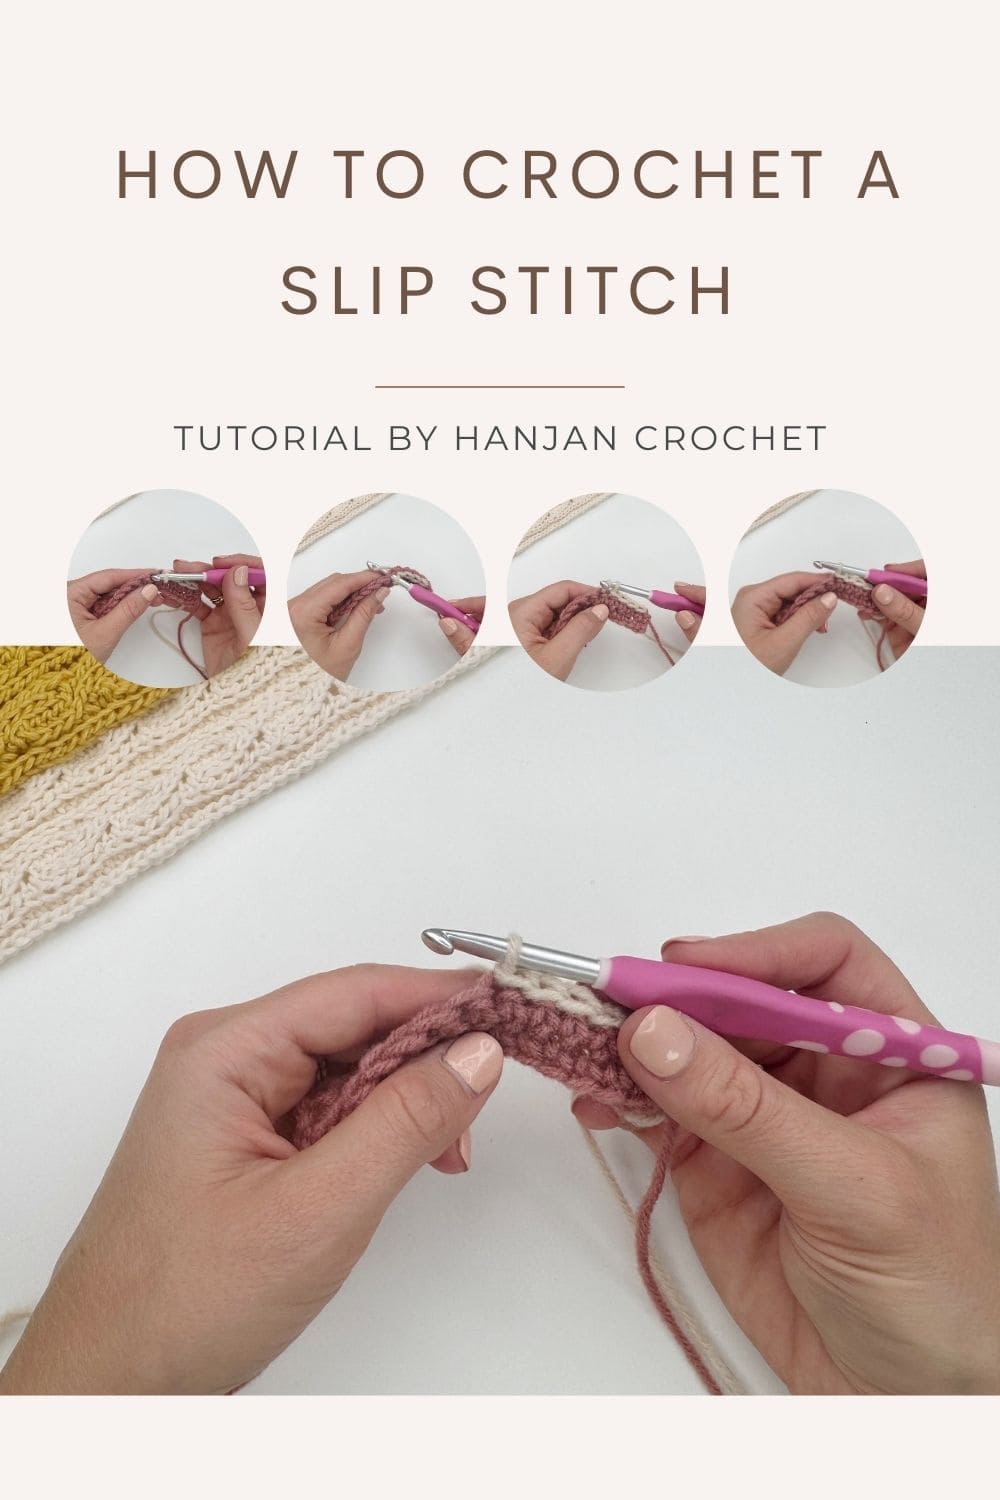
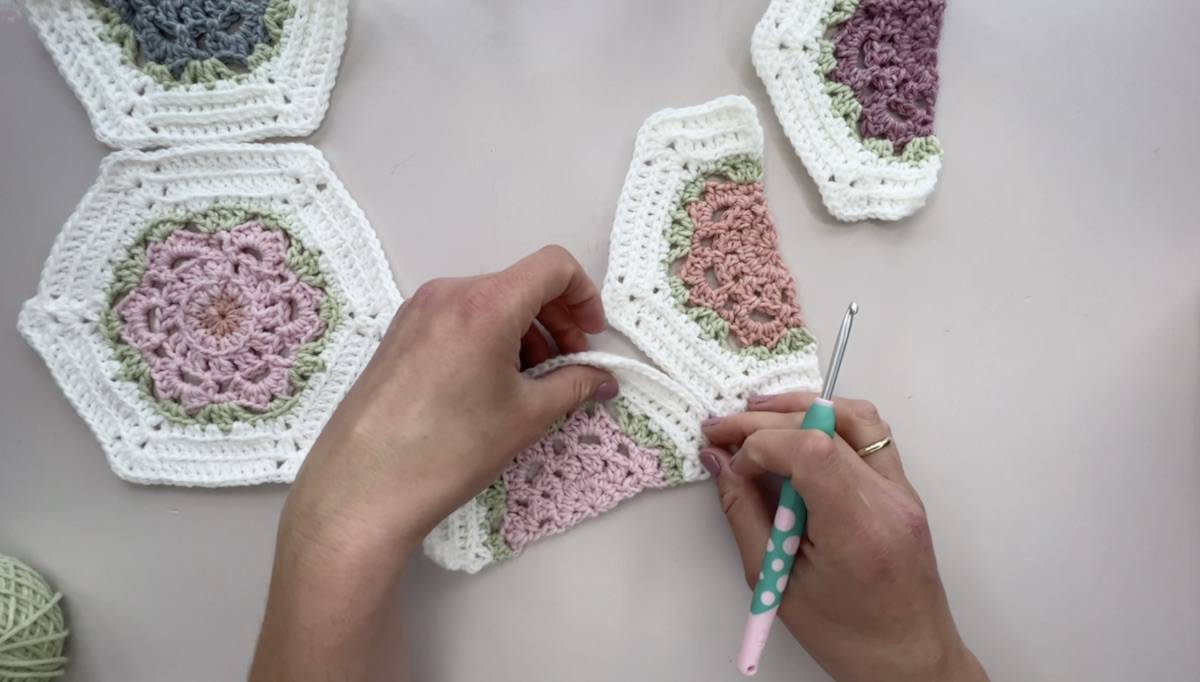
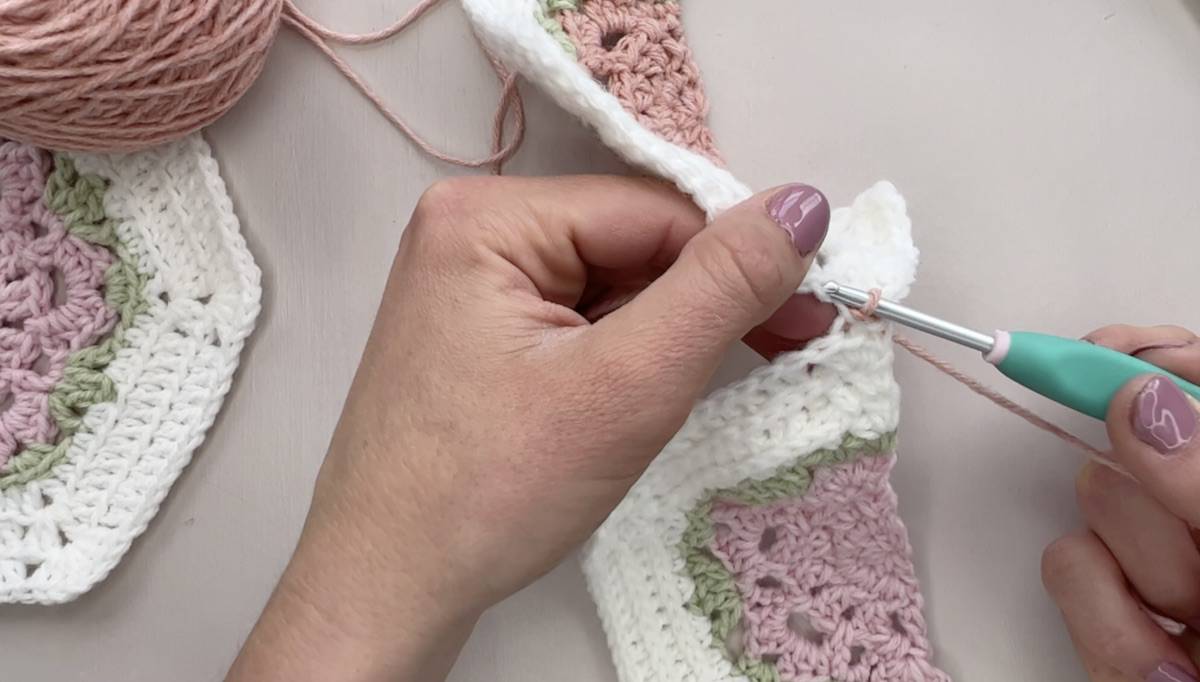
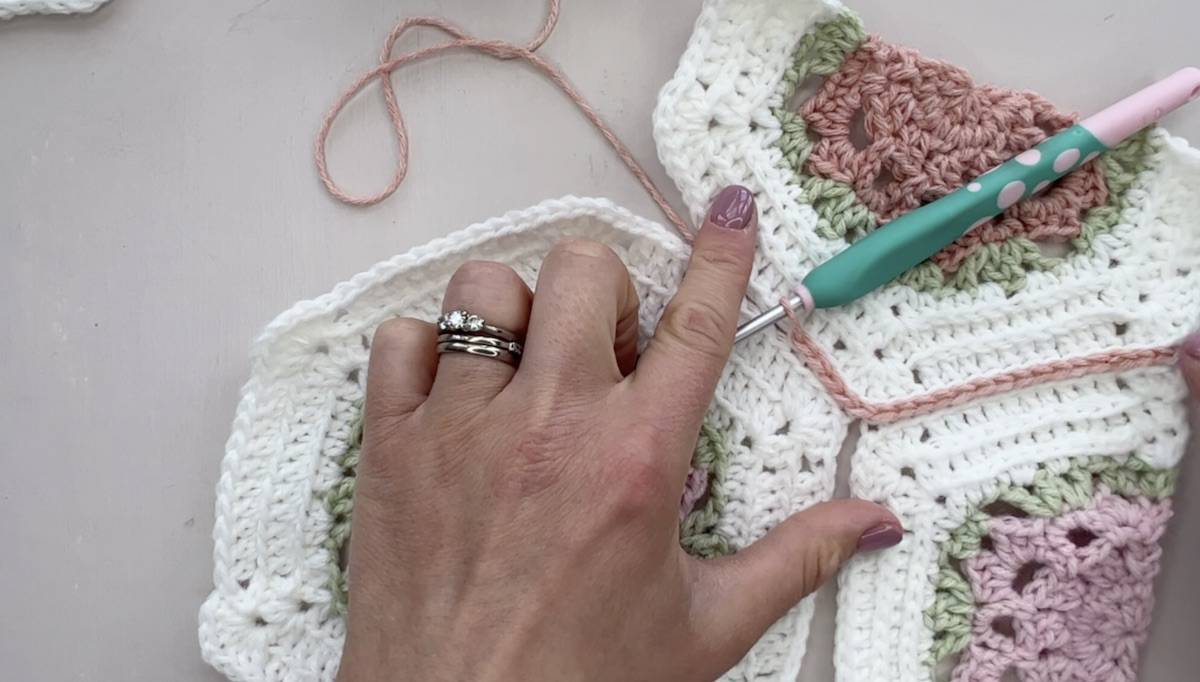
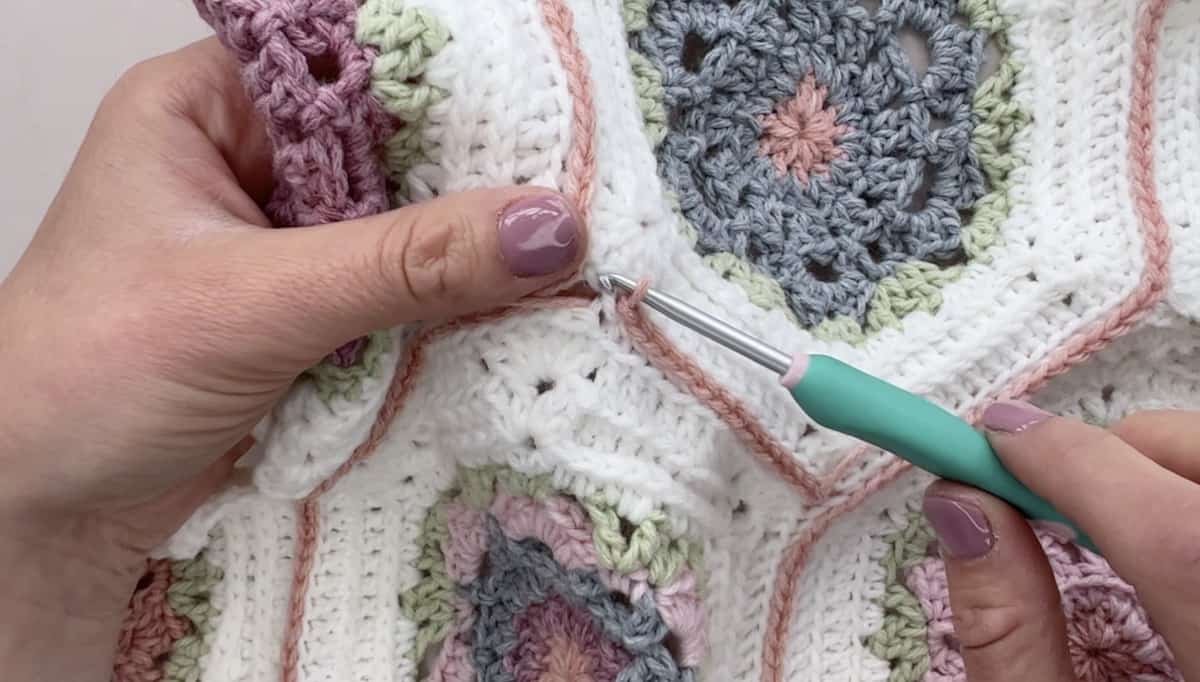
3. Begin the slip stitch join
Insert your hook into the back loop only of the corner stitch of the first hexagon (this one happens to be a half hexagon on the edge of my blanket).
4. Insert hook into next hexagon motif
Now insert your hook into the back loop only of the first stitch of the next hexagon that you are joining to.
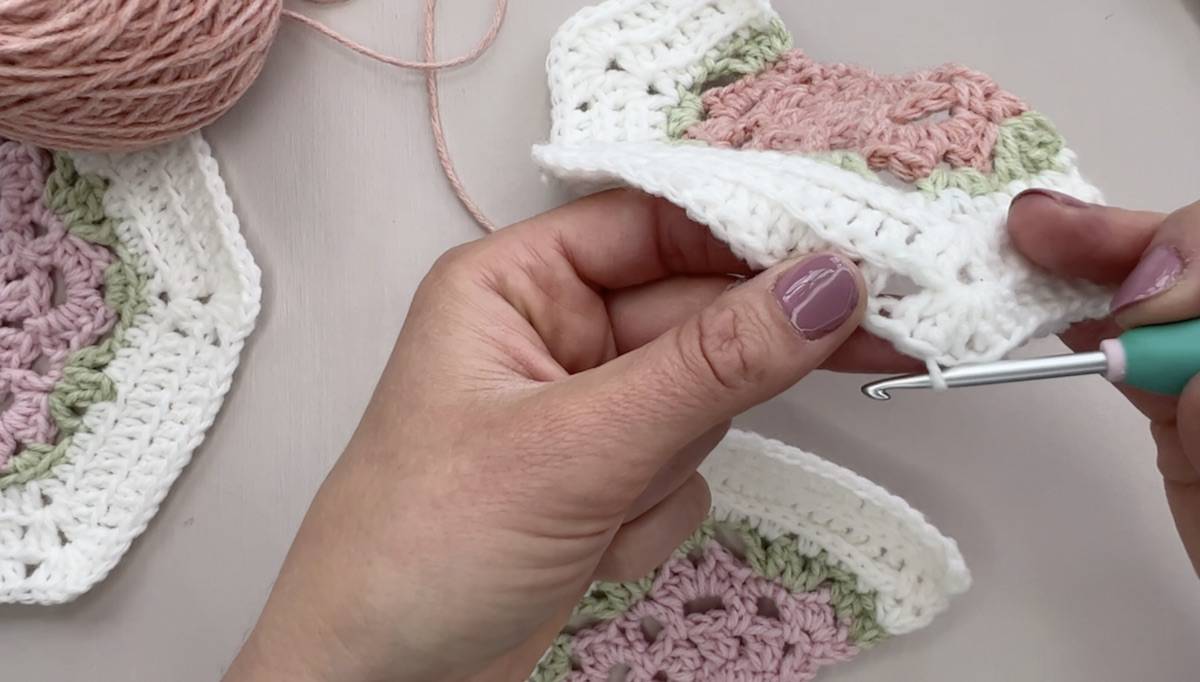
5. Pull working yarn through both loops on the hook
With the working yarn at the back of the hexagons (shown in a different colour here) pull through both loops on the hook. This will leave one loop in the colour you are using to join.
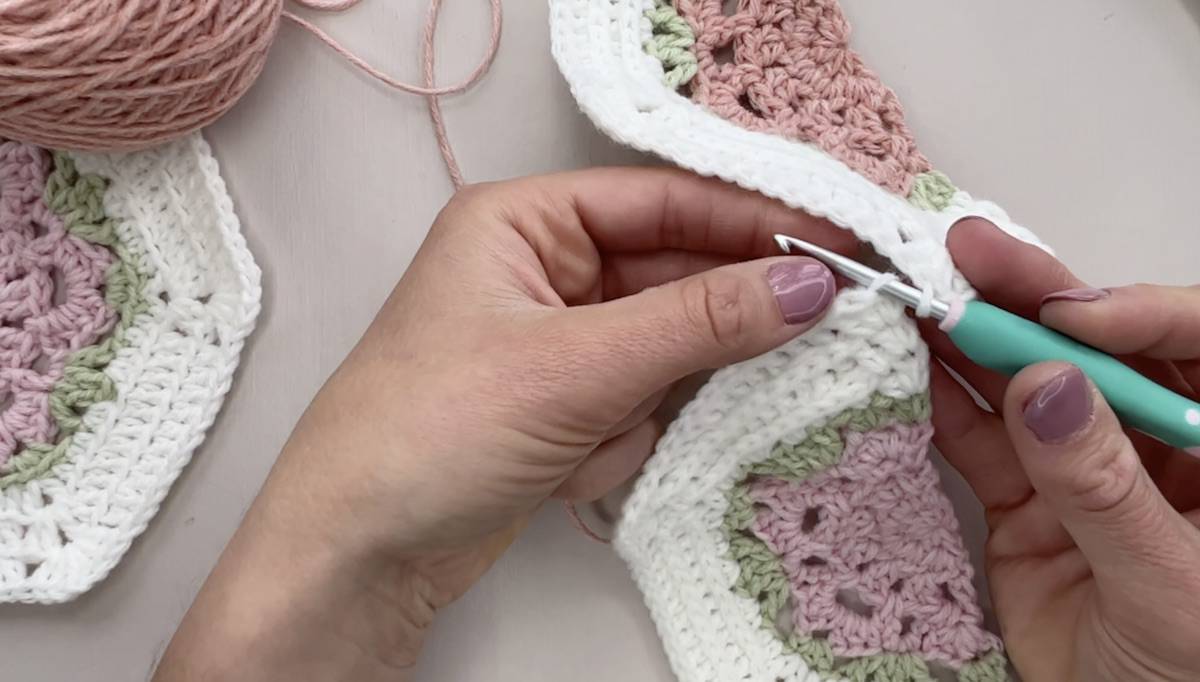
6. Repeat the process for each stitch along the edge of the hexagon
With the first stitch complete you now need to repeat steps 3-5. Insert the hook into the back loop only of the next stitch along on the first hexagon and then the back loop only of the corresponding stitch on the other hexagon. With the working yarn at the back, yarn over and pull through all the loops on the hook to complete the next stitch.
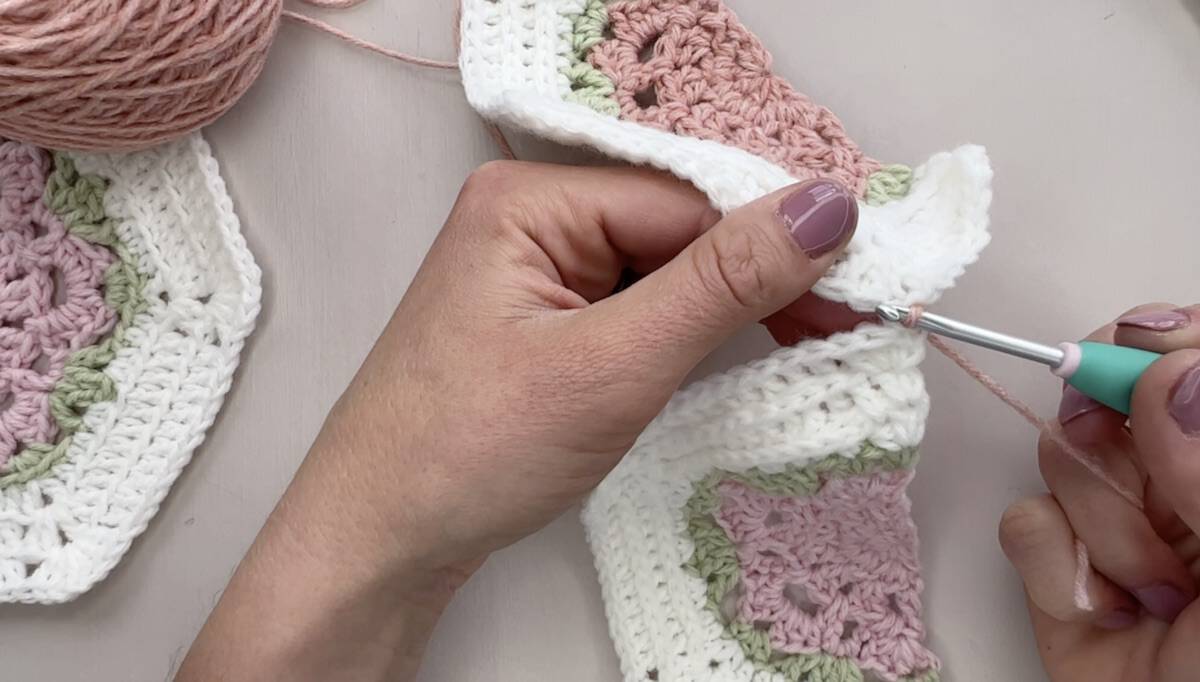
7. First side of flat slip stitch seam
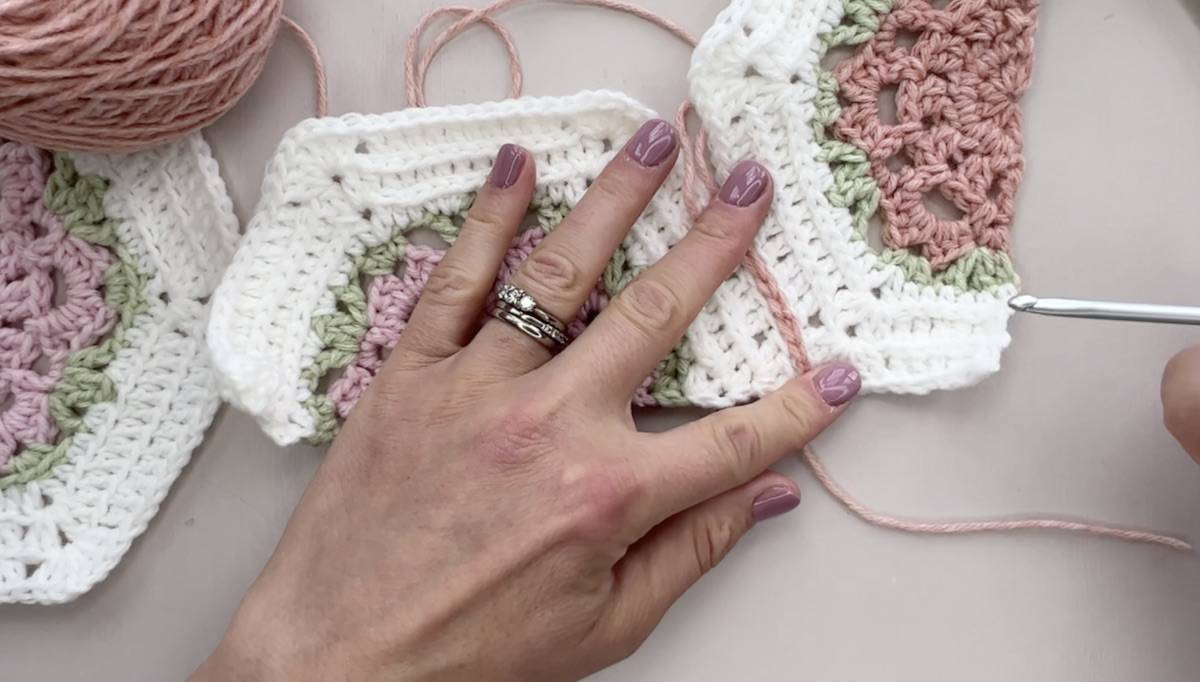
Continue working in the same way until you get to the corner of your hexagons.
8. Begin to join next hexagon together
Once you have joined the first side we are ready to continue up the vertical line and join the next hexagon. Begin by inserting your hook into the back loop only of the next stitch on the first motif as shown.
9. Add next hexagon to the blanket
Select your next hexagon and insert hook into the back loop only of the first stitch to join and then using the working yarn from behind, complete the slip stitch as you have done previously.
10. Continue to join the hexagons
Continue to crochet the hexagons together with a slip stitch until you reach the next corner.
11. Complete the vertical join
Carry on joining the hexagons in the same way until you reach the end of the vertical line as shown here. Then repeat the whole process to join the next vertical line of hexagons making sure to work in the same direction as you did the first one in.
12. Complete all of the vertical joins
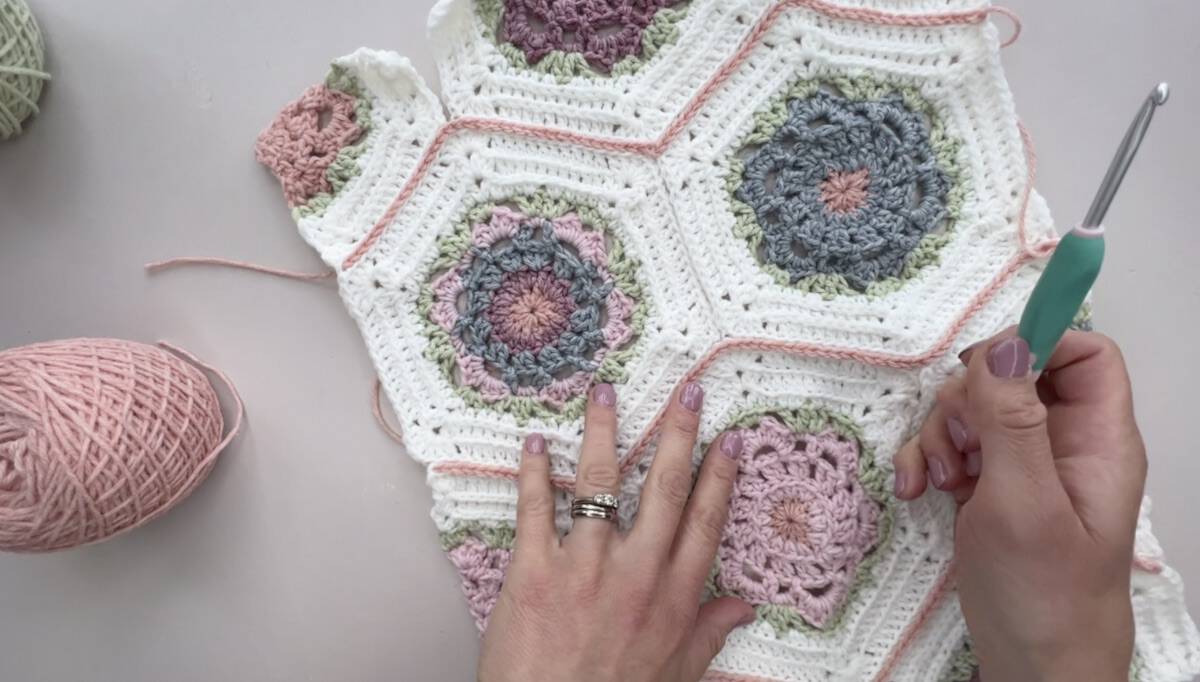
Once all of your vertical joins are complete we are ready to start joining the horizontal lines that join the hexagons together now.
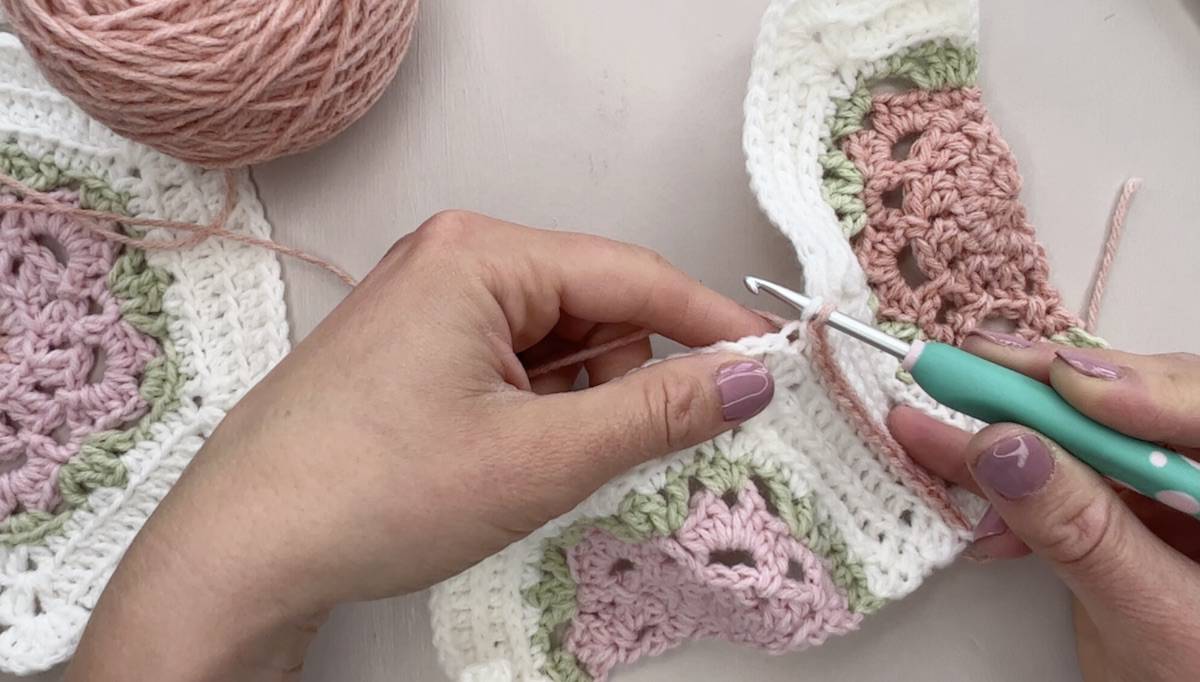
13. Insert hook to begin first horizontal join
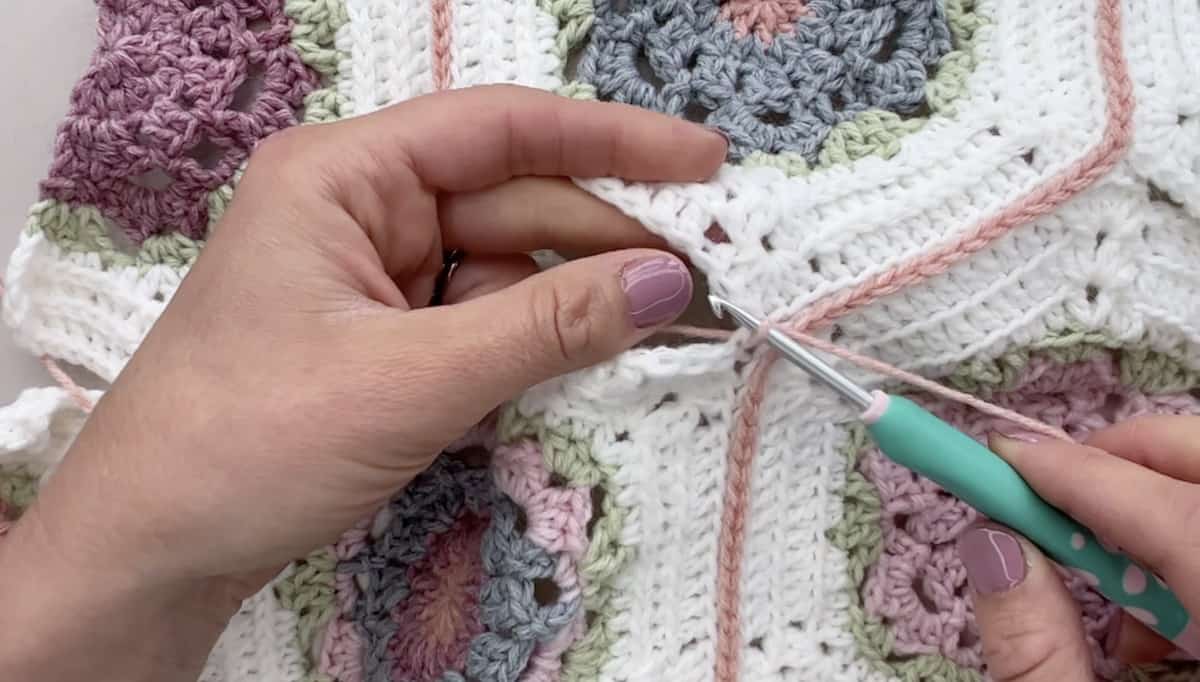
Choose any of the small horizontal joins to begin with and insert your hook into the back loop only of the stitch that is already joined as part of the vertical line. This will help keep your work much neater.
14. Join hexagons with slip stitch seam
Work along the horizontal line in the same way as before, joining each stitch with a flat slip stitch seam.
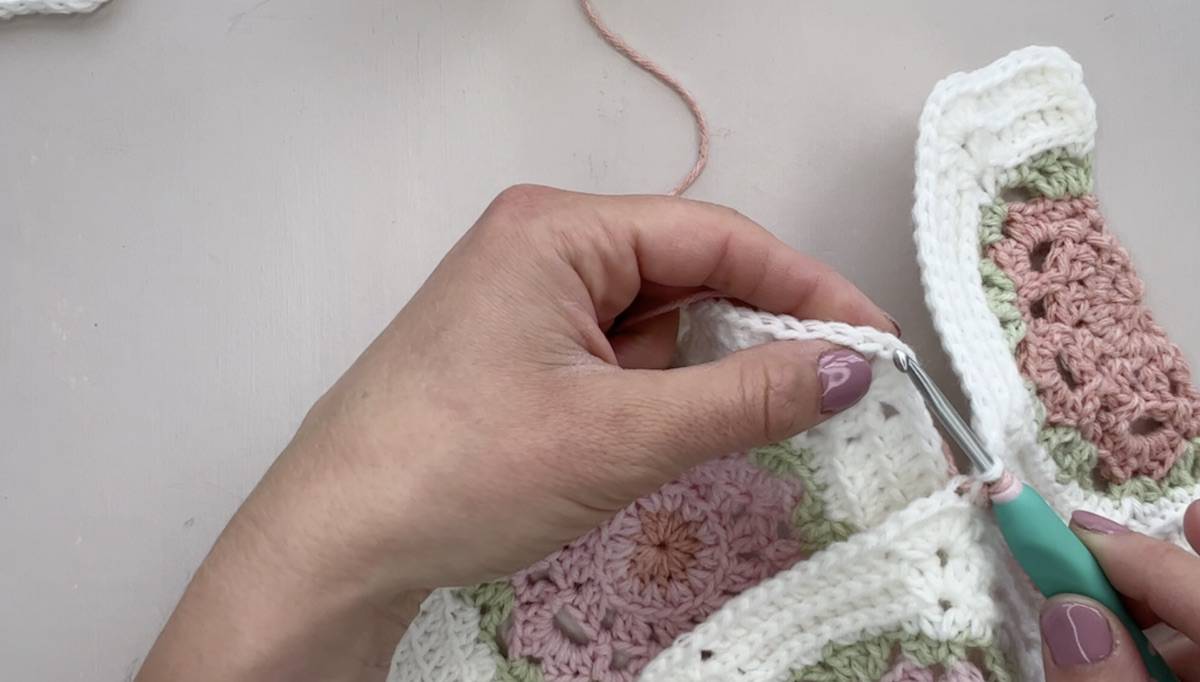
15. Pull final stitch through
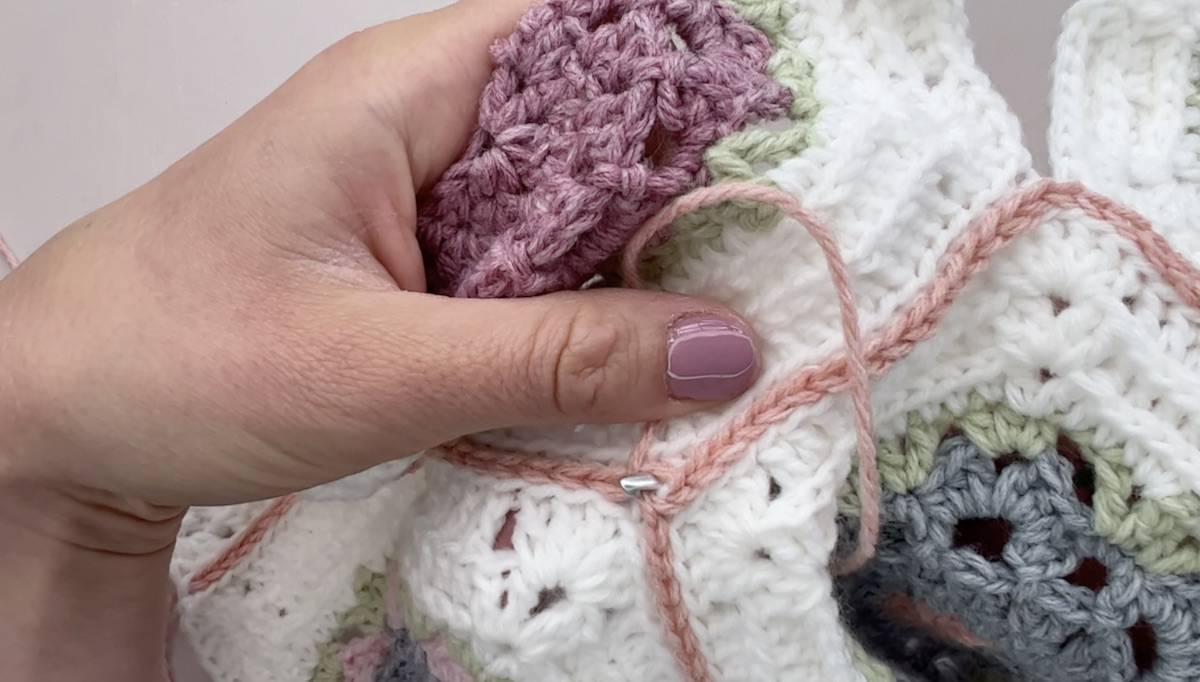
After completing the final slip stitch pull the yarn through the centre of the stitch in the vertical join you have just come to. This will make a much neater finish and get your yarn in the right place to weave in the ends.
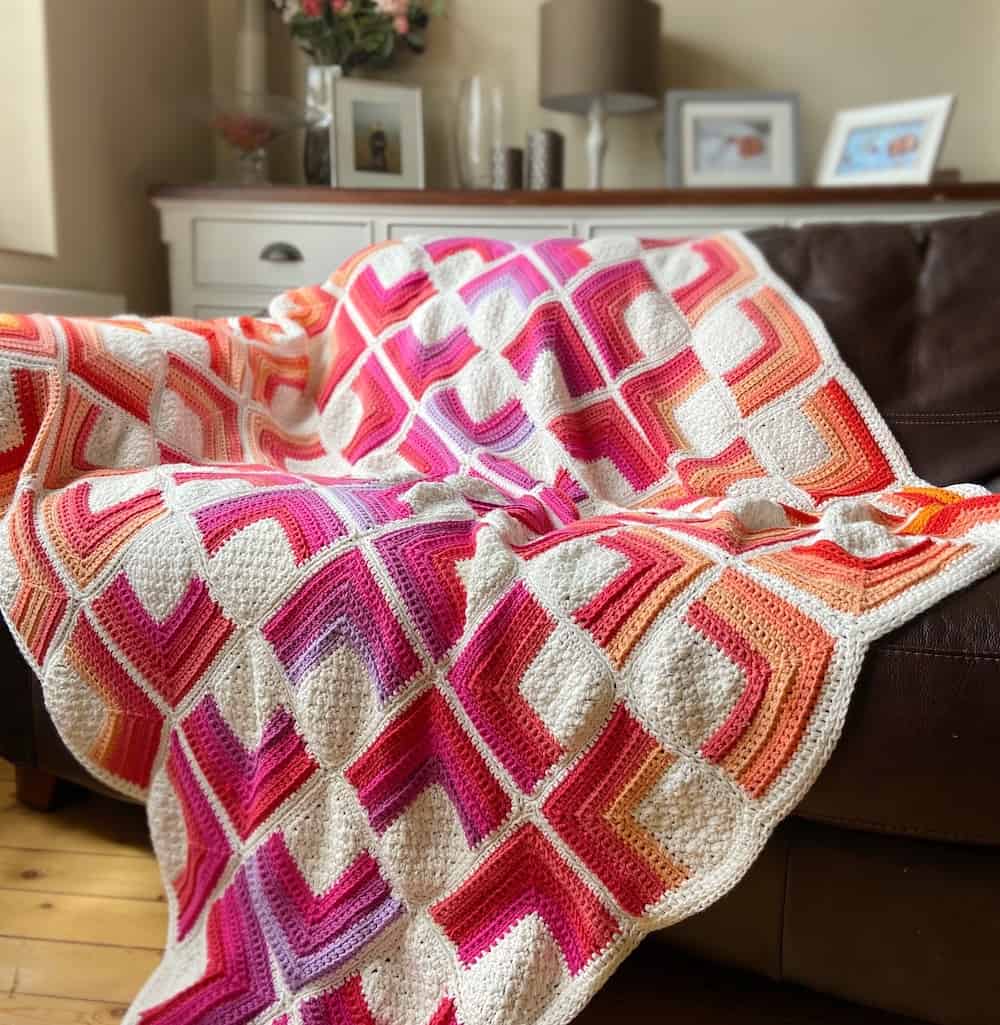
Once complete this is how your crochet hexagons will look like when they are joined together! Such a neat and flat join that is not only great for hexagons but squares, octagons, rectangles and any other shape you like to crochet!

Watch the video tutorial here:

Join HanJan and Share Your Crochet!
I really hope you’ve enjoyed learning how to join crochet hexagons together with a flat slip stitch seam. It’s one of my favourite joining methods for everything I crochet!
It’s an honour to be able to create and share my free crochet patterns with you. I’d love to stay connected and send you regular discount codes and free patterns! Please sign up for my subscriber list to get a free gift right now!
I look forward to seeing your finished crochet projects, so please share them with me in the HanJan Crochet Facebook group or on Instagram and tag #hanjancrochet.
Does Lifetime Ad-free Access sound good?
Come and join me for the Time to Bloom course and get extra videos, tutorials, downloads and more!