This post may contain affiliate links. Please see my full disclosure and privacy policy for details.
I have this thing for textured crochet stitches and I just can’t stop myself from experimenting to figure out how to add more and more to everything I design. So after lots of fiddling around I came up with the herringbone half double crochet moss stitch in the back loop only which is a right mouthful but goodness me is it a stunning crochet stitch!
I have long been a fan of both the half double crochet herringbone stitch that gives you that slanted fabric and the crochet moss stitch that gives you that amazing drape so I tried them out together and they worked like magic!
I came up with idea to work into the back loop too because it just gives you even more texture and also allows the fabric to breathe a little more and be flexible – it makes it great for wearables like mittens and socks.
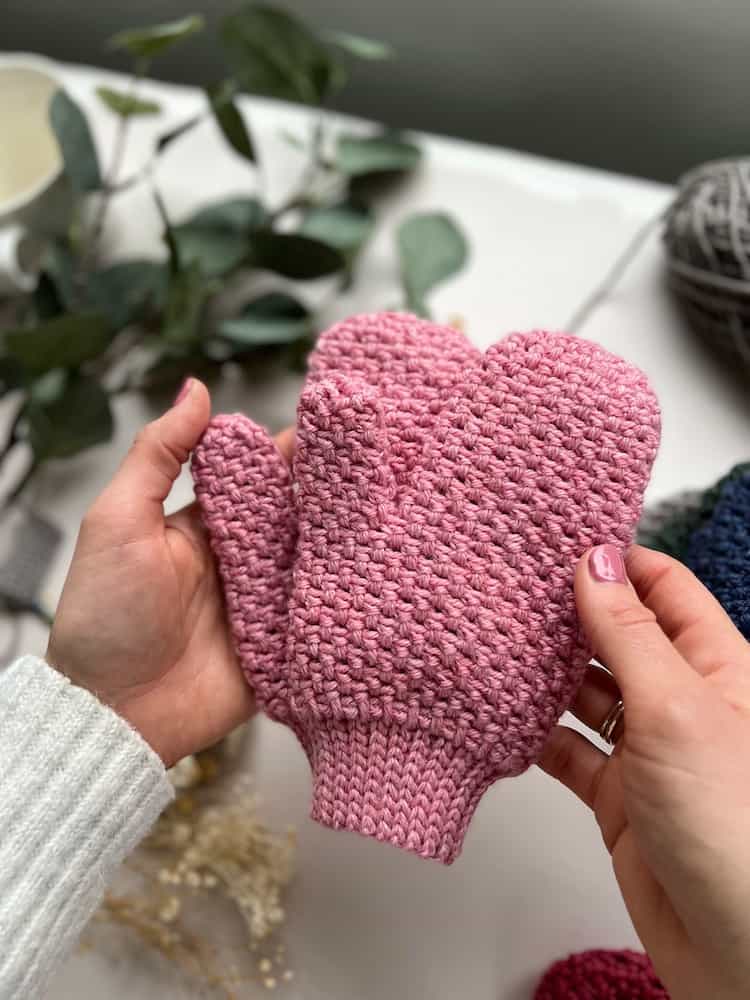
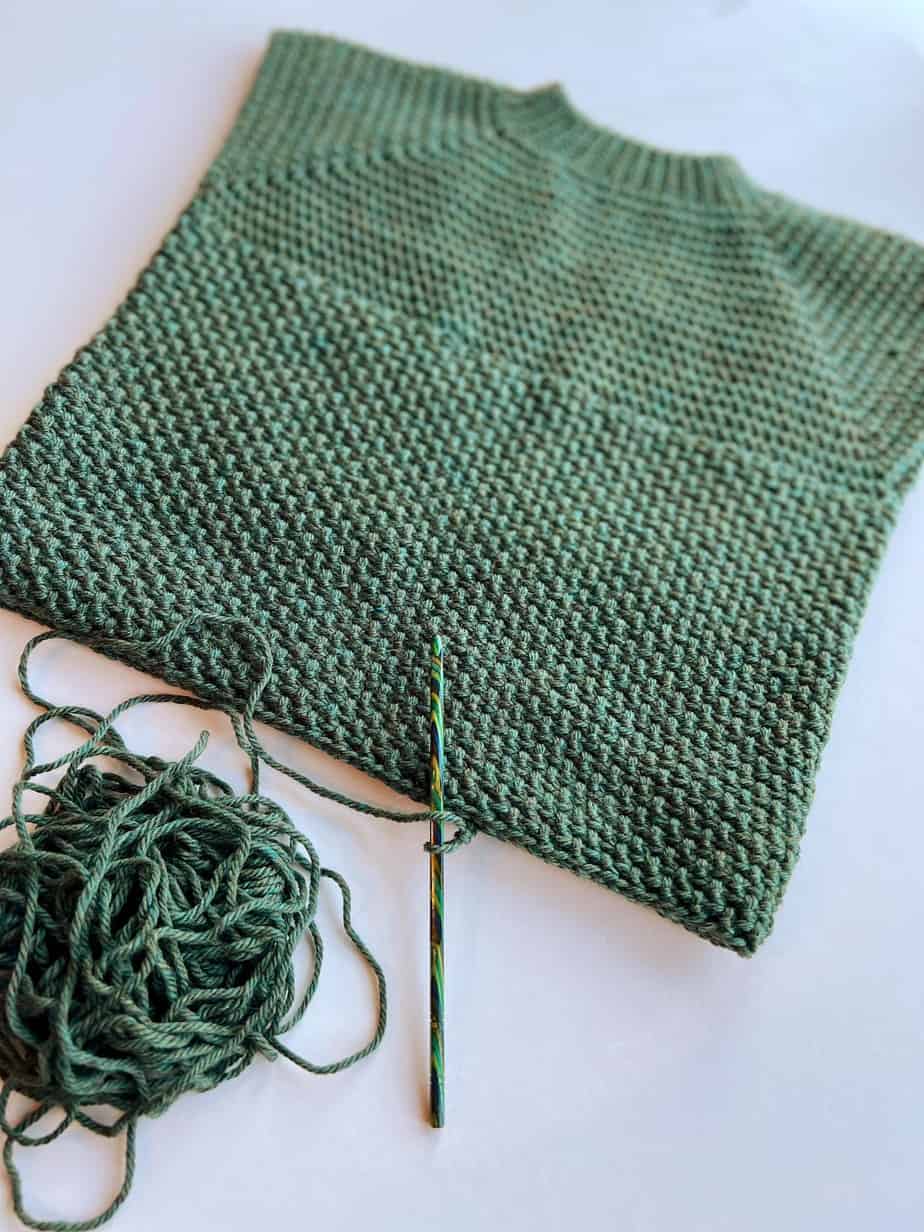
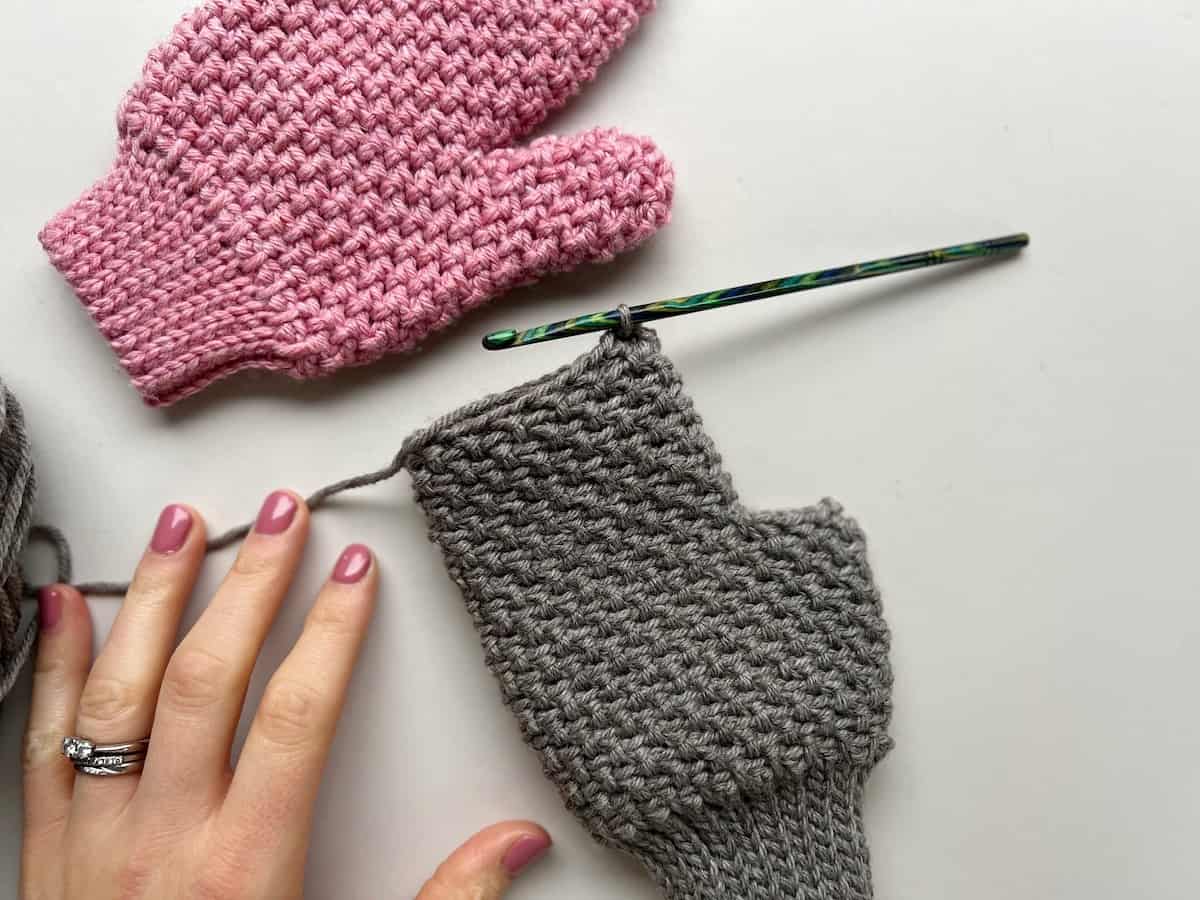
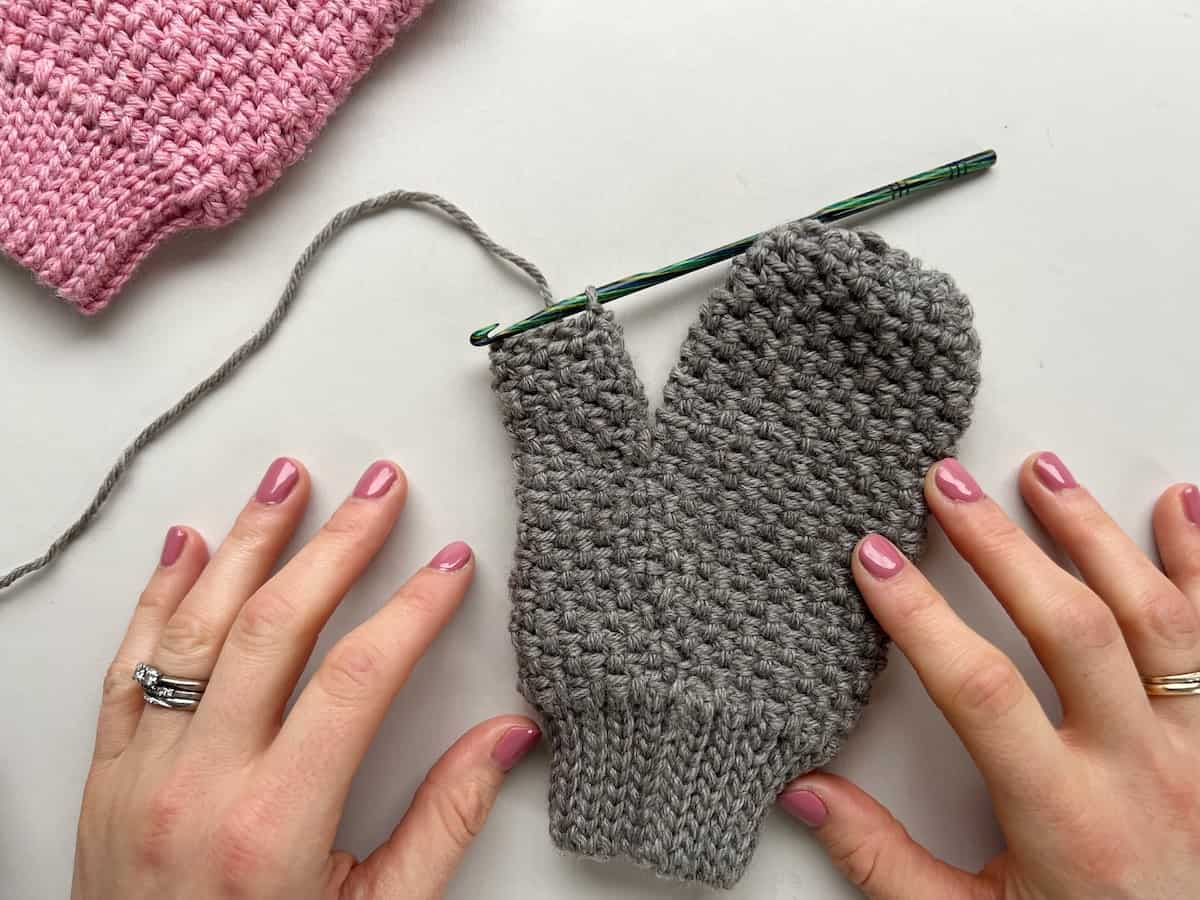
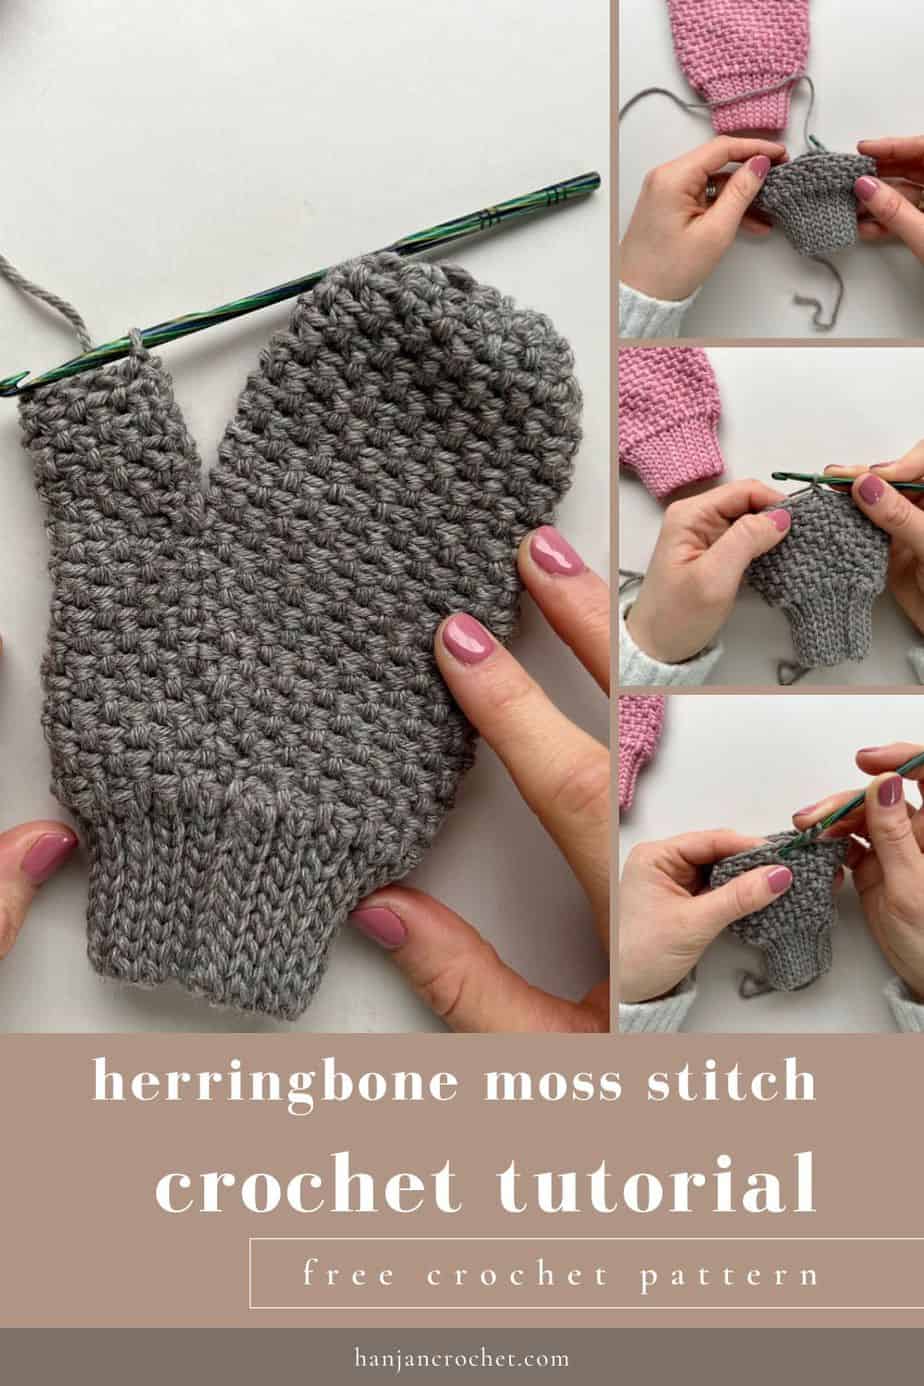
The stitch is featured in my Herringbone Moss Stitch Mittens that you can see below.
Want to remove Ads?
- Get ad-free access on all posts; 200+ patterns & tutorials!
- Member-only resource library with downloadable PDF guides
- Bonus eBook (Worth over $30)
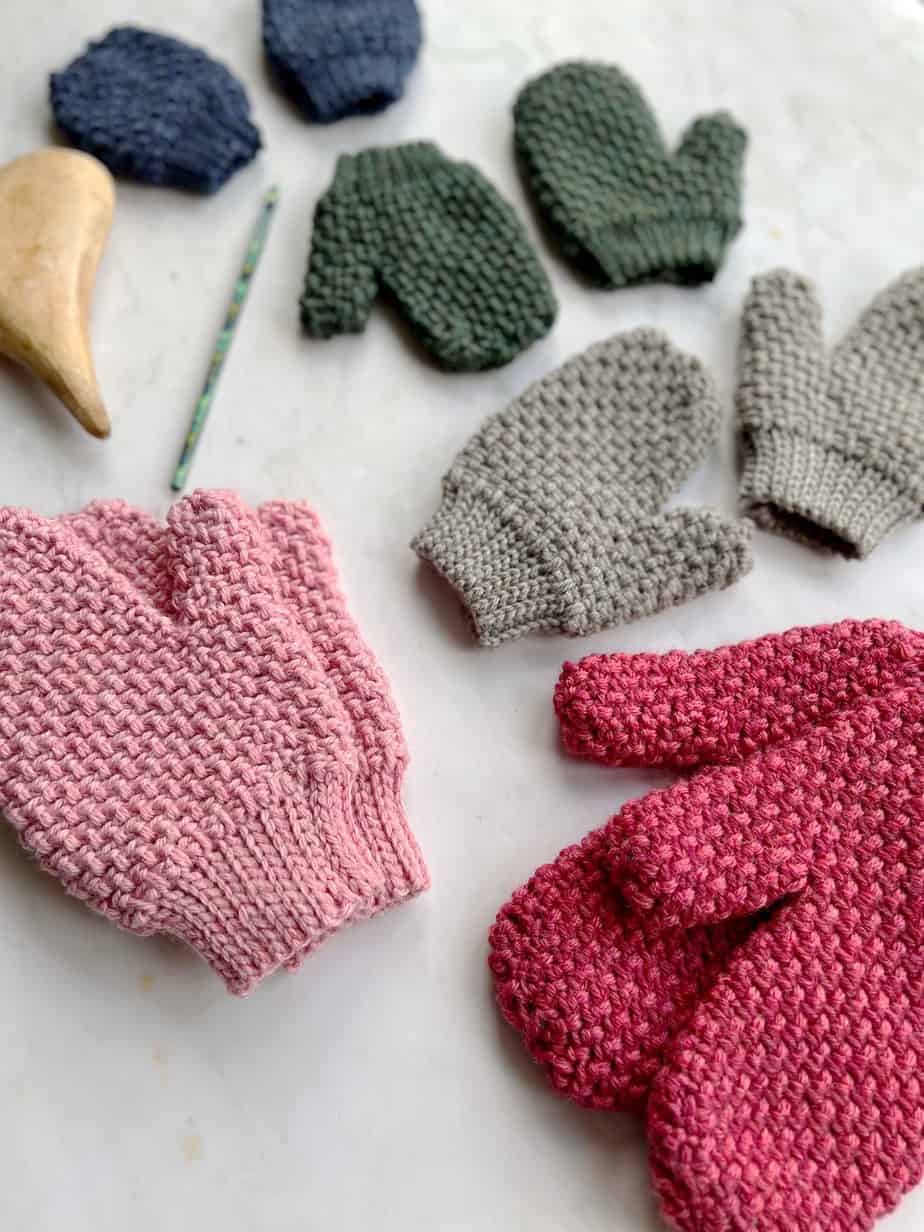
Table of Contents
Why I love the herringbone half double crochet moss stitch so much
If you know me at all you’ll know that I love using the moss stitch! I have a number of designs that use it and have a tutorial about the more common double crochet moss stitch that uses exactly the same principle as the herringbone half double version that we are talking about here.
In simple terms, the moss stitch is just a two row or round repeat that works by having a stitch followed by a chain space. On the next row or round you just ‘fill in’ the chain spaces from the previous one with a stitch and then make a new chain space for the next round.
I’ve mixed it up a bit here though and used a herringbone crochet stitch which is generally known for being worked in rows so that you get a diagonal or slanted feel to it but the nature of the moss stitch (and the fact that we are working in rounds here) means that it sits nice and straight but still has oodles of texture.
You can work this stitch as a half double crochet but I also love the herringbone double crochet stitch for even more slant and gorgeous drape too!
It might look like it’s really complicated, especially if you want to use it for colour work but you only ever need to use one colour per row but because the stitches drop down into two rows below it gives the illusion of tricky colour changes, perfect!
Is the herringbone moss stitch best crocheted in the round or flat in rows?
The beauty of the herringbone crochet moss stitch is that it works beautifully in flat rows or in the round!
I have used it for both and whilst it gives a slightly different texture you’ll see that both are stunning crochet stitches to work with.
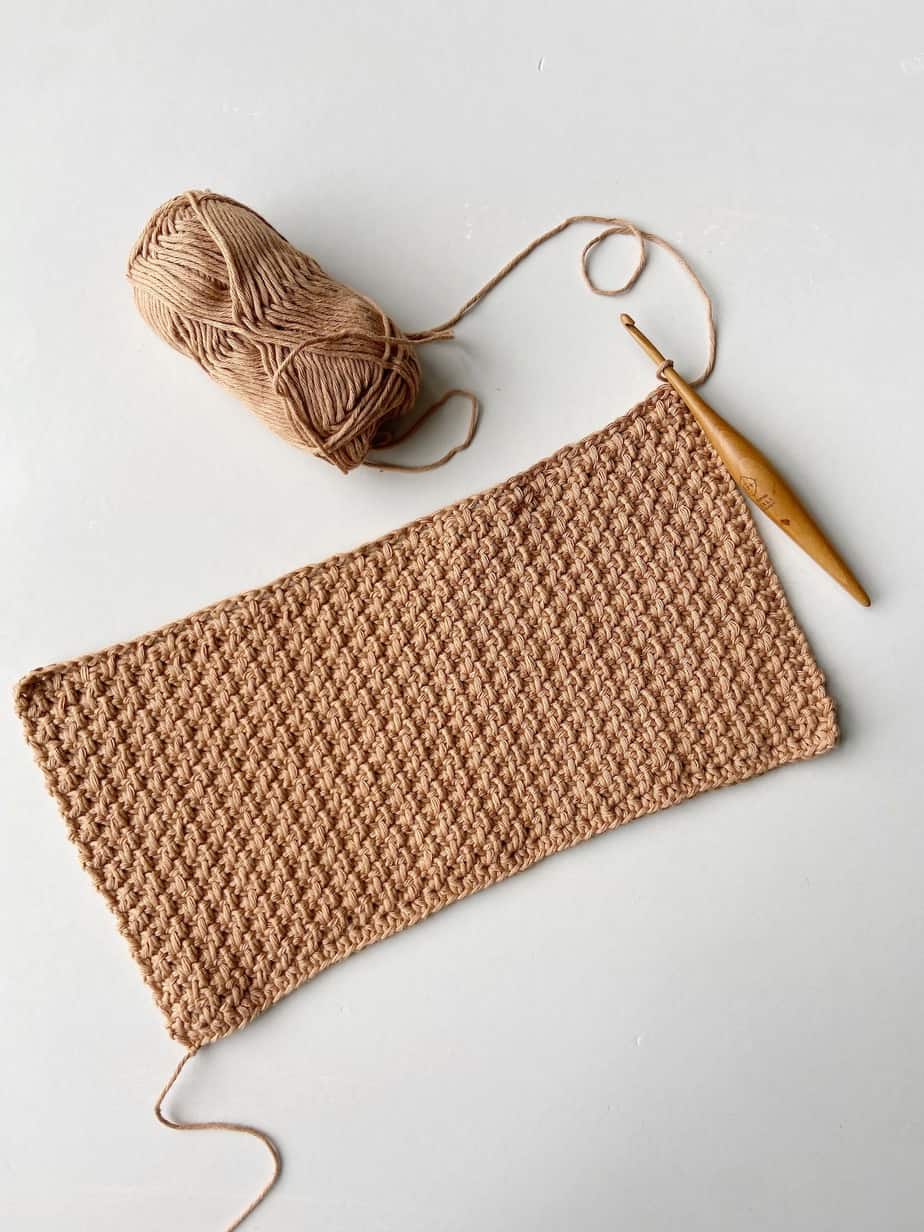
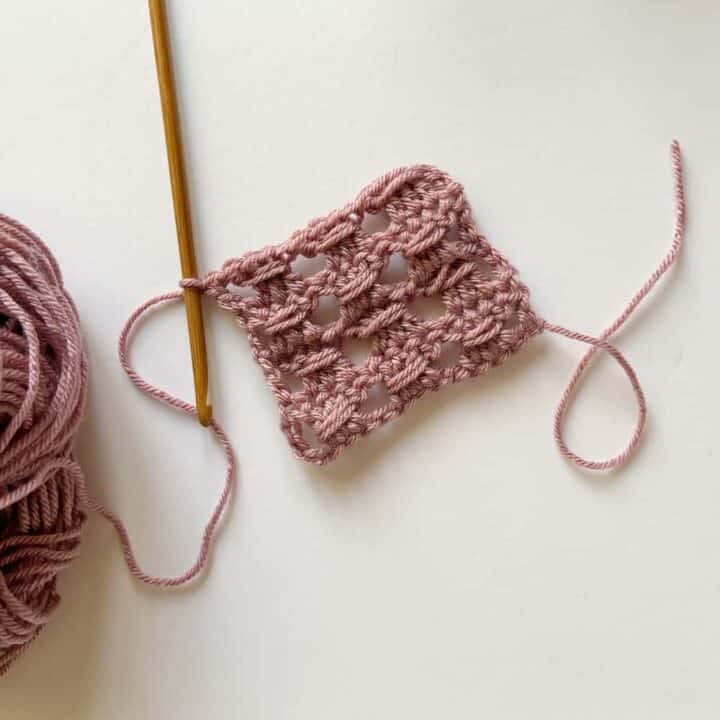
Here it is worked in flat rows that go back and forth:
And here we have it crocheted in the round –
Can you see the subtle difference? I can’t decide which I like best!
What projects can I crochet with the herringbone moss stitch?
Anything you like!
I’m delighted to say that I’ve designed a few patterns using this stitch and still have more to come!
Here are some of my patterns using it:
- free crochet mittens pattern – in sizes for the whole family.
- free crochet winter hat pattern – it co-ordinates perfectly with the mittens.
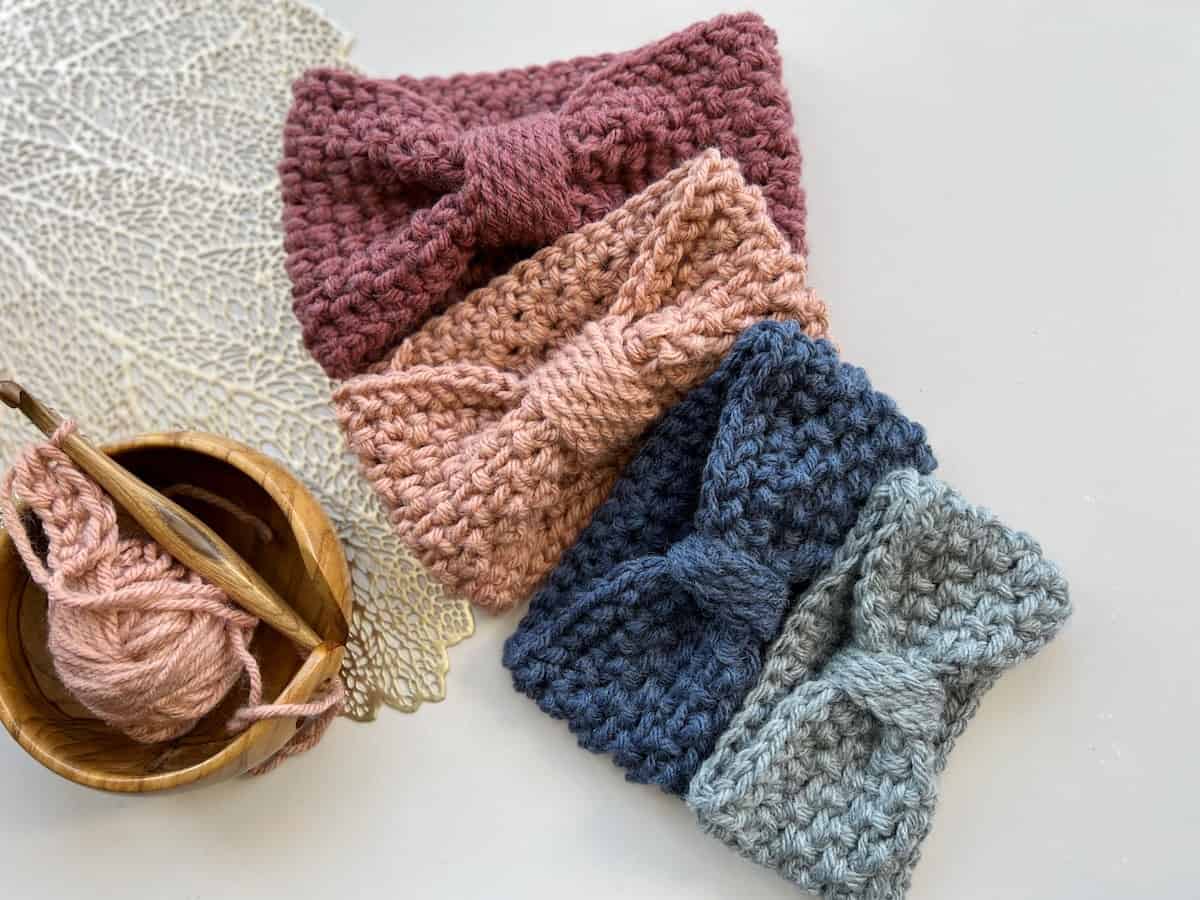
- free chunky crochet headband pattern – you can make one in less than half an hour it’s so quick!
- free crochet dickie pattern – this one works in rows rather than rounds and is great fun.
- free crochet backpack pattern – just 2 rectangles worked in rows and joined together!
I’m so excited to release them both soon! You could also use it for bags, baskets, hats and all sorts – let me know if you try it 🙂
Materials
I used Swish DK by WeCrochet for the tutorial photos which is a lovely, soft, 100% Superwash wool double knit yarn, 123yds/50g.
You’ll need a crochet hook that works with the yarn that you choose (remember to experiment if you want to change the drape). I used my 4.5mm/G+ Caspian wood crochet hook which worked brilliantly with this yarn weight.
The only other things you’ll need is a pair of sharp scissors and a darning needle to weave in your ends.
Crochet Terms You Need To Know
It’s also important to make sure make sure you know whether you are working in US or UK crochet terms. For the written pattern here, I’ll add both versions so in US terms you’ll be working double crochet stitches and UK terms you’ll be working treble crochet stitches.
For the written pattern you’ll need the following terms:
ch(s) – chain(s)
st(s) – stitch(es)
RS – right side
rep – repeat
sp – space
| UK Crochet Stitches | US Crochet Stitches |
| htr – half treble | hdc – half double crochet |
Special Stitches:
Herringbone half double crochet: Hhdc
Yarn over, insert hook into next stitch, yarn over and pull up a loop (3 loops on hook). Pull first loop straight through the second loop (similar to a slip stitch to leave 2 loops on the hook). Yarn over, pull through two remaining loops on hook.
Back loop only herringbone half double crochet moss stitch: Hhdc-moss
Work as for Hhdc but insert hook into back loop only of unworked stitch 2 rounds below. Work over the chain 1 space on the previous round.
Written Pattern
Notes
You can work the herringbone half double crochet moss stitch in the following multiples depending on whether you are working flat rows or in the round.
Flat Rows:
Any multiples of 2 + 1 (if you want to be more adventurous with blocks of stitches then just jot it down on some graph paper first to check it works).
Rounds:
Any multiple of 2 will work in rounds.
Colour changes
If you decide to work with multiple colours then change colour on the final yrh on the last stitch of the row before you then turn and work the next row with the new colour.
A ch1 at the beginning of a row or round does not count as a stitch.
Herringbone Half Double Crochet Moss Stitch in US Terms:
Let’s work in the round for this example –
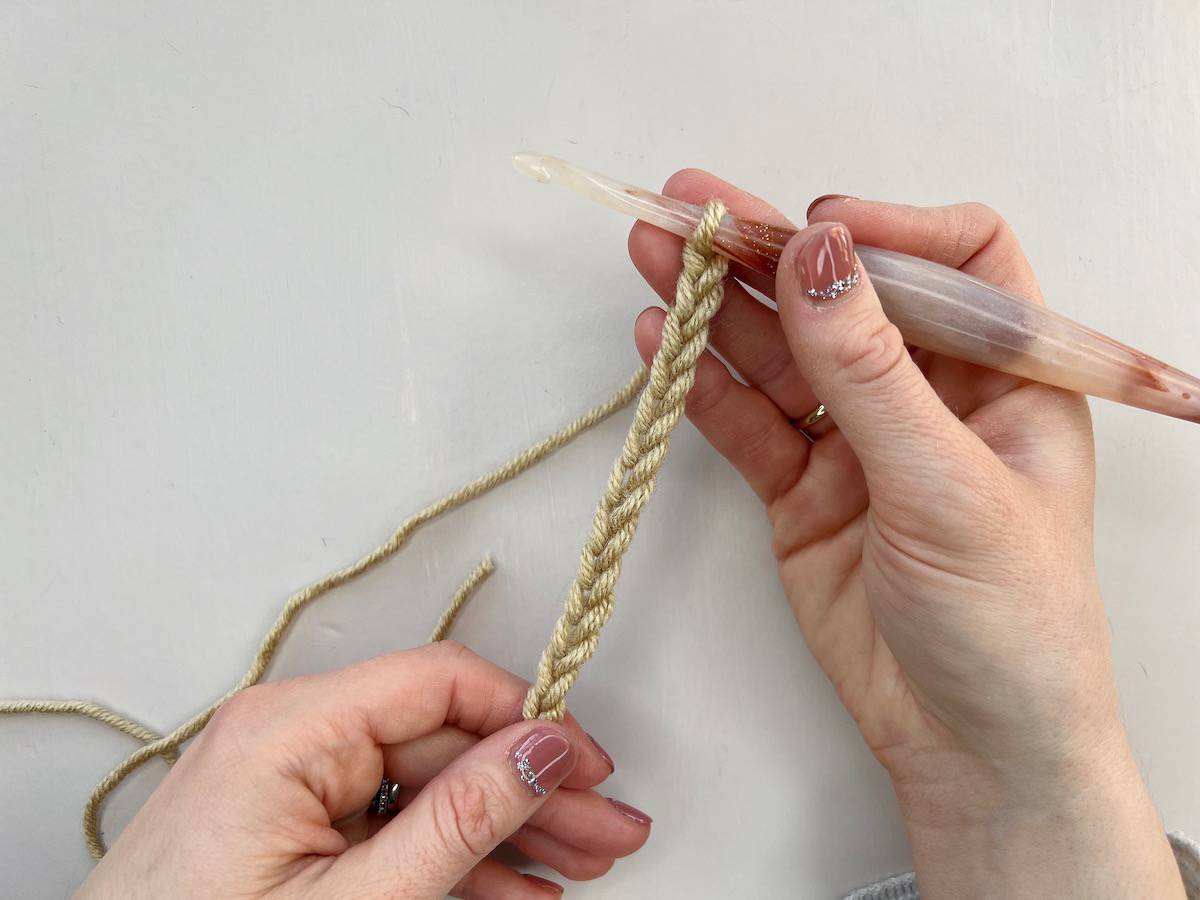
Round 1: Foundation half double crochet your chosen amount of stitches (multiple of 2), ss in 1st to form a ring.
Round 2: ch1, *Hhdc in next, ch1, skip 1; rep from * around, ss in 1st to join.
Round 3: work all moss stitches in blo from now onwards, ch1, Hhdc-moss in skipped st below ch-1 sp, ch1, skip next st, *Hhdc-moss in next skipped st below ch1-sp, ch1, skip next st; rep from * around, ss in 1st Hhdc-moss to join.
Round 4: ch2 (counts as ch1-sp), Hhdc-moss in next skipped st below ch-1 sp, *ch1, skip next st, Hhdc-moss in next skipped st below ch-1 sp; rep from * around, ss in 1st ch of beginning ch2 to join.
Rounds 3 and 4 create the set pattern.
Repeat the set pattern as many times as you like.
Final round: rather than working chain spaces in the final row, replace them with a sc instead to finish.

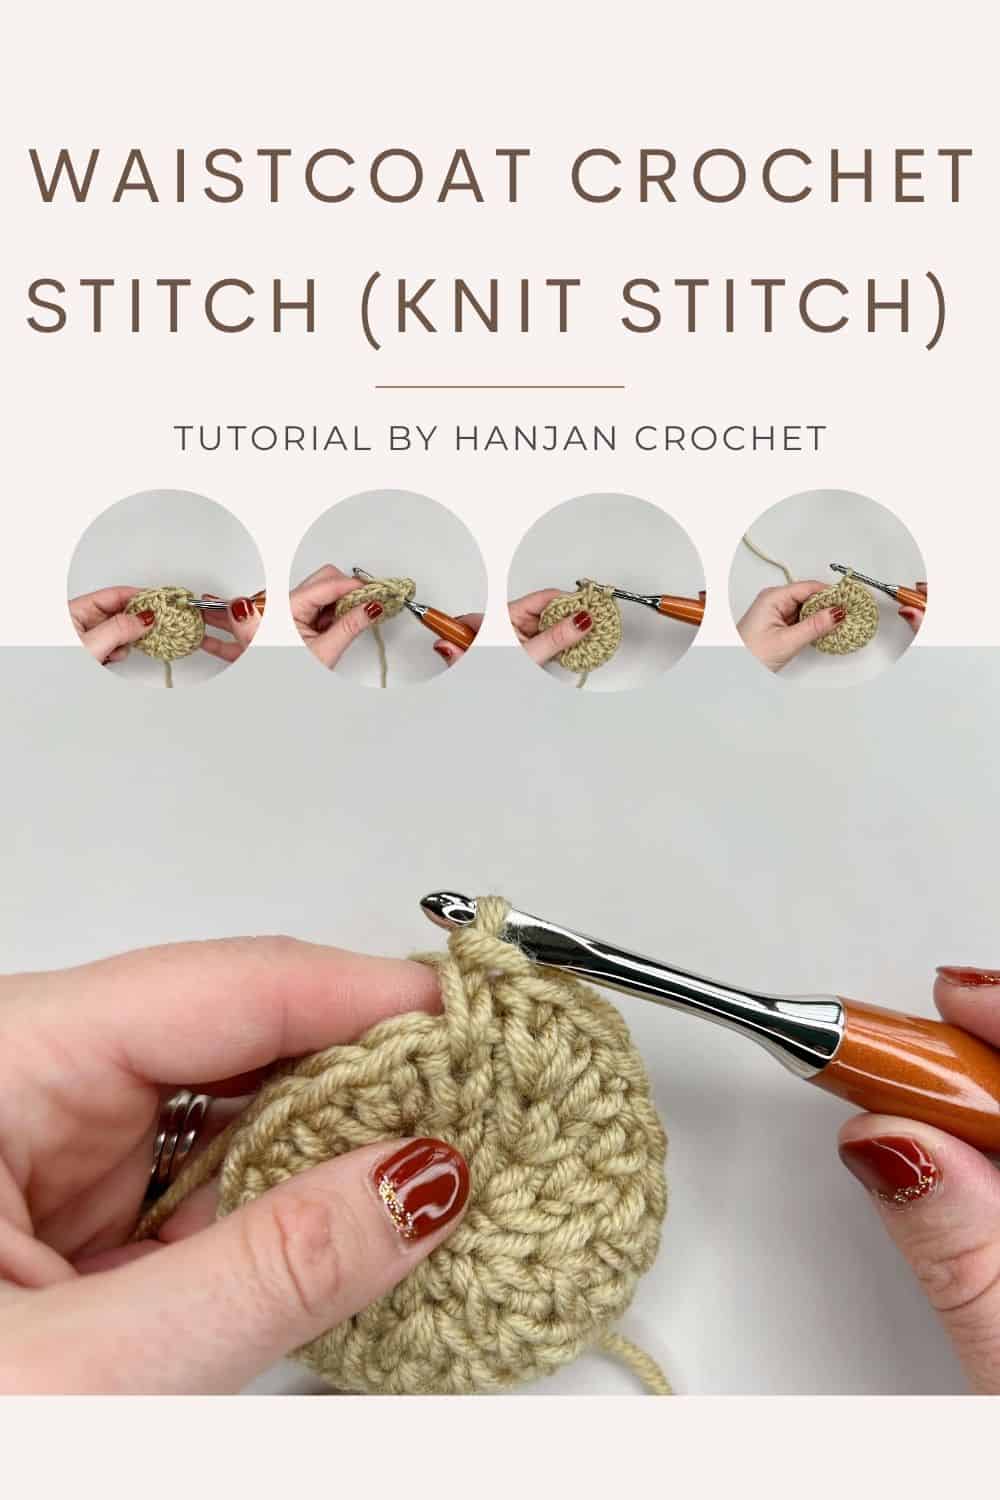
Video Tutorial
If you’d like to see the stitch in action then you can watch the video tutorial for my Herringbone Moss Stitch Crochet Mittens (pictured above). Or you can watch a really brief tutorial of how it works in the round here –

Photo Tutorial
I know that sometimes pictures are easier to follow so here are some step by step ones to give you an idea of how the stitch works in real life once you get to the moss stitch section.
These are to show Rounds 3 and 4 of the pattern repeat above to show where to pop the stitches.
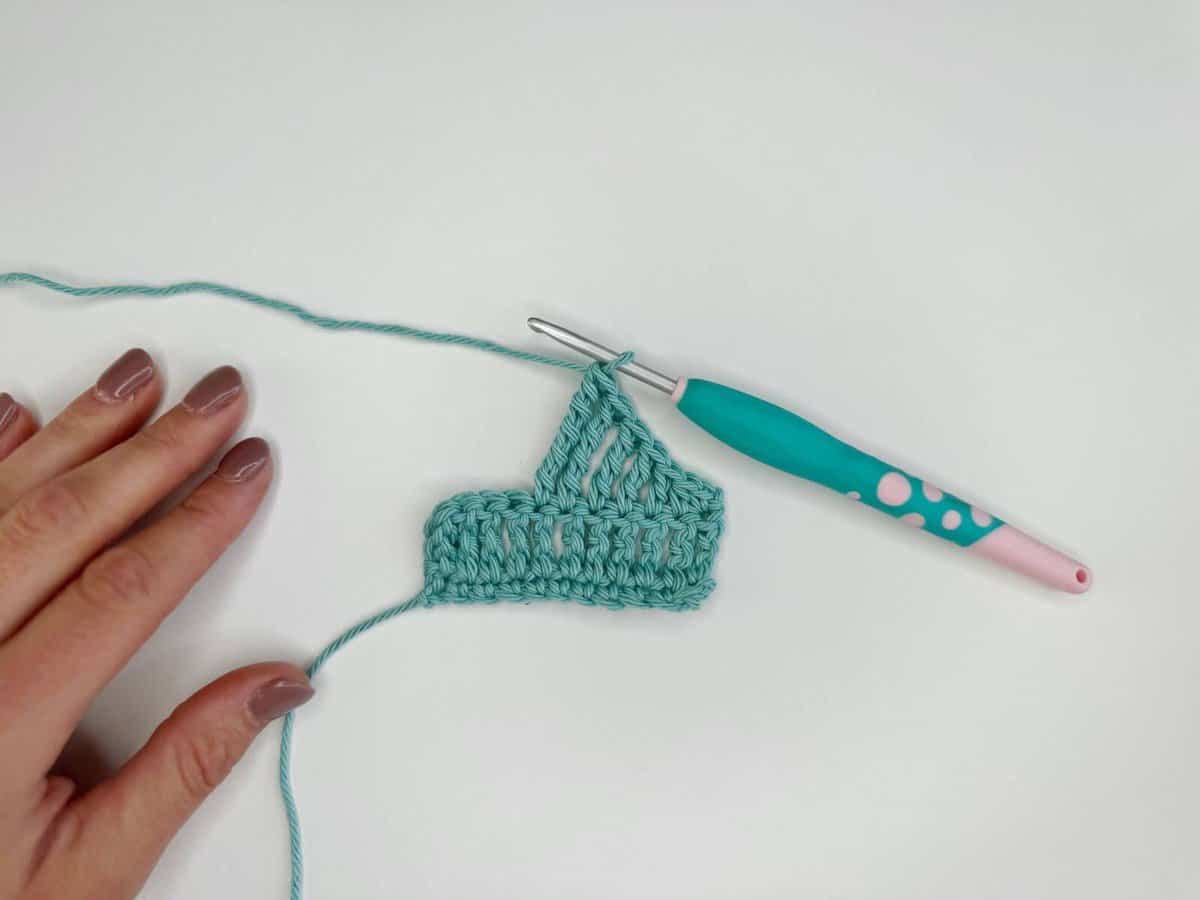
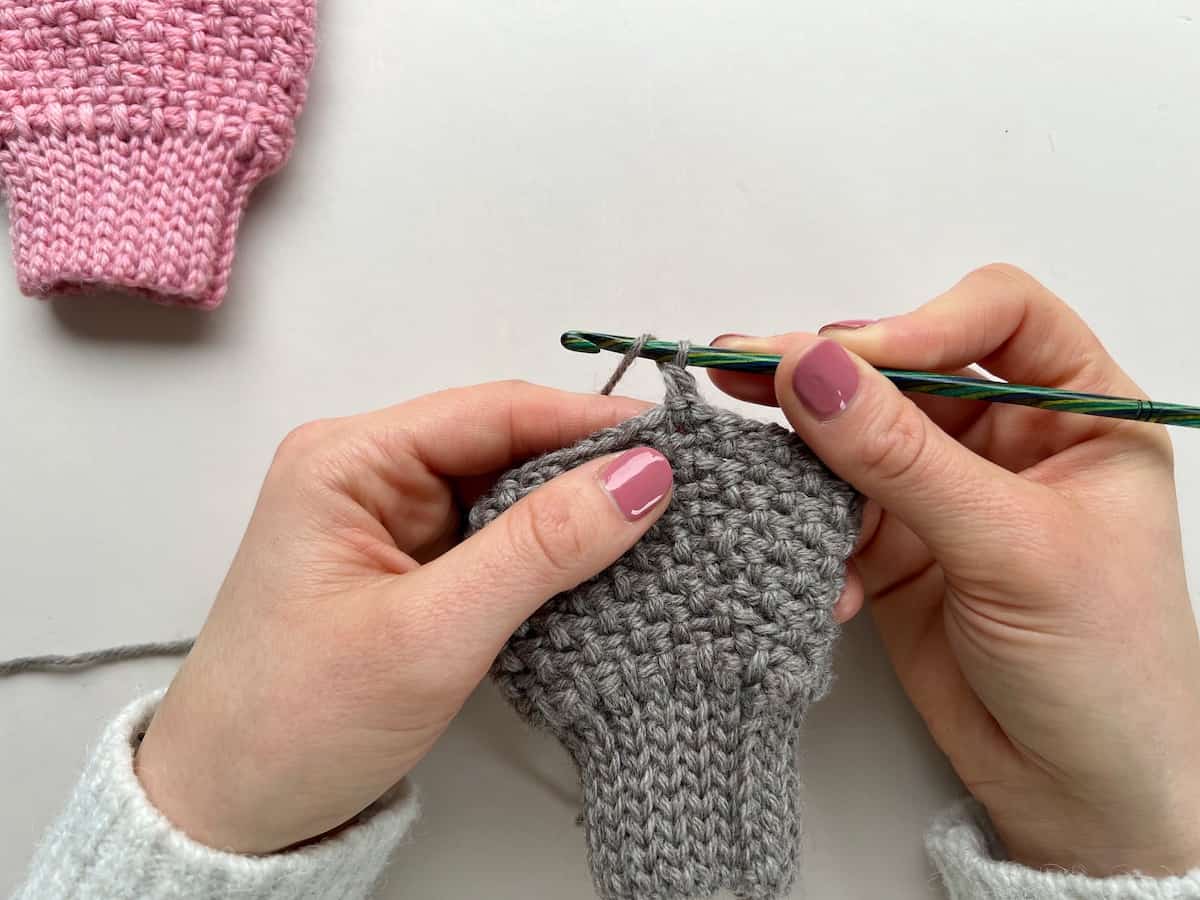
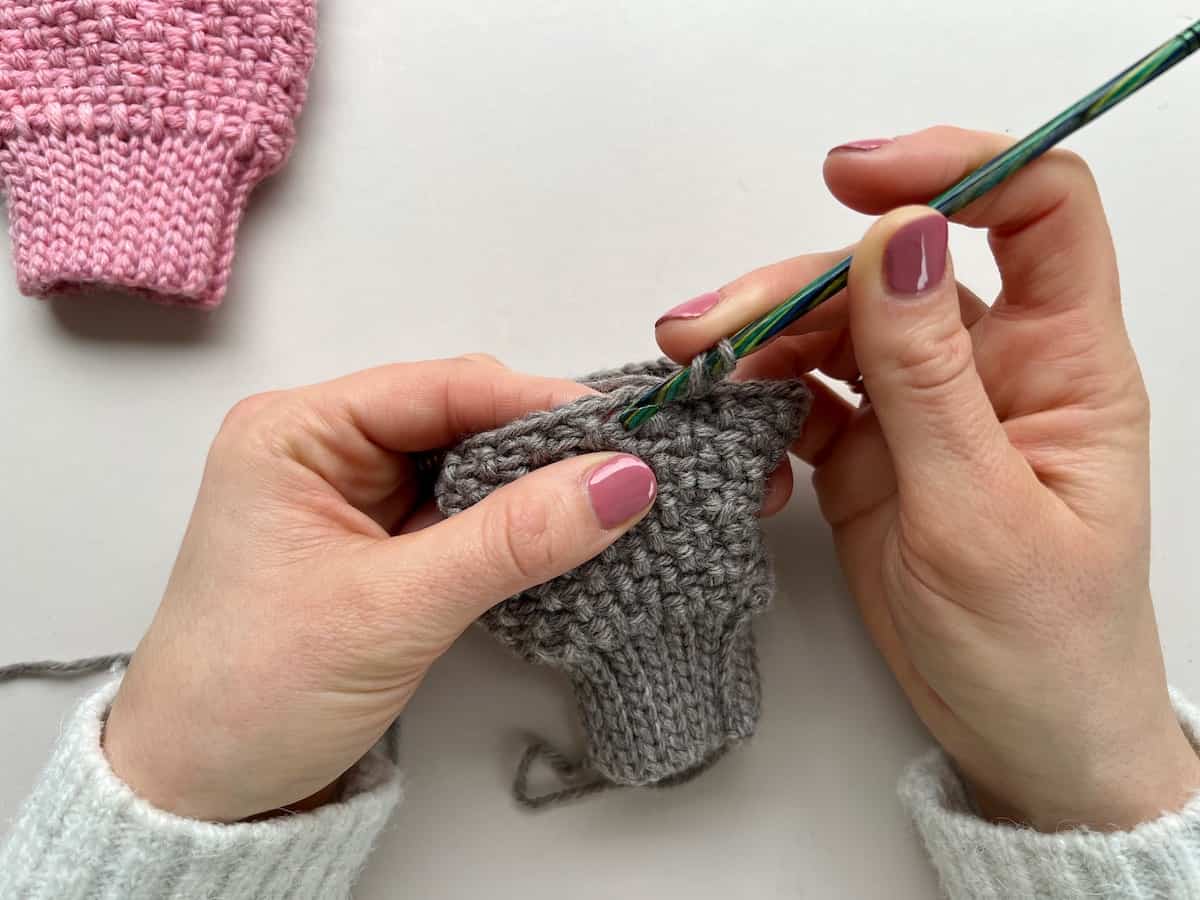
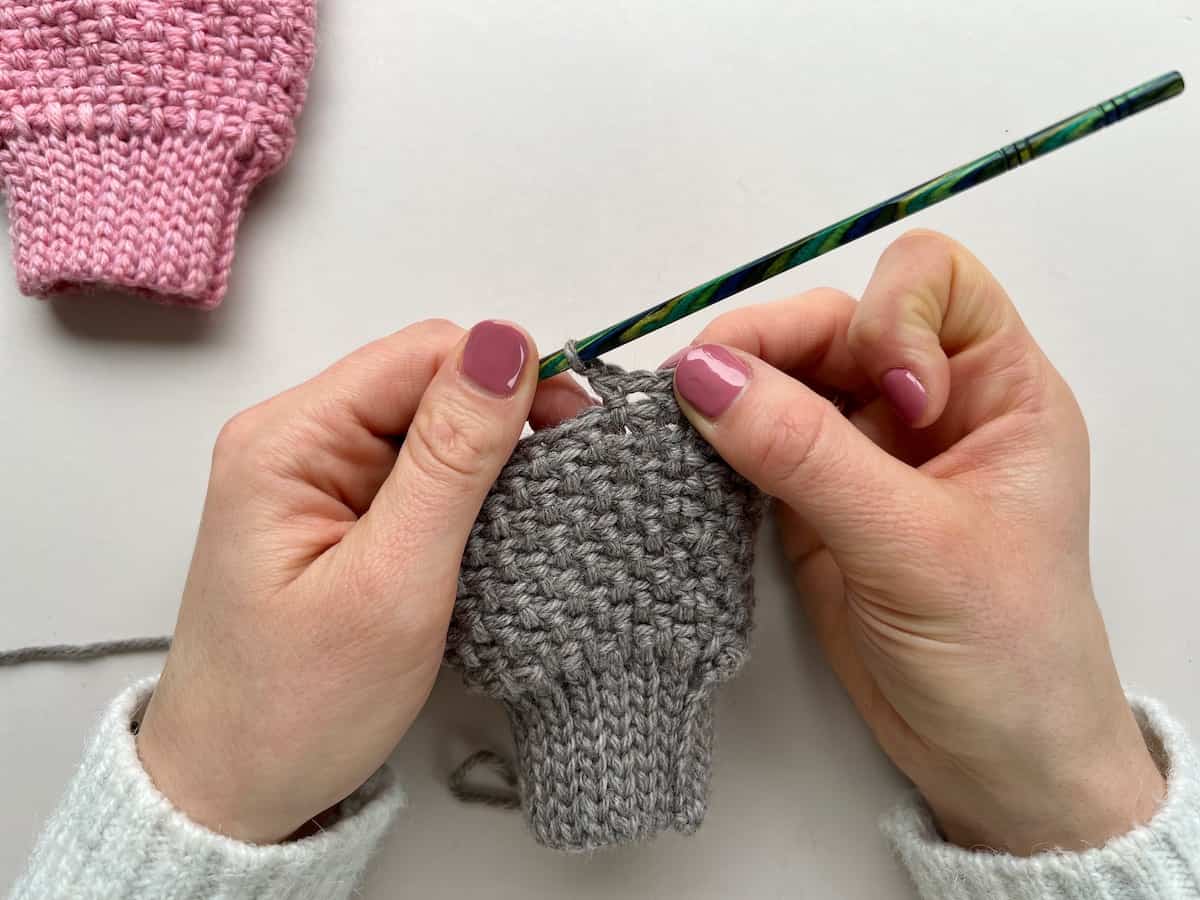
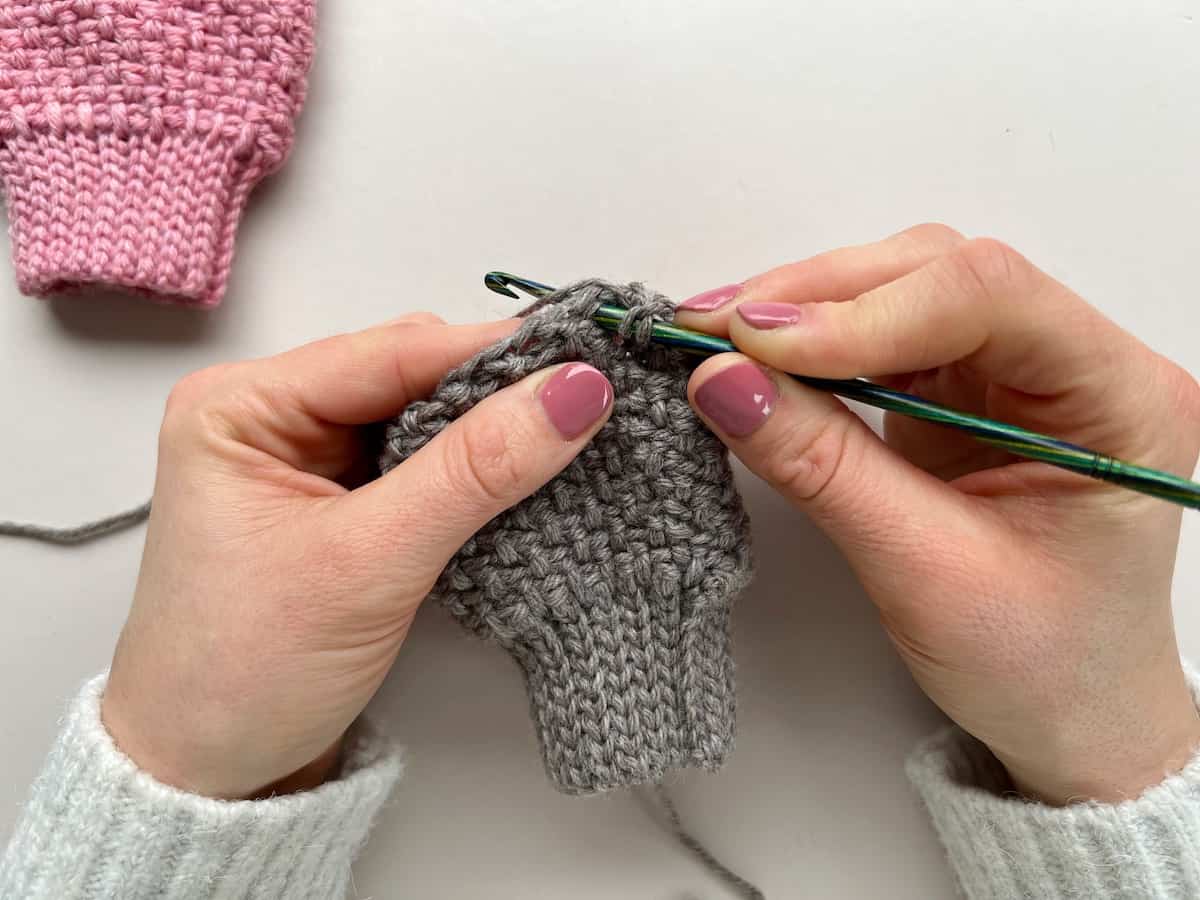
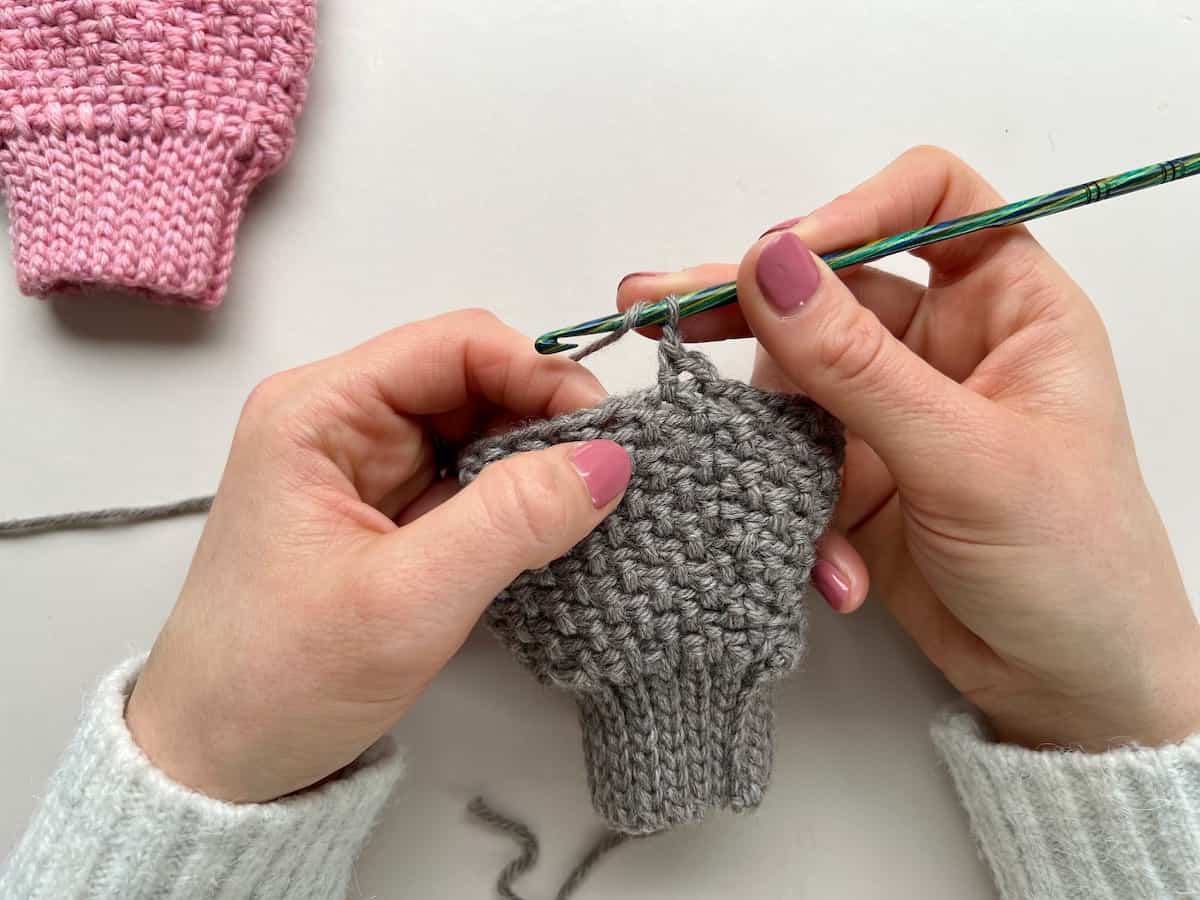
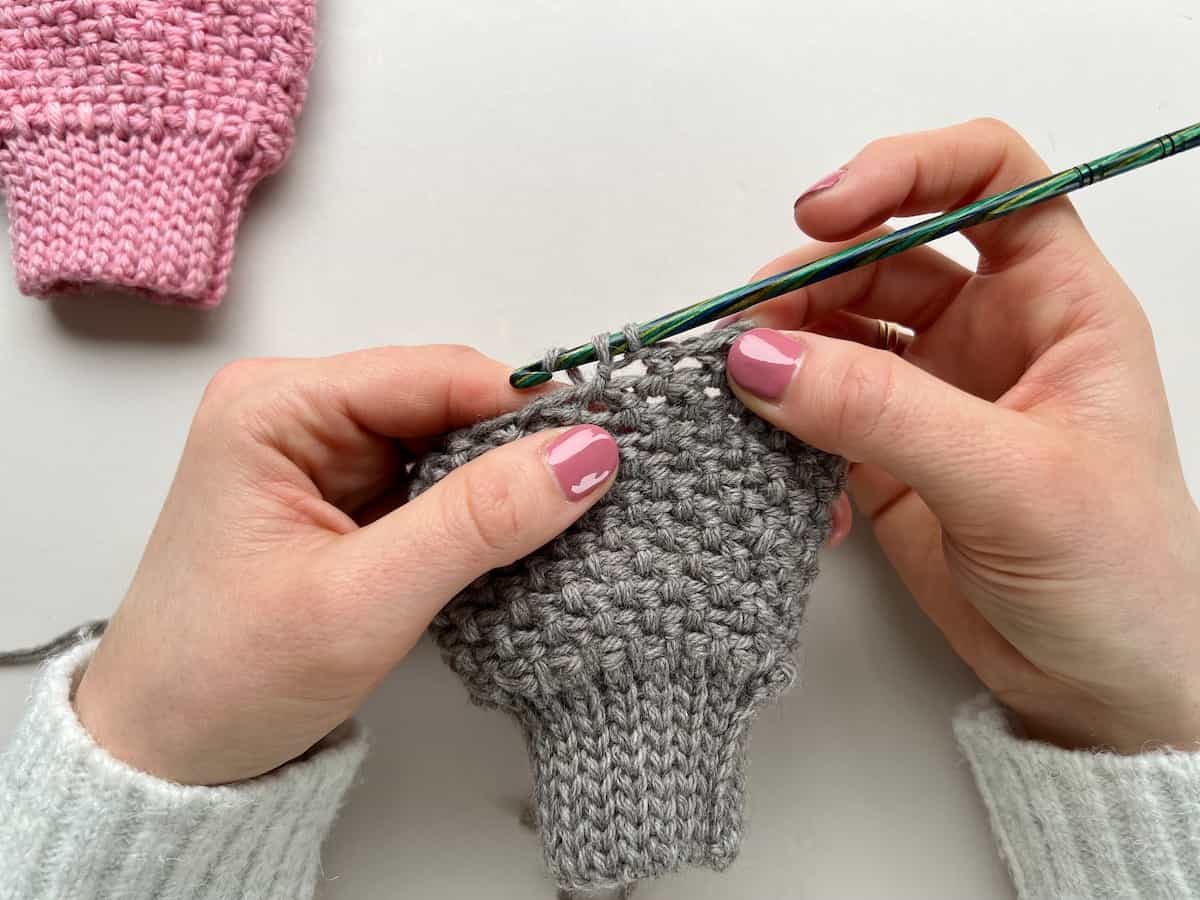
Round 3

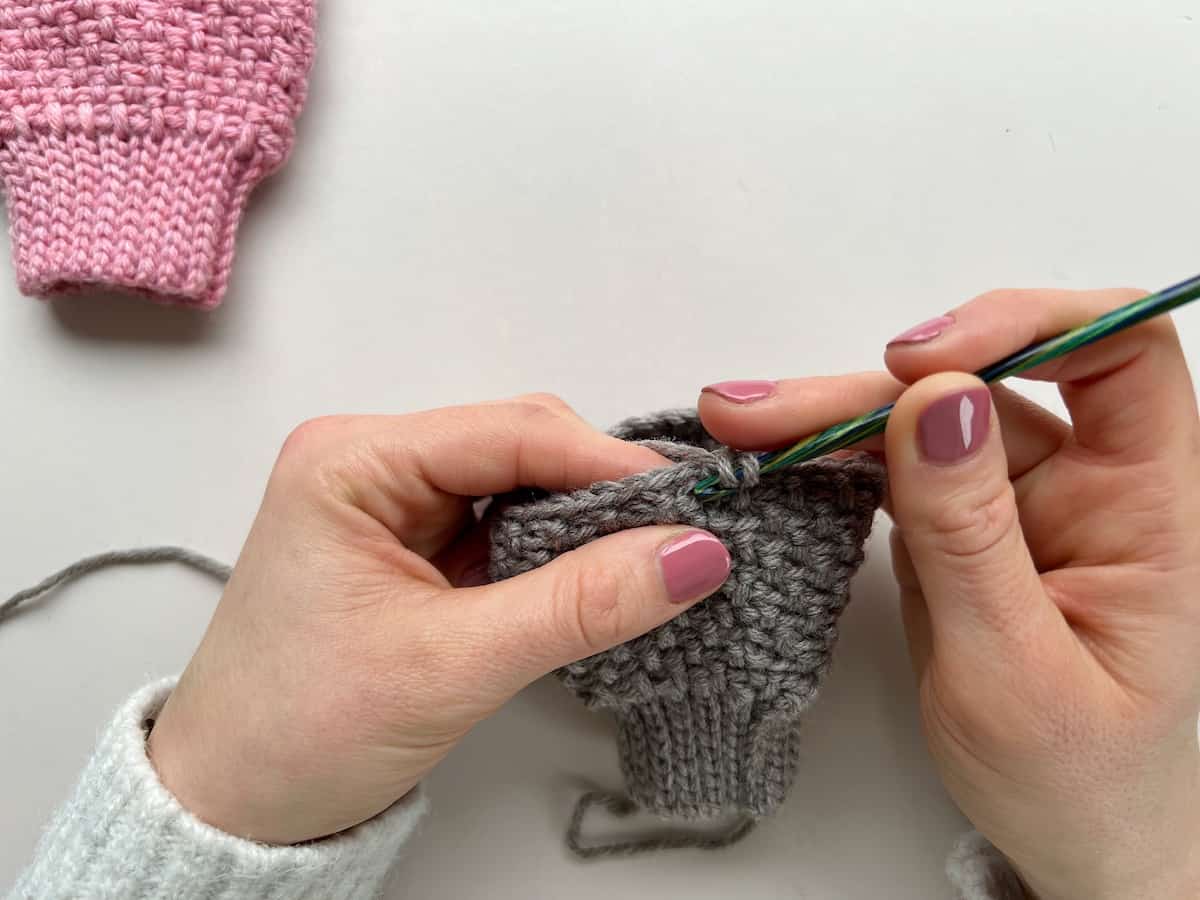
- Begin Round 3 by chaining 1 (this doesn’t count as a stitch).
2. Yarn over and insert hook into back loop only of unworked stitch 2 rounds below. Work over the chain 1 space on the previous round.
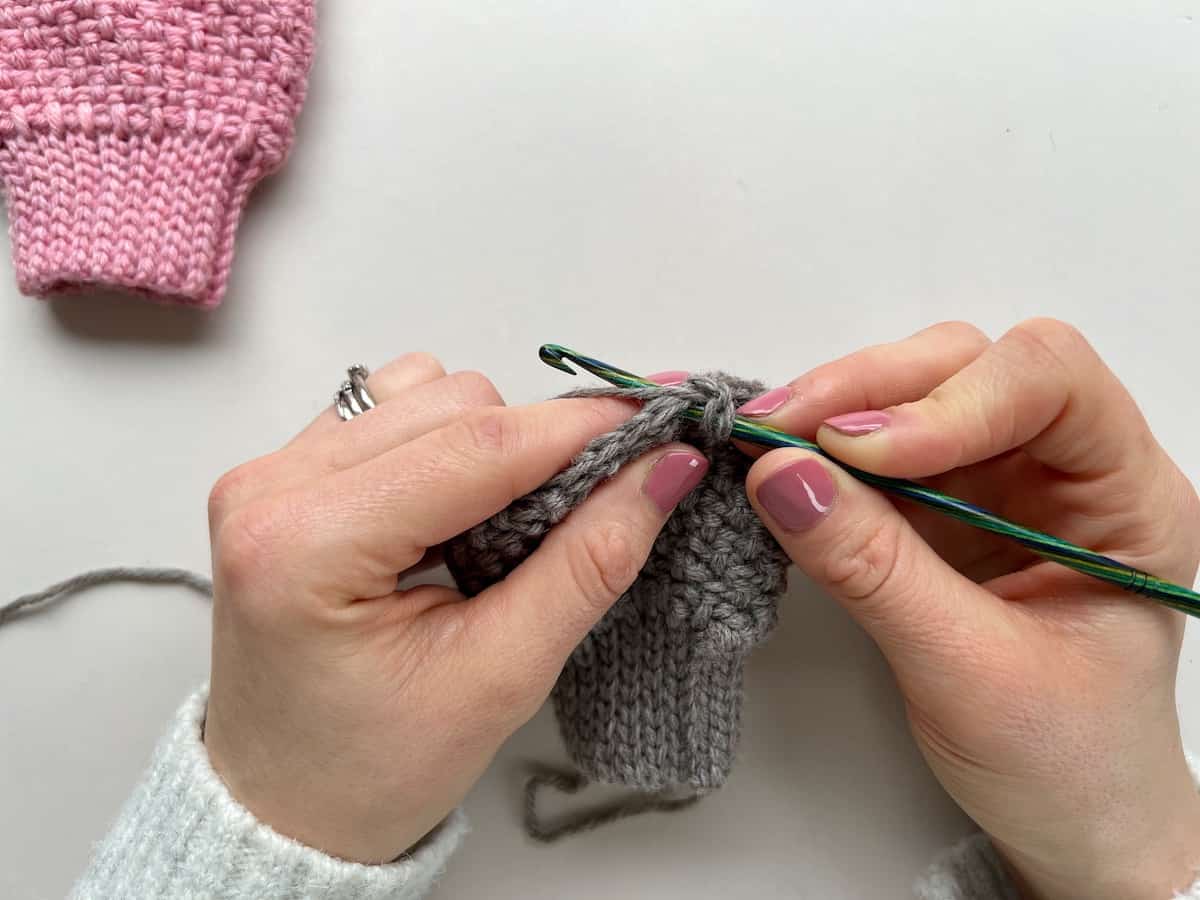
3. Yarn over and pull up a loop through the stitch and then also through the first loop of the two already on your hook.
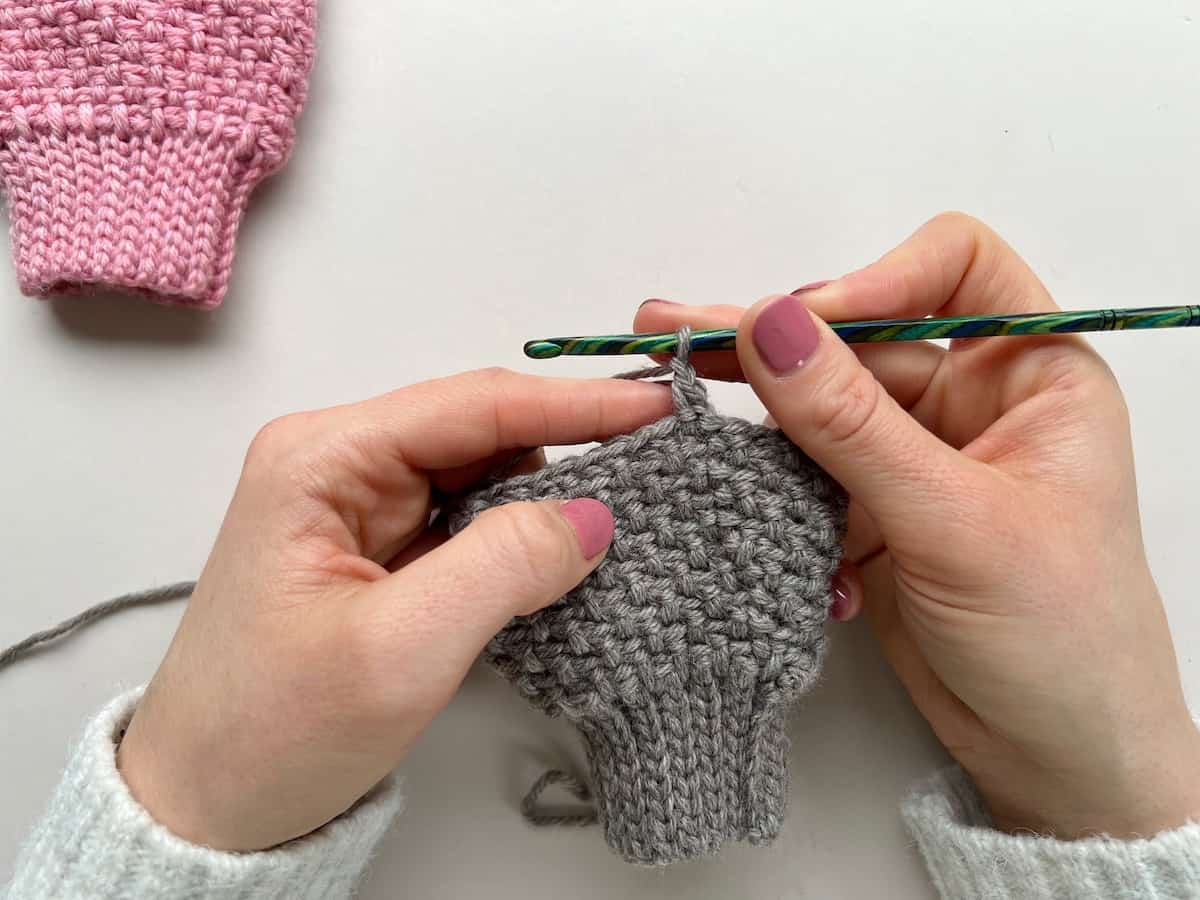
- Now you have two loops on the hook. Yarn over and pull through both loops to complete your first herringbone half double crochet.
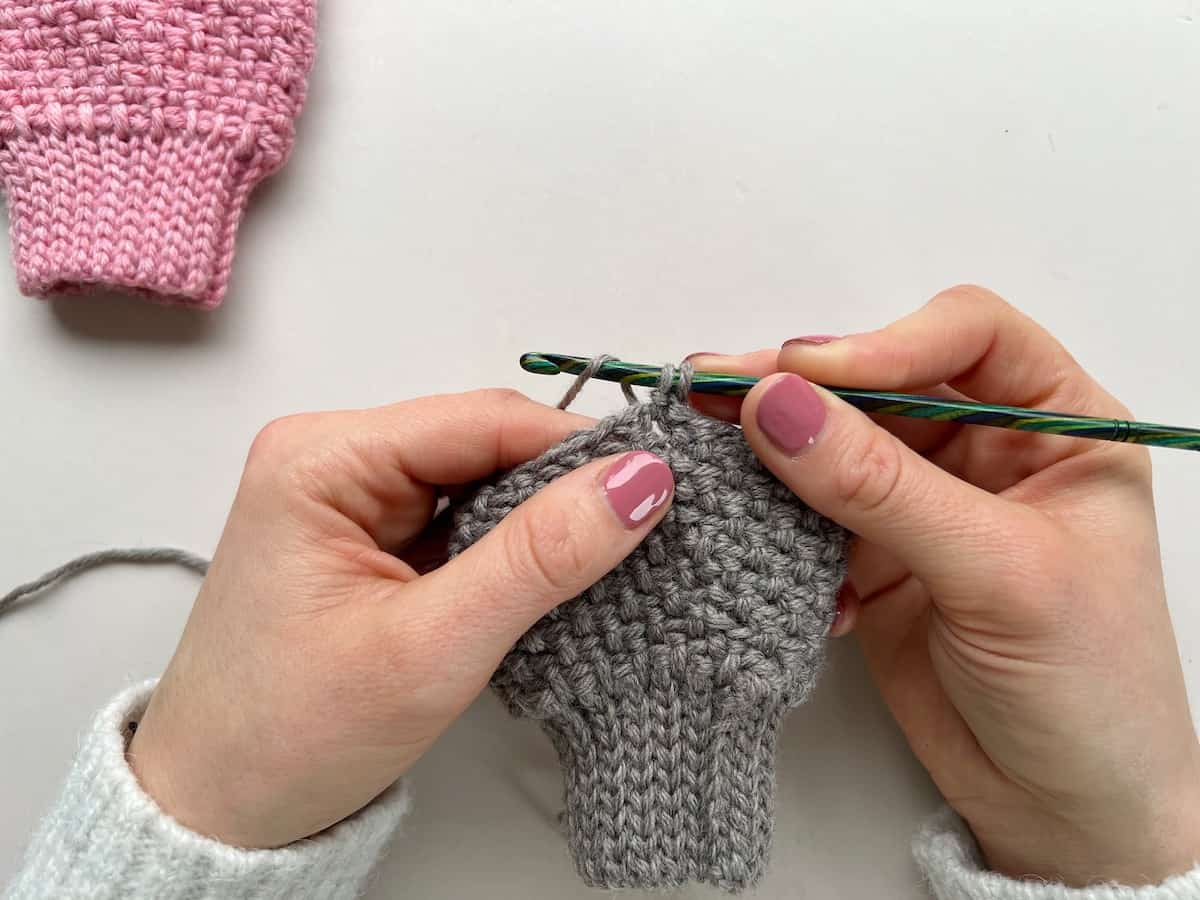
2. Here’s what the completed stitch will look like.
3. Chain and skip the next stitch on the previous round..
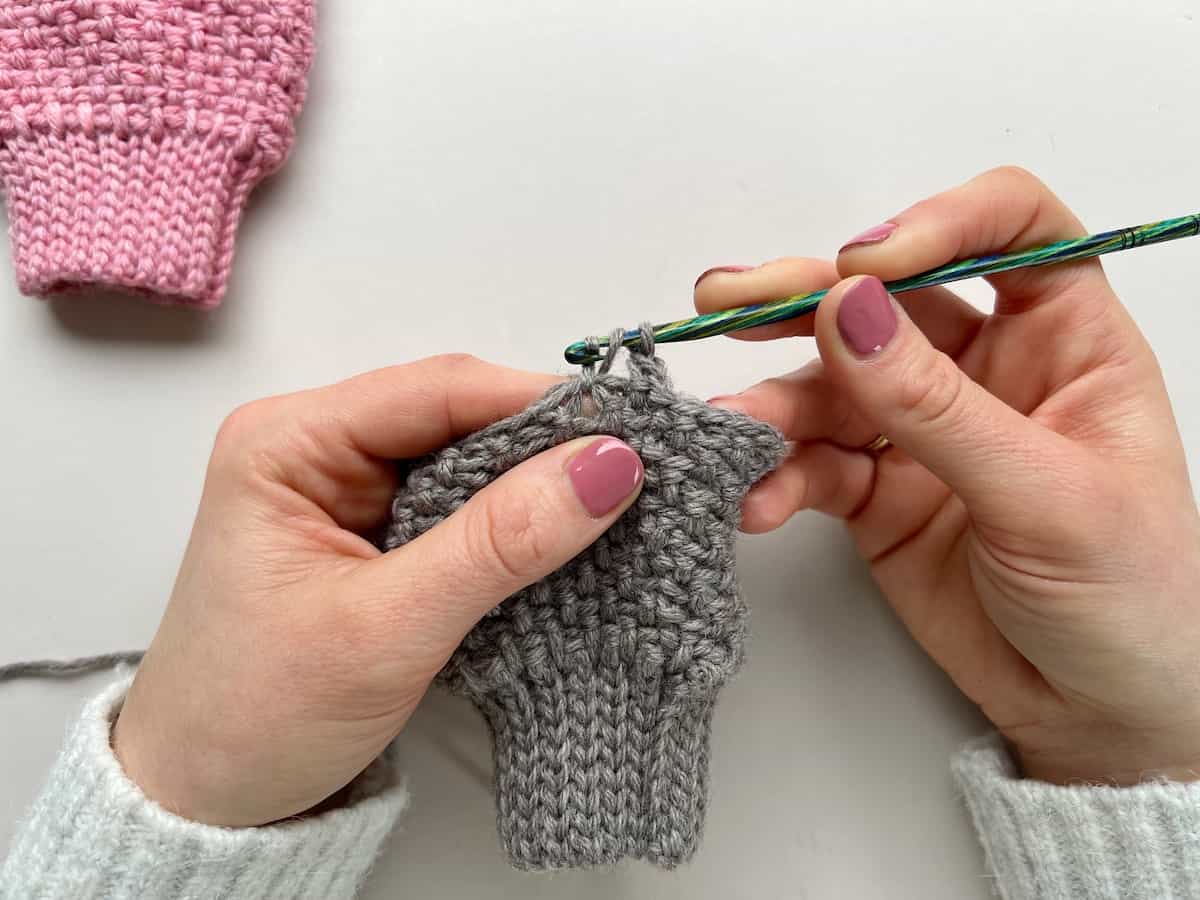
- Repeat the process now – yarn over and insert the hook into the back loop of the stitch 2 rounds below.
2. Continue to work a herringbone half double crochet in that place.
3. Chain 1, skip the next stitch. Keep repeating these steps until the end of the round and then join with a slip stitch to the first st.
Round 4

- Chain 2 to begin this round. One of the doesn’t count, the other counts as a chain 1. Skip the stitch directly under the ch2.
2. Work a herringbone half double crochet into the blo of the next st 2 rounds below as you did in Round 3.
3. Here’s what the first completed Hhdc-moss stitch will look like.
- Chain 1, skip the next stitch and then Hhdc-moss in the next blo of the st 2 rounds below.
2. Repeat these stitches around (you will end on a Hhdc-moss stitch) then slip stitch into the 1st to join.
3. You can even Hhdc-moss2tog to decrease really easily! It’s great fun!
Learn Some More Crochet Stitches With Me
If, like me, you’re eager to learn all the crochet stitches you possibly can then I’d love you to take a look at my crochet stitch tutorials – here are some of my favourites though:
Pin It For Later
I hope you’ve enjoyed learning the crochet moss stitch with me! I’d love to know if you decide to make any of patterns using it or if you create your own! You can sign up to become a member of HanJan Crochet and I’ll let you know about all the fabulous crochet adventures, offers, lives and more too!
See you there!