This post may contain affiliate links. Please see my full disclosure and privacy policy for details.
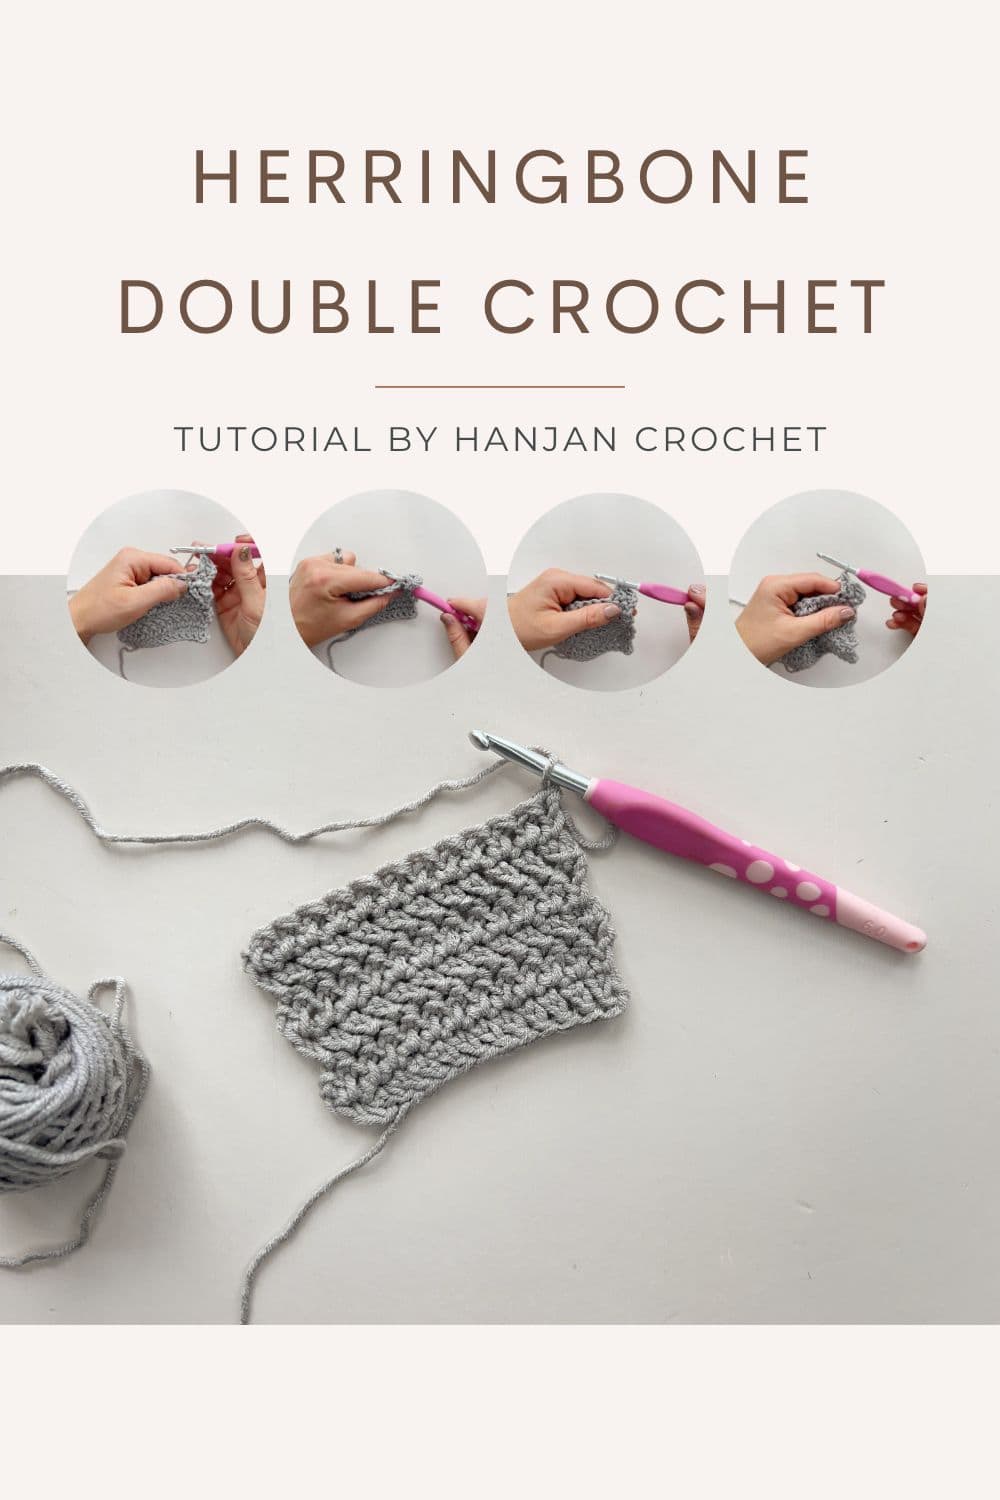
The Herringbone double crochet stitch (US) is a great alternative to the traditional double crochet. I like this stitch because it has a wonderful texture and you all know I love a textured stitch! The gorgeous slanted pattern looks beautiful in homewares and garments alike.
Herringbone double crochet is abbreviated to hbdc in US terms. In UK crochet terms it’s called a herringbone treble crochet / hbtr and in my opinion is one of the most beautiful and versatile crochet stitches you’ll find.
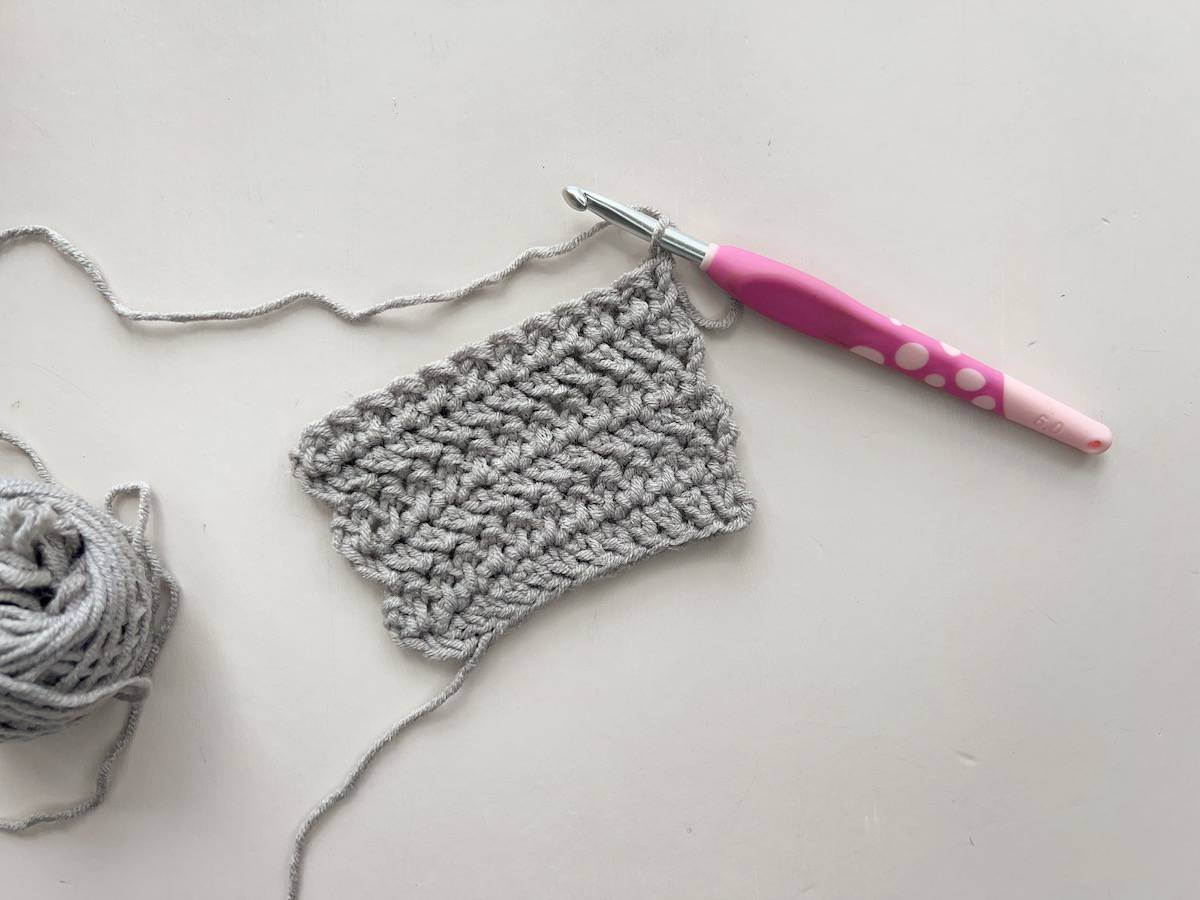
Table of Contents
What is a herringbone double crochet stitch?
The herringbone double crochet is named because of its distinctive herringbone pattern – seen often in menswear and also in parquet flooring. The slant of the stitch is created by an additional slip stitch partway through a normal US double crochet stitch.
It is a super easy stitch to create with only minor differences from a US double crochet, which you will see below.
Want to remove Ads?
- Get ad-free access on all posts; 200+ patterns & tutorials!
- Member-only resource library with downloadable PDF guides
- Bonus eBook (Worth over $30)
Before we learn more about this versatile stitch, let’s learn how to do it!
How do you crochet a herringbone double crochet stitch?
Let’s get right to it and look at how to work the herringbone double crochet stitch.
Firstly, let’s look at the description of the process and then have a closer look at some pictures. Remember that this tutorial is in US terms.
How to make a hbdc stitch
- Yarn over and insert your hook into the next stitch you’d like to work in.
- Yarn over and pull up a loop through the stitch you’ve chosen (you’ll have 3 loops on the hook).
- Pull straight through the next loop on the hook without yarning over (2 loops on the hook).
- Yarn over and pull through 1 loop (2 loops on the hook).
- Yarn over and pull through all the remaining 2 loops on your hook.
Step by step herringbone double crochet
Supplies you’ll need
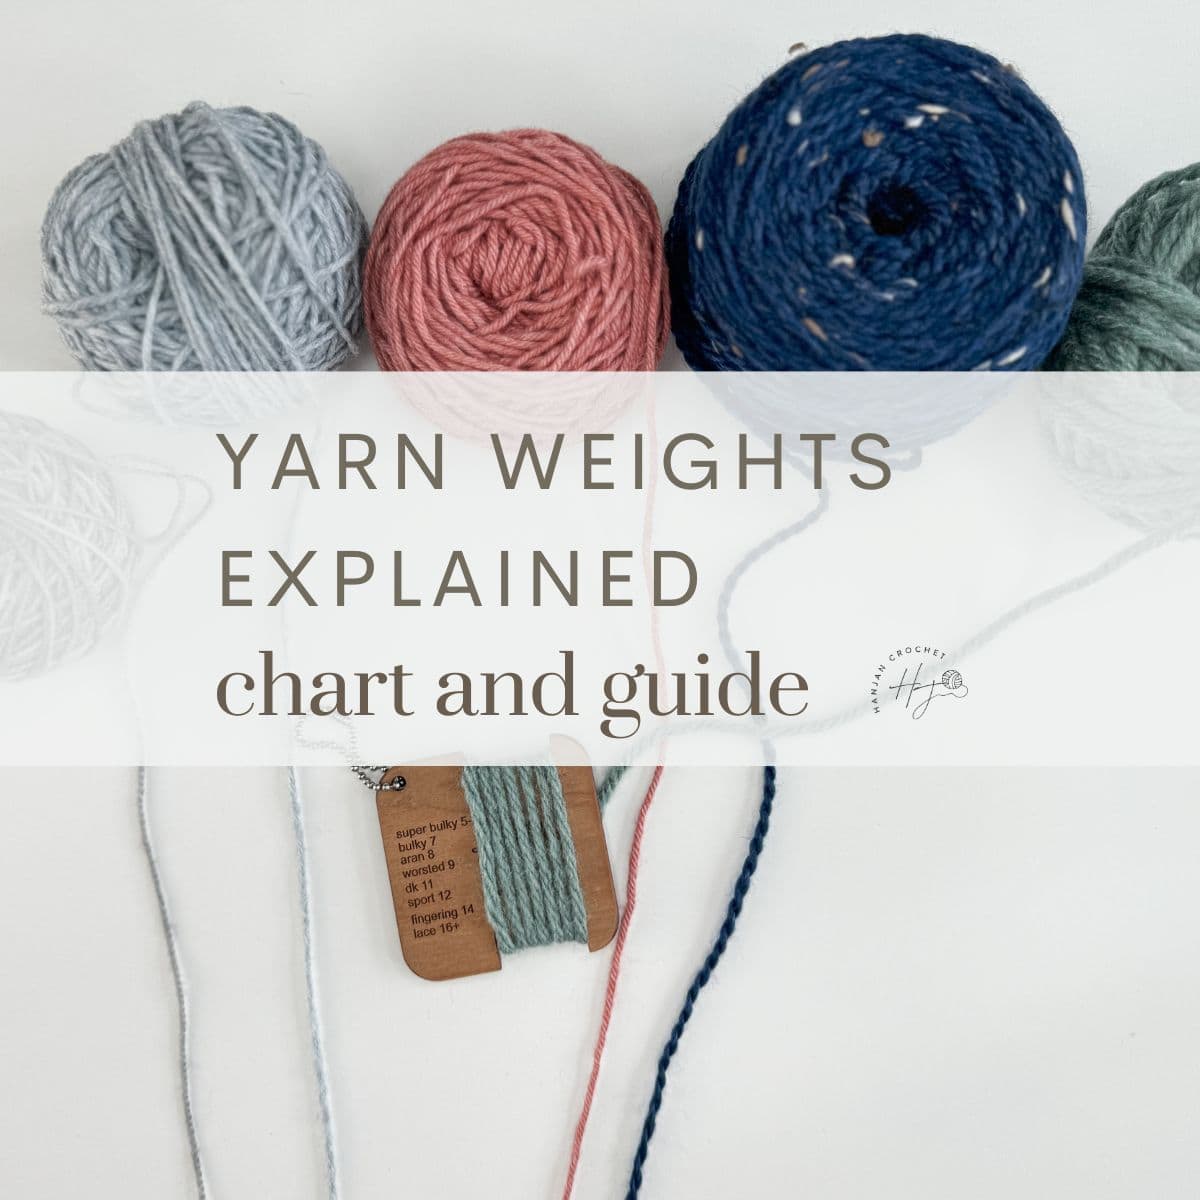
I used Hue + Me by Lion Brand for the tutorial photos which is a lovely, soft bulky weight yarn, 80% acrylic, 20% wool, 125yds/125g but you can use any yarn that you like. If you’re a beginner I’d recommend using a category 4 or 5 weight yarn so you can see your stitches easily. Find out more about yarn weights.
You’ll need a corresponding crochet hook for the yarn you choose. I’m using an ergonomic crochet hook here and it’s a 6mm size.
The only other things you’ll need is a pair of sharp scissors and a tapestry needle to weave in your ends if you’d like to save your swatch.
1. Begin with a starting chain
Before you can begin this easy herringbone double crochet stitch, you will need a foundation chain (or you can use foundation dc if you prefer). Chain the number of stitches you would like your piece to be, plus 3 for turning. For a practice swatch, I’d recommend starting with around 23 chains.
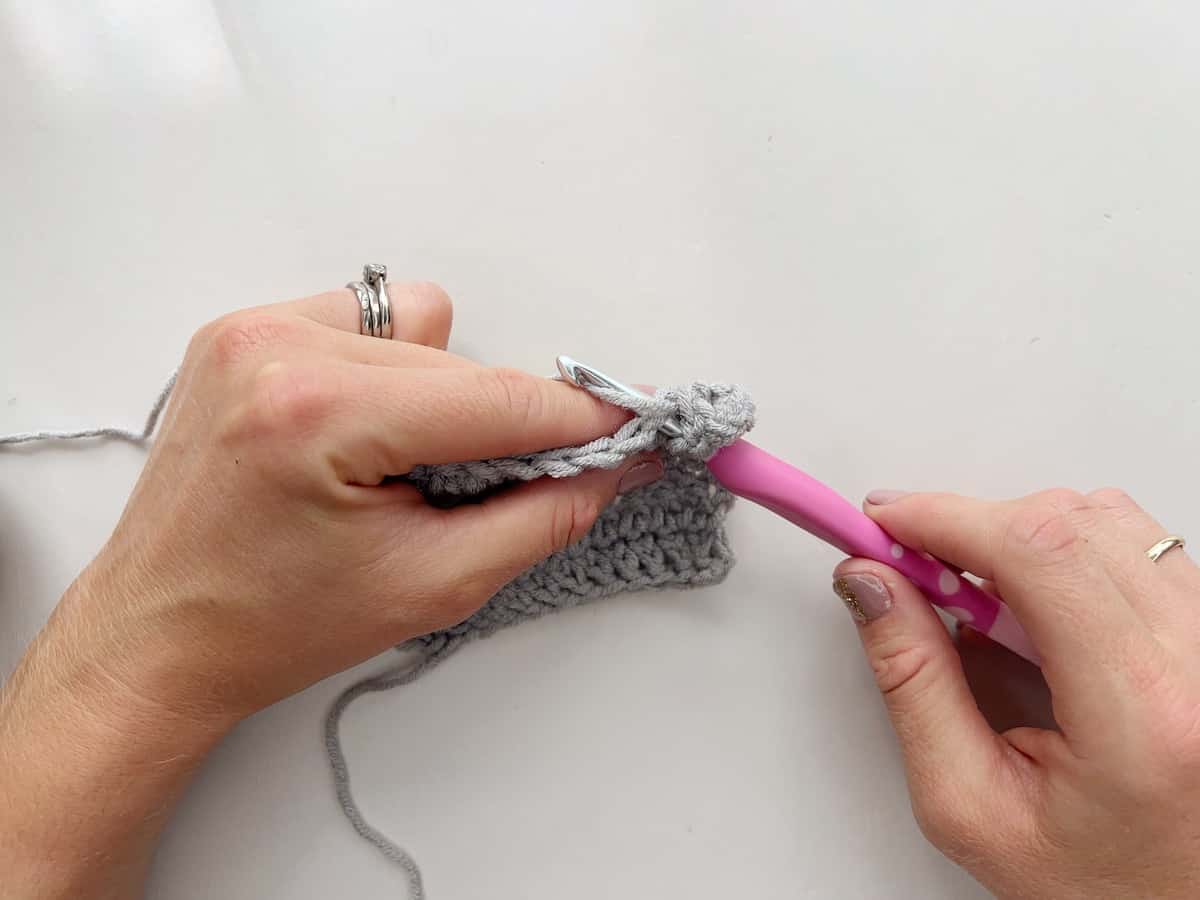
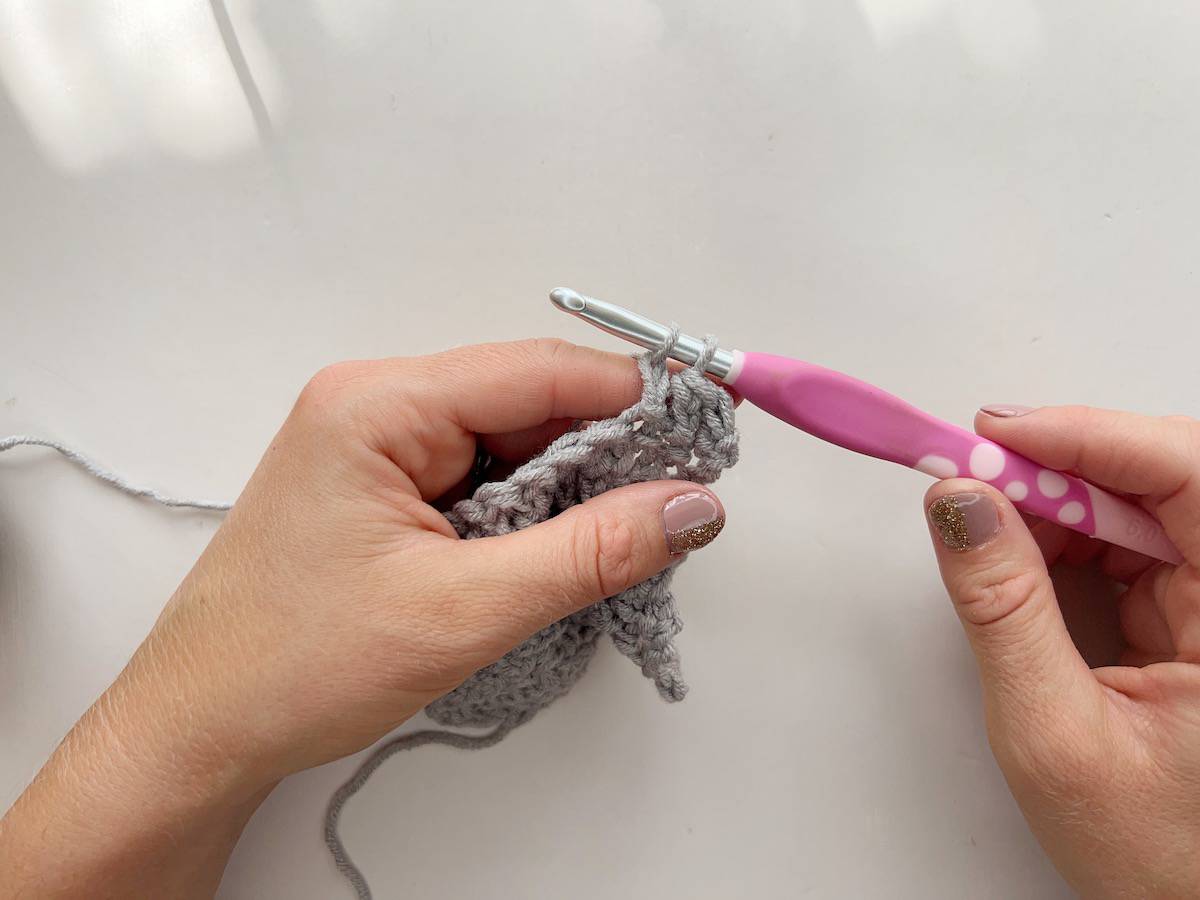
2. Yarn over and insert hook into the stitch
Wrap the yarn over the hook and insert your hook into the fourth chain from the hook, just as you would for a normal double crochet.
3. Yarn over
Wrap the yarn over the hook in the usual way, as shown below.
4. Pull through the stitch
Pull the loop back through the stitch. You will have 3 loops on your hook.
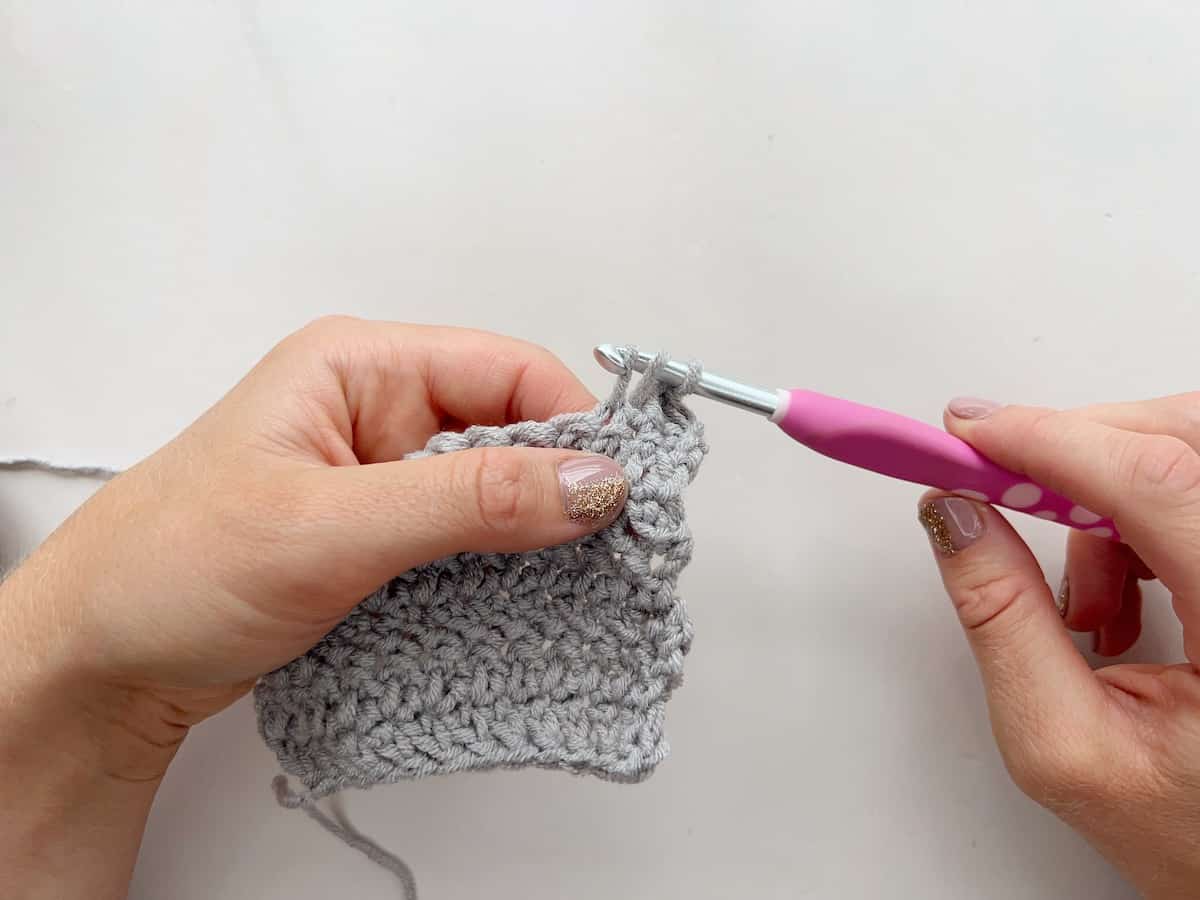
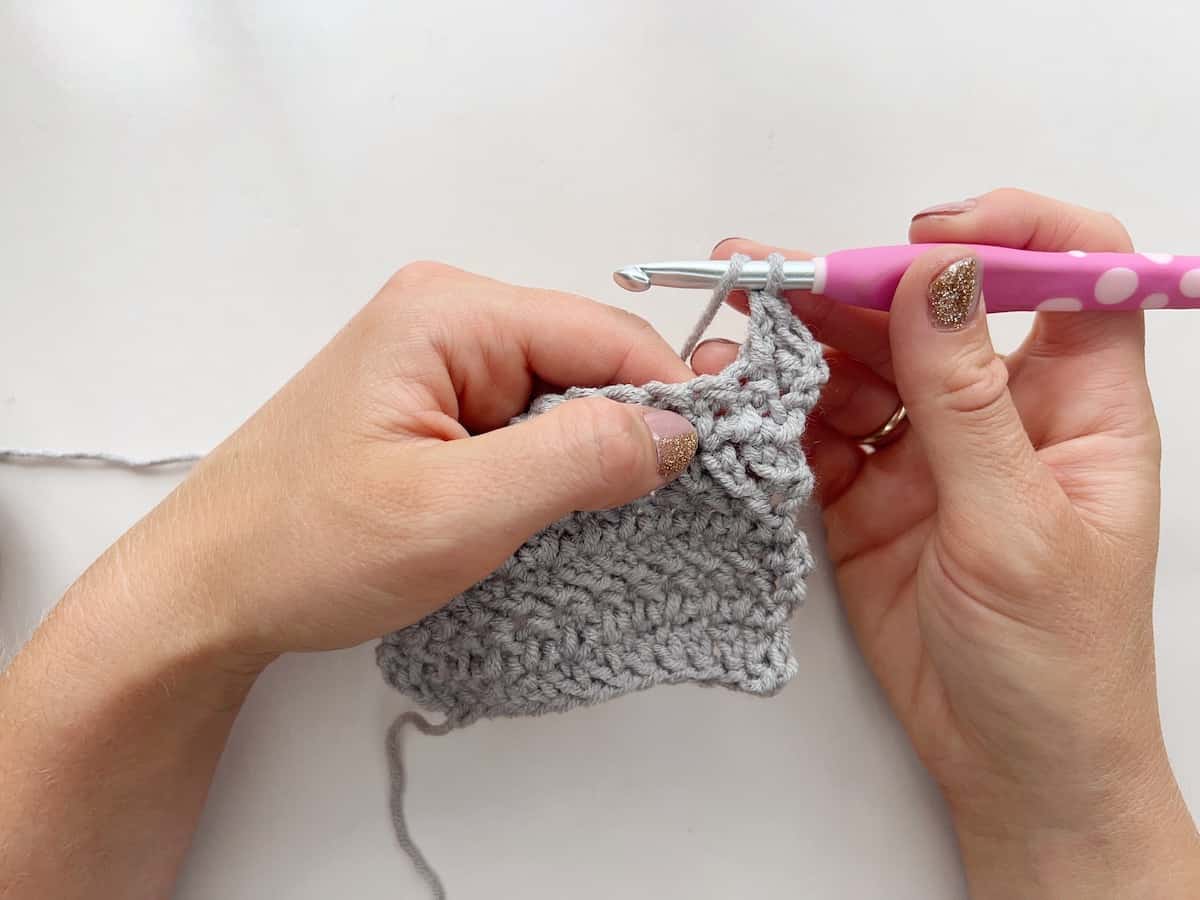
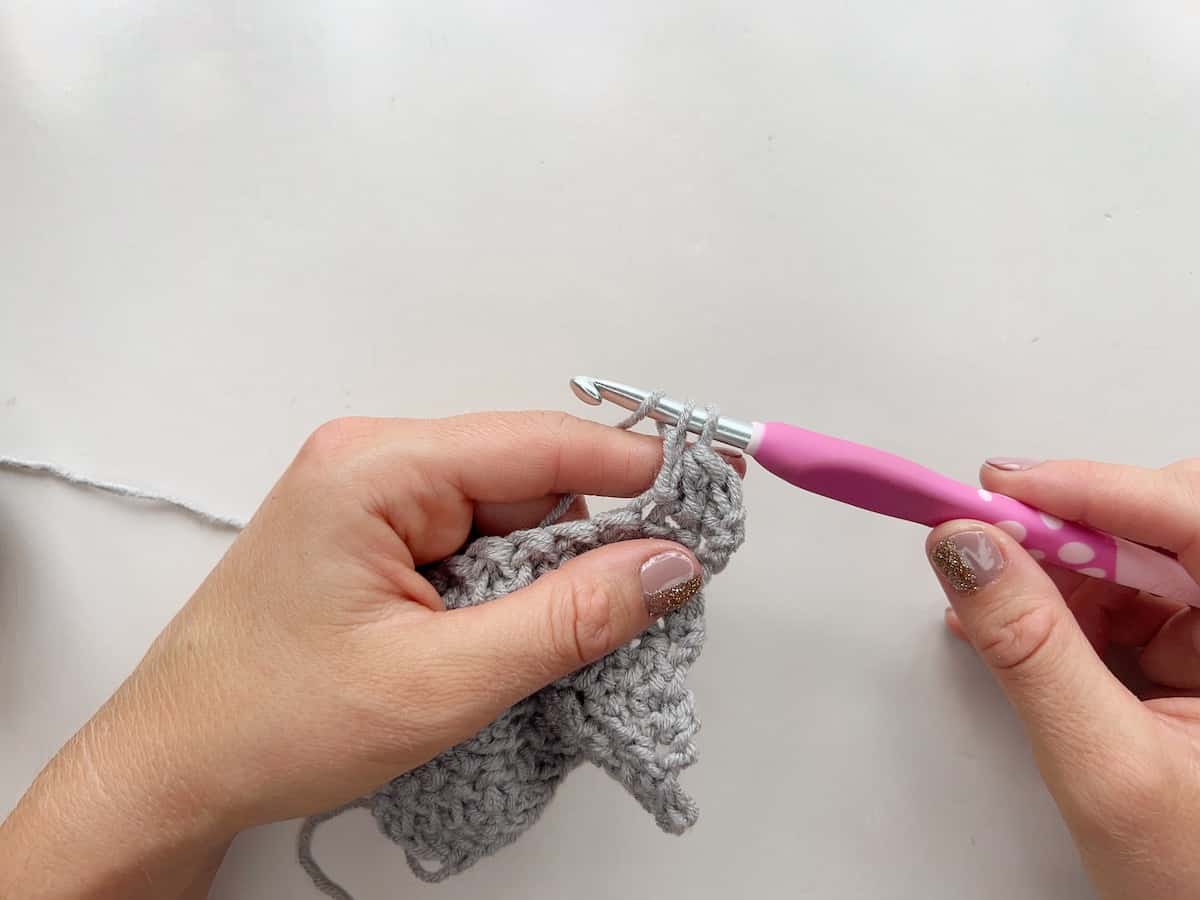
5. Pull straight through the next loop on the hook
Without wrapping the yarn over again, pull your yarn through the next loop on the hook. This acts like a slip stitch. Now, you’ll have 2 loops on your hook.
6. Yarn over
Wrap the yarn over the hook.
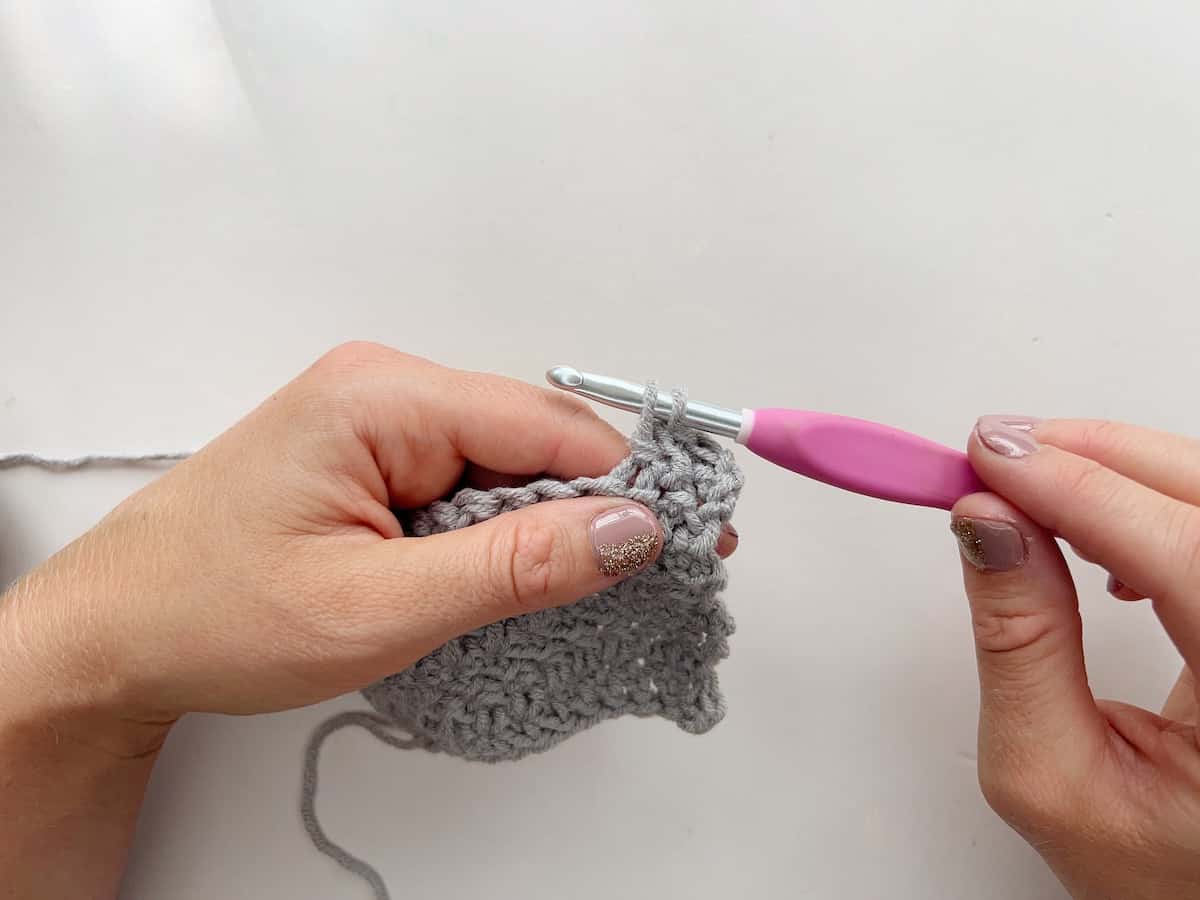
7. Pull through one loop
Pull through one loop, in the same way as a chain stitch. This will leave you with 2 loops on your hook.
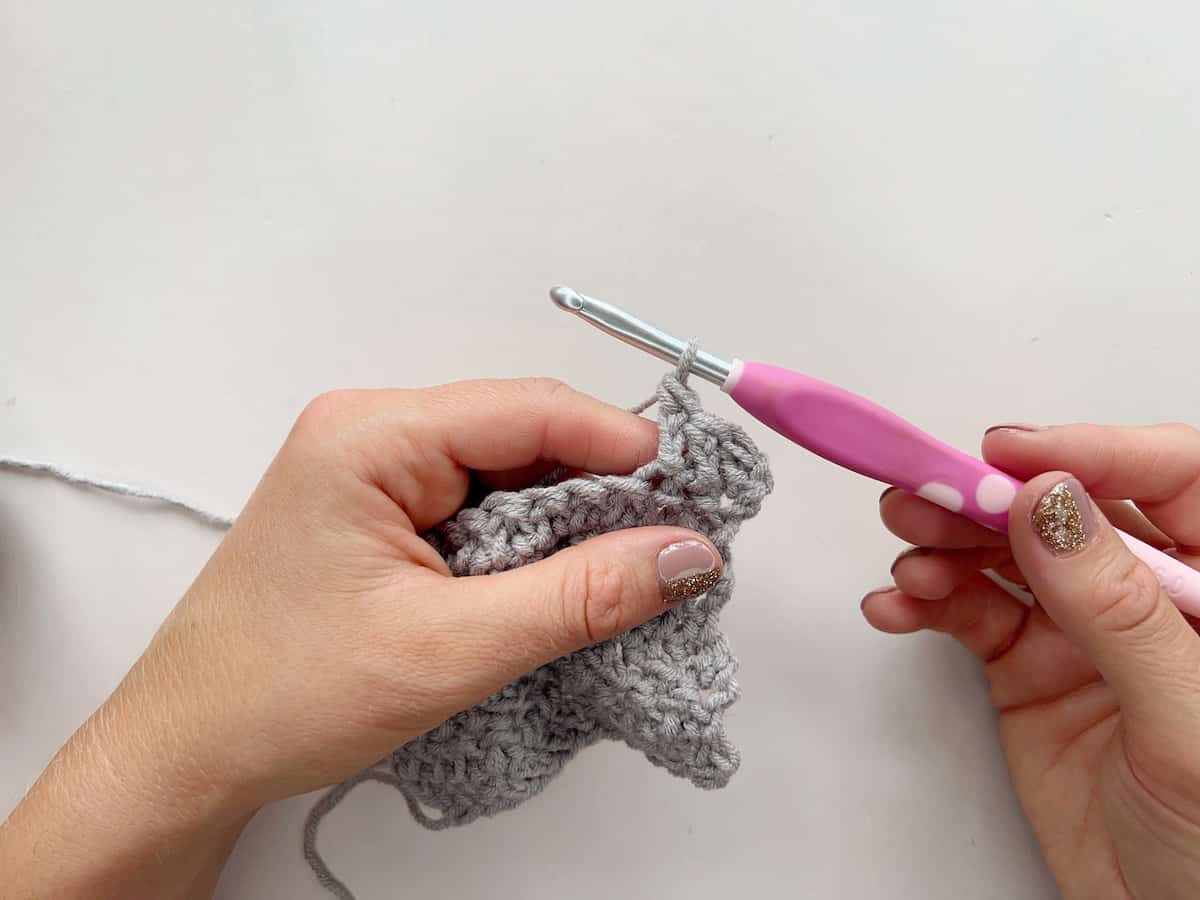
8. Yarn over and pull through 2 loops
Wrap the yarn over the hook and pull through the remaining 2 loops on your hook.
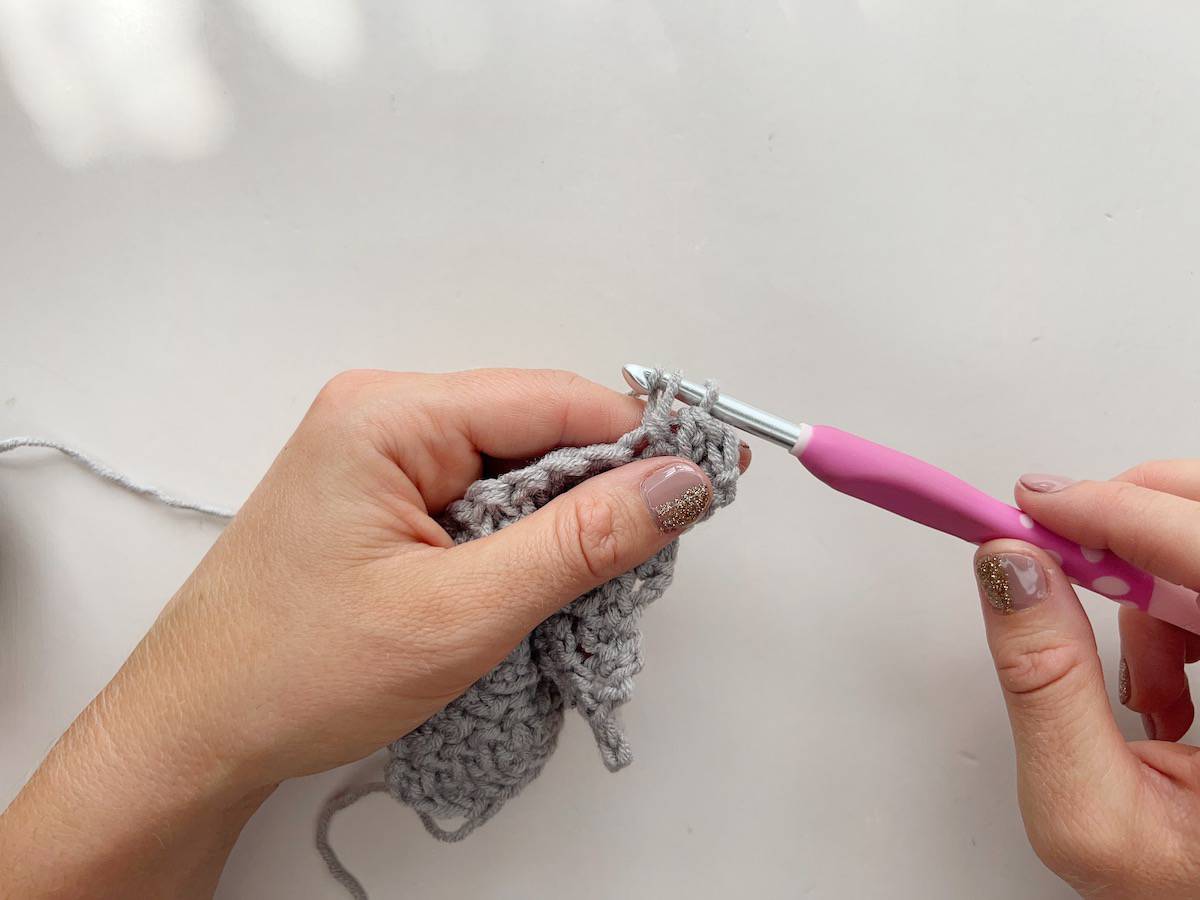
A completed herringbone double crochet stitch
This is what your completed stitch will look like:
9. Repeat steps 2 to 6
Continue on in this way, following steps 2 to 6 to complete the row. Turn and carry on like this to complete your project. Note, it is the backwards and forwards action along the rows that creates the slant going first one way and then the other. The distinctive herringbone!
What is the herringbone double crochet used for?
Loads of things! It’s so versatile.
Now that you know how to do it, let’s learn more about it.
Herringbone double crochet has some great qualities. A fabric made with this stitch will be quite dense, but it still has a good drape.
It is also reversible, which makes it a great choice for blankets. A blanket made with your favourite chunky yarn in herringbone double crochet will certainly keep you warm in the winter months.
The beautiful tweed-like pattern looks great in simple homeware items like dishcloths and potholders too. I would use a cotton DK yarn or similar for these items.
Equally stunning though are cosy jumpers and snuggly scarves in herringbone dc. The choice of yarn here is really up to you! There are so many amazing options. All weight yarn would look great here, just with different effects.
As you can see, this stitch pattern is super versatile, so you really do need to give it a go!
Creating the slant
One thing to note though, is that the herringbone dc doesn’t really work in the round. You are creating a tilt in each stitch as you go along a row. You would then turn and go back the other way. The first row will tilt one way, whilst the second row tilts in the opposite direction. This creates the classic herringbone pattern that we are looking for.
When working in the round, however, you wouldn’t normally turn at the end of each round, and so the herringbone pattern would not be created.
Equally something with lots of shaping required may not show the effect of the herringbone so nicely. I would stick to simple shapes where possible.
What projects can I use a herringbone double crochet stitch for?
If you would like to try using the herringbone double crochet stitch in a project, here is one that I’ve designed:
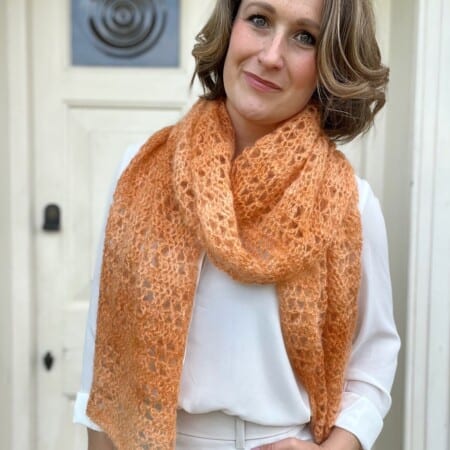
Elegant Scarf Crochet Pattern – a beautiful filet pattern using the hbdc.
If you’re excited to try this stitch in other projects then you could try this super bulky herringbone throw pattern or this plush and blush crop top sweater.
What yarn should I use?
Any weight yarn would work, but you’ll want to use a smooth yarn if you want to see that beautiful herringbone pattern coming through. I’d recommend a DK or Aran weight to see the pattern in all its glory.
Any bigger and the pattern might not be so clear, but it would still make a wonderfully snuggly blanket. That said, the hbdc really does work well in any yarn, and can be used to create so many different effects.
You’ll then need to remember to select a crochet hook that works with the weight of yarn you choose.
Cotton yarn works brilliantly for things like dishcloths, but acrylic, wool and bamboo will all work really well too. Why not dig into your stash and make a start right away?!
I hope you’ve enjoyed learning how to work the herringbone double crochet stitch with me! I’d love to know if you decide to make any of my patterns using it or if you create your own! You can sign up to become a member of HanJan Crochet and I’ll let you know about all the fabulous crochet adventures, offers, lives and more too!
See you there!
Learn Some More Crochet Stitches With Me
If, like me, you’re eager to learn all the crochet stitches and techniques you possibly can then I’d love you to take a look at my crochet stitch tutorials – here are some of my favourites though:
- Herringbone Half Double Crochet Moss Stitch – great for cosy garments and accessories
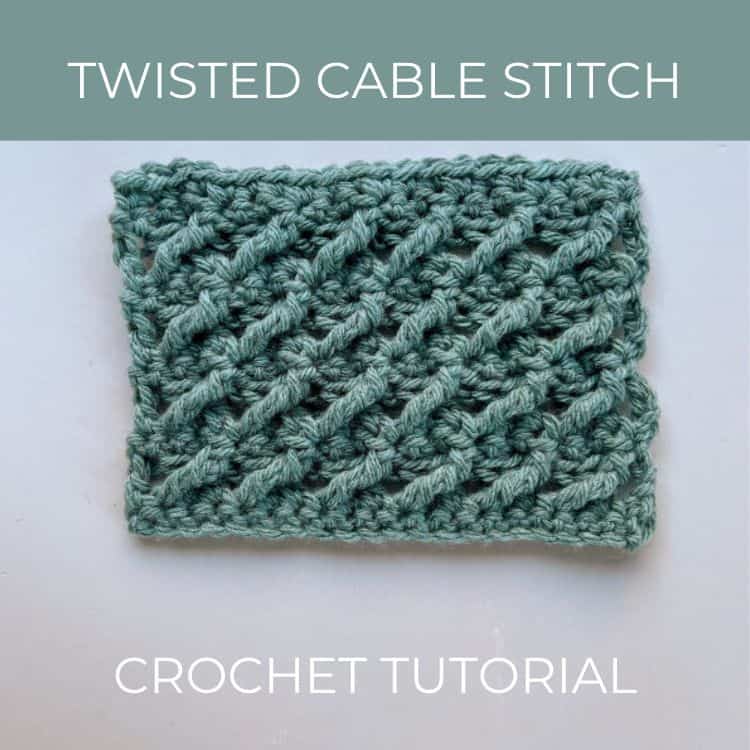
- Twisted Cable Stitch – perfect for texture and has a slanted look like herringbone too.
- Double Crochet Moss Stitch – a great stitch for easy colour work
- Ripple Stitch – great fun for blankets espeically!
Pin It For Later