This post may contain affiliate links. Please see my full disclosure and privacy policy for details.
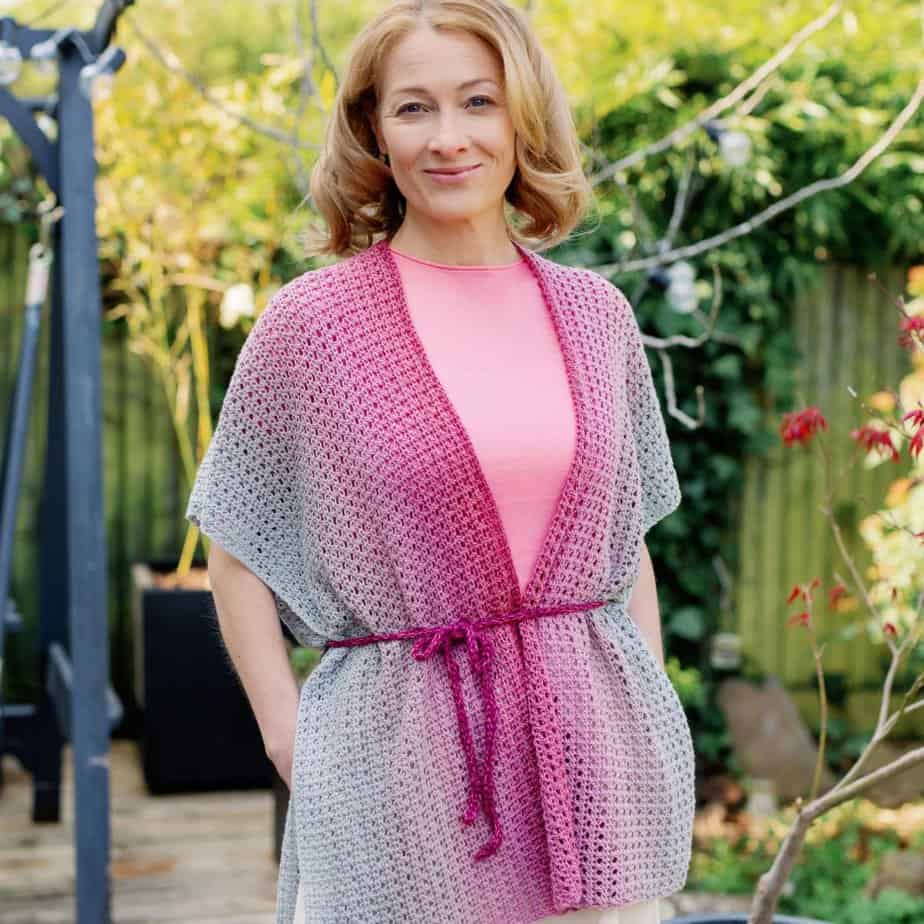
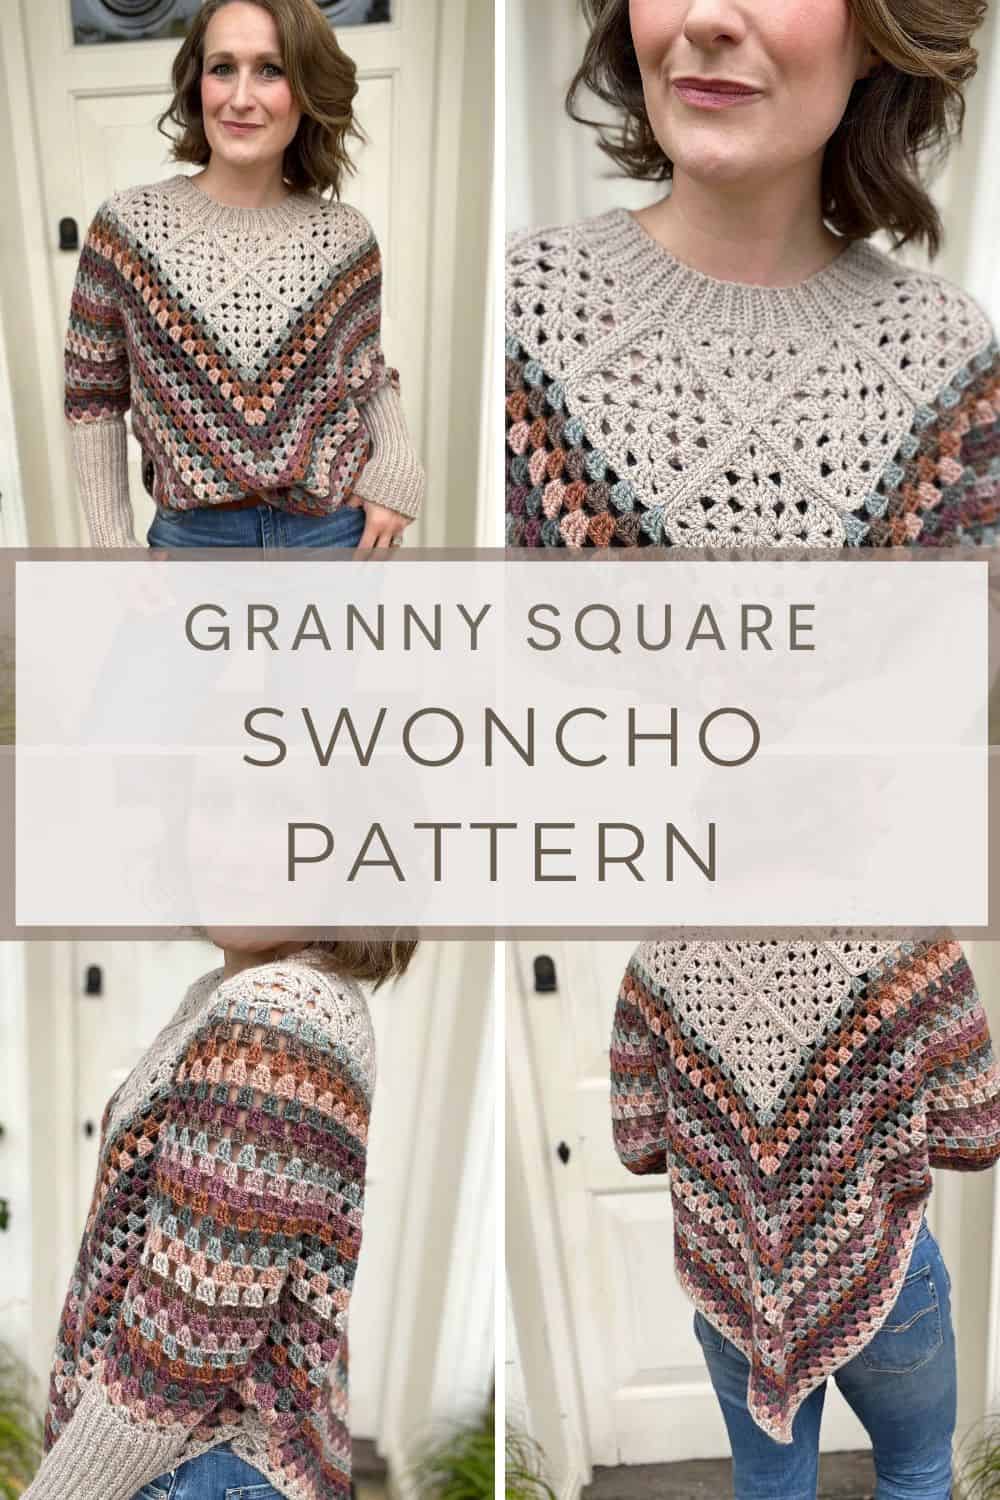
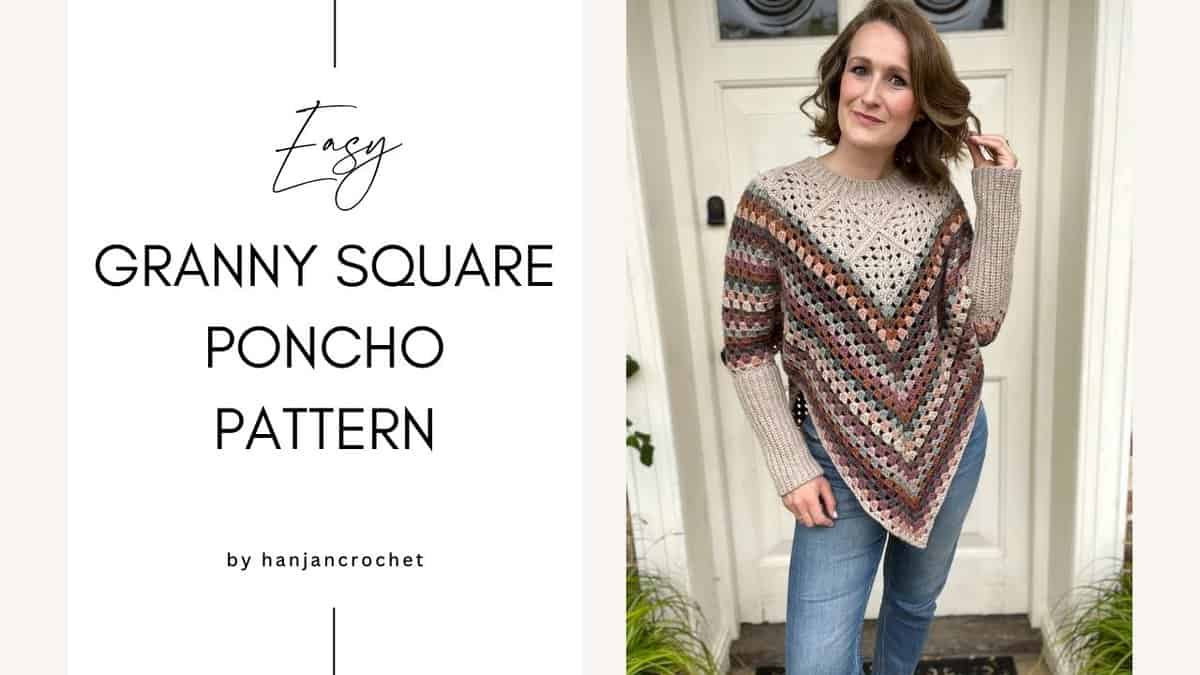
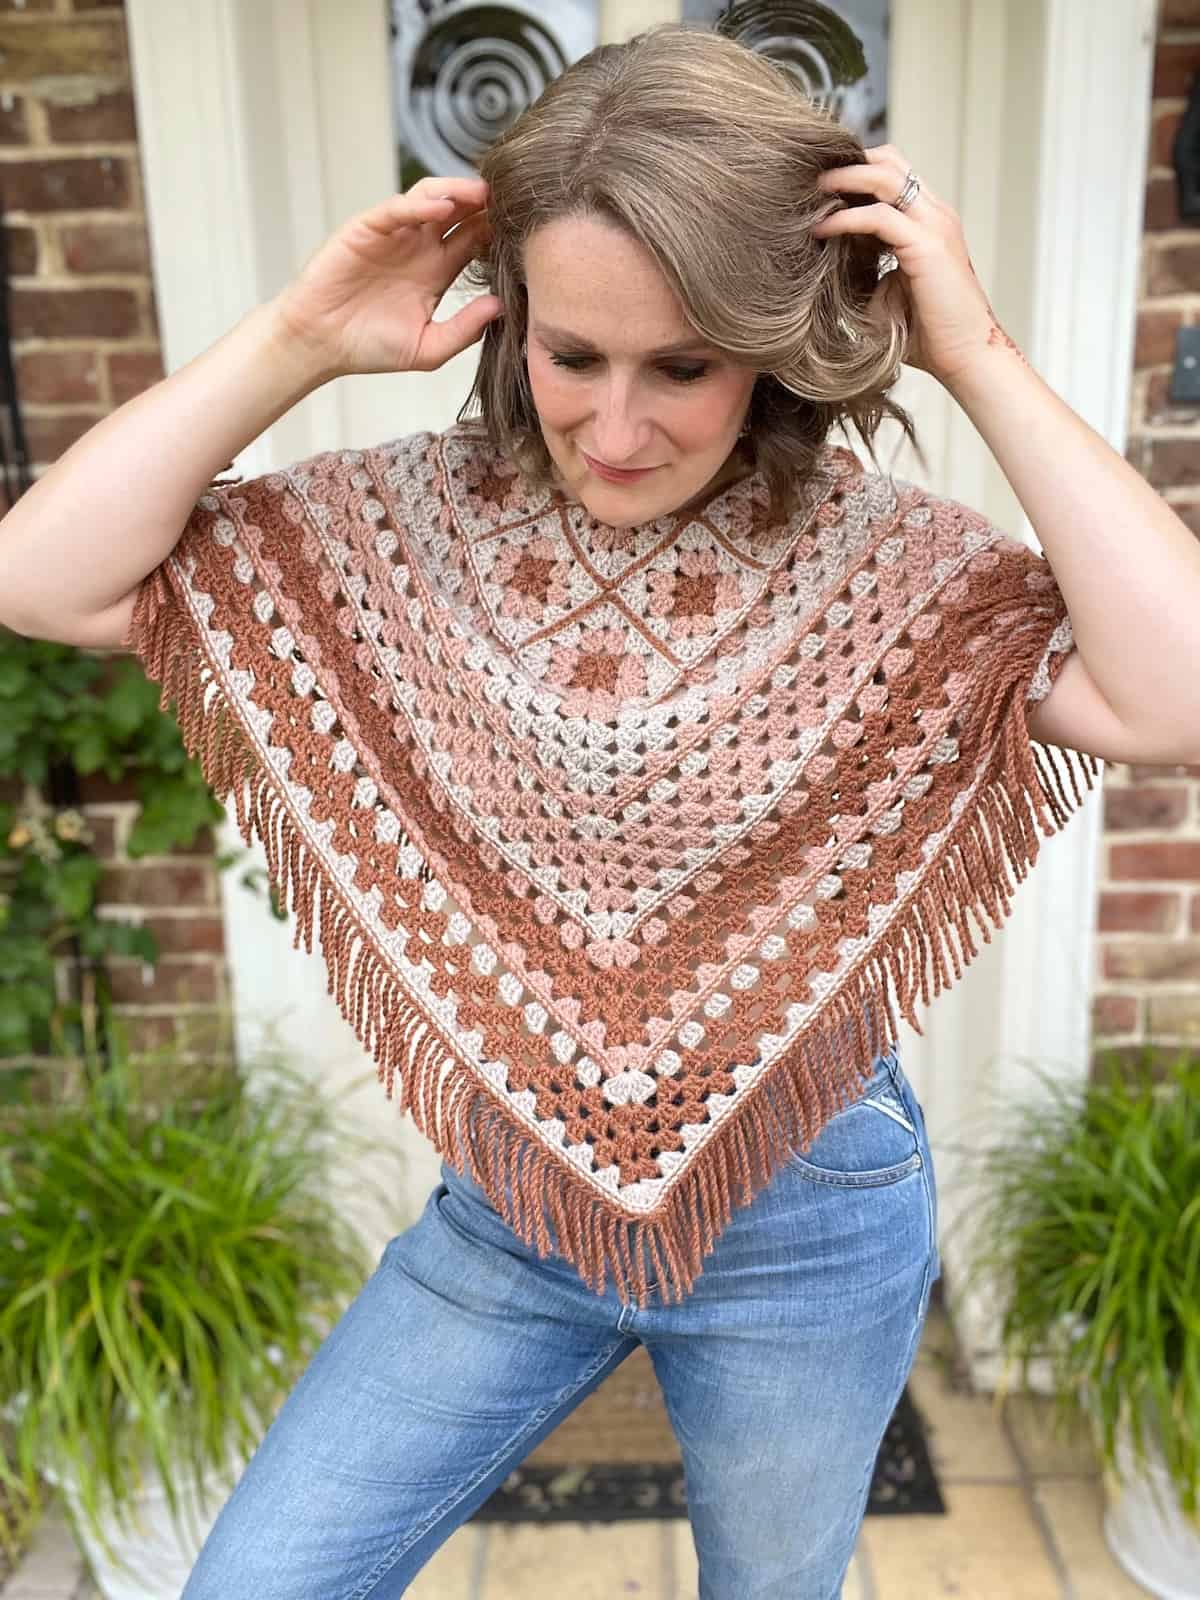
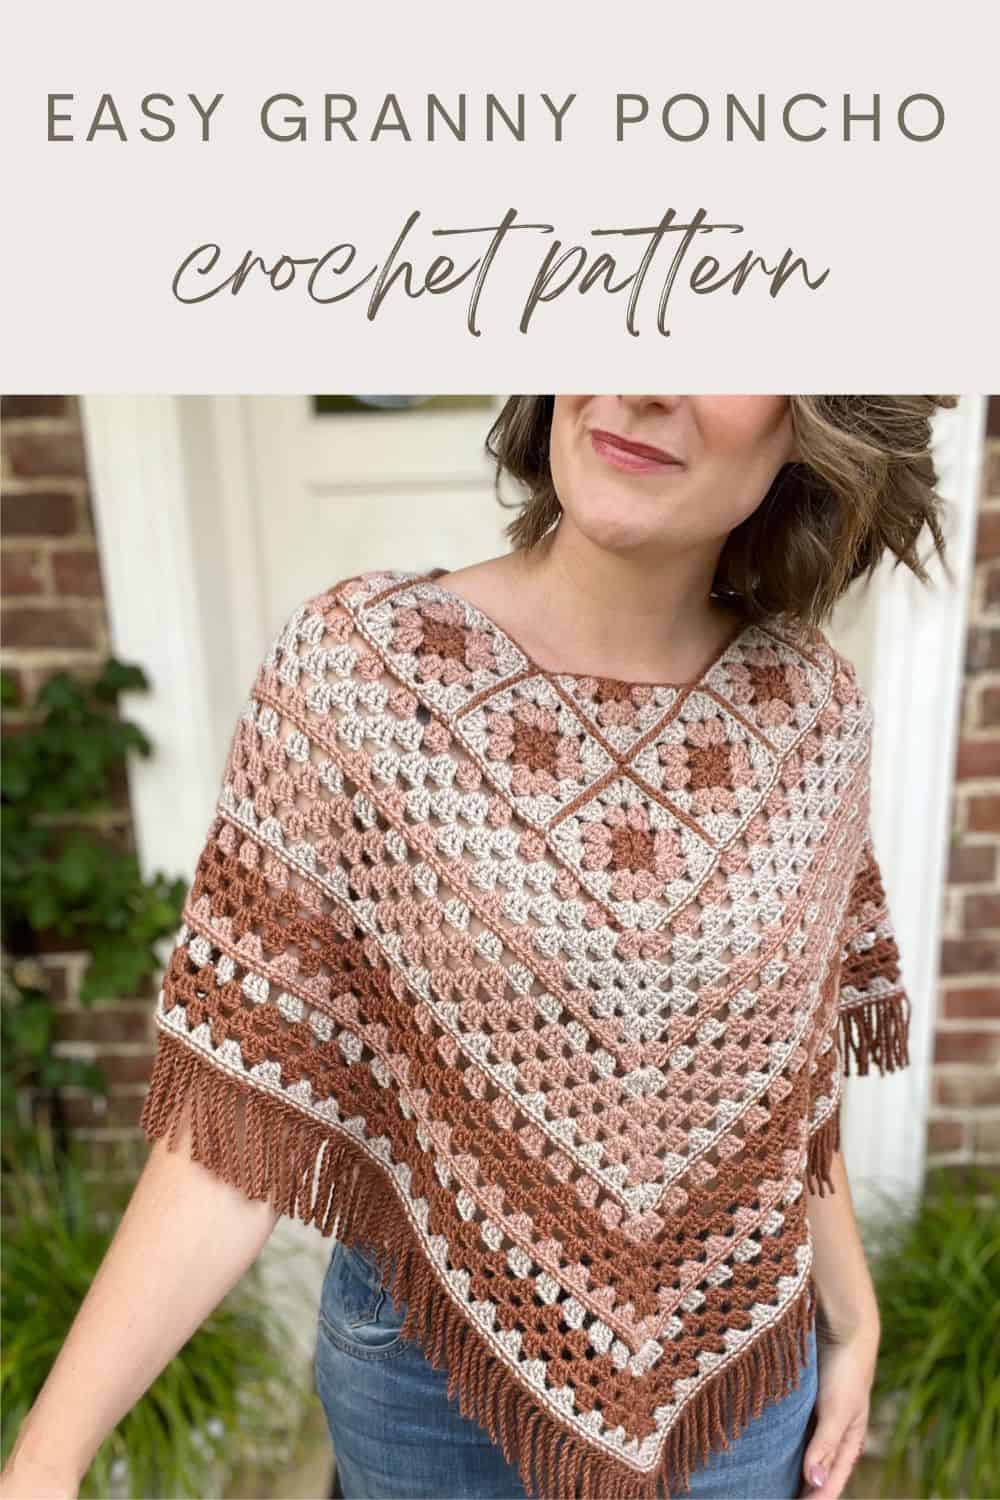
This easy granny square poncho pattern can be made with or without sleeves for either a sweater style (known as a swoncho) or traditional poncho look with a fringe!
With a simple and elegant feel and super easy construction it’s a great beginner crochet pattern using the traditional granny stitch to start making garments with.
In adult sizes from XS to 5XL with plenty of room for adjustment and personalisation, you can create you very own granny square clothes with this!
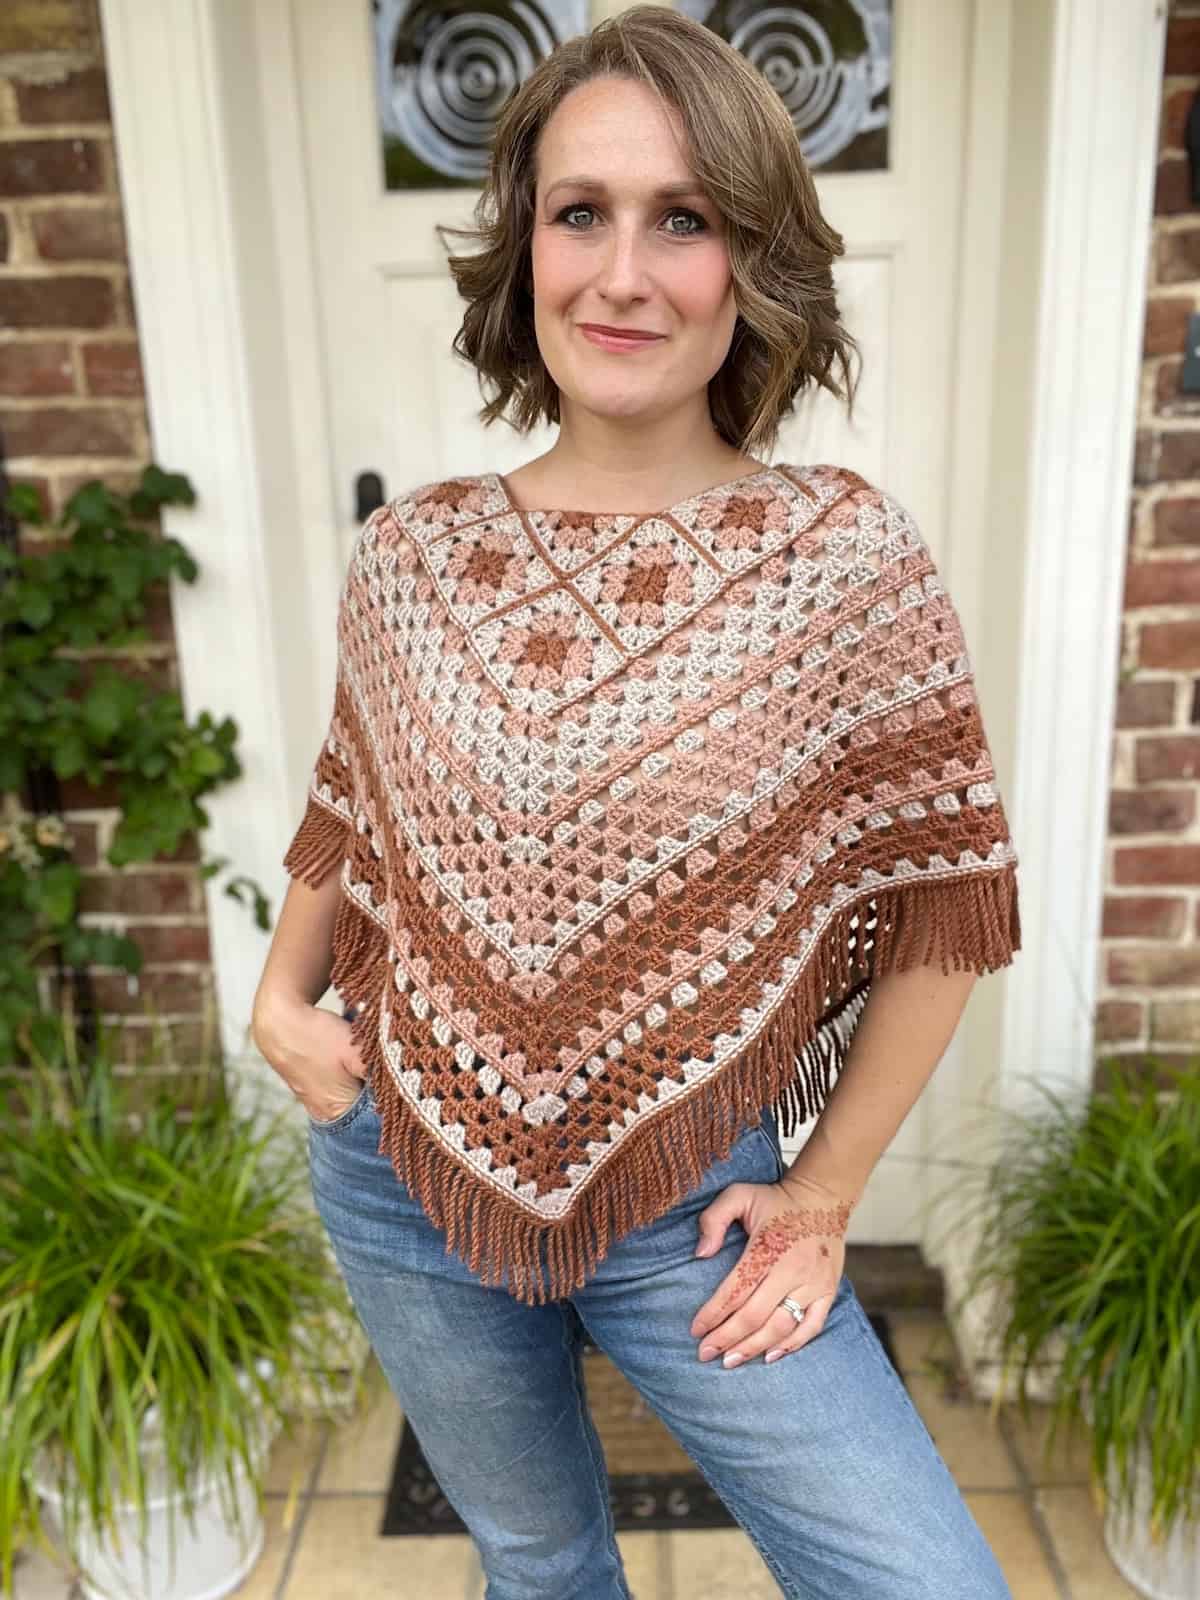
Table of Contents
More about this Easy Crochet Poncho Pattern
The history of the traditional granny square goes way back and it has seen a huge resurgence on the catwalks and high streets recently making it so very popular once again (but let’s face it, it never really went away for us crocheters!).
Want to remove Ads?
- Get ad-free access on all posts; 200+ patterns & tutorials!
- Member-only resource library with downloadable PDF guides
- Bonus eBook (Worth over $30)
But gone are the days of the old fashioned styles with it. In this new design I wanted to give a nod to the retro granny square but bring it up to date with an easy crochet poncho pattern that can be so much more.
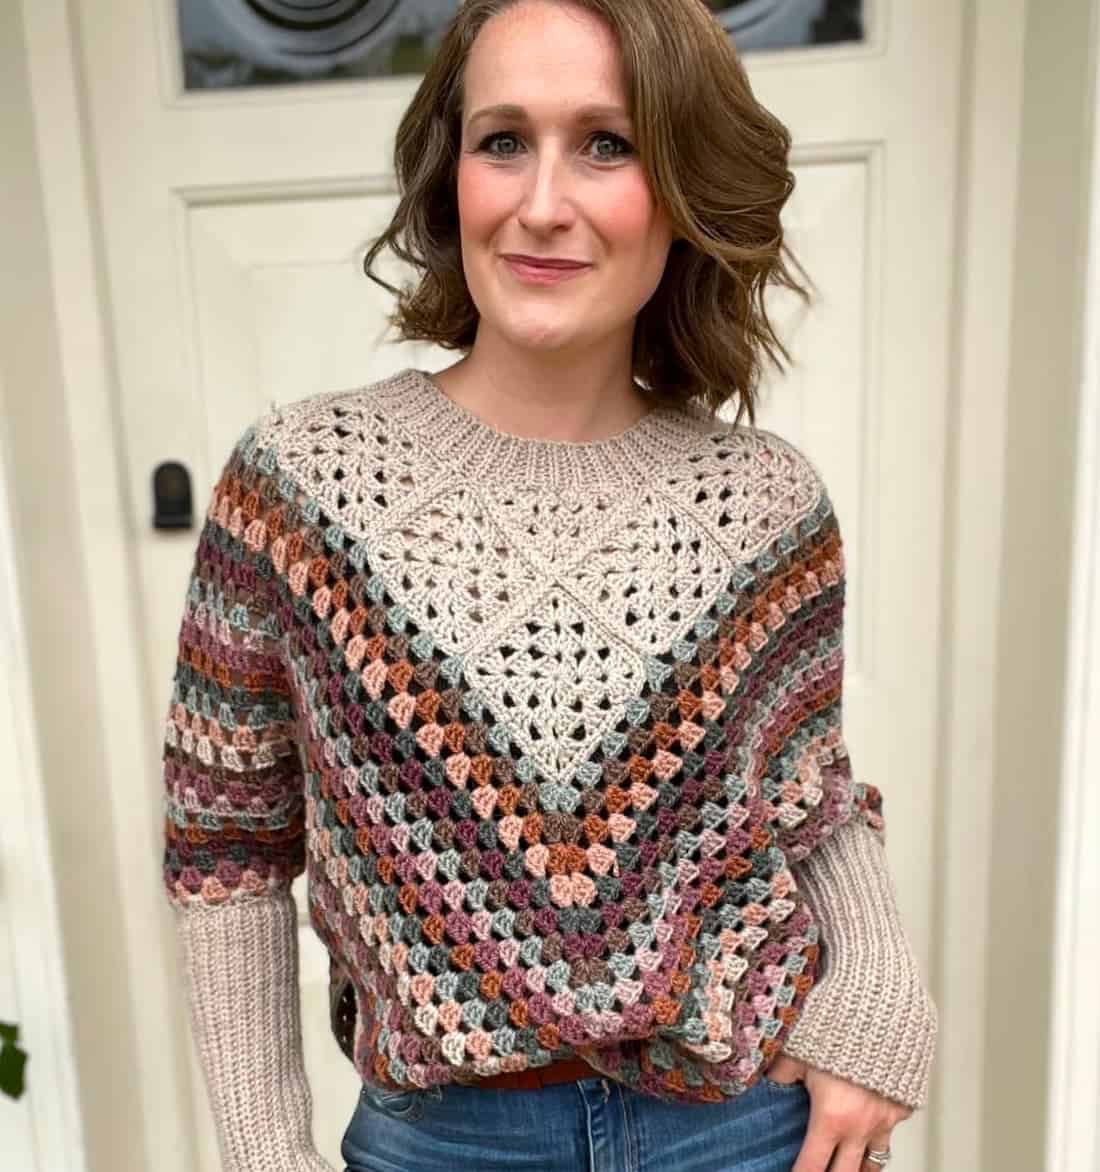
With an easy fit and endless possibilities to style to your taste, this poncho can be a swoncho with sleeves, collar or fringe!
How do you make a crochet poncho with sleeves?
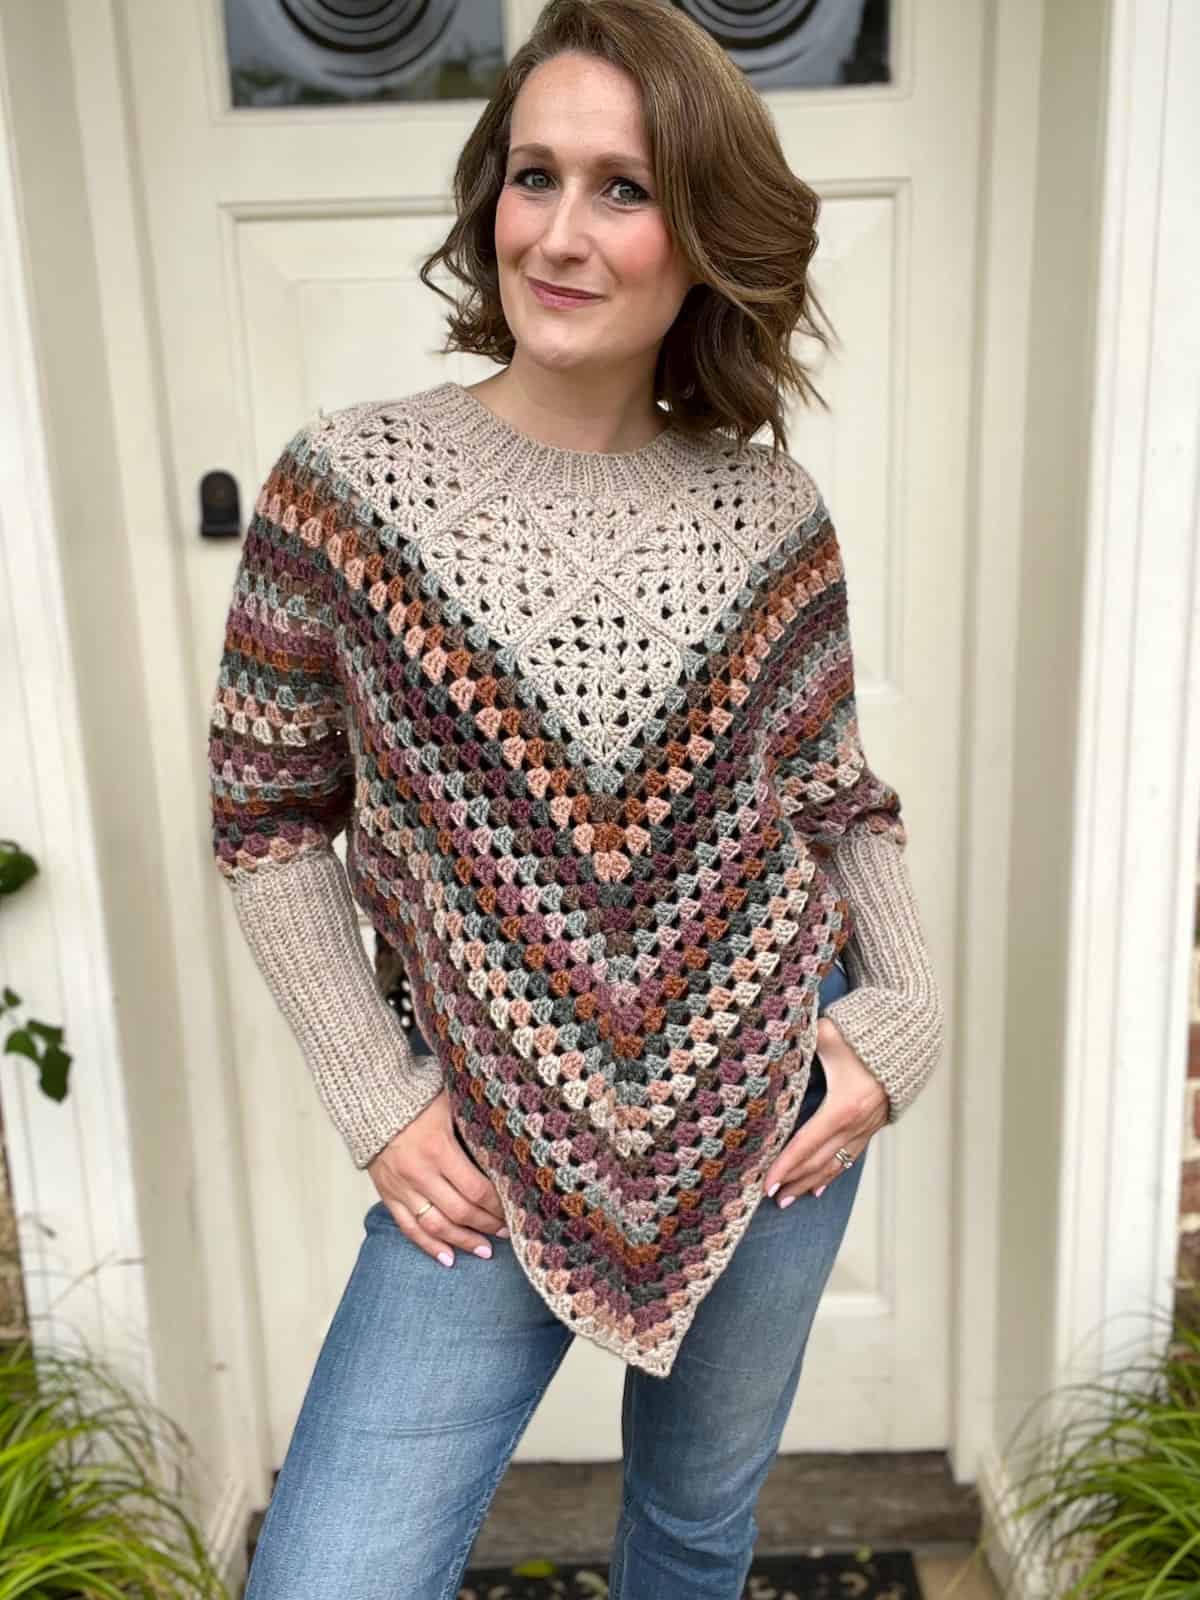
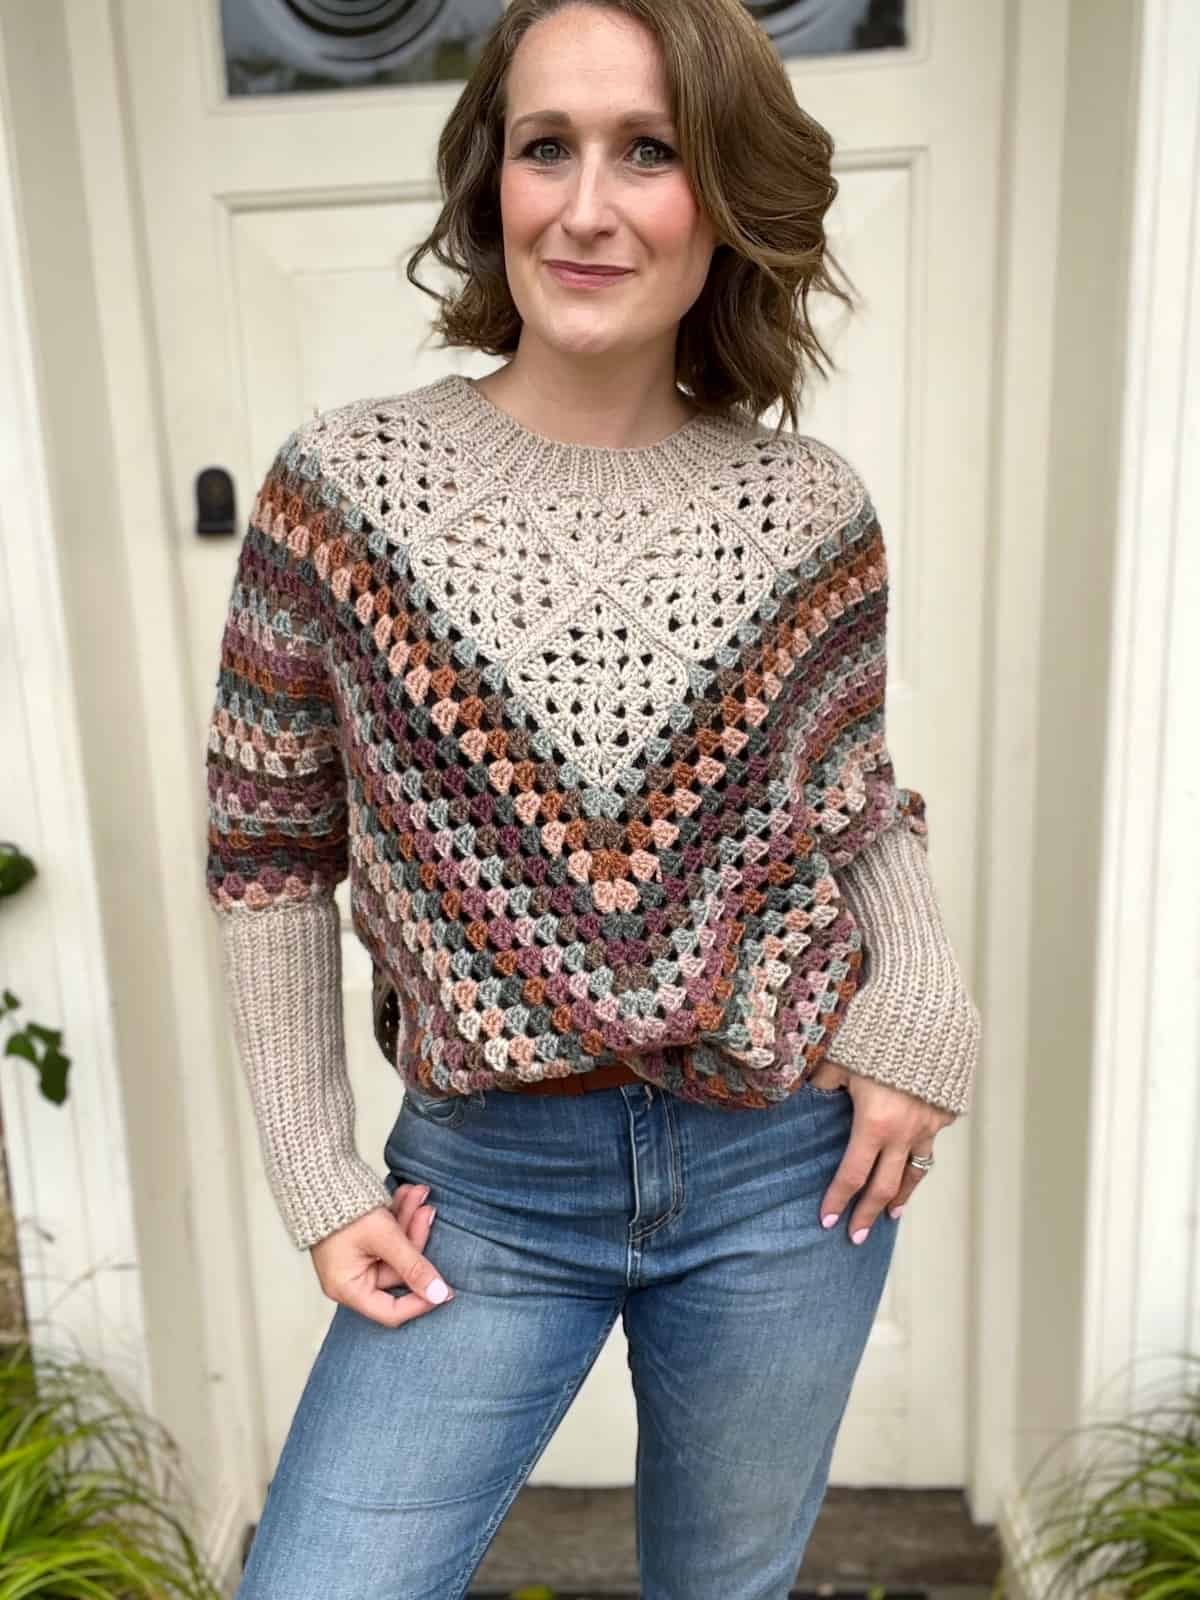
The design includes instructions for both the standard poncho or the poncho with sleeves which is sometimes called a swoncho.
It sounds like a festive joke doesn’t it?!
What is a poncho with sleeves called? A swoncho!
A sweater and poncho mixed together – how fabulous is that?!
The swoncho crochet pattern is almost identical to the poncho. The yoke and body are exactly the same. Once you have completed them we just need to crochet sleeves that then attach to the side of the poncho and add an optional collar to turn it into a swoncho!
If you love the look of this style but want a more traditional garment you’ll love my granny square cardigan and granny square sweater patterns too!
Sizing and Measurements
The pattern is in sizes XS – M (L – 2XL, 3XL – 5XL) to fit chest sizes 30″ – 38″ (42″ – 50″, 54″ – 62″).
The shaping of the poncho means that at the widest point the circumference is 58″ (62″, 66″) but this is adjustable to fit as you make it.
Once the yoke (the part with the traditional granny squares in it) is made then you can easily customise the fit of the rest to your liking as explained in the pattern.
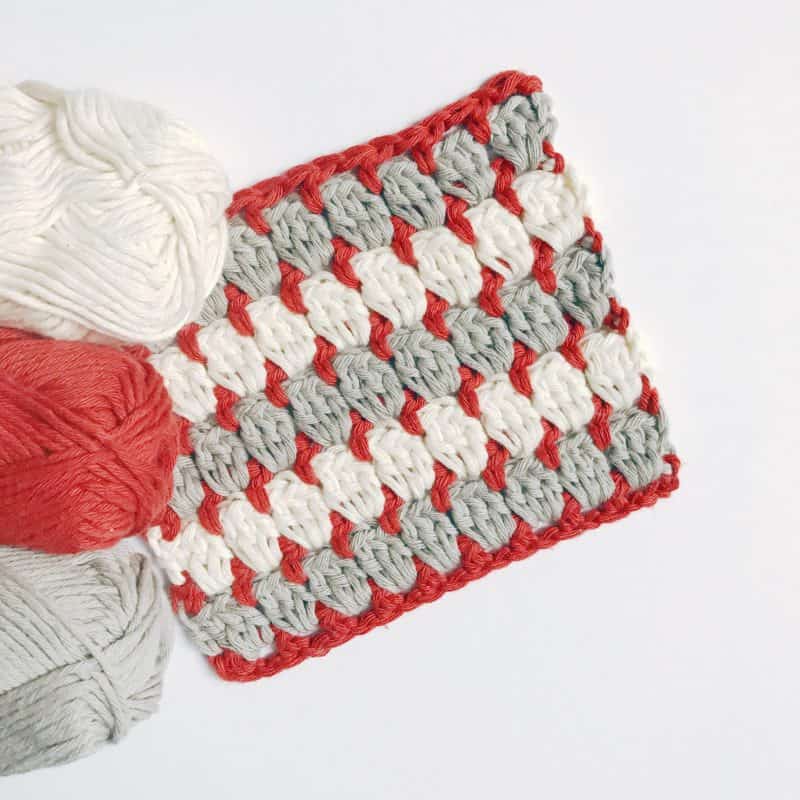
Yarn
To crochet both versions pictured (the poncho with twisted fringe and swoncho with sleeves) I used Upcycle Alpaca Blend Worsted by WeCrochet which is 33% Alpaca, 34% Wool, 33% Acrylic (219yds / 200m /100g).
The texture and feel that the mixture of wool, Alpaca and acrylic give is just stunning. See below for approximate yarn amounts for different colourway options including a solid colour too.
I used the following shades for my poncho version: Topaz, Parchment and Fawn.
I used the following shades for my multi colour swoncho version: A: Parchment, B: Fawn, C: Topaz, D: Fruit Punch, E: Garnet, F: Linen, G: Sage, H: Thyme, I: Latte.
How much yarn do I need to crochet a poncho?
This design has a large amount of positive ease meaning it is larger than your body measurements.
Approximate yarn quantities are shown for each of the 3 adult sizes in 3 different colour options:
- solid single colour
- 3 colours
- multi colours (see next page for details)
To add a twisted fringe to your poncho you will need approximately 130 (150, 170) yds of yarn (depending on how long you make it of course). This means you will need another ball of yarn in your chosen colour.
To add the sleeves and neckband for the swoncho you will need approximately 200 (240, 280) yds of yarn. This means you will need another 1 (2, 2) balls of yarn in your chosen colour.
All yarn amounts are approximate.
Single Colour Option
Yarn A: 700 (1140, 1535)yds; 4 (6, 7) balls.
Three Colour Option
Yarn A: 350 (570, 770)yds; 2 (3, 4) balls.
Yarns B and C: 175 (285, 385)yds; 1 (2, 2) balls.
Multi Colour Option
Yarn A: 235 (380, 510)yds; 2 (3, 4) balls.
Yarns B, C, D, E, F, G, H and I: 60 (95, 128)yds; 1 (1, 1) ball.
I chose to create a 3 tone and multi coloured version of the poncho as each and every shade in the Upcycle Alpaca Blend collection works so beautifully together.
Although it will be an investment to purchase all the colours, you’ll find that I have designs for a bag and hat that will use up any leftovers! From 1 ball of each multi colour shade I made 2 ponchos, 1 bag and 4 hats!
Yarn Substitutes
You can use any yarn that matches gauge and works well for your poncho! Some other great options are:
- Lion Brand Heartland (100% Acrylic, 251yds/230m/142g)
- Brava Tweed (97% Premium Acrylic, 3% viscose,218yds/100g)
- Sirdar Country Classic Worsted (50% Wool, 50% Acrylic, 218yds/200m/100g)
Materials
Along with your yarn, you will need the following:
- A 4.5mm/G+ crochet hook or hook size that meets the pattern gauge
- Scissors
- Tapestry needle
- Stitch markers
Don’t forget to join HanJan Crochet to receive regular discount codes (and more free patterns!) and Pin this fun granny square poncho pattern to your Pinterest board!
Granny Square Poncho Video Tutorial
Come along as I crochet the poncho with sleeves in this step-by-step video tutorial.
Included in the video tutorial:
Join me to make the ten motifs we need for the yoke of the poncho using a traditional granny square.
We will then join the squares to create the yoke.
Next comes the main body of the poncho which is worked in the easy granny stitch.
Finally you need to decide if you are turning your poncho into a swoncho or adding a fringe – the choice is yours! I’ll show you how to add the sleeves and collar or the fringe.
Poncho Construction
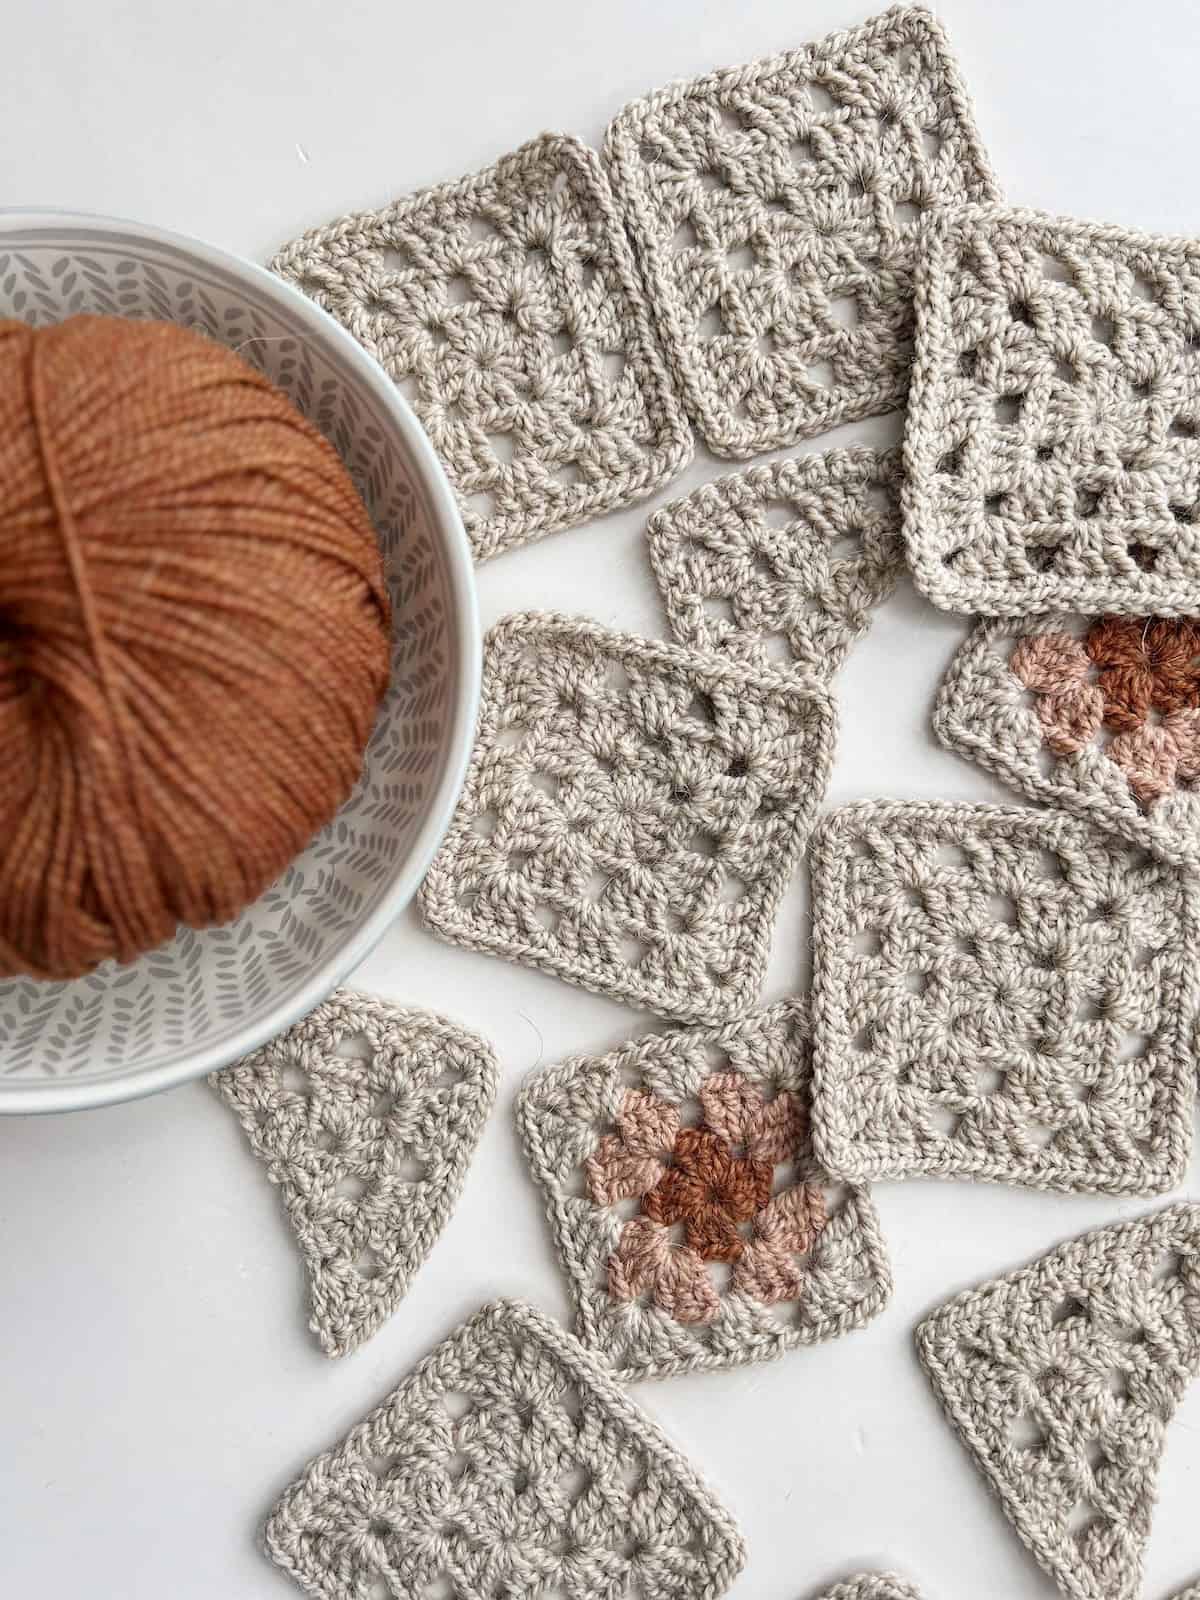
The poncho is made by first creating a yoke from full and half granny squares that are joined together with a flat slip stitch seam.
The body is then worked in rounds from the top down around the yoke using a granny stitch.
The optional fringe, sleeves and neckband are then added to complete.
Glossary and Abbreviations
beg – beginning
ch(s) – chain(s)
st(s) – stitch(es)
sp – space
ss – slip stitch
RS – right side
WS – wrong side
rep – repeat
yoh – yarn over hook
blo – back loop only
flo – front loop only
Stitches
The pattern uses the following crochet stitches:
Yo slst – yarn over slip stitch
sc – single crochet (UK dc – double crochet)
dc – double crochet (UK tr – treble crochet)
Special Stitches
Yarn Over Slip Stitch (Yo slst)
Yoh, insert your hook, yoh and pull through stitch and all loops on the hook.
Customising your crochet poncho
Adjusting the fit and length:
The great thing about the poncho is that once you have made your yoke you can adjust the fit and length to your taste!
If you would like your poncho bigger then increase the amount of groups you work on the first round of the Main Body. If you would like it smaller then work less groups on this round.
Each round will increase the size of your poncho by adding 2 extra groups of 3dc so you can increase both the length and size by working as many rounds as you would like to.
Add a detailed slip stitch to the poncho:
There are two options for working the Main Body of the poncho; with slip stitch detail or without. The 3 colour version I made has the slip stitch detail. The multi colour version does not.
The overall size of the poncho doesn’t change, it just adds a decorative detail. Both options are explained in the written pattern.
Before you dive into crocheting your poncho, take a moment to read through the pattern notes—it’s a game-changer!
These handy insights will not only simplify your pattern-reading journey but also ensure a smoother crochet experience. You’ll find helpful tips on deciphering the sizing, transitioning yarn colours, and tips on turning your work.
Trust me, a quick peek at these notes will set you up for crochet success!
- A ch1 at the beginning of a row does not count as st.
- Do not turn at the end of each round.
- Turn at the end of every row.
- Read through the entire pattern before beginning.
- Before you start, go through the pattern and highlight/mark the stitch and row counts that correspond to the size you are making (this will make your life much easier!).
- Make sure that you are familiar with all of the stitches in the abbreviations list before you begin.
- Stitch counts are given in [ ] at the end of each row. If no stitch count is given, then the count is the same as the previous row.
- The count number referring to each size is laid out as follows: XS-M (L-2XL, 3XL-5XL).
- The pattern is written in US terms.
Using your chosen colours
The colour placement for my multi colour version was very organic and so I would encourage you to work in the same way with yours!
However, if you would like to follow the same sequence and balance as I have here, then you’ll find the order I used them in the written pattern.
If choosing and planning colours is something you’d like to know more about then I’d love for you to join my Using Colour In Crochet Course – it’s designed to give you all the tools you need to choose and combine the perfect colours for every project you make!
Pattern Options
There are a few options for you to access and enjoy this crochet pattern:
- View the free pattern on the blog – all blog subscribers will be able to view the patterns supported by ads by logging into their Grow account.
- Purchase the individual pattern on Etsy or Ravelry as a beautifully formatted PDF with extra stitch charts, schematic and colour information page and more!
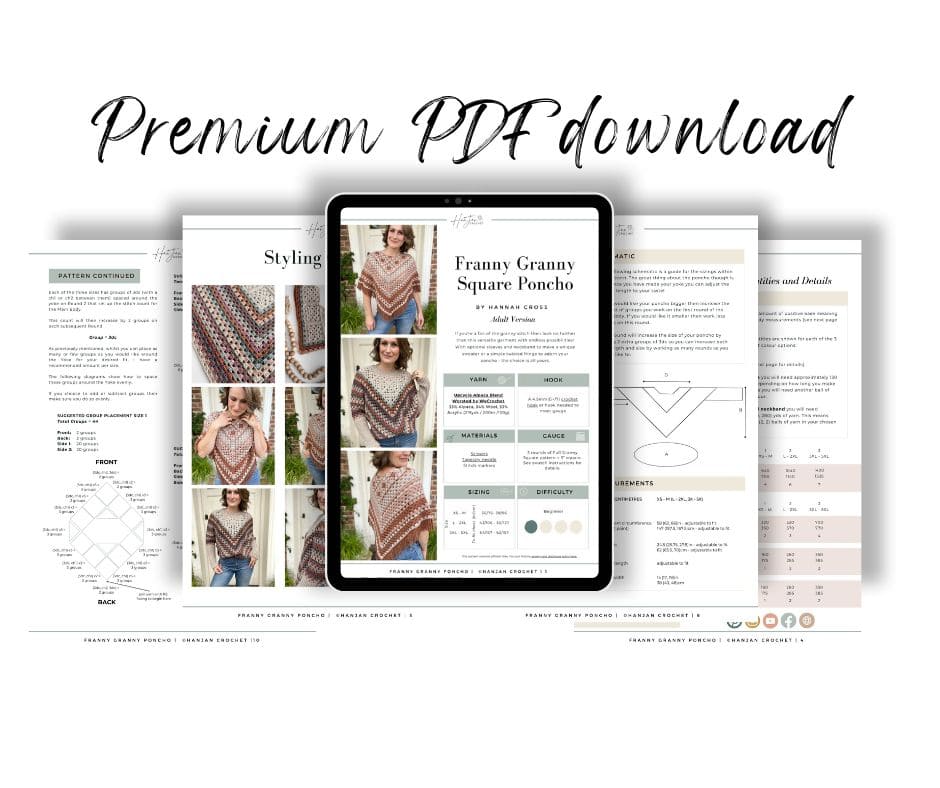
Upgrade to the ad-free PDF download
Perfect to print out or use on any device, with added schematic and charts, colour inspiration and stitch tutorials
Copyright Notice
The Franny Granny Poncho Crochet Pattern and its contents are fully owned and copyrighted by HanJan Crochet Ltd., and all rights are reserved.
This pattern is protected by copyright and other intellectual property laws and may not be reproduced, distributed, or transmitted in any form or by any means without the prior written consent of the author (Hannah Cross of HanJan Crochet Ltd).
Unauthorised distribution or reproduction of this pattern or elements of the instructions is strictly prohibited. The free to view crochet pattern is intended for personal viewing only. By accessing this pattern, you acknowledge and agree to comply with these copyright terms and conditions.
Pattern Support
I am delighted to invite you to join the HanJan Crochet Community Facebook Group where we host all pattern support queries and love to see your progress, yarn choices and finished projects!
Easy Crochet Poncho Pattern Free for Blog Subscribers to View
To unlock Exclusive Content on the HanJan Crochet Blog, all you need to do is click the box below and the Grow.me app will pop up, allowing you to enter your email and create a password.
Once you’ve created an account, every time you see Exclusive Content on my blog (or any others that use Grow), simply login to your Grow account. Be sure to switch to the login screen to enter your login credentials.
If you forget your password, click the “forgot password” link and follow the prompts. Please note that I’m unable to assist with resetting Grow passwords or accessing your Grow account, so be sure to save your login information in a safe place.
Thank you for subscribing and for joining me at HanJan Crochet! I hope you enjoy the exclusive content available on the site and I can’t wait to see what you create 🙂
US Terminology
Pattern Gauge
3 rounds of granny square pattern = 3” square
Read all about how to make a crochet gauge swatch and why it matters.
A gauge swatch will help you find out if your yarn and hook size will give you the tension for the poncho and make it the size of the schematic.
Work a gauge swatch as given below and then block it lightly before measuring to make sure you meet the gauge.
If your swatch is smaller than the tension states, try changing to a bigger hook.
If your swatch is bigger than the tension states, try changing to a smaller hook.
This is also a great way to get used to the stitches used in the project and practise getting your stitches nice and neat.
I would recommend making your swatch in colour A.
Using a 4.5mm hook make a magic ring.
Round 1: ch1, (3dc into ring, ch2) 4 times, ss in 1st dc to join [12dc, 4 x ch2-sp], ss to 1st ch2-sp.
Round 2: ch1, (3dc, ch2, 3dc) in ch2-sp, ch1, *(3dc, ch2, 3dc) in next ch2-sp, ch1; rep from * 2 more times, ss in 1st dc to join [24dc, 4 x c2-sp, 4 x ch1-sp] ss to 1st ch2-sp.
Round 3: ch1, (3dc, ch2, 3dc) in ch2-sp, ch1, 3dc in next ch1-sp, ch1, *(3dc, ch2, 3dc) in next ch2-sp, ch1, 3dc in next ch1-sp, ch1; rep from *2 more times, ss in 1st dc to join [36dc, 4 x ch2-sp, 8 x ch1-sp].
Yoke
Full Granny Square:
Make 10 for each size of poncho.
All sizes: work Rounds 1-3.
Make a magic ring.
Round 1: ch1, (3dc into ring, ch2) 4 times, ss in 1st dc to join [12dc, 4 x ch2-sp].
If changing colour break yarn and join new colour to any ch2-sp, if continuing in same colour ss to 1st ch2-sp.
Round 2: ch1, (3dc, ch2, 3dc) in ch2-sp, ch1, *(3dc, ch2, 3dc) in next ch2-sp, ch1; rep from * 2 more times, ss in 1st dc to join [24dc, 4 x c2-sp, 4 x ch1-sp].
If changing colour break yarn and join new colour to any ch2-sp, if continuing in same colour ss to 1st ch2-sp.
Round 3: ch1, (3dc, ch2, 3dc) in ch2-sp, ch1, 3dc in next ch1-sp, ch1, *(3dc, ch2, 3dc) in next ch2-sp, ch1, 3dc in next ch1-sp, ch1; rep from *2 more times, ss in 1st dc to join [36dc, 4 x ch2-sp, 8 x ch1-sp].
Finish here for Size 1.
Size 2 only:
Round 4: continue in same yarn colour, ch1, sc in each dc and ch1-sp around, 3sc in each ch2-sp [56sc].
Size 3 only:
If changing colour break yarn and join new colour to any ch2-sp, if continuing in same colour ss to 1st ch2-sp.
Round 4: ch1, (3dc, ch2, 3dc) in ch2-sp, ch1, (3dc in next ch1-sp, ch1) twice, *(3dc, ch2, 3dc) in next ch2-sp, ch1, (3dc in next ch1-sp, ch1) twice; rep from *2 more times, ss in 1st dc to join [48dc, 4 x ch2-sp, 12 x ch1-sp].
Half Granny Square:
Make 4 for each size of poncho. Remember to turn after each row.
All sizes: work Rows 1-3
Change colours to match your Full Granny Squares at the end of each row.
Make a magic ring.
Row 1: ch1, 3dc, ch2, 3dc into magic ring [6dc, 1 x ch2-sp].
Row 2: ch1, 3dc in 1st st, ch1, (3dc, ch2, 3dc) in ch2-sp, ch1, 3dc in last st [12dc, 1 x ch2-sp, 2 x ch1-sp].
Row 3: ch1, 3dc in 1st st, ch1, 3dc in next ch1-sp, ch1, (3dc, ch2, 3dc) in ch2-sp, ch1, 3dc in next ch1-sp, ch1, 3dc in last st [18dc, 1 x ch2-sp, 4 x ch1-sp].
Finish here for Size 1.
Size 2 only:
Row 4: ch1, sc in each dc and ch1-sp, 3sc in ch2-sp [25sc].
Size 3 only:
Row 4: ch1, 3dc in 1st st, ch1, (3dc in next ch1-sp, ch1) twice, (3dc, ch2, 3dc) in ch2-sp, ch1, (3dc in next ch1-sp, ch1) twice, 3dc in last st [24dc, 1 x ch2-sp, 6 x ch1-sp].
Weave in ends and block all Full Granny Squares and Half Granny Squares to measurements before joining.
Block your squares to XS-M (L-2XL, 3XL-5XL): 3″ (3.5″, 4″).
Joining the squares to create the yoke
Position the Full and Half Granny Squares as shown in the diagram below. Join using a flat slip stitch seam in your desired colour to the right side.
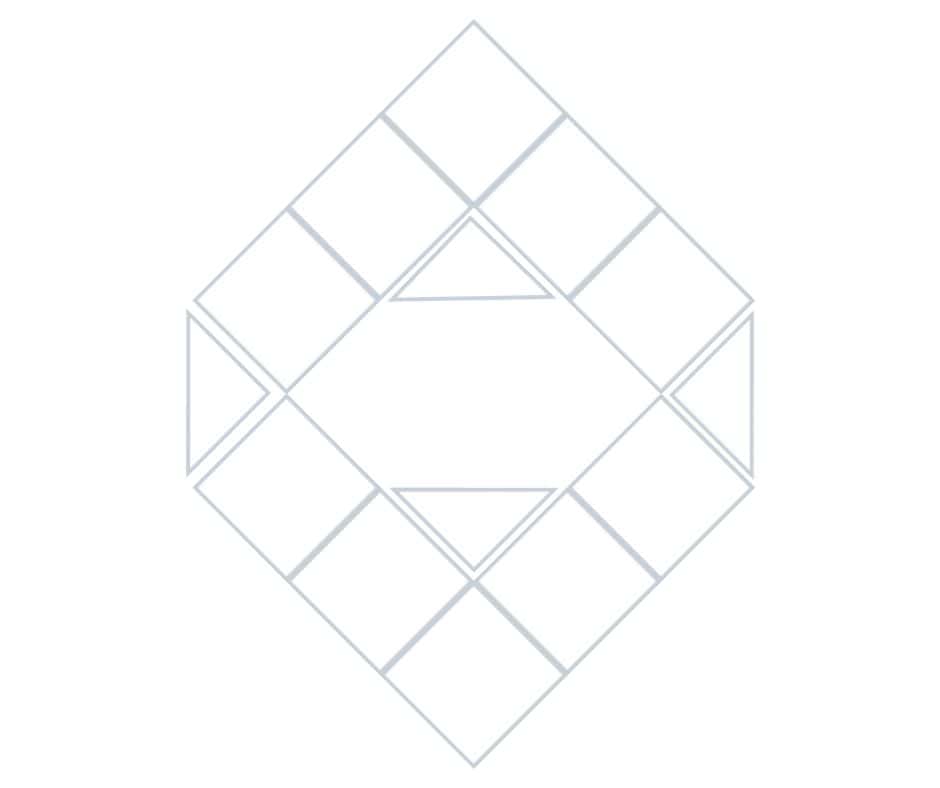
All sizes use the same number of full and half granny squares as shown in the diagram but they will differ in size making the yoke the right size.
Choose your main body style
You will see from the images that there are two different versions of the Main Body to choose from.
The multi coloured version with sleeves uses the SIMPLE GRANNY STITCH MAIN BODY and the one with three colours and twisted fringe uses the DETAILED GRANNY STITCH MAIN BODY.
Both are worked in a really similar way, the detailed one just has some extra rounds of slip stitches to create more detail.
The first two rounds of both styles are worked in the same way.
The full pattern for each will be detailed further down but also explained here so that you can adjust your sizing if you would like to.
Main body set up instructions
With WS facing join yarn to ch2-sp/central sc at point of yoke (this will become the back of the body).
Round 1: ss in flo of each st, ch and ch2-sp around, ss in 1st to join. Break yarn.
Turn to RS facing and join yarn to ch2-sp(sc, ch2-sp) at point of yoke over the top of Round 1 slip stitches.
In the following example n = the number of groups along each side between the front and back points.
These are set as a guide and are completely adjustable to suit how you would like your poncho to fit.
If you are changing the group count then just make sure to work matching numbers of groups on each side.
Also make sure that after Round 2 your poncho isn’t too puckered or wavy. Try it on to make sure that you are happy with where it sits on you before continuing.
The suggested number of groups in the pattern are for an oversized, easy fit as shown in the images.
Round 2: ch1, (3dc, ch2, 3dc) into ch2-sp(sc, ch2-sp), ch1, work (n groups of 3dc in blo of ss, ch1), evenly along side of yoke until you reach the next ch2-sp, (3dc, ch2, 3dc) into next ch2-sp(sc, ch2-sp), ch1, work (n groups of 3dc in blo of ss, ch1), evenly along side of yoke until you reach the first ch2-sp again, ss in 1st dc to join.
Each of the three sizes has groups of 3dc (with a ch1 or ch2 between them) spaced around the yoke on Round 2 that set up the stitch count for the Main Body.
This count will then increase by 2 groups on each subsequent Round.
Group = 3dc
As previously mentioned, whilst you can place as many or few groups as you would like around the Yoke for your desired fit, I have a recommended amount per size.
If you choose to add or subtract groups then make sure you do so evenly.
The following instructions include group numbers and placement for each size. The PDF version of the pattern includes extra placement diagrams.
Above all this is designed to be a simple, repetitive pattern so don’t worry too about exactly where your groups land. As long as you are happy with the placement and fit around your shoulders then that is great!
SUGGESTED GROUP PLACEMENT SIZE 1
Total Groups = 44
Front: 2 groups
Back: 2 groups
Side 1: 20 groups
Side 2: 20 groups
SUGGESTED GROUP PLACEMENT SIZE 2
Total Groups = 60
Front: 2 groups
Back: 2 groups
Side 1: 28 groups
Side 2: 28 groups
SUGGESTED GROUP PLACEMENT SIZE 3
Total Groups = 74
Front: 2 groups
Back: 2 groups
Side 1: 35 groups
Side 2: 35 groups
Simple Granny Stitch Poncho Main Body
Shown in multi colour sleeved poncho. Colour change suggestions below.
With WS facing join yarn to ch2-sp/central sc at point of yoke (this will become the back of the body).
Round 1: ss in flo of each st around (chains count as sts here), ss in 1st to join. Break yarn.
Turn to RS facing and join yarn B to ch2-sp/sc at point of yoke over the top of Round 1 slip stitches.
Round 2: ch1, (3dc, ch2, 3dc) into ch2-sp(sc, ch2-sp), ch1, work (20 (28, 35) groups of 3dc in blo of ss, ch1), evenly along side of yoke until you reach the next ch2-sp, (3dc, ch2, 3dc) into next ch2-sp(sc, ch2-sp), ch1, work (20 (28, 35) groups of 3dc in blo of ss, ch1), evenly along side of yoke until you reach the first ch2-sp again, ss in 1st dc to join [44 (60, 74) 3dc groups, 2 x ch2-sp].
If changing colour, break yarn and join new colour to 1st ch2-sp, if continuing in same colour ss to 1st ch2-sp.
Round 3: ch1, *(3dc, ch2, 3dc) into ch2-sp, ch1, (3dc into each ch1-sp, ch1), to next ch2-sp; rep from * to end, ss in 1st st to join [46 (62, 76) 3dc groups, 2 x ch2-sp].
Round 4-26 (or until desired length): Repeat Round 2 increasing by two 3dc groups each round.
Break yarn. Continue to add optional neckband, sleeves and/or fringe.
Round 1: G, Sage
Round 2: I, Latte
Round 3: C, Topaz
Round 4: B, Fawn
Round 5: H, Thyme
Round 6: E, Garnet
Round 7: I, Latte
Round 8: G, Sage
Round 9: F, Linen
Round 10: D, Fruit Punch
Round 11: C, Topaz
Round 12: H, Thyme
Round 13: G, Sage
Round 14: B, Fawn
Round 15: A, Parchment
Round 16: I, Latte
Round 17: D, Fruit Punch
Round 18: F, Linen
Round 19: G, Sage
Round 20: C, Topaz
Round 21: E, Garnet
Round 22: H, Thyme
Round 23: D, Fruit Punch
Round 24: B, Fawn
Round 25: A, Parchment
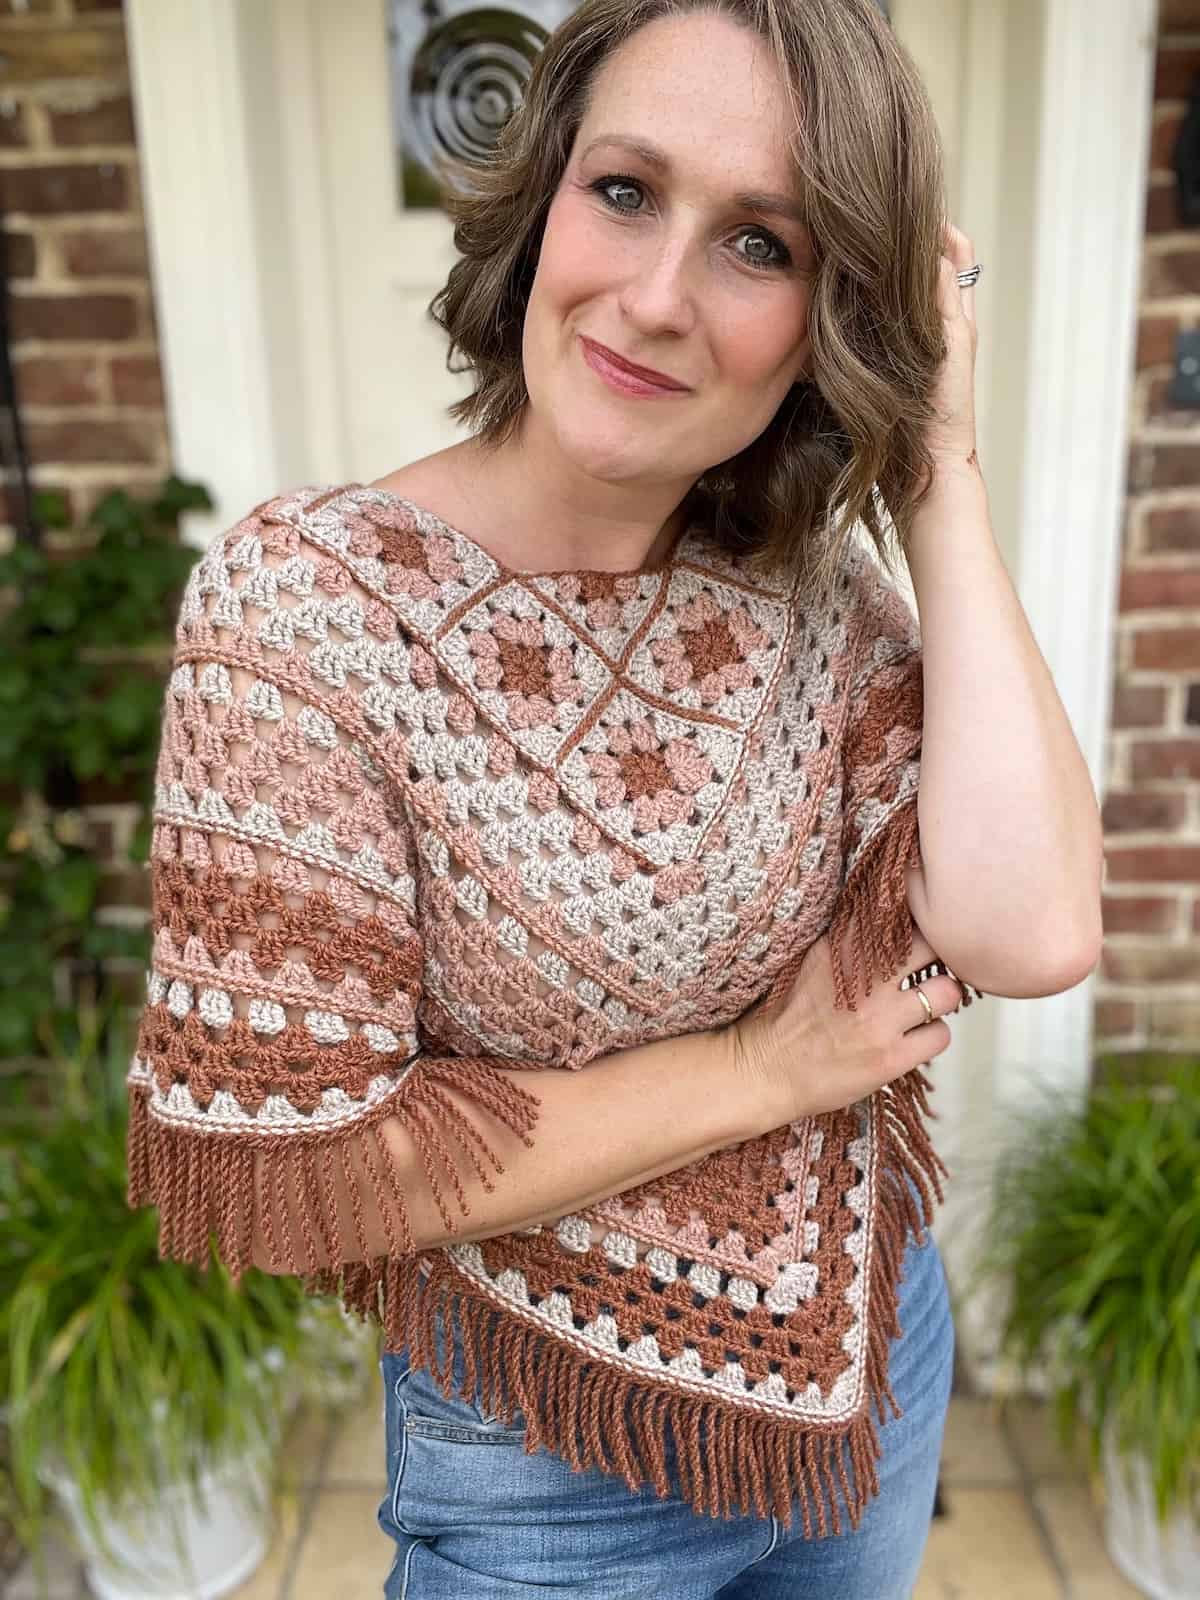
Detailed Granny Stitch Main Body
Shown in 3 colour poncho with twisted fringe version.
With WS facing join yarn C to ch2-sp at point of yoke (this will become the back of the body).
Round 1: ss in flo of each st around (chains count as sts here), ss in 1st to join. Break yarn.
Turn to RS facing and join yarn B to ch2-sp/sc at point of yoke over the top of Round 1 slip stitches.
Round 2: ch1, (3dc, ch2, 3dc) into ch2-sp(sc, ch2-sp), ch1, work (20 (28, 35) groups of 3dc in blo of ss, ch1), evenly along side of yoke until you reach the next ch2-sp, (3dc, ch2, 3dc) into next ch2-sp(sc, ch2-sp), ch1, work (20 (28, 35) groups of 3dc in blo of ss, ch1), evenly along side of yoke until you reach the first ch2-sp again, ss in 1st dc to join [44 (60, 74) 3dc groups, 2 x ch2-sp].
Change to A.
Round 3: ch1, *(3dc, ch2, 3dc) into ch2-sp, ch1, (3dc into each ch1-sp, ch1), to next ch2-sp; rep from * to end, ss in 1st st to join [46 (62, 76) 3dc groups, 2 x ch2-sp].
Rounds 4 – 5: Repeat Round 3, increasing by two 3dc groups each round.
Change to B.
Round 6: Repeat Round 3. Break yarn.
With WS facing join yarn C to ch2-sp at point of yoke.
Round 7: Repeat Round 1.
Rounds 8 – 12: Repeat Round 3 in the following colour sequence – A, B, B, B, A.
With WS facing join yarn C to ch2-sp at point of yoke.
Round 13: Repeat Round 1.
Rounds 14 – 18: Repeat Round 3 in the following colour sequence – B, C, C, C, B.
With WS facing join yarn C to ch2-sp at point of yoke.
Round 19: Repeat Round 1.
Rounds 20 – 24: Repeat Round 3 in the following colour sequence – A, C, C, C, A.
With WS facing join yarn C to ch2-sp at point of yoke.
Round 25: Repeat Round 1.
Break yarn. Continue to add optional neckband, sleeves and/or fringe.
How to add a twisted fringe (optional)
Shown in 3 colour poncho version.
You can add a twisted fringe to the final round of your poncho. I used colour C for mine and would recommend to use the colour of the final round to make it look neater.
With RS facing, join yarn to any stitch on the final round.
Using your hook, pull the yarn away from your project for the desired length. The twisted fringe will be just less than half of this height. I used my crochet hook as my guide for length here.
Pinch the base of the loop with your fingers so that it stays in place for the first spin. Turn clockwise 18-22 times (or as many as you like) to create the twist.
Don’t worry if it looks a wobbly mess at this point!
Keeping hold of the twist at the base, insert your hook back into the same stitch and secure with a slip stitch.
Slip stitch into the next stitch and repeat the process.
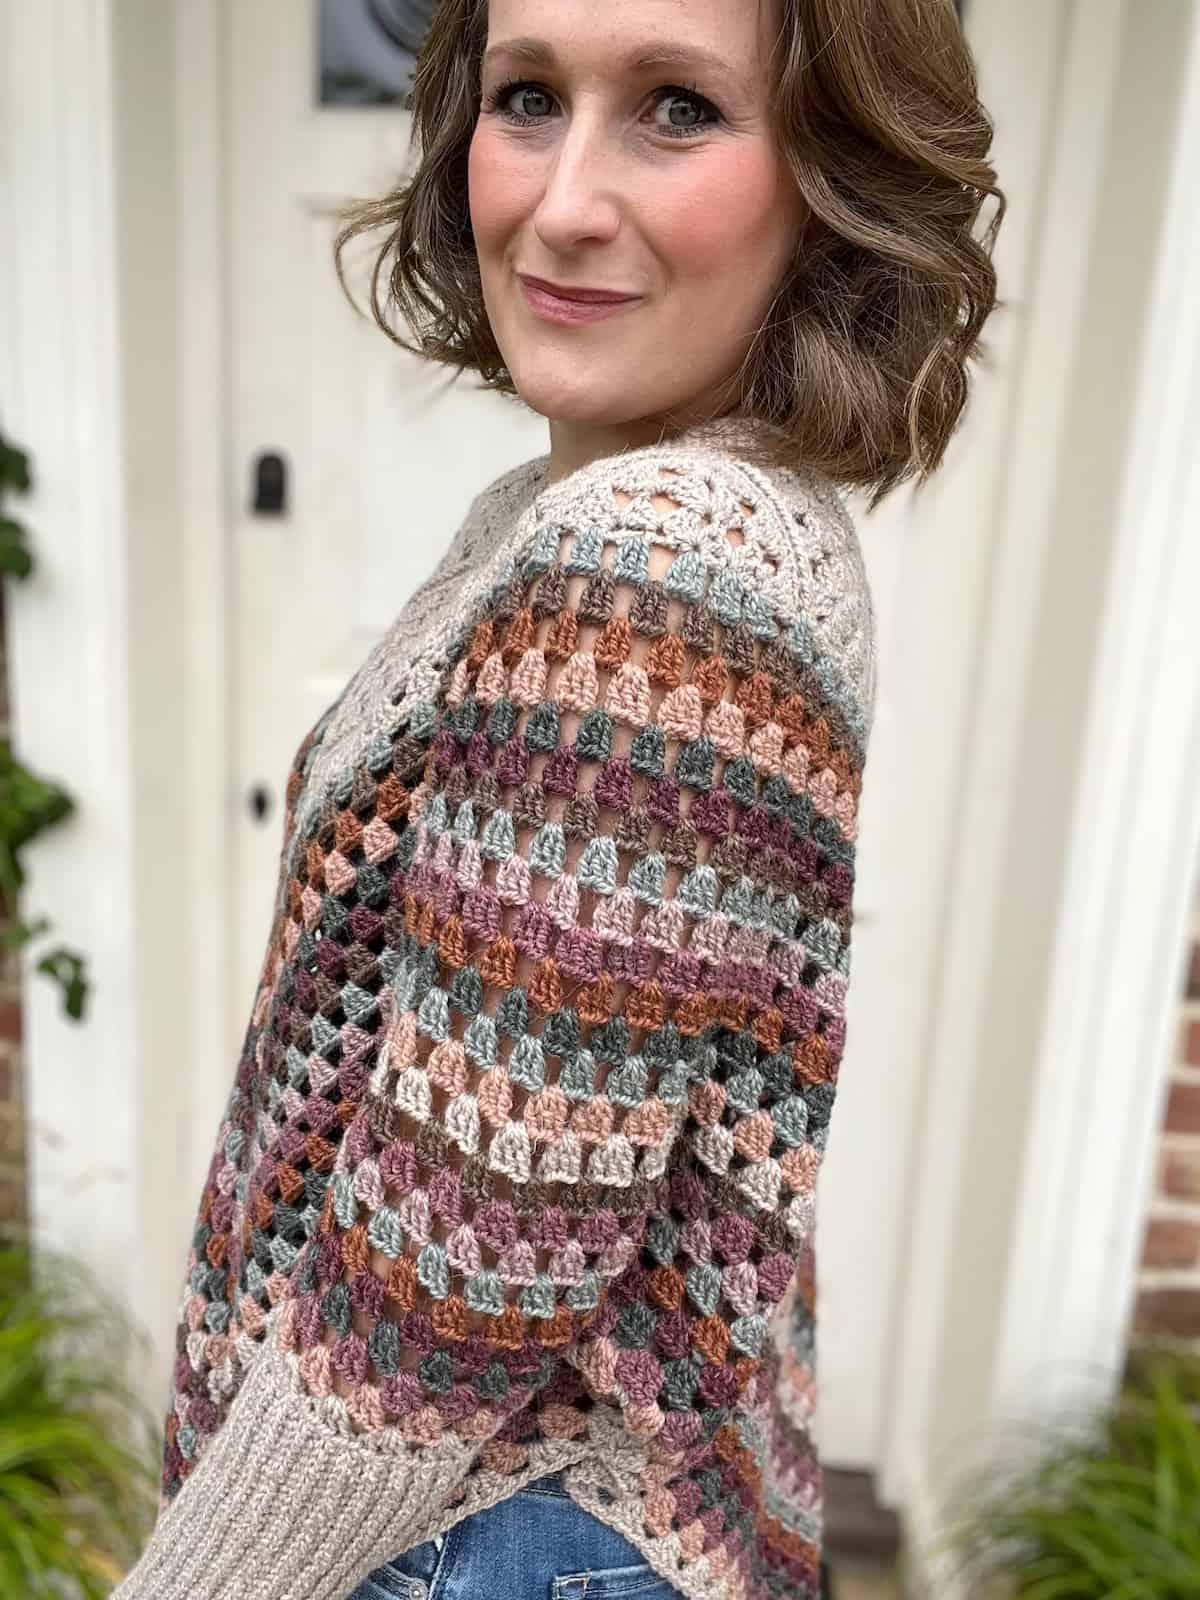
How to add sleeves to a poncho (optional)
Shown in multi colour swoncho version.
The sleeves are made separately and then sewn in place allowing you to gather the poncho as much or as little as you like.
Once your poncho is the length you would like it try it on and measure from where it ends on your arm to your wrist. This is how long your sleeve needs to be.
Using desired colour (I chose A) make a chain to match the length you’d like your sleeve to be. I chained 48.
Row 1: yo slst in 2nd ch from hook and each to end [47].
Row 2 – 44 (or desired size): ch1, yo slst in blo of each st to end.
Join the last row to the first row with a slip stitch seam and break yarn leaving a tail long enough to sew with.
Sew the sleeves in place on either side.
How to add a collar (optional)
Shown in multi colour sweater version.
Adding a neckband can really make the poncho look more like a sweater!
We use a join as you go method here, turning at the end of each row.
Using desired colour join yarn to any stitch in line with a shoulder on neckline, ch9.
Row 1: yo slst in 2nd ch from hook and each to end, ss in next 2 sts of neckline [8].
Row 2: yo slst in blo of each st to end.
Row 3: ch1, yo slst in blo of each st to end, ss in next 2 sts of neckline.
Repeat Rows 2 and 3 around the neckline.
Join the last row to the first row with a slip stitch seam to complete.
Weave in ends and block lightly to finish.
Join HanJan and Share Your Crochet!
It’s an honour to be able to create and share my free crochet patterns with you. I’d love to stay connected and send you regular discount codes and free patterns! Please sign up for my subscriber list to get a free gift right now!
I look forward to seeing your finished crochet projects, especially this easy crochet pattern, so please share them with me in the HanJan Crochet Facebook group or on Instagram and tag #hanjancrochet.
Purchase and Print
Get the ad-free, printable PDF with added extras in my pattern stores:


Looking for pattern support?
Not only will you find pattern support in the HanJan Crochet Facebook Community Group but we have over 16,200 like minded crocheters eager to chat with you!
It is a fun, supportive and educational group where we all support each other to be the best we can be. Everyone is always happy to share their knowledge and experience so do come and join us!
Other easy crochet garments for beginners
If you are eager to try make more beginner friendly crochet garments then you could try these:
Congratulations on completing your granny square poncho pattern! 🌟 Now that you’ve crafted this stunning piece, why stop here? Dive into my other fun adult crochet garment patterns, each waiting to be transformed into your next crochet masterpiece.
Don’t forget to share your creations with me on social media—I love seeing your unique twists and colourful creations! Join our community of crochet enthusiasts, where we share tips, tricks, and plenty of crafting inspiration. So, grab your hooks, explore more patterns, and let’s continue this crochet adventure together! Happy stitching! 🧶✨