This post may contain affiliate links. Please see my full disclosure and privacy policy for details.
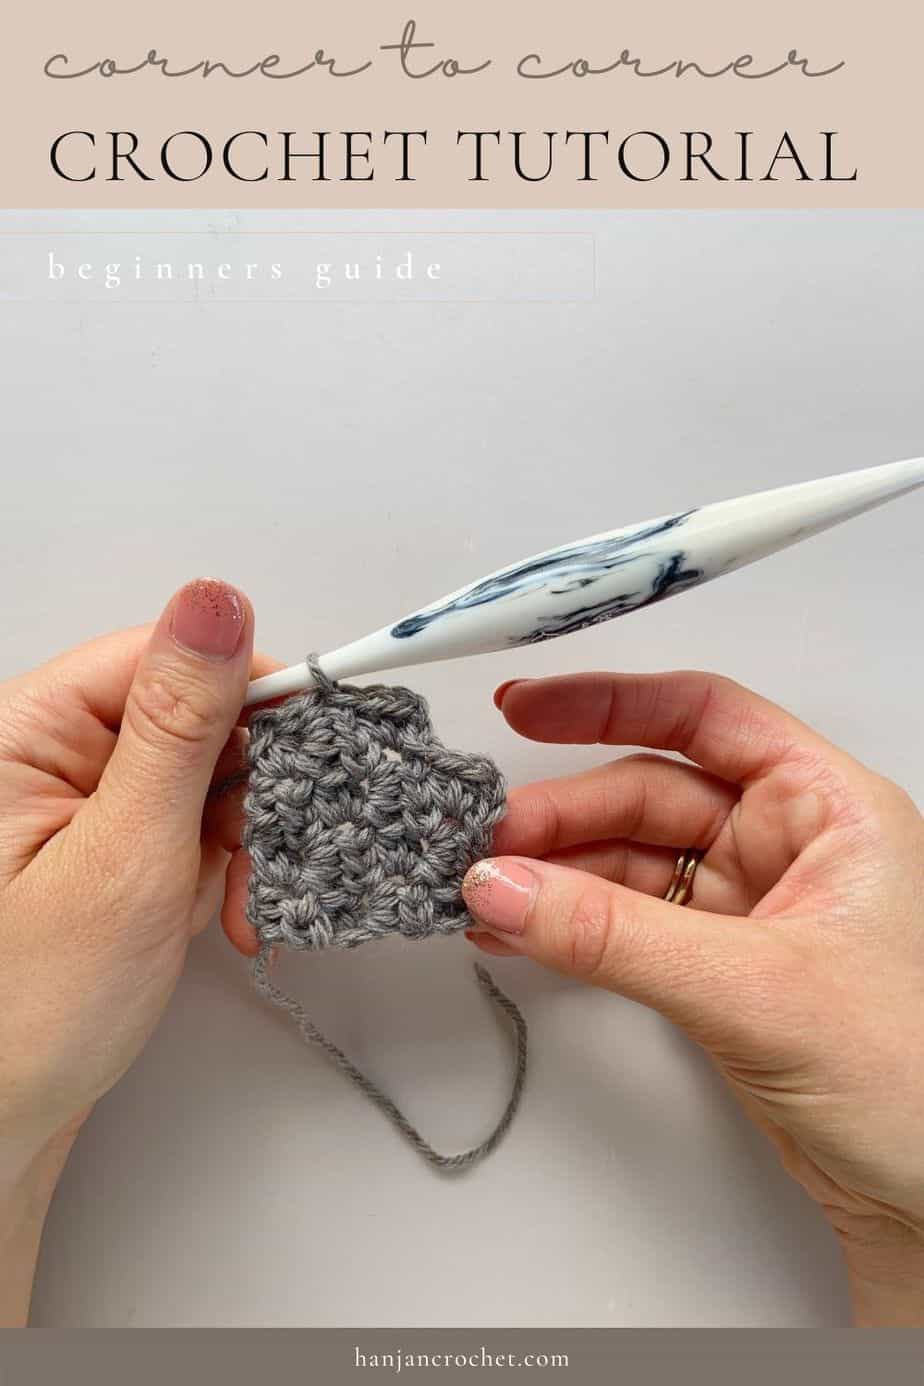
Have you learned how to corner to corner crochet yet? It took me so many years to try out the c2c crochet technique and as soon as I did, I couldn’t get over how amazing it is! Anything that uses simple crochet stitches but can look really complicated is a winner in my book!
I know that there are still many people that haven’t tried c2c crochet pattern – or have given up on it – for all the same reasons as I nearly did.
How do you start? Is it hard? What stitch do I use? How do I neatly change colours? Which is the right side? How do I end it with just one block? And of course the biggest of all – how do I actually read a chart?!
Trust me, you are not alone in thinking that this looks tricky! So did I. Then I made myself have a go. Then I added a few stripes of colour. Then I changed halfway through a row.
Want to remove Ads?
- Get ad-free access on all posts; 200+ patterns & tutorials!
- Member-only resource library with downloadable PDF guides
- Bonus eBook (Worth over $30)
Build it up – you’ll be so surprised at how it works! Plus if you can do a corner to corner crochet increase and get to row 2 then you can make the whole thing!
So, let’s answer all the questions, take you through the process with a corner to corner crochet tutorial, and get making everything and anything in c2c crochet!
Table of Contents
What is c2c crochet?
Corner to corner crochet, or c2c crochet as it’s often referred to, is a construction technique where you work in diagonal rows to create a square or rectangle of any size that you like.
Beginning with a single block of stitches (sometimes referred to as a ’tile’) you increase each row until you reach the size you’d like, then you decrease each row until you are left with just one block at the opposite corner.
Whether you’re making a square or a rectangle at the beginning of a row you are always either increasing or decreasing. When you work from the chart it makes so much more sense because you just stop making blocks when the chart stops.
If you’re making a c2c crochet square, then once you reach the height you need by increasing 1 block each row, you then start to decrease by 1 block each row until you are left with a single block.
If you’re making a rectangle like for my Widcombe c2c hat for example, the process is slightly different.
Once you reach the height you’d like for the rectangle, you’ll need to decrease at one end but continue to increase at the other to keep it straight. This means that the number of blocks will stay the same until you reach the width you need. Then you’re ready to decrease to the corner so just work as you would with a square version.
Sound confusing? I promise it’s much easier in real life!
You literally work from one corner to the other corner in rows and so it works perfectly with crochet charts and graphs to create fabulous pixel-like images created by these blocks. The braver you are with colours and charts, the more amazing the result becomes.
If you work better with videos then you can see a video tutorial for my c2c crochet rectangle for the Widcombe hat. It includes lots of information on reading charts and changing colours too!
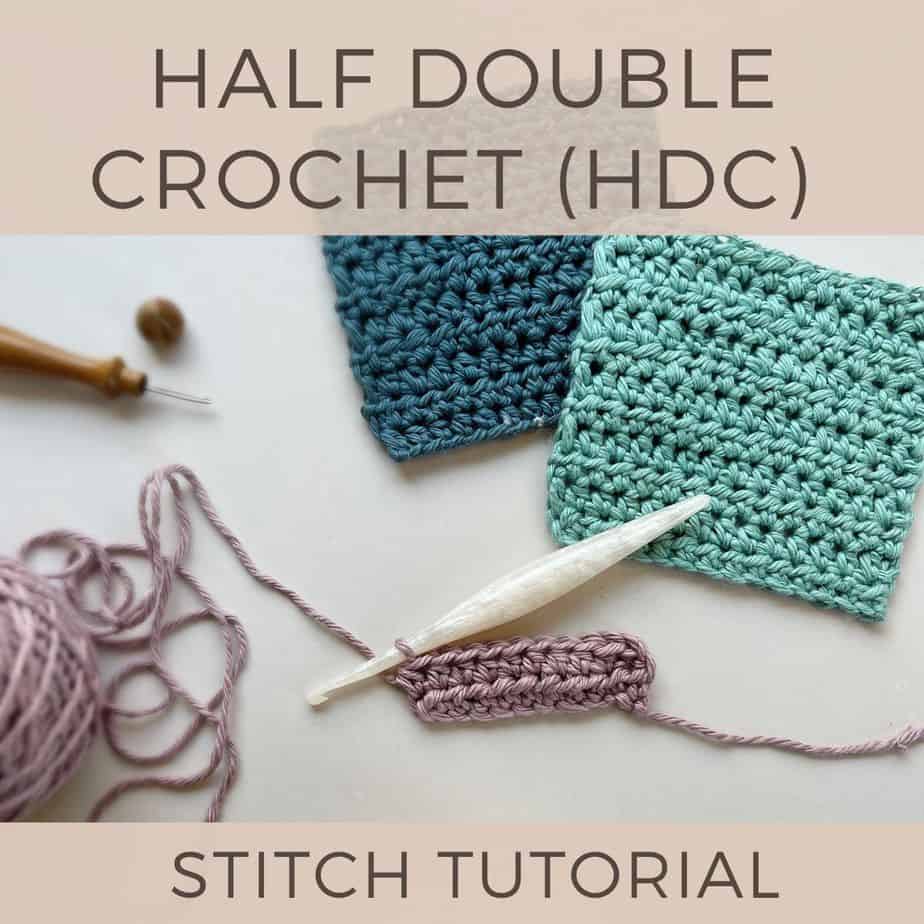
What stitch is used for c2c crochet?
In terms of learning how to c2c crochet, the stitch can change depending on what your chosen project calls for.
Traditionally, the technique uses blocks of stitches consisting of a chain 3 and then 3 US double crochet stitches (dc). This doesn’t have to be the case though and you can pretty much use any stitch you like as long as it creates the type of ‘block’ that you need.
My favourite version uses a chain 2 and 2 US half double crochet stitches (hdc) but I have seen amazing versions using single crochet (sc), the c2c linen stitch, the granny stitch, even a combination of stitches to create a wavy c2c crochet pattern!
Whichever stitch you are using for your c2c crochet pattern, the basic concept remains the same so you can work from one corner to the other to create your square or rectangle.
Is c2c hard?
My honest opinion is that no, learning how to corner to corner crochet is not hard.
What is hard perhaps is to not only get the concept of the increasing and decreasing but to also read the chart or written pattern, change colours and keep track of where you are!
None of these things alone are too tricky but add them together and it might seem a little complex.
My best advise here would then be to just work a little swatch in one single colour. Then when you can work a square like that, do another with a change of colour on an entire row. Then make one with a single block of another colour so you switch during the row. Then make a rectangle, you get the idea.
Like anything in life, just get the foundations right, build from there and add the layers. Before you know it you’ll be following complex charts and changing colours left right and centre!
For a little bit of inspiration before we get started here are a few of my patterns that use the c2c crochet technique (can you tell I’m a bit addicted to it now?!)
How do you start a c2c in crochet and increase?
When you begin your corner to corner pattern, you begin with just one block. This means that right from the start we need to know how to increase on the next row.
Each row increases by one block (which makes it super easy to keep track of where you are!) so row 1 has 1 block, row 2 has 2 blocks, row 3 has 3 and so on. This continues until you are ready to decrease because you’ve reached the height you need.
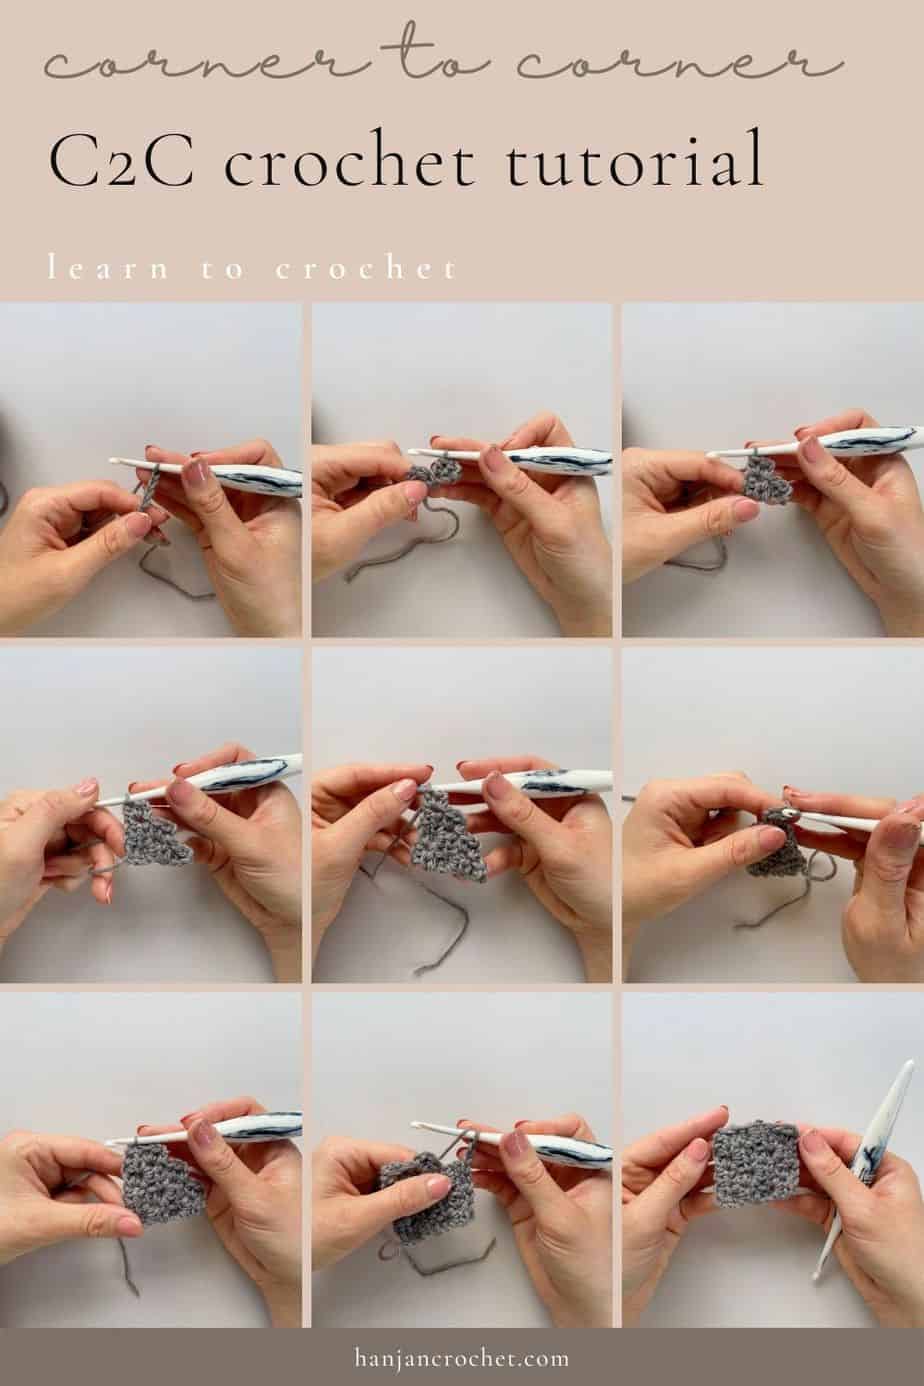
Let’s take a look at what this looks like when we use my favourite version of half double crochet stitches (UK half treble).
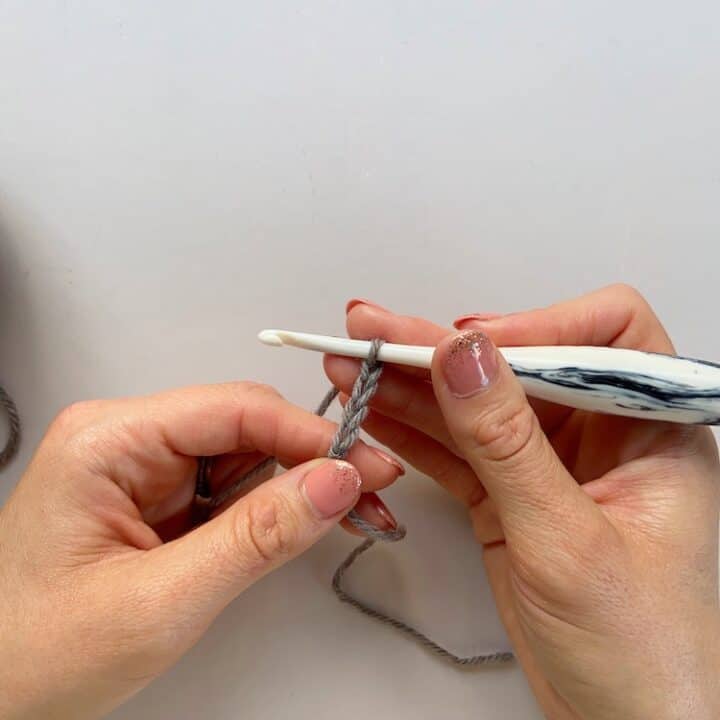
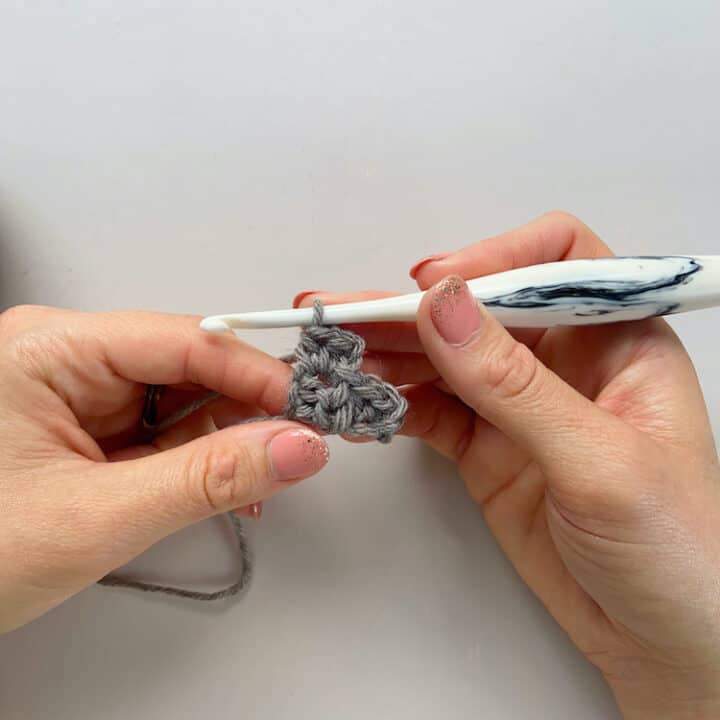
Step 1
Begin with a chain of 4.
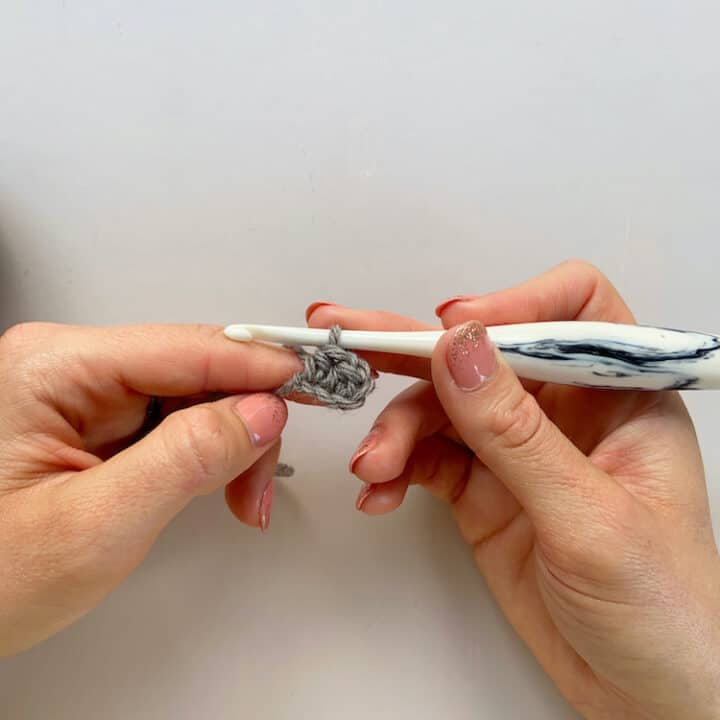
Step 2
Work a hdc into the 3rd and 4th chains from the hook.
This is the end of Row 1 and your first block made!
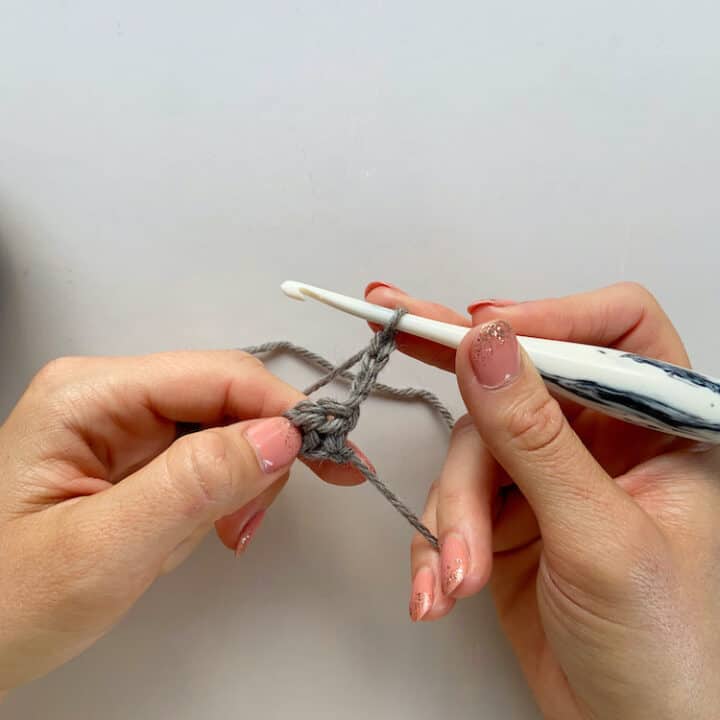
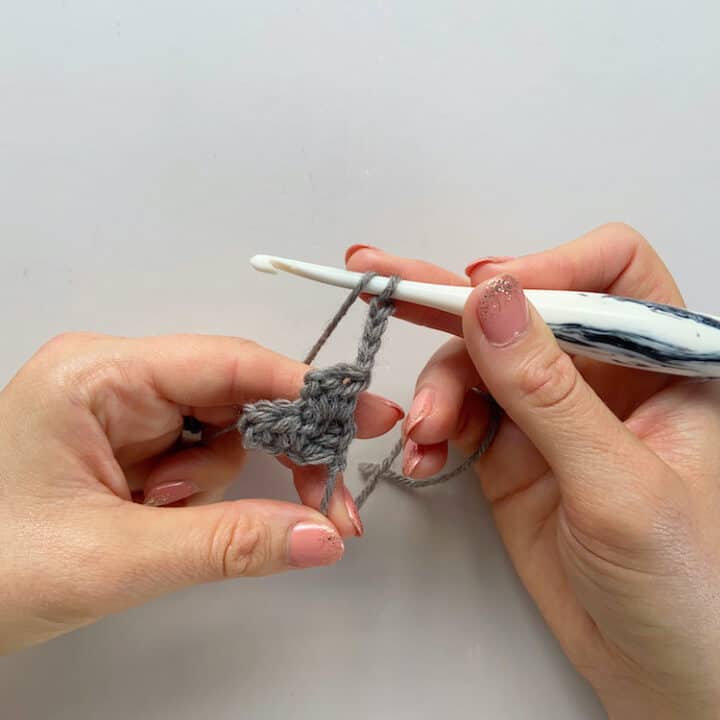
Step 3
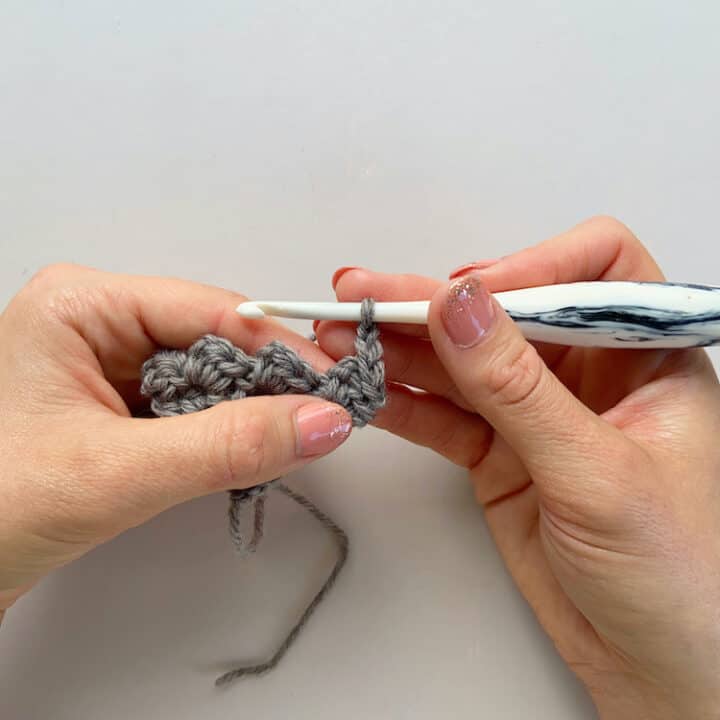
Turn and chain 4 to start increasing for your next block.
Step 4
Work a hdc into the 3rd and 4th chains from the hook.
Then slip stitch into the ch2 of the previous row to join.
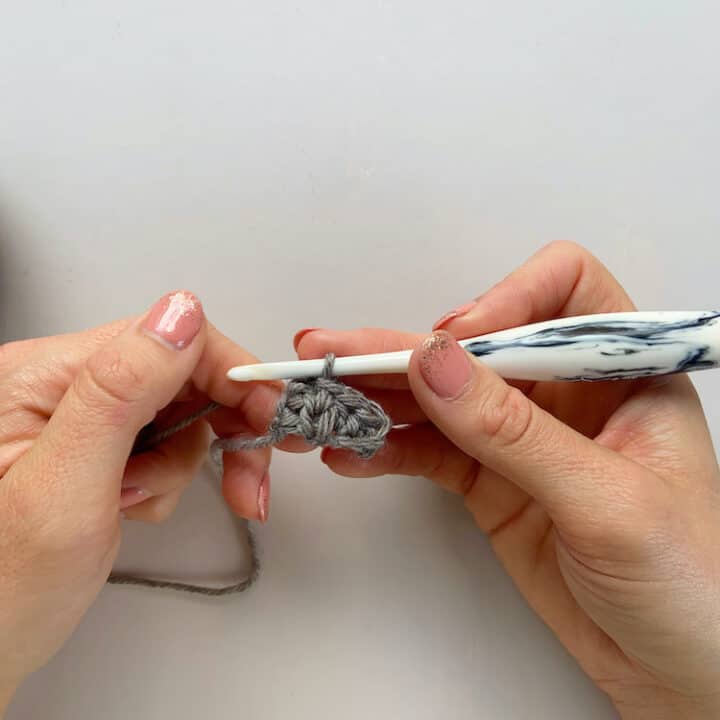
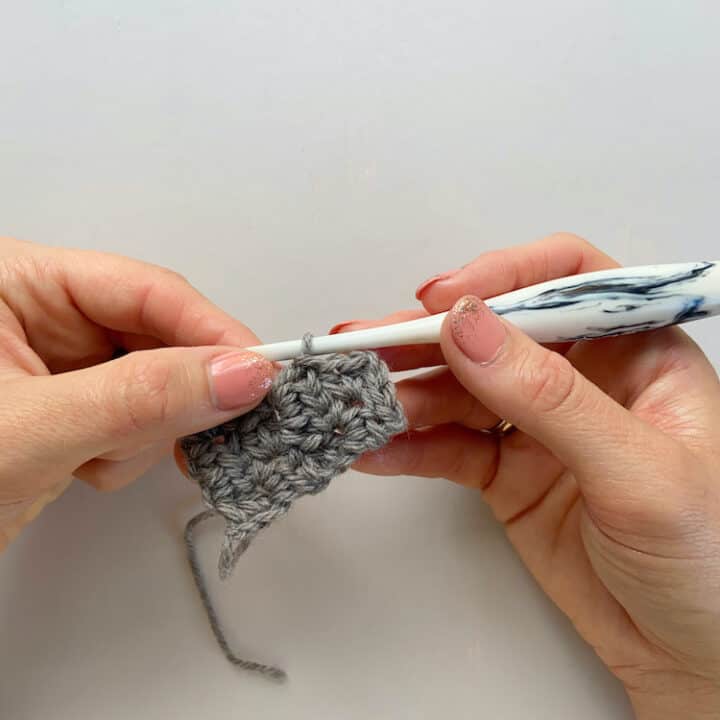
Step 5
Begin your next block by working a chain of 2.
Step 6
Work 2 hdc into the ch2 space from the previous row.
This is the end of row 2 and you have 2 blocks now.
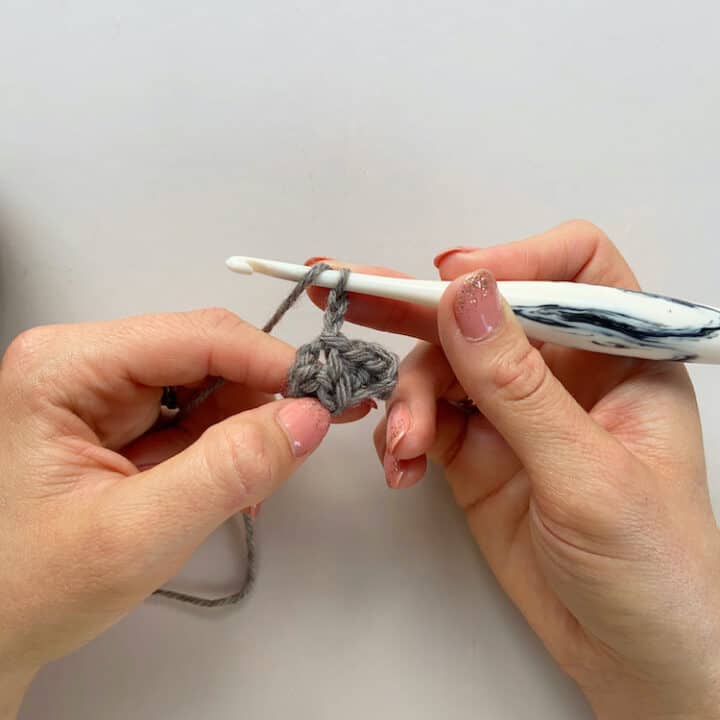
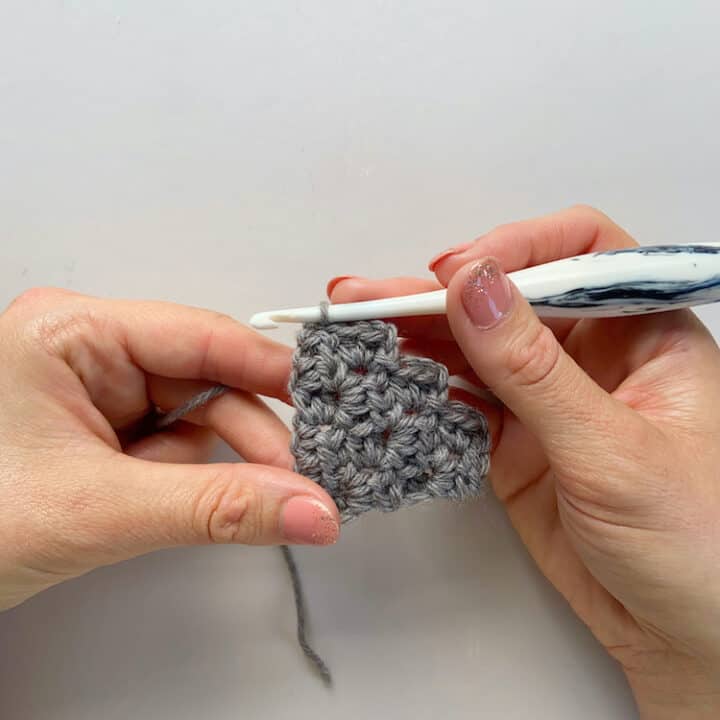
Step 7
Repeat steps 3-6 by turning and chaining 4.

Step 8
Continue repeating steps 3-6 until the end of the row.
At the end of Row 3 you have 3 blocks.
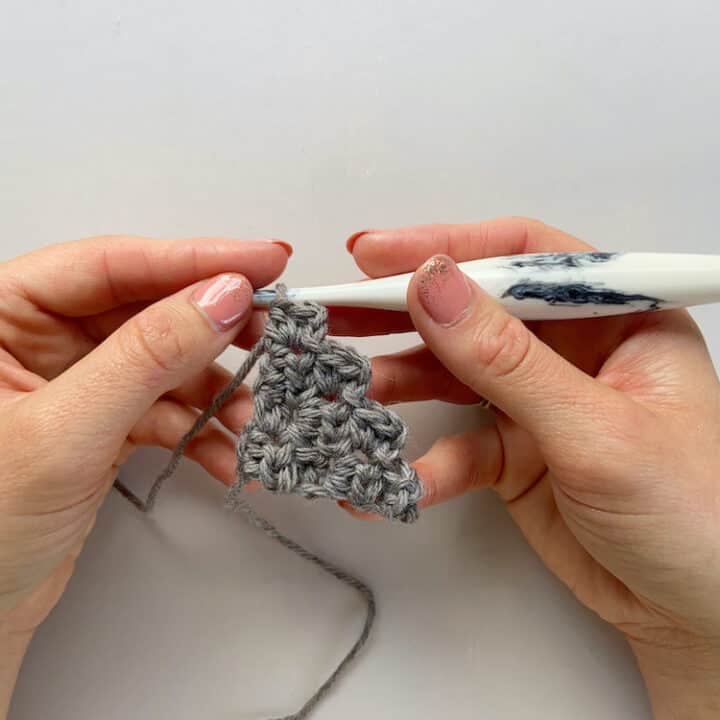
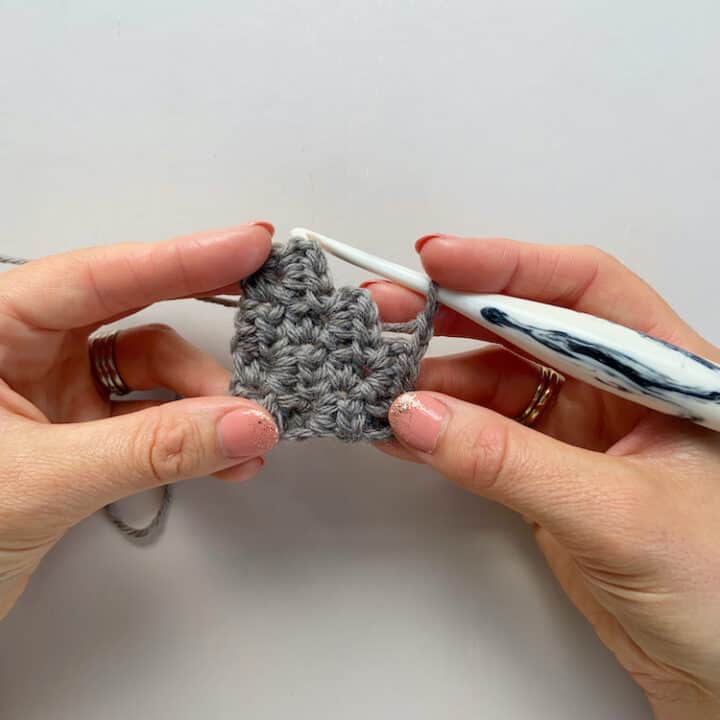
Step 9
Repeat steps 3-6 for each row now.
At the end of Row 4 you have 4 blocks.
So hopefully that makes learning how to corner to corner crochet much easier to visualise. The best thing about it now is that you can follow that principle for as long as you like. The pattern remains the same until you decide (or your chart tells you) to change.
This is why I love corner to corner so much – you can really get into a rhythm with it.
So now lets take a look at what happens when you get to the height you’d like and you’re ready to do a corner to corner crochet decrease.
How do you end a c2c crochet pattern and decrease?
As I mentioned earlier, if you’re working a square of c2c then you only need to consider an increase section and a decrease section.
If you’re making a rectangle then you need to make sure to work a centre section that will decrease on one side (to keep the height the same) but increase on the other side (to keep making it wider). Or vice versa if your rectangle is thin and tall!
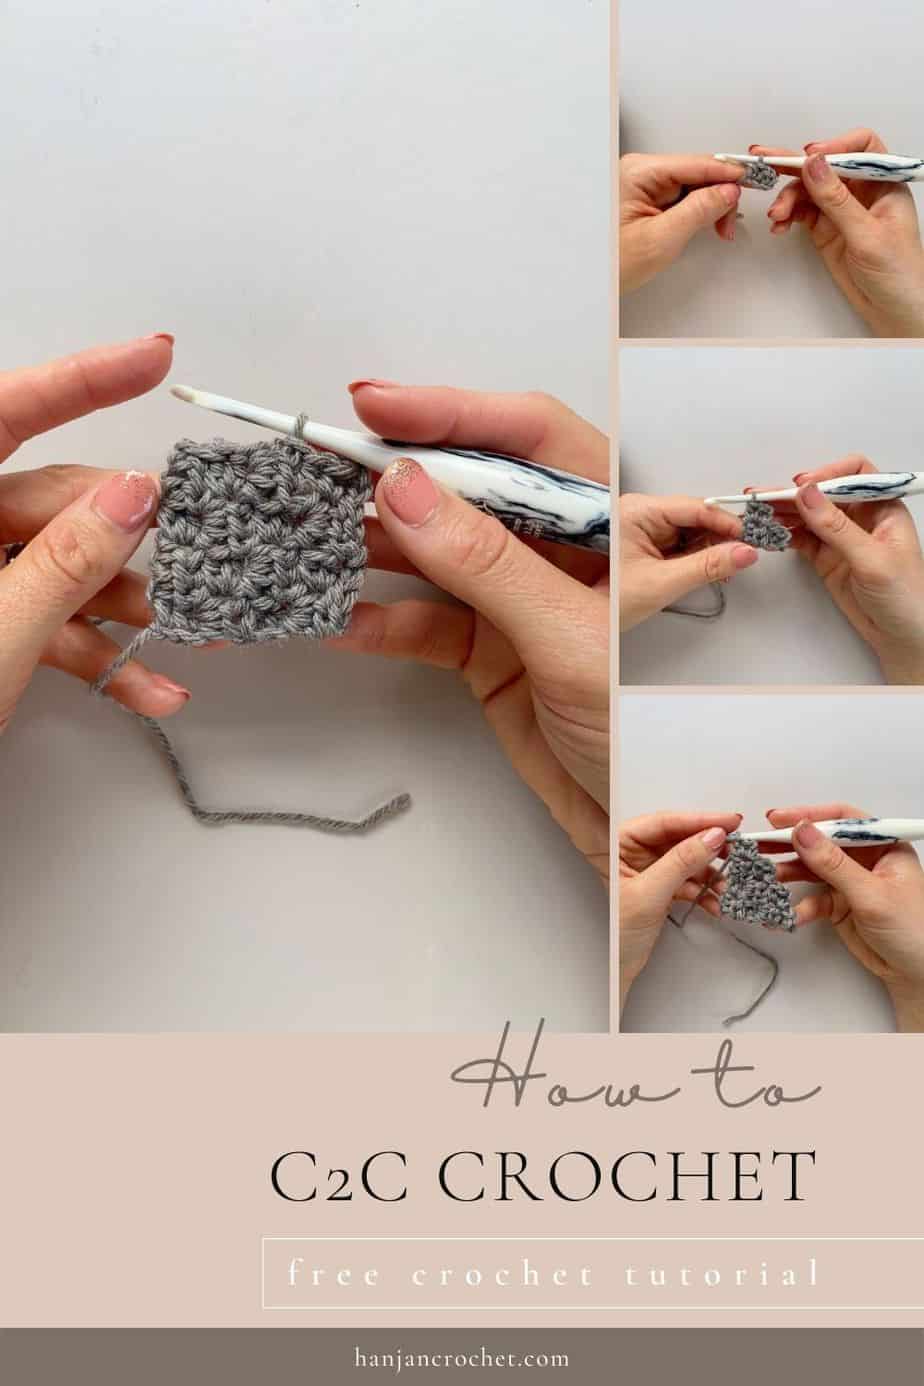
Once you’re ready to decrease your work here’s what we do:
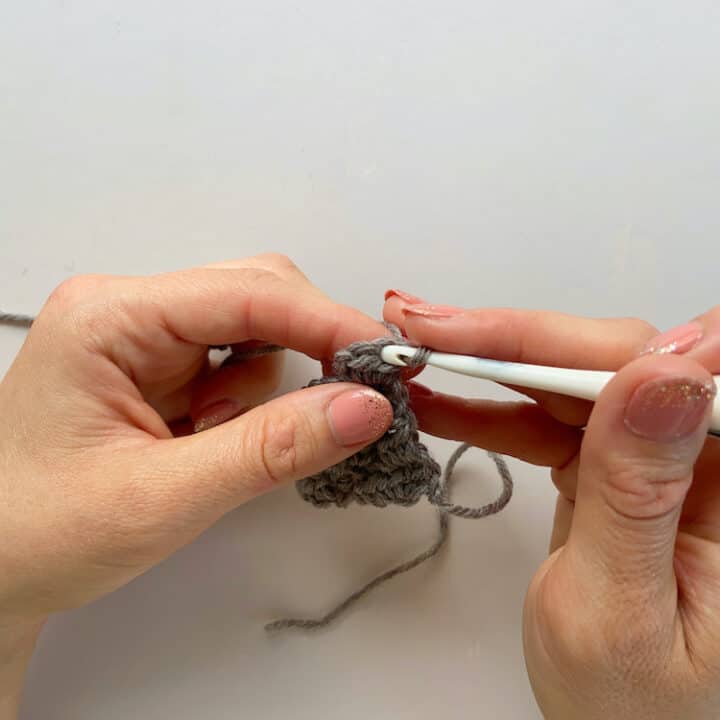
Step 1
At the start of the row, slip stitch into the 2 hdc of the last block you made.
This will put you in the right place to start the next row.
Step 2
Chain 2 to begin the next block. This will be the first block of the row you are working.
(Some people like to slip stitch into the ch2 of the previous block first but I find this way is neater for me.)
Step 3
Work 2 hdc into the ch2 of the previous row.
This is exactly the same method as you used to create the blocks in the increase section.
Step 4
Continue to work blocks along the row as you did for the increase section until you reach the last block.
Don’t work a new block in the last ch2, just slip stitch to join and turn.
Step 5
Repeat steps 1-4 to create the next row.
Each row will decrease by 1 block each row now.
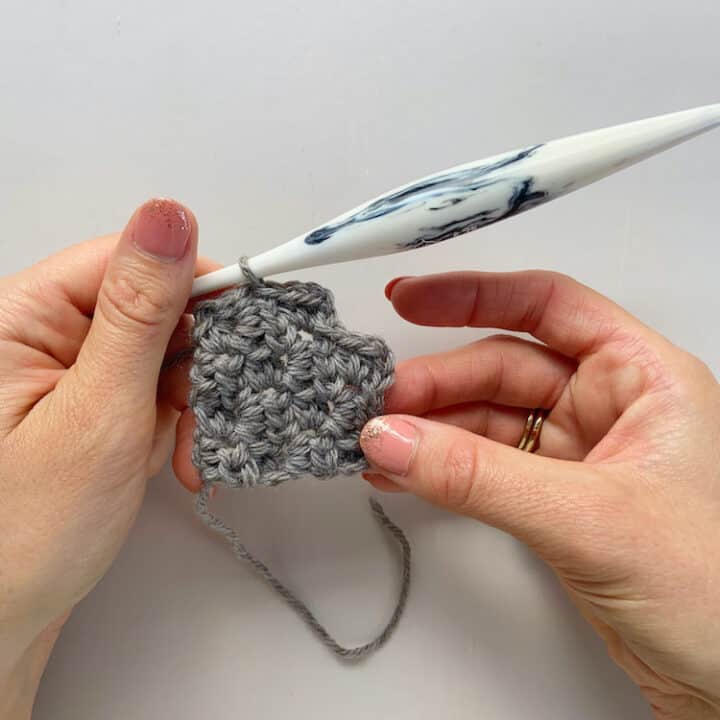
Step 6
Complete the row to decrease to 2 blocks.
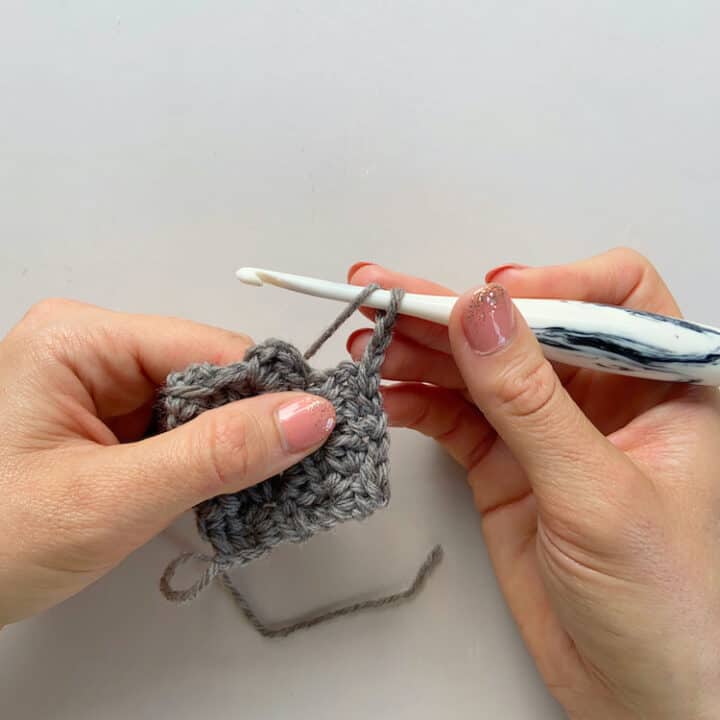
Step 7
Repeat steps 1-4 for the final row now.
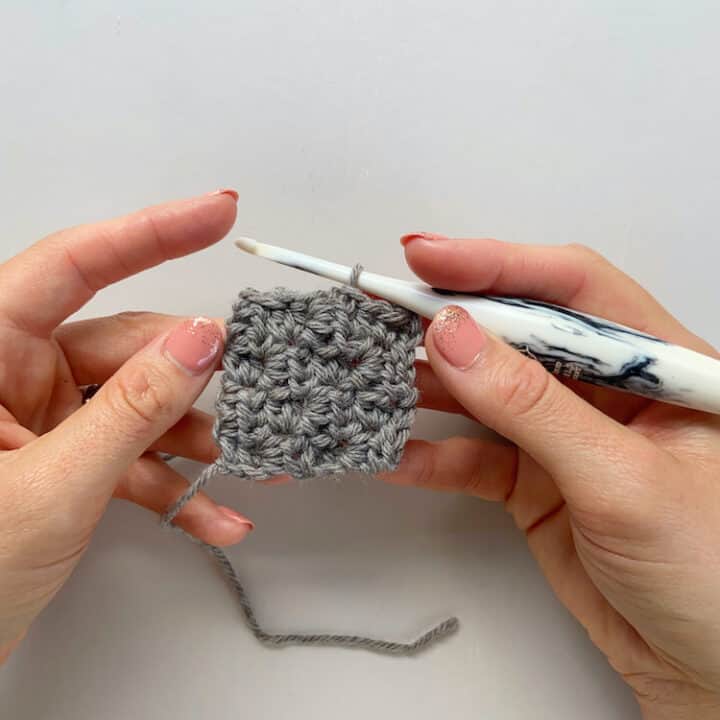
Step 8
Finish with a slip stitch to join the final block.
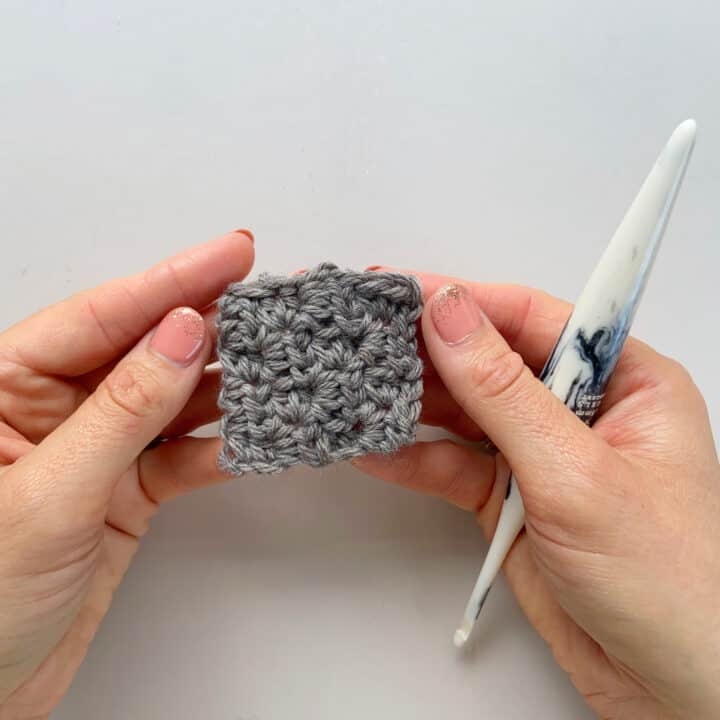
Complete!
And that’s it! You can now make any size of square or rectangle that you like.
Now that you have the basic principle under your belt, the world is your oyster!
It really is that straight forward and I think that the complexity comes when you layer up the other aspects.
There are some other key things to cover that will get you crocheting all the charts you like with confidence and ease.
How do I read a c2c crochet chart?
Once you have the nuts and bolts of how to crochet corner to corner set in your mind (or in your hands!), it’s probably a good time to start thinking about adding colour and how that works.
I think the best way to follow a pattern is with a chart although I know lots of people really don’t like them!
My top tips for c2c charts are:
- Print the chart out if you can, especially when you are learning so that you can tick the blocks off.
- If you find it really tricky to follow then draw a line through the row once you complete it or use a ruler to move across the chart to help keep track.
- You can also go through beforehand and number the blocks in sets of colour to make it easier to follow.
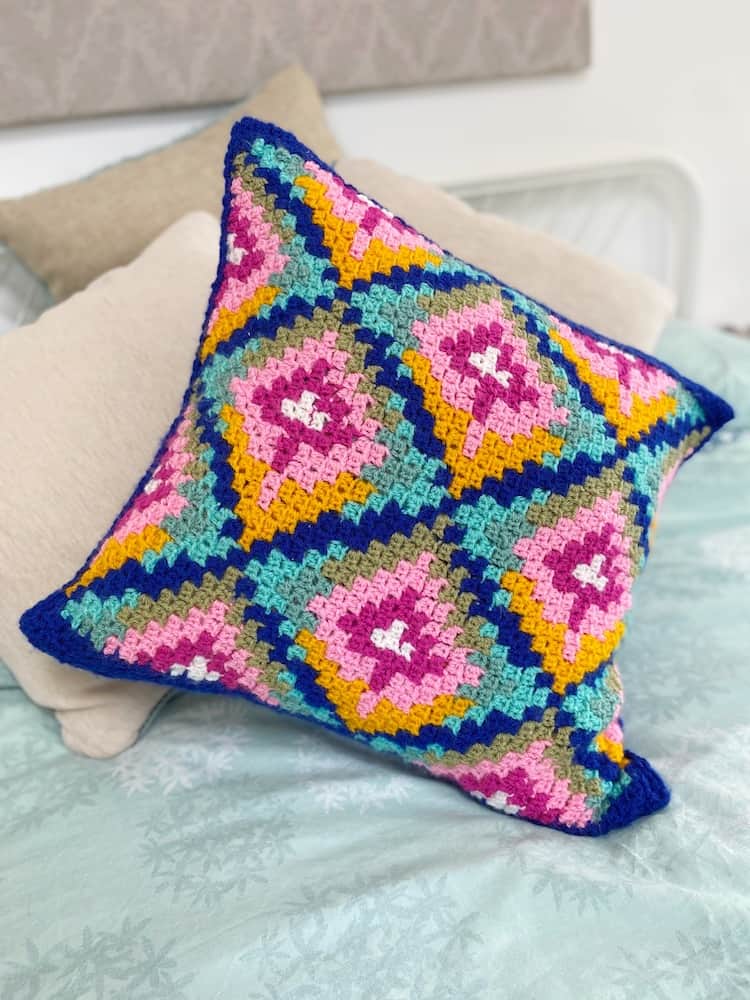
For example, if you are going to work with a more involved chart like the one I designed for my colourful c2c pillow pattern then a ruler and a marker pen are going to be your best friend!
There are a few principles to reading a crochete corner to corner chart, and once you know how to follow them you’ll be able to tackle anything that you fancy!
Lets take an example – this is the baby size chart for my Widcombe hat:
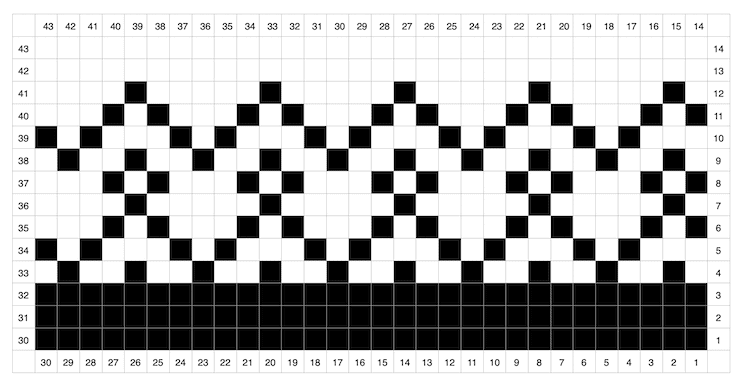
On the charts, each square represents 1 c2c block. You need to read the charts from the bottom right-hand corner, where Row 1 is located.
Each row is read diagonally, with even-numbered rows read from bottom left to top right and odd-numbered rows read from top right to bottom left.
Change colour in the yrh of the ss at the beginning of the new block (more on changing colours in a moment).
As this chart is of my hat which is made of a rectangle we need to create three distinct sections of c2c crochet but if you’re making a square you don’t need to worry about the Centre Section:
- Increase Section – where we will increase either side of the work to make the panel the height it needs to be. The number of blocks will increase by 1 per row in this section.
- Centre Section – where we will decrease one end of a row and increase the other end of a row to keep the panel straight. The number of blocks in each row will remain the same in this section.
- Decrease Section – where we will decrease both sides of the panel to complete the rectangle and end with just 1 c2c block on the last row. The number of blocks will decrease by 1 per row in this section.
Here’s the chart with a few arrows to show you the directions that you’ll be working in to make the shape appear and an example of part way through an actual project too.
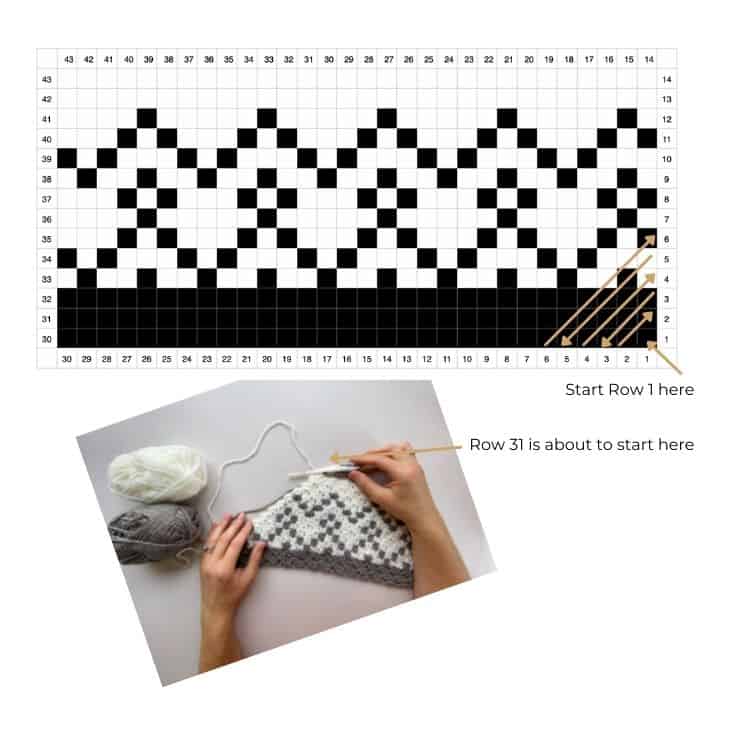
Taking the row that’s about to start in the image, Row 31 is read as follows:
It’s an odd numbered row so we know we need to read it from the top to the bottom and that it will be a right side row.
Looking at the chart we see that the start of Row 31 begins with a decrease to continue making the top of the rectangle flat.
Working from the first block down, we need 2 blocks in white, 4 blocks in black, 5 blocks in white and 2 blocks in black.
As you can see then end of the row starts to become vertical now so you don’t need to increase at the end here. Just slip stitch into the last block of the previous row and you’re ready to turn and start the next row. (Pop back to the step by step photos of the decrease section if that seems tricky).
I think that charts are by far the easiest way (for me anyway!) to read corner to corner patterns but I know that some people much prefer to have the colour changes written out instead. This is why I’ve added this to almost all of my PDF versions of my c2c designs. You can choose whichever version you prefer to work with that way.
How do you write down a c2c crochet pattern?
A written version of a c2c pattern is really quite simple and in my version of blocks (ch2 and 2hdc) a square veison would look like this:
Increase Section:
Using Yarn A, ch4.
Row 1 (RS): hdc in third ch from hook, hdc in next ch, turn. [1 c2c block].
Row 2 (WS): Ch4, hdc in third ch from hook, hdc in next ch, ss into ch-2 sp on next block, (ch2, 2hdc) into same ch-2 sp, turn. [2 c2c blocks].
Row 3: Ch4, hdc in third ch from hook, hdc in next ch, *ss into ch-2 sp on next block, ch2, 2hdc into same sp; rep from * to end, turn. [3 c2c blocks].
Row 3 creates the increase c2c row.
Rows 4- desired height: Repeat Row 3 using the colour chart or written instructions [ X c2c blocks].
Decrease Section:
Row Y: ss into next 2 sts, ss into next ch2-sp on previous block made, *ch2, 2hdc into same sp, ss into next ch-2 sp across; rep from * across, turn [X-1 c2c blocks].
Row Y creates the decrease c2c row.
Rows Y-Z: Repeat RowY using the colour chart or written instructions [1 c2c block].
You can use this to make any chart or image that you like but what you need to consider is the yarn weight, hook size and tension or gauge that you have. You need to figure these 3 aspects out so that you know how big your finished item will end up being (this is true of every crochet project of course!).
How do you tell the right side in c2c crochet?
Something else I always wondered to begin with is how to work out which side is which in c2c crochet? How do you know if you’re working the right or wrong side?
Well, generally in my patterns I consider an odd row to be a right side and an even number to be the wrong side.
However, if your c2c pattern is symmetrical (as lots of them are) and most importantly doesn’t involve numbers or letters then it doesn’t really matter. It should look the same from both sides.
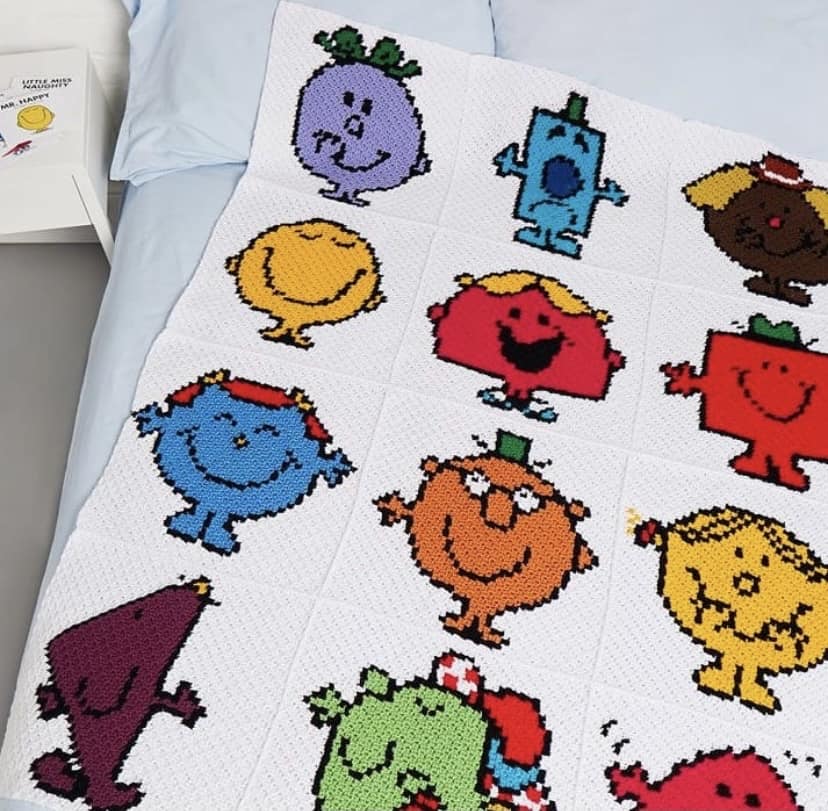
A good example of this is the Mr Men and Little Miss Blanket I designed for Crochet Now a few years back. The front and back of this work equally as well as each other. (The pattern isn’t available now as it was an exclusive copyright at the time).
If you have lettering on a design though then you need to make sure you keep track of your right and wrong side so that the right side looks as neat as you can make it.
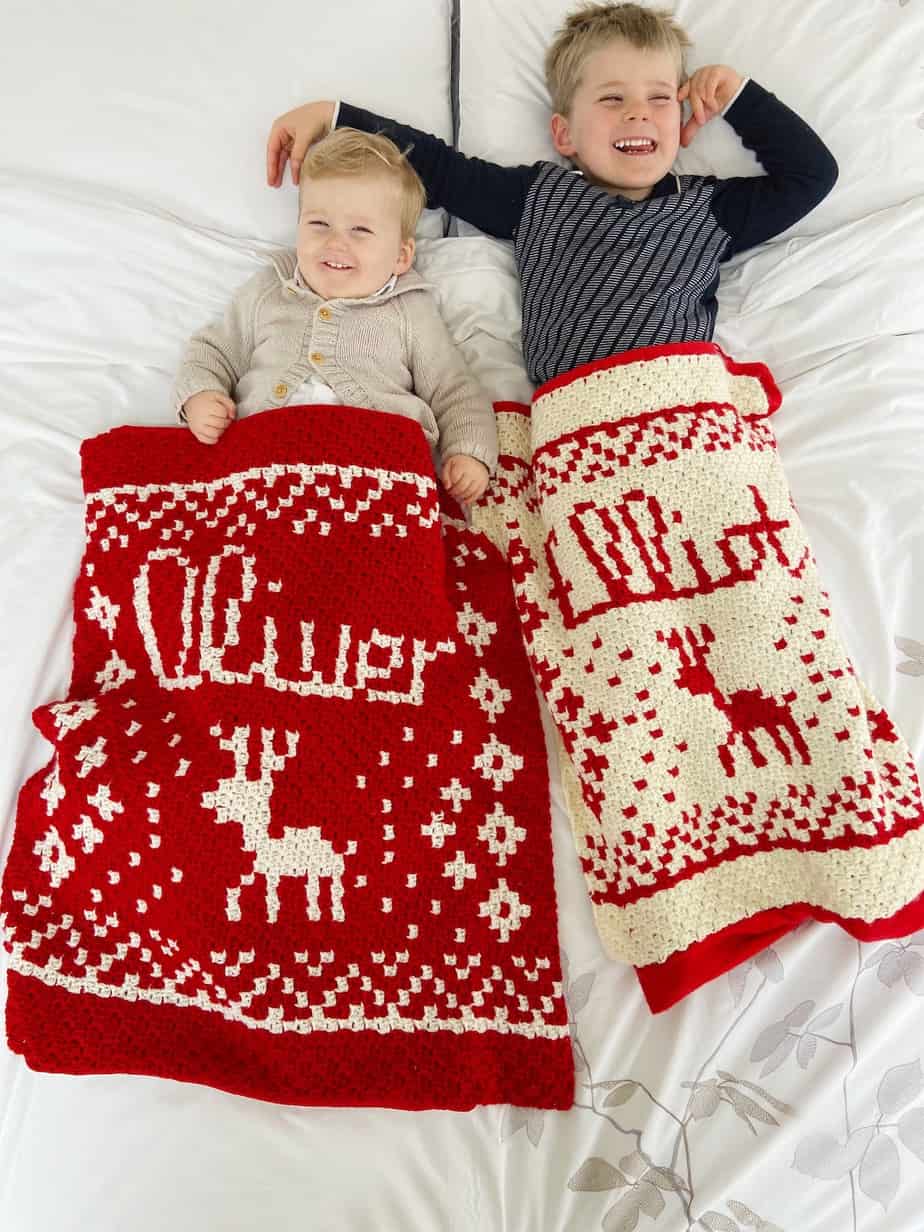
So far I’ve only used lettering in my c2c crochet Christmas blanket pattern (which you can also personalise to add any name to!).
How do I change colours neatly in c2c crochet?
The final thing to think about (well done if you’ve managed to get this far in one go!) is how to change your yarn colour in c2c crochet without it looking clumsy or awkward.
I find that changing yarn for the next block is best done on the yarn round hook of the slip stitch into the next block you want to work into.
The thing that took me ages to work out was how to make that slip stitch and join as neat as possible.
If you are working your new block in the same colour as the block from the previous row then don’t worry, you won’t see the join at all and you can join from the front as you would normally.
If you’re joining a different colour then I suggest something fairly radical – insert your hook from the BACK of the work for a right side row and from the FRONT from the wrong side row.
I don’t think I can explain in words how I wind the yarn for these changes so I’ve made a little video of how to change colours in c2c crochet that might make more sense!
The important thing to say is that this does make a clear right and wrong side of your work (which does mean that you can easily carry yarn floats across the back) so you need to decide whether you’re ok with that or not. For lots of projects I think having a really neat front side is preferable to me but have a go and see what you think!
In terms of keeping your yarns in check – if I’m working with multiple colours then I work off a single ball or skein and carry them at the back of the work. I always make sure to untangle them at the end of every row (otherwise it will all go horribly wrong!).
I have tried winding yarn bobbins and having smaller amounts of yarn to work with but I’ve never enjoyed it. I think if you’re keen to make sure you don’t carry the yarn on the wrong side it’s a great idea though so go for it if you’d like to!
Watch the video tutorial here:

What c2c crochet patterns should I start with?
Now that you know how to crochet corner to corner and have all the tools you need to get making, you need to decide what to crochet!
Once you have the technique mastered, you’ll be able to tackle any c2c pattern you like but you might like to pace yourself with the colour changes.
Here are some free crochet patterns using the c2c technique that you can try:

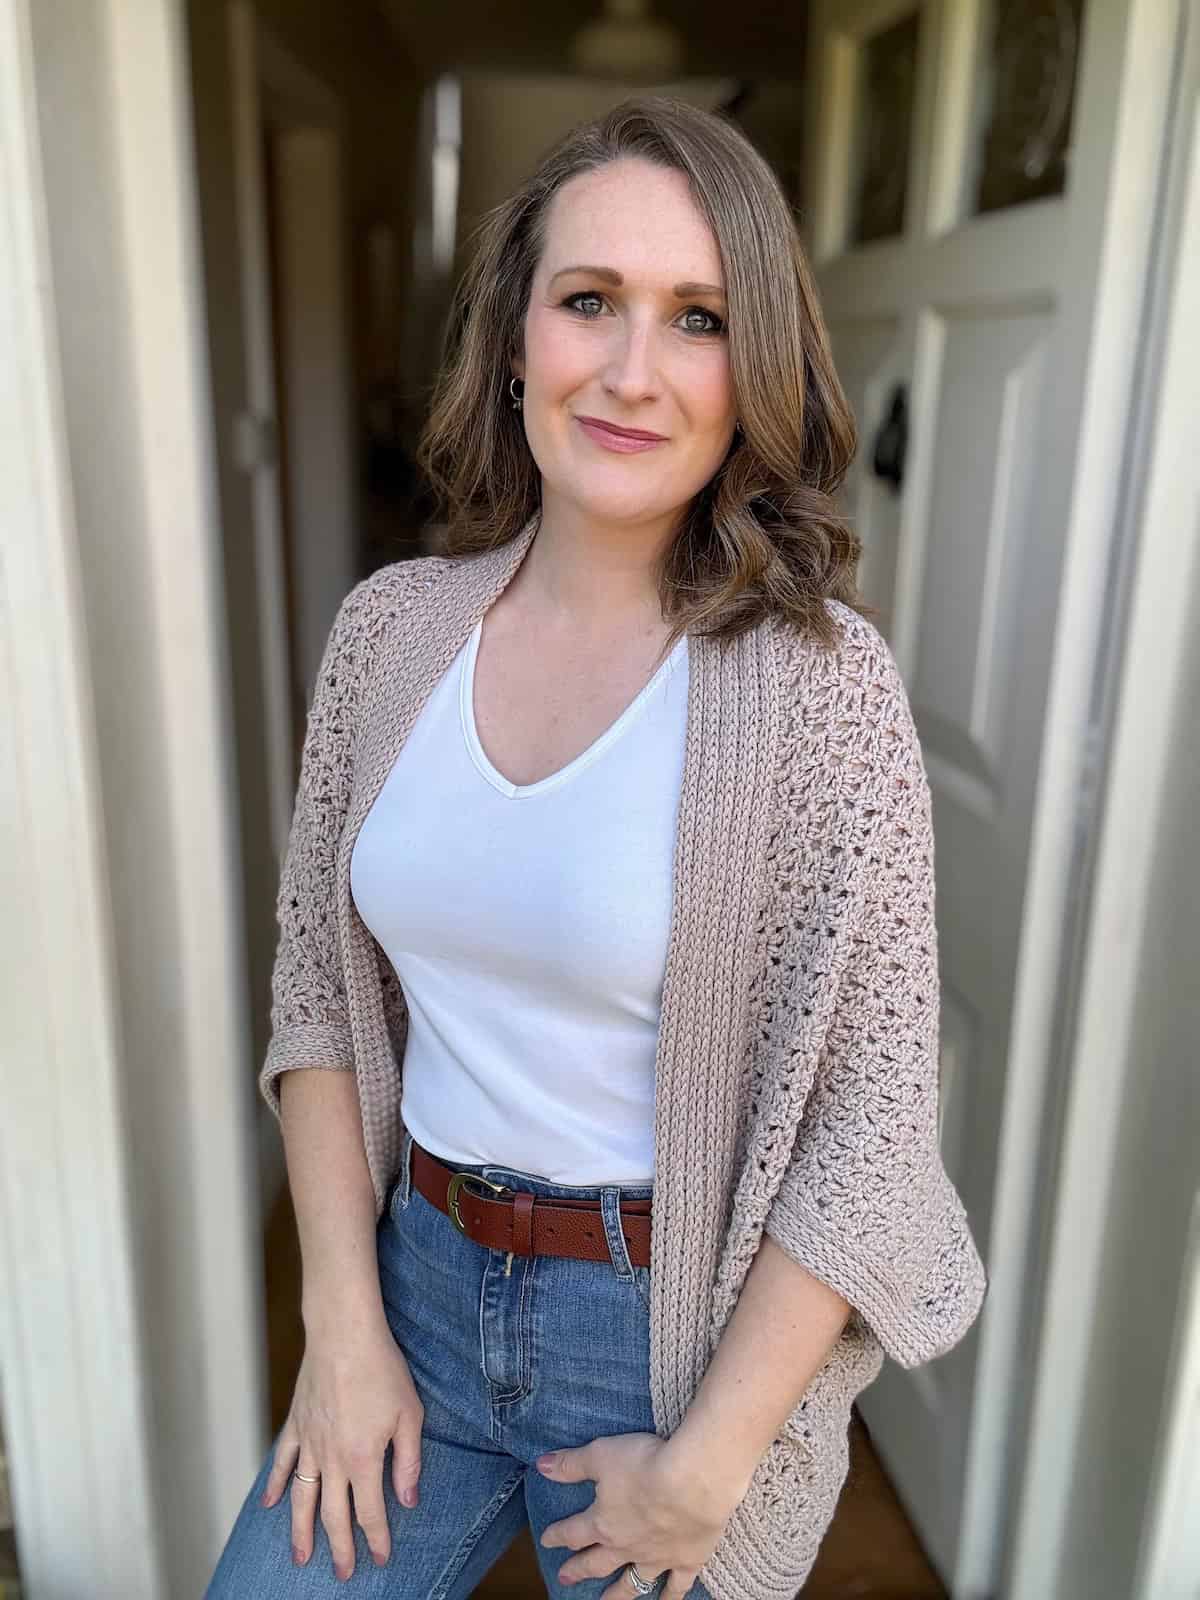
Free Cocoon Cardigan Crochet Pattern
Constructed from a simple lace corner to corner square, this flattering crochet cocoon cardigan pattern is a breeze to make and effortless wear.
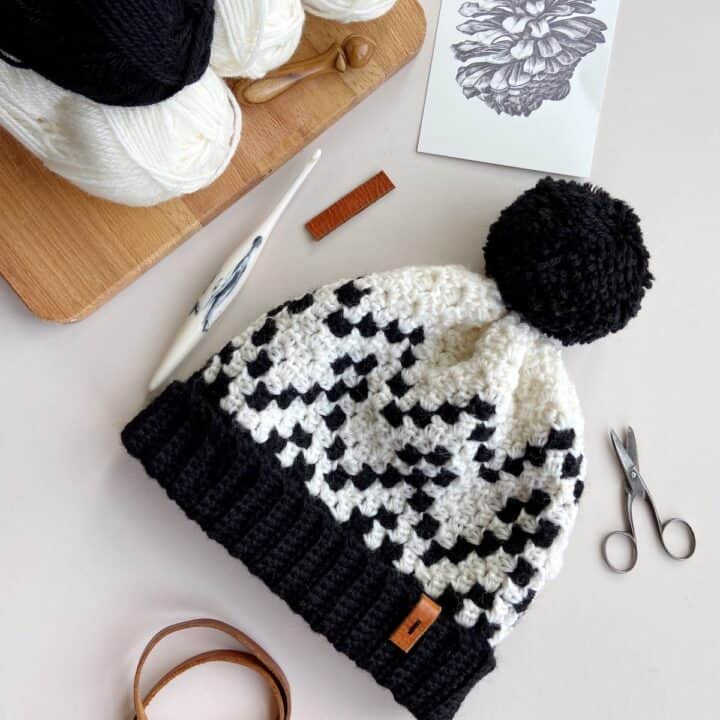
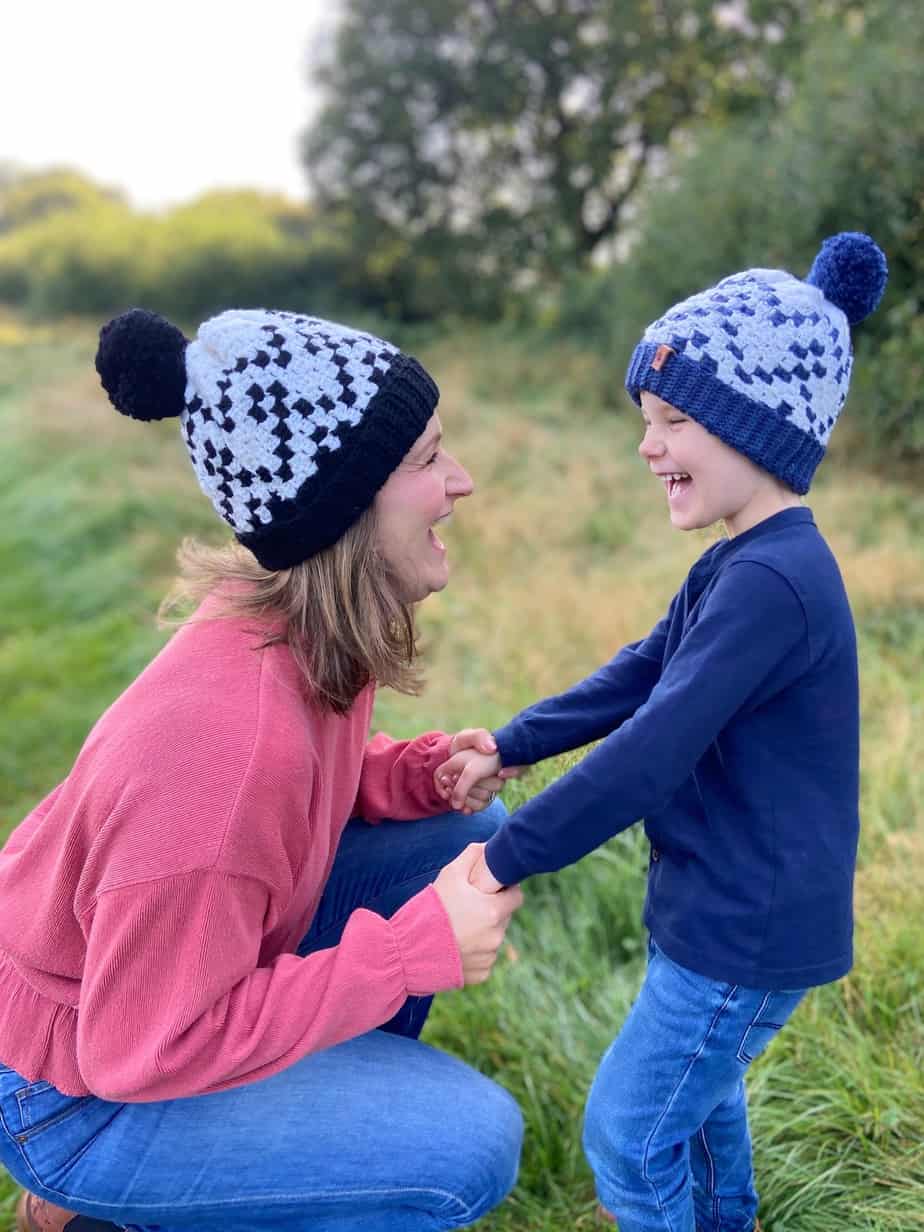
Widcombe c2c Crochet Hat
A great project to start with and it comes with a full video tutorial too.
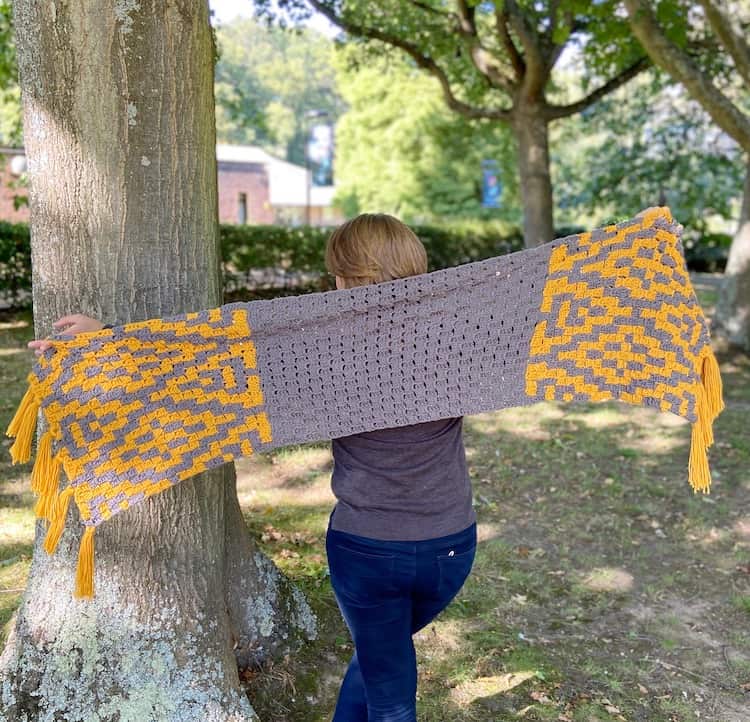
Diamond Trees c2c Crochet Scarf
Made from 3 easy c2c crochet squares and a very generous fringe, this scarf is a great project to wok on your colour changes.
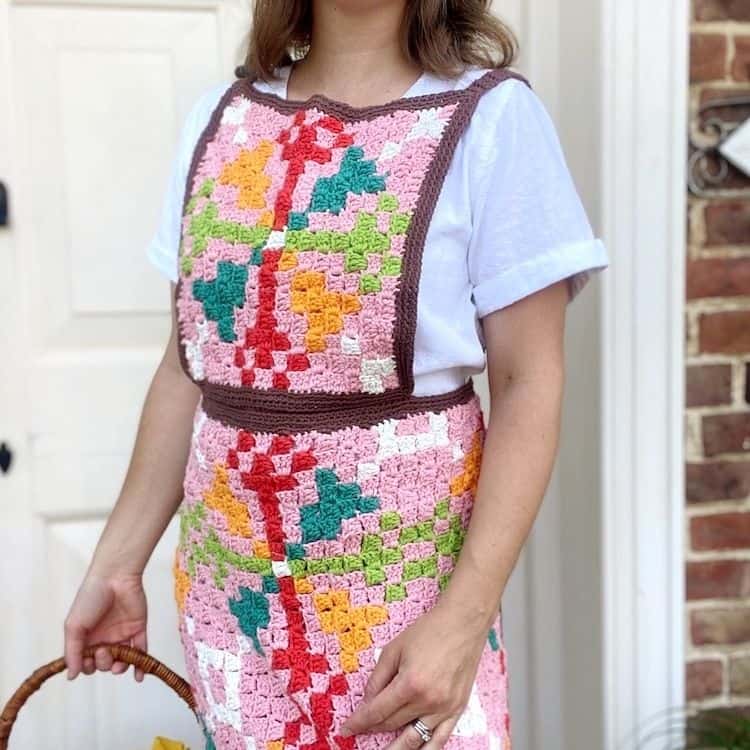
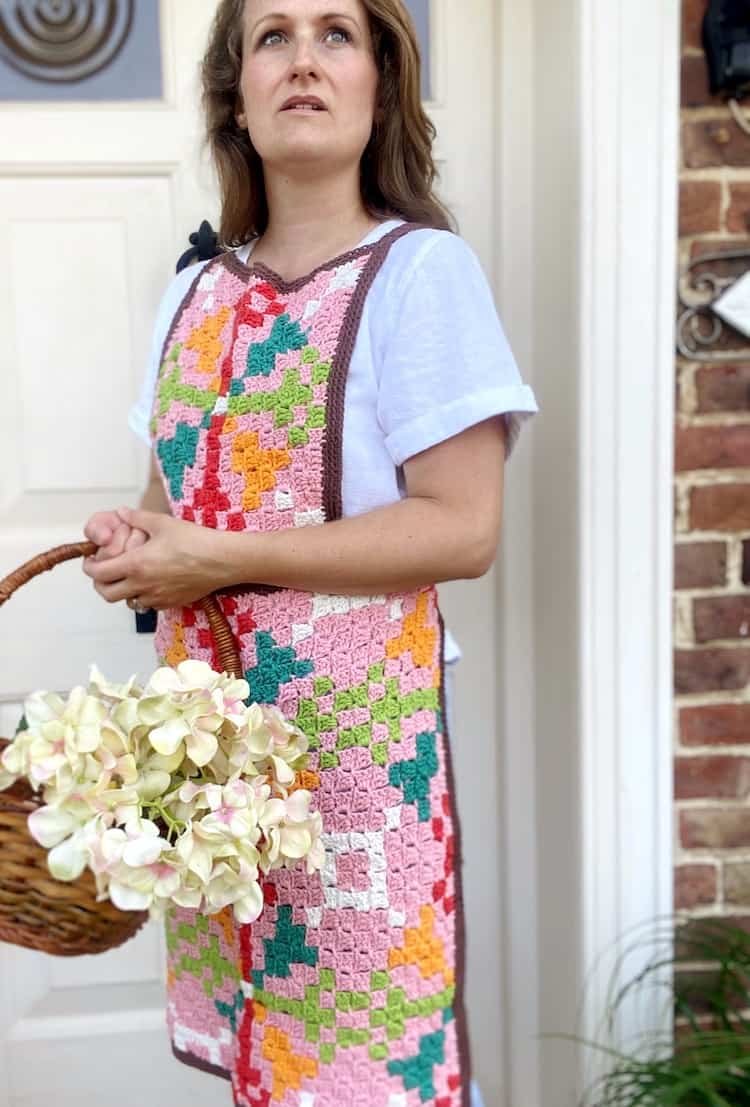
Martha's Retro c2c Crochet Apron
Made from two different size c2c crochet squares, this fun and vintage style apron is perfect if you're feeling adventurous with colour changes.
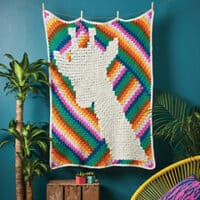
Giraffe c2c Crochet Blanket
This is one for the adventurous! The changes of directions in the background stripes mean you need to be on the ball to keep track but if you're feeling up to it then you could just do a plain background instead of course.
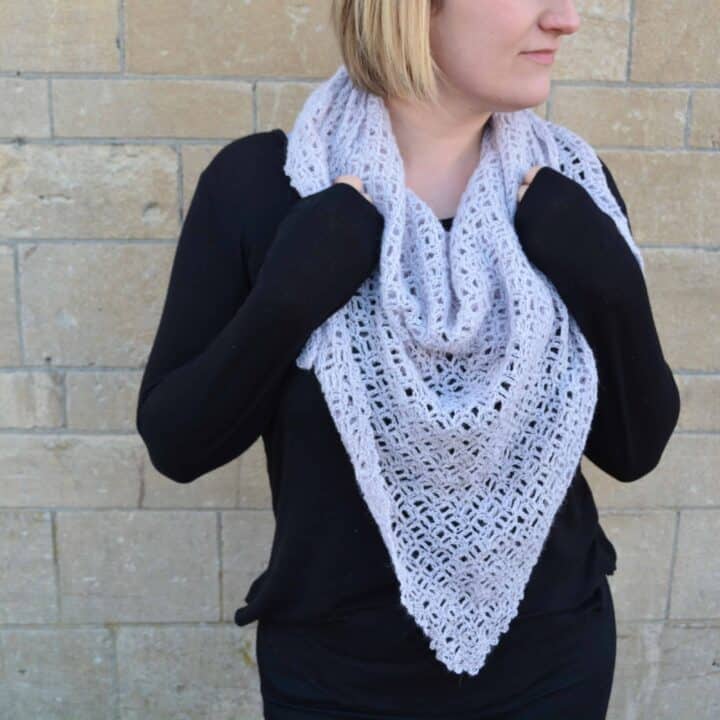
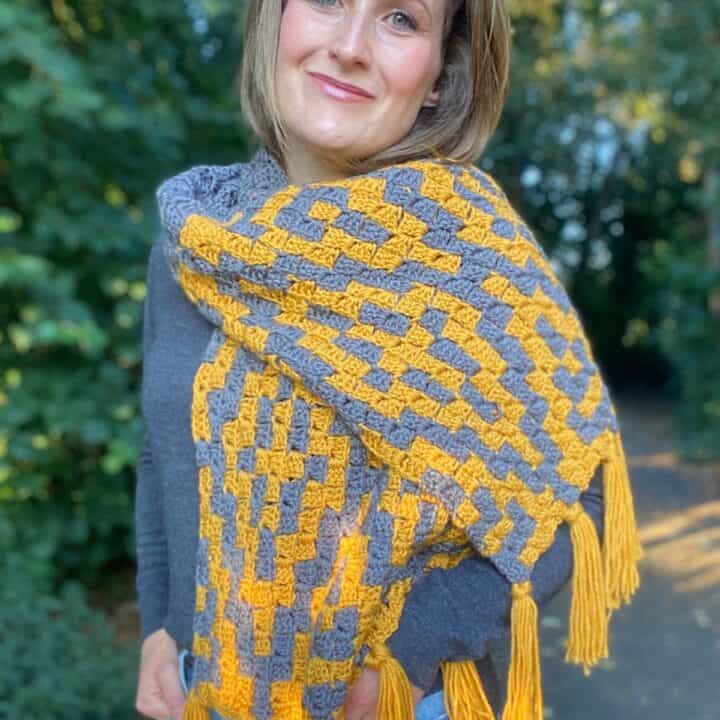
The Serenity c2c Crochet Shawl
So I know I said squares and rectangles but you can also make triangles by just stopping at the widest point! The shawl also using a chain space in one of the blocks to add a light and lacy feel.
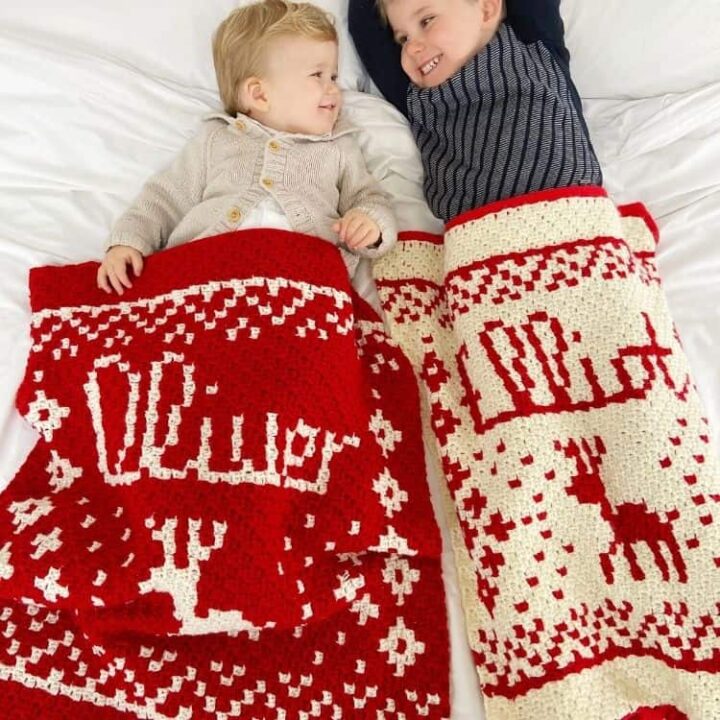
Personalised c2c Christmas Crochet Blanket Pattern and Present Sack
Make the Ho Ho Ho version or personalise with any name you like! This pattern showcases just what corner to corner is capable of and how you can make it your very own unique version too!