This post may contain affiliate links. Please see my full disclosure and privacy policy for details.
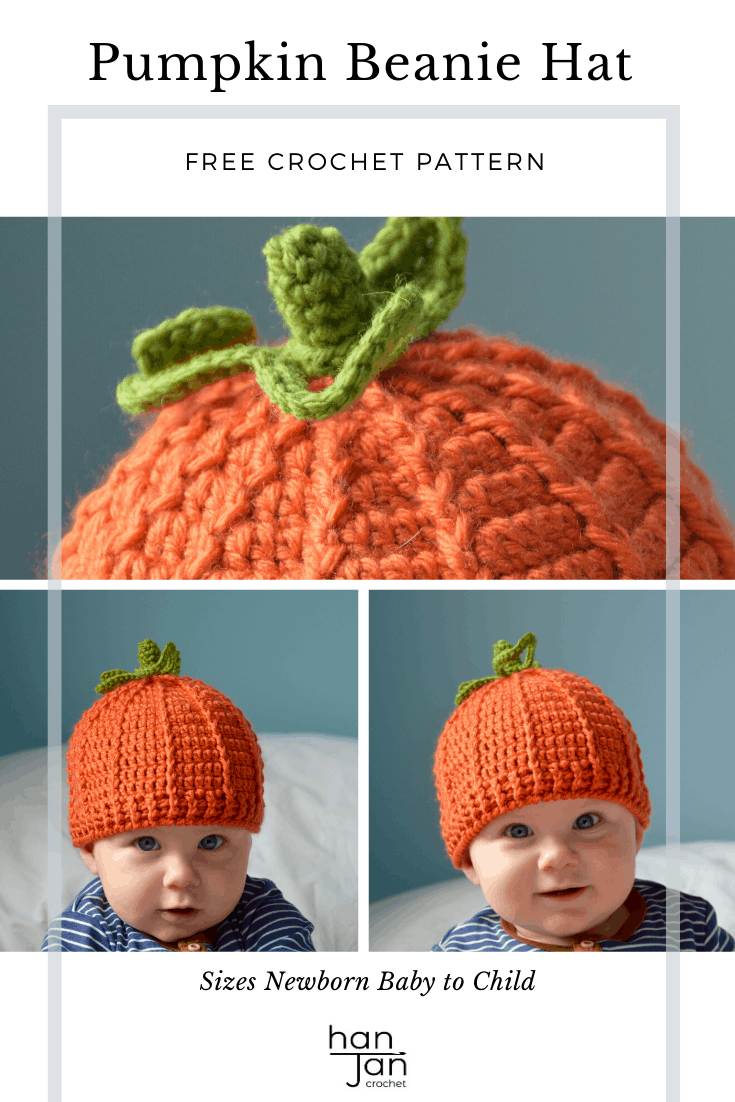
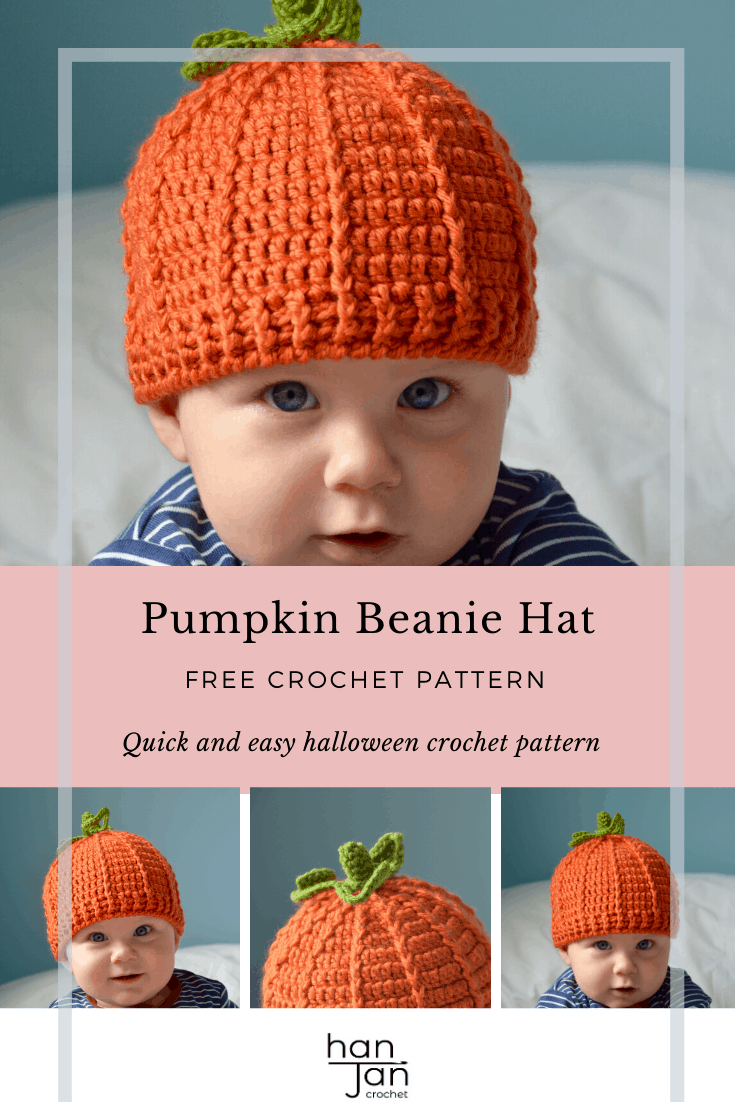
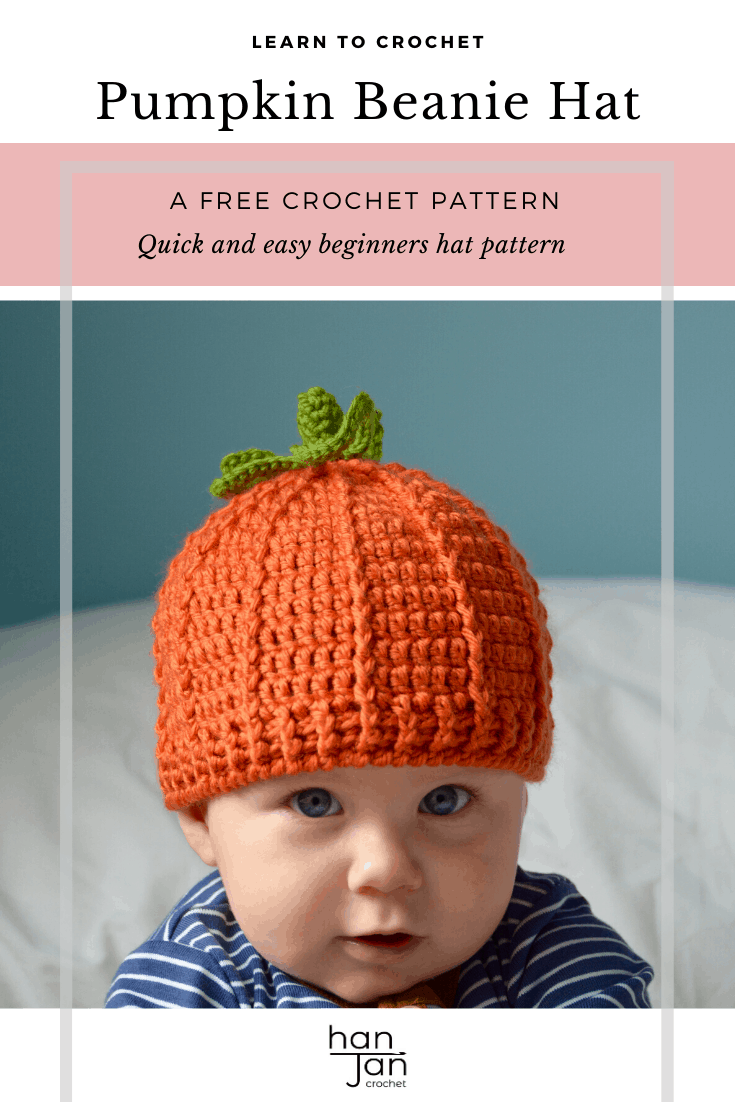
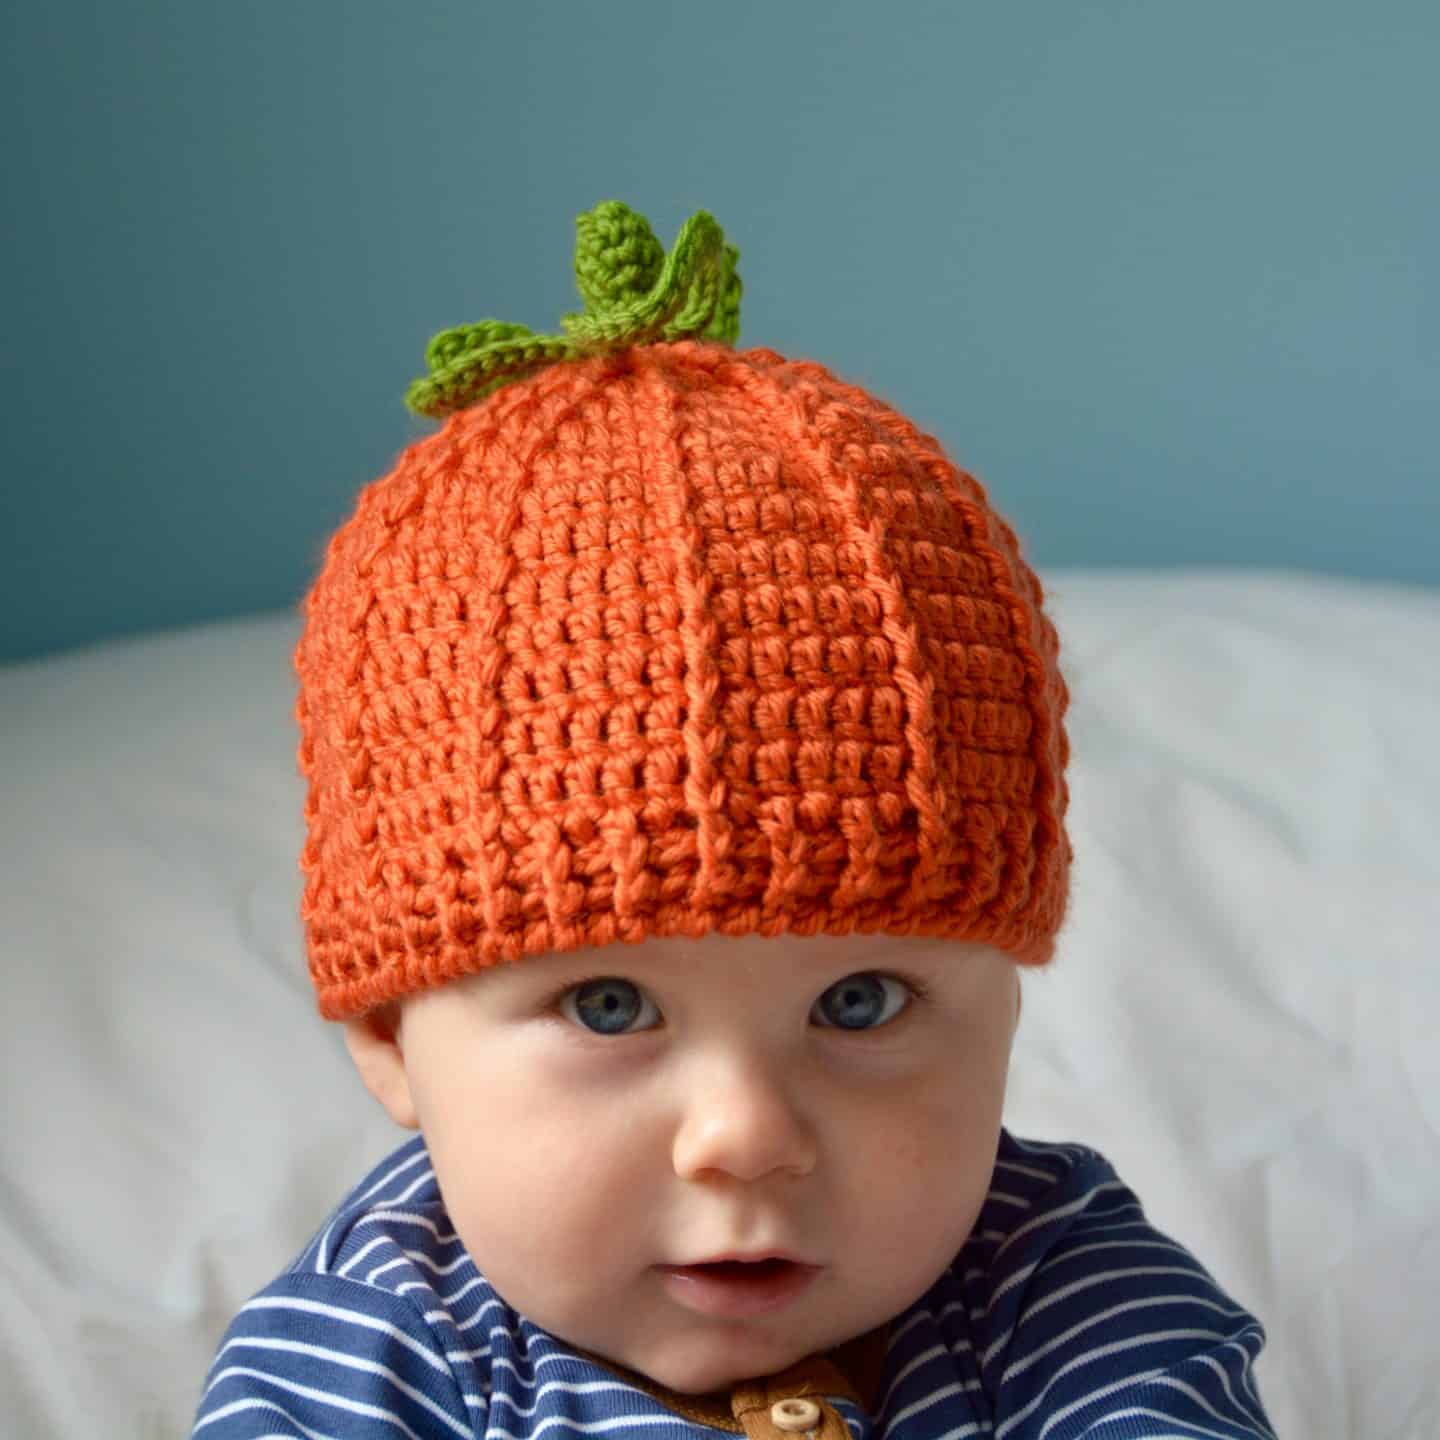
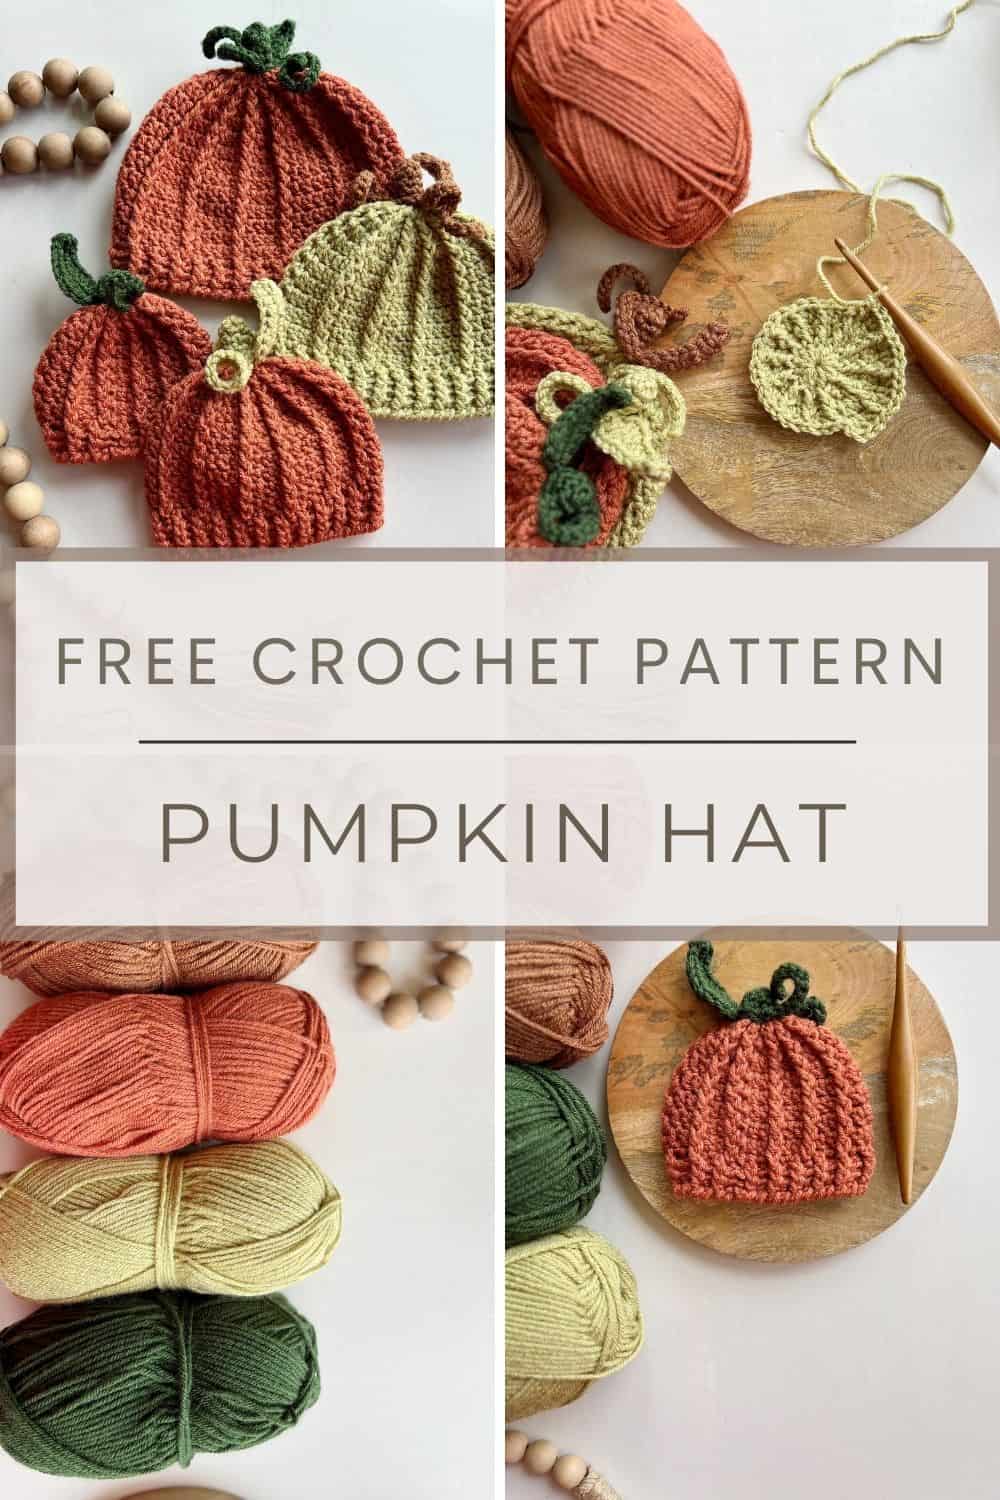
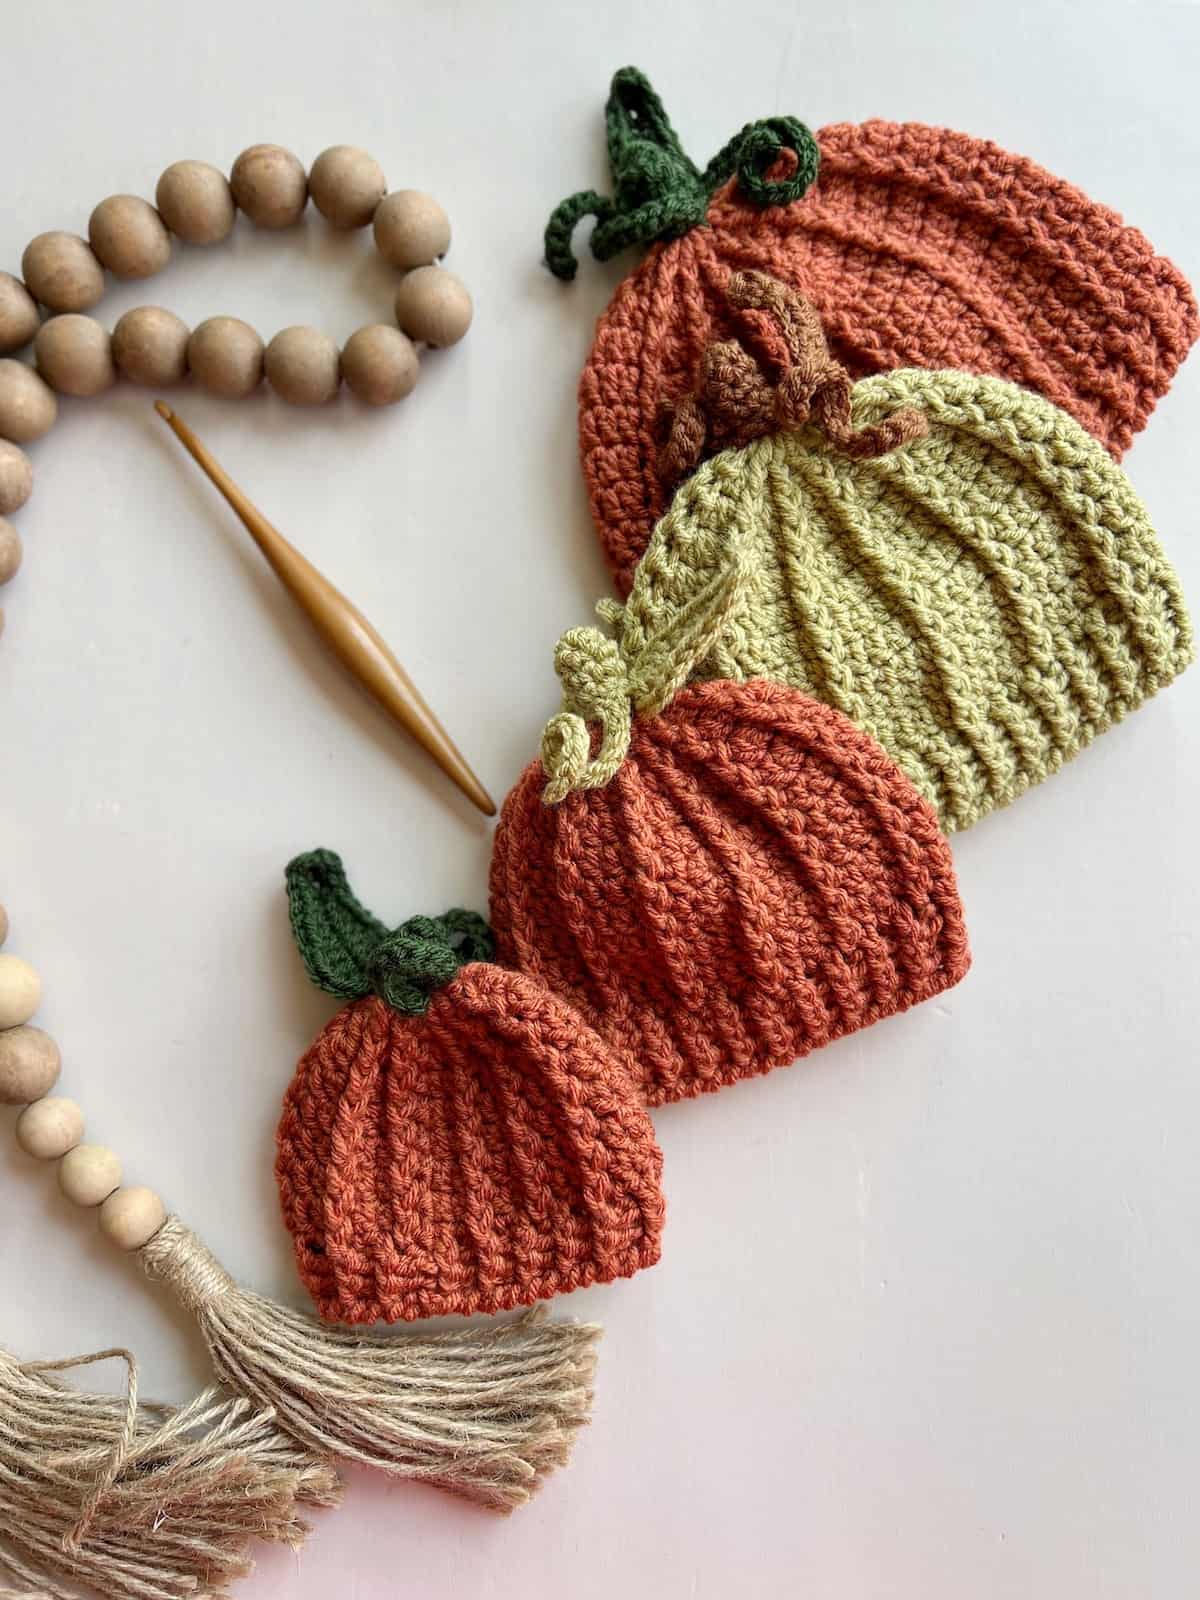
Who doesn’t need a crochet pumpkin hat complete with stalk and leaf? It’s an absolute must have whatever age you are. Easy to make, the perfect gift and a great little project for post stitch practise.
This cute little number comes in seven sizes from premature baby to adult and is super simple to add rounds to so that it’s the perfect fit. It’s made from the top down and uses front post stitches to add texture.
I made this for my little boy last year and have the next size on my hook ready for him this year too. What else do you need for an October halloween treat?!
Scroll down and sign in for the hat pattern here on this post or purchase an ad-free, printable PDF version from my stores:
Want to remove Ads?
- Get ad-free access on all posts; 200+ patterns & tutorials!
- Member-only resource library with downloadable PDF guides
- Bonus eBook (Worth over $30)
Table of Contents
How to make a crochet pumpkin hat
Crochet pumpkins are everywhere and have been for so many years now! What could be cuter and celebrate the autumnal season (and Halloween of course) more than a cute little pumpkin or two?
When I first designed this pumpkin hat for Elliot I only had limited sizes and so after lots of requests for a video tutorial I decided to go for it and make it in sizes from premature baby all the way to adult. So everyone can have their own pumpkin hat!
It’s a really easy crochet pattern that uses simple post stitches to create the texture and shape of the pumpkin. Then we make a stalk, leaf and twirls all in one piece to pop on top. Super easy, super quick, super fun.
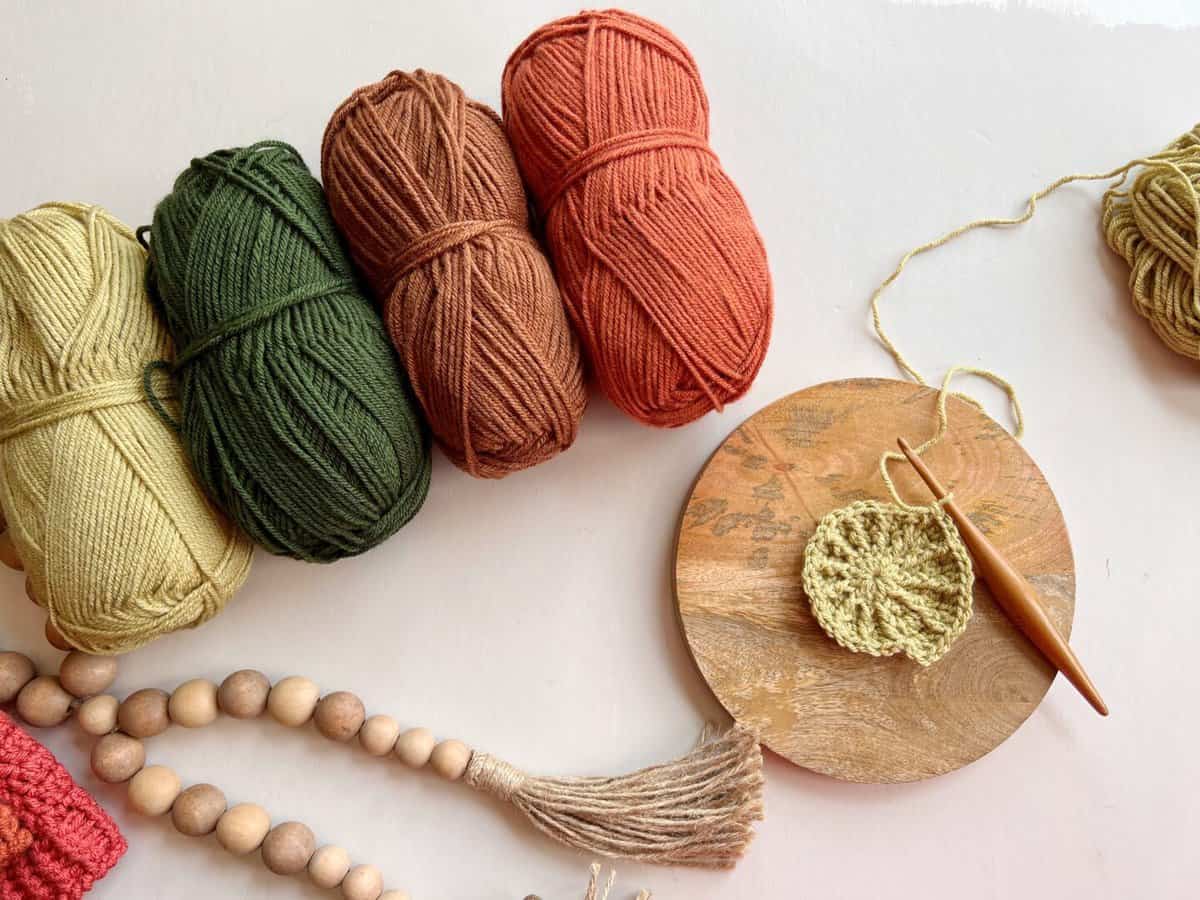
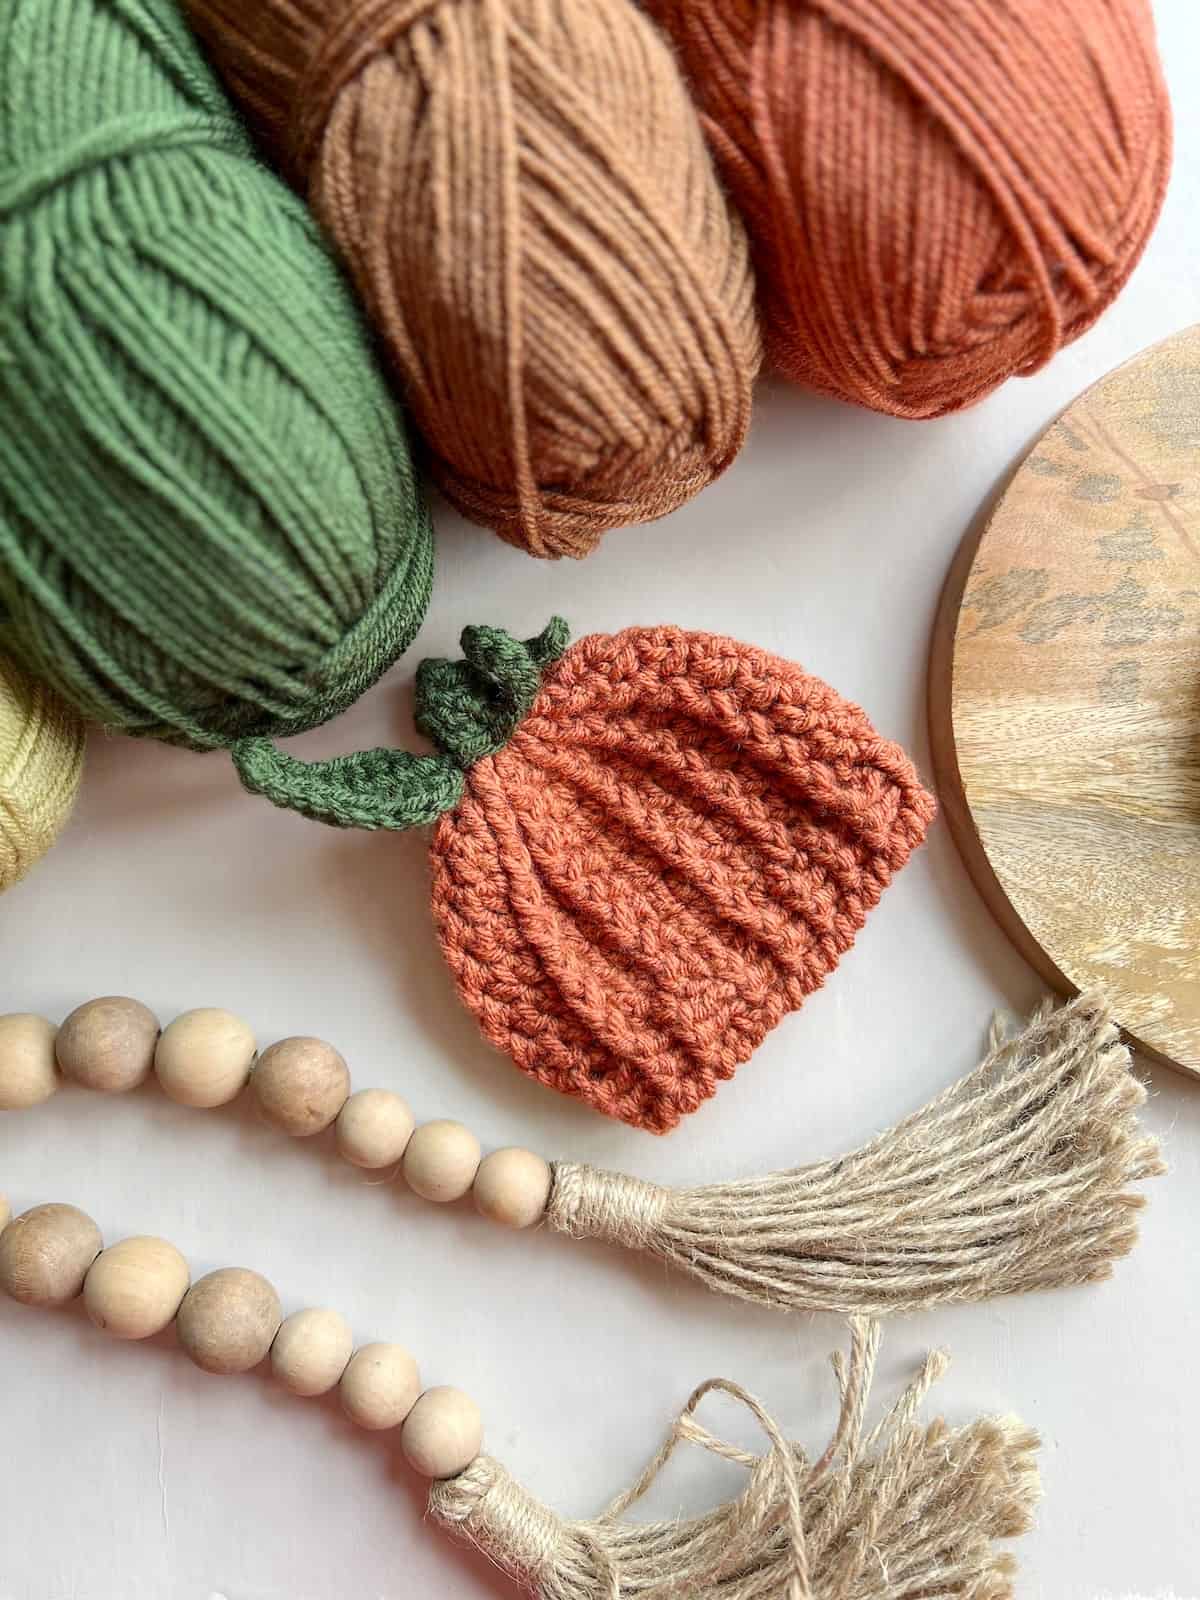
Yarn
I used Brava Worsted by WeCrochet for it’s fabulous colours, it’s price and the fact it washes so well (pumpkin hats get mucky in our house I’m afraid!)
You will need:
Brava Worsted – Worsted Weight (category 4) – 100% Acrylic, 208yds/100g
1 ball per size of colour A (I used Persimmon) and about 10g of your colour B for the stalk and leaf (I used Dublin, Fig and Brindle for my hats.
Materials
Along with the yarn you will also need:
- A 4.5mm(G+) crochet hook – my favourites are Dots Crochet Hooks
- Scissors
- Tapestry Needle
Gauge
14 sts and 4.25 rounds measure 10cm x 10cm (4″ x 4″) over dc stitches.
Sizes
Child Sizes: Premature (0-3 months, 3-12 months, Toddler 1-3yrs, Child 3-10yrs)
To fit head (in): 12-13 (14-15, 16-17, 18-19, 19-20)
Adult Sizes: Teen/Small Adult, Large Adult
To fit head (in): 20 21
A full schematic and sizing is included in the PDF version of the pattern.

Glossary/Abbreviations:
ch(s) – chain(s)
sk – skip
RS – right side
WS – wrong side
FP – front post
BP – back post
rep – repeat
st(s) – stitches
ss – slip stitch
sc – single crochet (UK dc – double crochet)
hdc – half double crochet (UK htr – half treble)
dc – double crochet (UK tr – treble)
Special Stitches
Back Post – BP
To work a back post stitch yarn over, reaching over the top and behind work insert the hook from right to left around vertical post of next stitch, then complete your stitch as usual.
Front Post – FP
To work a front post stitch yarn over, reaching in front of work insert the hook from right to left around vertical post of next stitch, then complete your stitch as usual.
Reverse Single Crochet
Working from left to right, insert hook from front to back in next st to the right, yoh, pull loop through st, yoh, pull through 2 loops on hook.
Notes
The hat is worked in rounds from the top down.
A ch1 at the beginning of a round does not count as a stitch throughout.
You can begin each round with either a ch1 and then work into the first stitch or a stacked double crochet stitch, whichever you prefer.
The pattern is written in US terms.
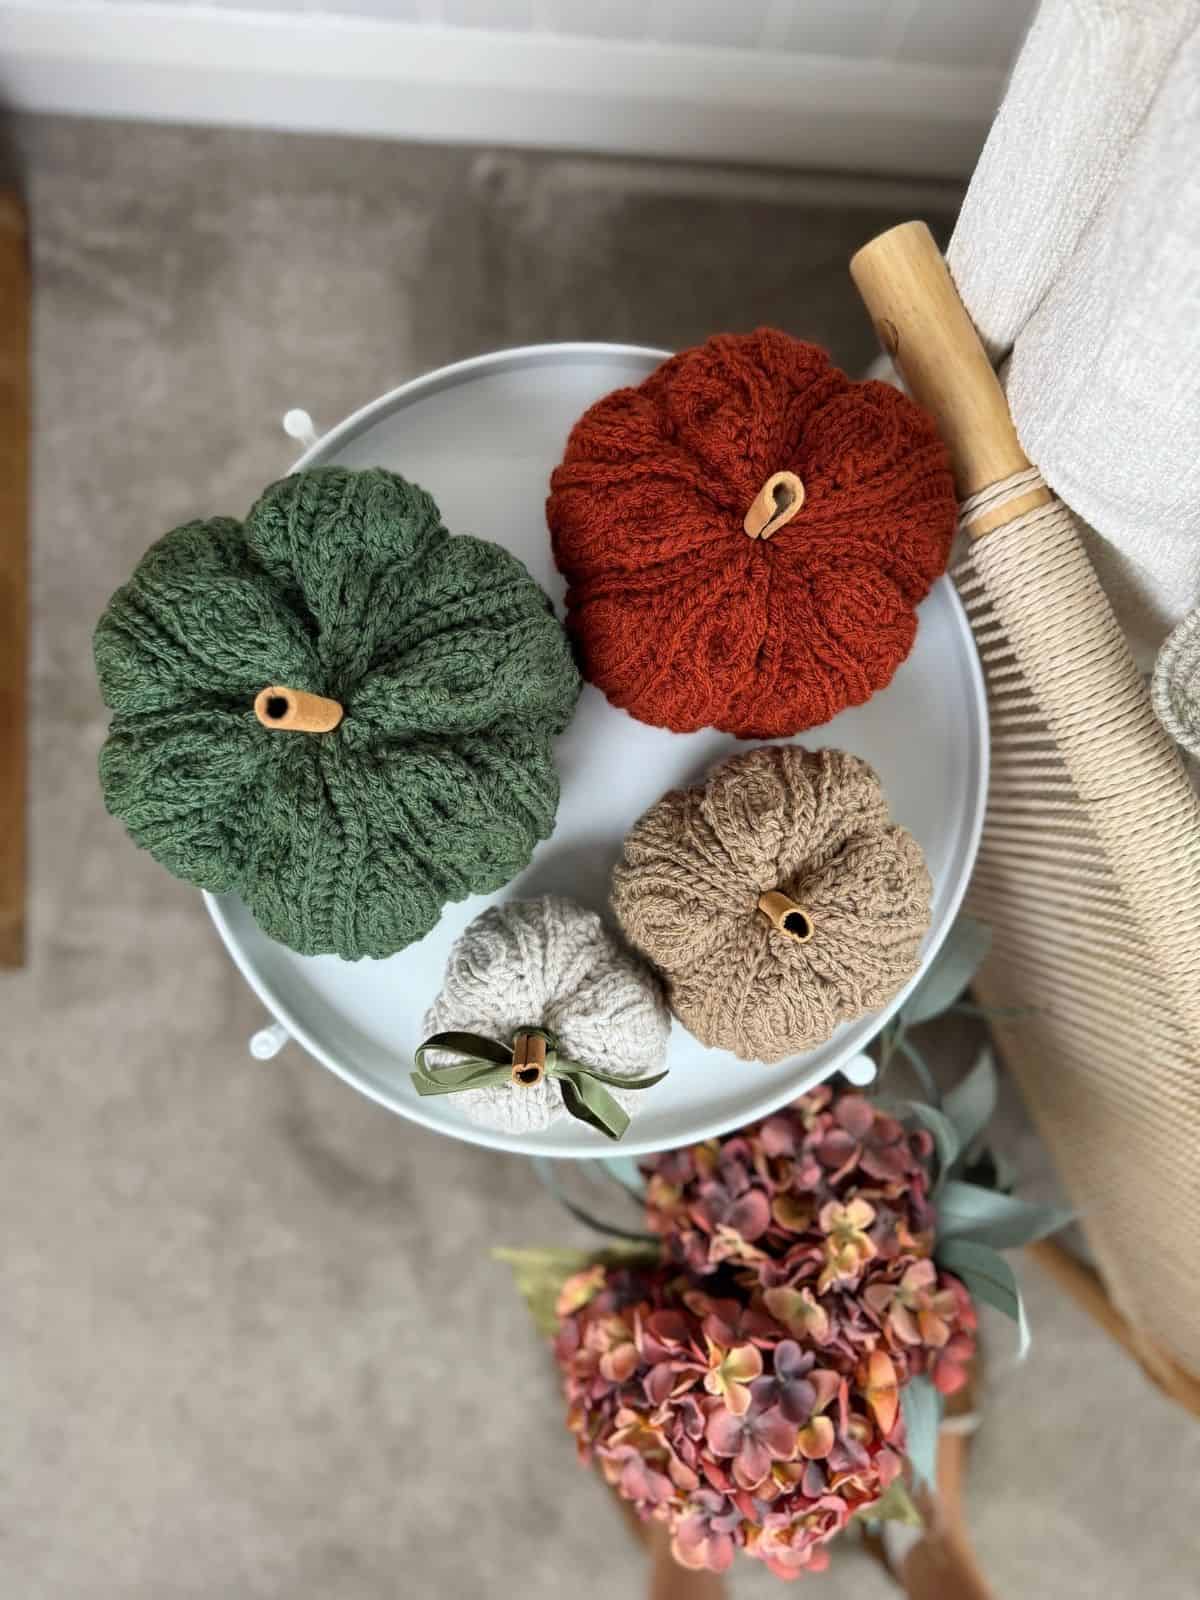
Looking for some pumpkin home decor ideas too?
This stunning crochet pumpkin pattern is packed with texture and fun and comes in 4 sizes to stack 🙂
The perfect home decor crochet pattern for Fall


Crochet Pumpkin Hat Pattern
To unlock Exclusive Content on the HanJan Crochet Blog, all you need to do is click the box below and the Grow.me app will pop up, allowing you to enter your email and create a password.
Once you’ve created an account, every time you see Exclusive Content on my blog (or any others that use Grow), simply login to your Grow account. Be sure to switch to the login screen to enter your login credentials.
If you forget your password, click the “forgot password” link and follow the prompts. Please note that I’m unable to assist with resetting Grow passwords or accessing your Grow account, so be sure to save your login information in a safe place.
Thank you for subscribing and for joining me at HanJan Crochet! I hope you enjoy the exclusive content available on the site and I can’t wait to see what you create 🙂
Premature Baby Crochet Pumpkin Hat Pattern
HAT CROWN
Using A make a Magic Ring.
Round 1: 12dc into Magic Ring, ss in 1st to join [12].
Round 2: ch1, (dc, FPdc) in first st, *(dc, FPdc) in next st, rep from * around, ss in 1st to join [24].
Round 3: ch1, 2dc in same st, FPdc in next st, *2dc in next st, FPdc in next st, rep from * around, ss in 1st to join [36].
HAT BODY
Round 1: ch1, *dc in next 2 sts, FPdc in next st, rep from * around, ss in 1st st to join [36].
Rounds 2-5: Rep Round 1 of Hat Body.
HAT BAND
Round 1: ch1, *BPhdc in next st, FPhdc in next st, rep from * around, ss in 1st to join [36].
Round 2: Rep Round 1 of Hat Band.
Round 3: ch1, reverse sc in each st around, ss in 1st to join [36].
Break yarn. Weave in ends.
Move to Leaf and Stalk Section.
0-3 Month Baby Crochet Pumpkin Hat Pattern
HAT CROWN
Using A make a Magic Ring.
Round 1: 12dc into Magic Ring, ss in 1st to join [12].
Round 2: ch1, (dc, FPdc) in first st, *(dc, FPdc) in next st, rep from * around, ss in 1st to join [24].
Round 3: ch1, 2dc in same st, FPdc in next st, *2dc in next st, FPdc in next st, rep from * around, ss in 1st to join [36].
Round 4: ch1, 2dc in same st, dc in next st, FPdc in next st, *2dc in next st, dc in next st, FPdc in next st, rep from * around, ss in 1st to join [48].
HAT BODY
Round 1: ch1, *dc in next 3 sts, FPdc in next st, rep from * around, ss in 1st st to join [48].
Rounds 2-6: Rep Round 1 of Hat Body.
HAT BAND
Round 1: ch1, *BPhdc in next st, FPhdc in next st, rep from * around, ss in 1st to join [48].
Rounds 2-3: Rep Round 1 of Hat Band.
Round 4: ch1, reverse sc in each st around, ss in 1st to join [48].
Break yarn. Weave in ends.
Move to Leaf and Stalk Section.
3-12 Month Baby Crochet Pumpkin Hat Pattern
HAT CROWN
Using A make a Magic Ring.
Round 1: 11dc into Magic Ring, ss in 1st to join [11].
Round 2: ch1, (dc, FPdc) in first st, *(dc, FPdc) in next st, rep from * around, ss in 1st to join [22].
Round 3: ch1, 2dc in same st, FPdc in next st, *2dc in next st, FPdc in next st, rep from * around, ss in 1st to join [33].
Round 4: ch1, 2dc in same st, dc in next st, FPdc in next st, *2dc in next st, dc in next st, FPdc in next st, rep from * around, ss in 1st to join [44].
Round 5: ch1, 2dc in same st, dc in next 2sts, FPdc in next st, *2dc in next st, dc in next 2 sts, FPdc in next st, rep from * around, ss in 1st to join [55].
HAT BODY
Round 1: ch1, *dc in next 4 sts, FPdc in next st, rep from * around, ss in 1st st to join [55].
Rounds 2-7: Rep Round 1 of Hat Body.
HAT BAND
Round 1: ch1, *BPhdc in next st, FPhdc in next st, rep from * around to last st, BPhdc in last st, ss in 1st to join [55].
Rounds 2-3: Rep Round 1 of Hat Band.
Round 4: ch1, reverse sc in each st around, ss in 1st to join [55].
Break yarn. Weave in ends.
Move to Leaf and Stalk Section.
Toddler Crochet Pumpkin Hat Pattern
HAT CROWN
Using A make a Magic Ring.
Round 1: 12dc into Magic Ring, ss in 1st to join [12].
Round 2: ch1, (dc, FPdc) in first st, *(dc, FPdc) in next st, rep from * around, ss in 1st to join [24].
Round 3: ch1, 2dc in same st, FPdc in next st, *2dc in next st, FPdc in next st, rep from * around, ss in 1st to join [36].
Round 4: ch1, 2dc in same st, dc in next st, FPdc in next st, *2dc in next st, dc in next st, FPdc in next st, rep from * around, ss in 1st to join [48].
Round 5: ch1, 2dc in same st, dc in next 2sts, FPdc in next st, *2dc in next st, dc in next 2sts, FPdc in next st, rep from * around, ss in 1st to join [60].
HAT BODY
Round 1: ch1, *dc in next 4 sts, FPdc in next st, rep from * around, ss in 1st st to join [60].
Rounds 2-8: Rep Round 1 of Hat Body.
HAT BAND
Round 1: ch1, *BPhdc in next st, FPhdc in next st, rep from * around, ss in 1st to join [60].
Rounds 2-3: Rep Round 1 of Hat Band.
Round 4: ch1, reverse sc in each st around, ss in 1st to join [60].
Break yarn. Weave in ends.
Move to Leaf and Stalk Section.
Child Crochet Pumpkin Hat Pattern
HAT CROWN
Using A make a Magic Ring.
Round 1: 11dc into Magic Ring, ss in 1st to join [11].
Round 2: ch1, (dc, FPdc) in first st, *(dc, FPdc) in next st, rep from * around, ss in 1st to join [22].
Round 3: ch1, 2dc in same st, FPdc in next st, *2dc in next st, FPdc in next st, rep from * around, ss in 1st to join [33].
Round 4: ch1, 2dc in same st, dc in next st, FPdc in next st, *2dc in next st, dc in next st, FPdc in next st, rep from * around, ss in 1st to join [44].
Round 5: ch1, 2dc in same st, dc in next 2sts, FPdc in next st, *2dc in next st, dc in next 2sts, FPdc in next st, rep from * around, ss in 1st to join [55].
Round 6: ch1, 2dc in same st, dc in next 3sts, FPdc in next st, *2dc in next st, dc in next 3sts, FPdc in next st, rep from * around, ss in 1st to join [66].
HAT BODY
Round 1: ch1, *dc in next 5 sts, FPdc in next st, rep from * around, ss in 1st st to join [66].
Rounds 2-9: Rep Round 1 of Hat Body.
HAT BAND
Round 1: ch1, *BPhdc in next st, FPhdc in next st, rep from * around, ss in 1st to join [66].
Rounds 2-3: Rep Round 1 of Hat Band.
Round 4: ch1, reverse sc in each st around, ss in 1st to join [66].
Break yarn. Weave in ends.
Move to Leaf and Stalk Section.
Teen Crochet Pumpkin Hat Pattern
HAT CROWN
Using A make a Magic Ring.
Round 1: 12dc into Magic Ring, ss in 1st to join [12].
Round 2: ch1, (dc, FPdc) in first st, *(dc, FPdc) in next st, rep from * around, ss in 1st to join [24].
Round 3: ch1, 2dc in same st, FPdc in next st, *2dc in next st, FPdc in next st, rep from * around, ss in 1st to join [36].
Round 4: ch1, 2dc in same st, dc in next st, FPdc in next st, *2dc in next st, dc in next st, FPdc in next st, rep from * around, ss in 1st to join [48].
Round 5: ch1, 2dc in same st, dc in next 2sts, FPdc in next st, *2dc in next st, dc in next 2sts, FPdc in next st, rep from * around, ss in 1st to join [60].
Round 6: ch1, 2dc in same st, dc in next 3sts, FPdc in next st, *2dc in next st, dc in next 3sts, FPdc in next st, rep from * around, ss in 1st to join [72].
HAT BODY
Round 1: ch1, *dc in next 5 sts, FPdc in next st, rep from * around, ss in 1st st to join [72].
Rounds 2-10: Rep Round 1 of Hat Body.
HAT BAND
Round 1: ch1, *BPhdc in next st, FPhdc in next st, rep from * around, ss in 1st to join [72].
Rounds 2-4: Rep Round 1 of Hat Band.
Round 5: ch1, reverse sc in each st around, ss in 1st to join [72].
Break yarn. Weave in ends.
Move to Leaf and Stalk Section.
Adult Crochet Pumpkin Hat Pattern
HAT CROWN
Using A make a Magic Ring.
Round 1: 11dc into Magic Ring, ss in 1st to join [11].
Round 2: ch1, (dc, FPdc) in first st, *(dc, FPdc) in next st, rep from * around, ss in 1st to join [22].
Round 3: ch1, 2dc in same st, FPdc in next st, *2dc in next st, FPdc in next st, rep from * around, ss in 1st to join [33].
Round 4: ch1, 2dc in same st, dc in next st, FPdc in next st, *2dc in next st, dc in next st, FPdc in next st, rep from * around, ss in 1st to join [44].
Round 5: ch1, 2dc in same st, dc in next 2sts, FPdc in next st, *2dc in next st, dc in next 2sts, FPdc in next st, rep from * around, ss in 1st to join [55].
Round 6: ch1, 2dc in same st, dc in next 3sts, FPdc in next st, *2dc in next st, dc in next 3sts, FPdc in next st, rep from * around, ss in 1st to join [66].
Round 7: ch1, 2dc in same st, dc in next 4sts, FPdc in next st, *2dc in next st, dc in next 4sts, FPdc in next st, rep from * around, ss in 1st to join [77].
HAT BODY
Round 1: ch1, *dc in next 6 sts, FPdc in next st, rep from * around, ss in 1st st to join [77].
Rounds 2- 11: Rep Round 1 of Hat Body.
HAT BAND
Round 1: ch1, *BPhdc in next st, FPhdc in next st, rep from * around to last st, BPhdc in last st, ss in 1st to join [77].
Rounds 2-4: Rep Round 1 of Hat Band.
Round 5: ch1, reverse sc in each st around, ss in 1st to join [77].
Break yarn. Weave in ends.
Move to Leaf and Stalk Section.
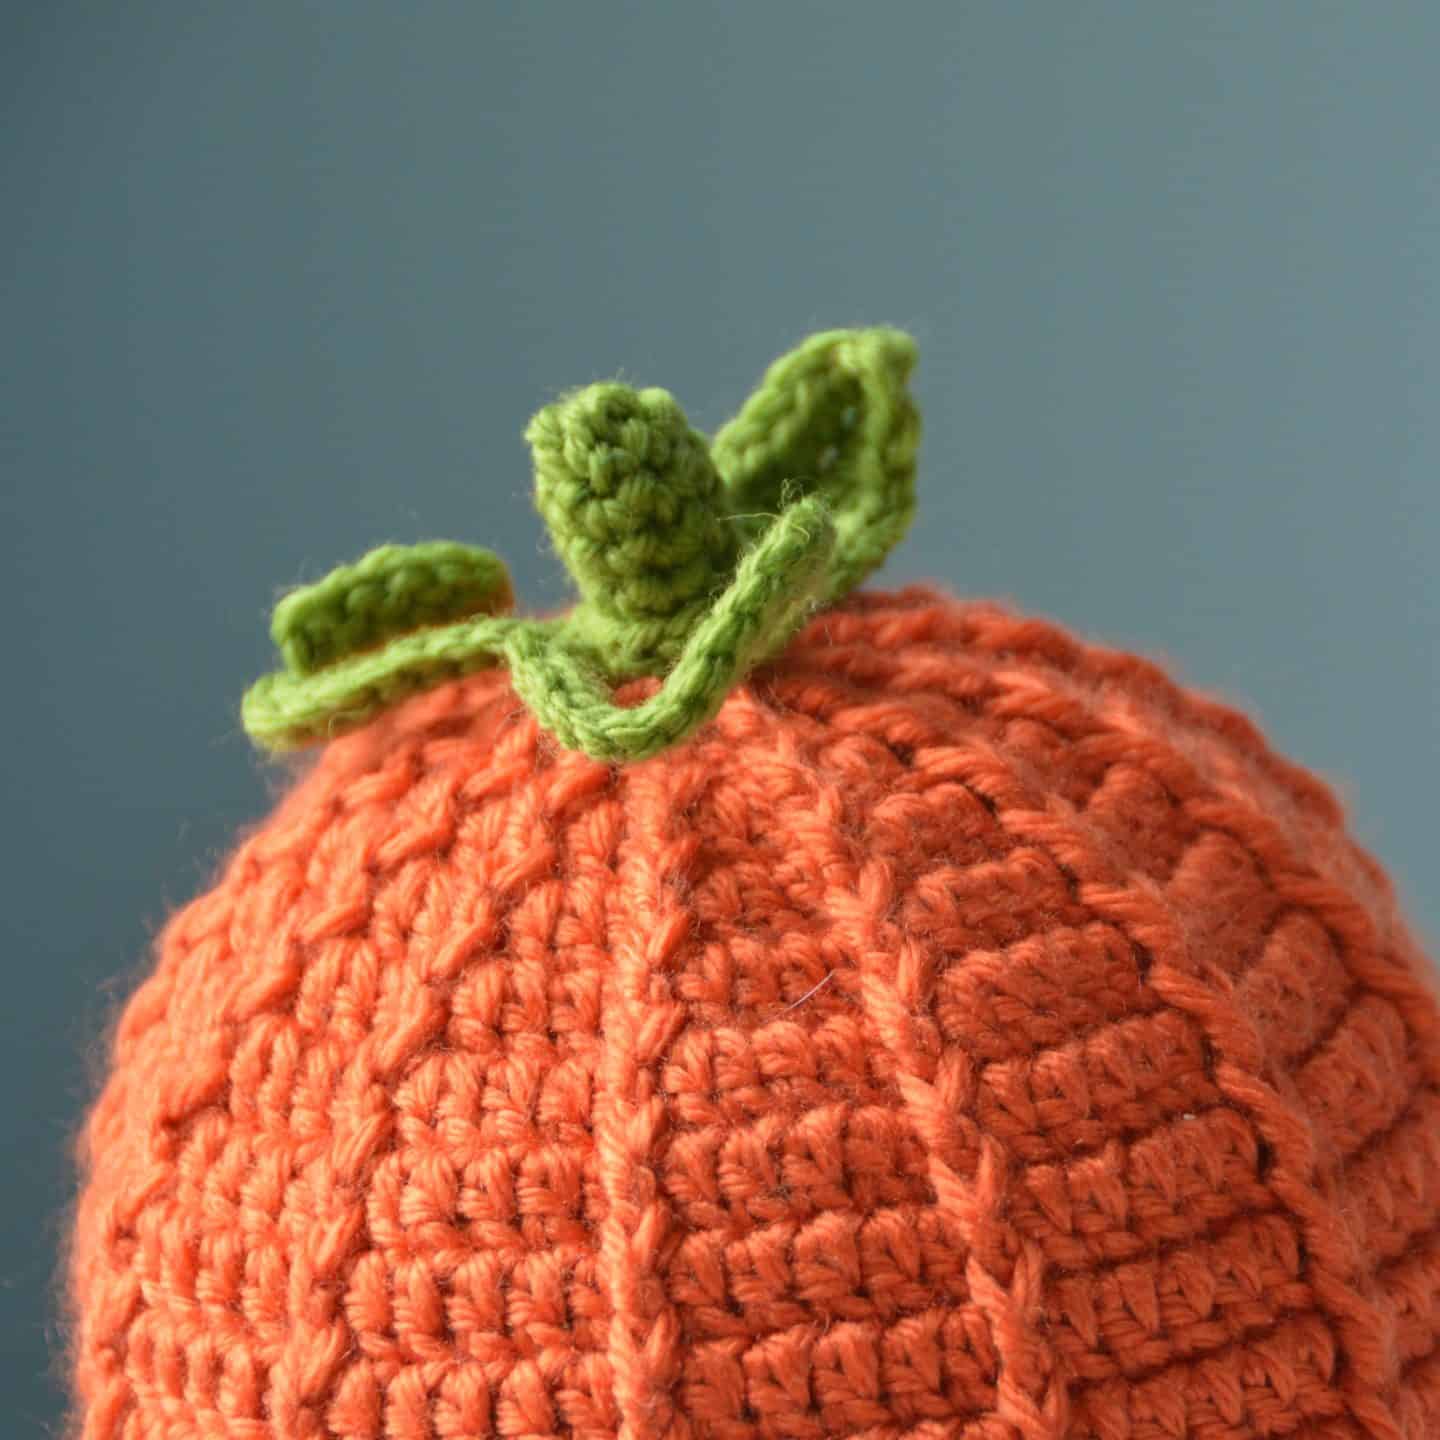
Pumpkin Hat Leaf and Stalk
I made the Leaf and Stalk the same size for all of my hats but you can make yours any size you like!
Just increase or decrease the rounds that you work for the Stalk as you’d like it and then add as many chains as you need for the greenery!
STALK
Using B make a Magic Ring. Leave a tail long enough to sew to hat.
Round 1: 6sc into Magic Ring [6]. Work in continuous rounds now.
Rounds 2-5: sc in each st around. Do not break yarn.
Slip stitch into 1st st at the end of the final Round. Then begin Twirls and Leaf Section.
TWIRLS
Continue with yarn from Stalk, *ch19, ss in 2nd ch from hook and each ch to end, ss in same st of stalk, ss in next 2sts of stalk.
Repeat from * for the Second Twirl. Do not break yarn.
LEAF
Continue with yarn from Twirls, ch10, sc in 2nd ch from hook, sc in next 2chs, hdc in next 3chs, dc in next 3chs, ss into side of dc just worked, ss into st of stalk that has the leaf attached, ch1, rotate to work in unworked side of ch10; dc in next 3chs, hdc in next 3chs, sc in next 3chs. Break yarn.
Using your tail, sew Stalk into place on the top of the hat as shown.
Weave in ends to finish.
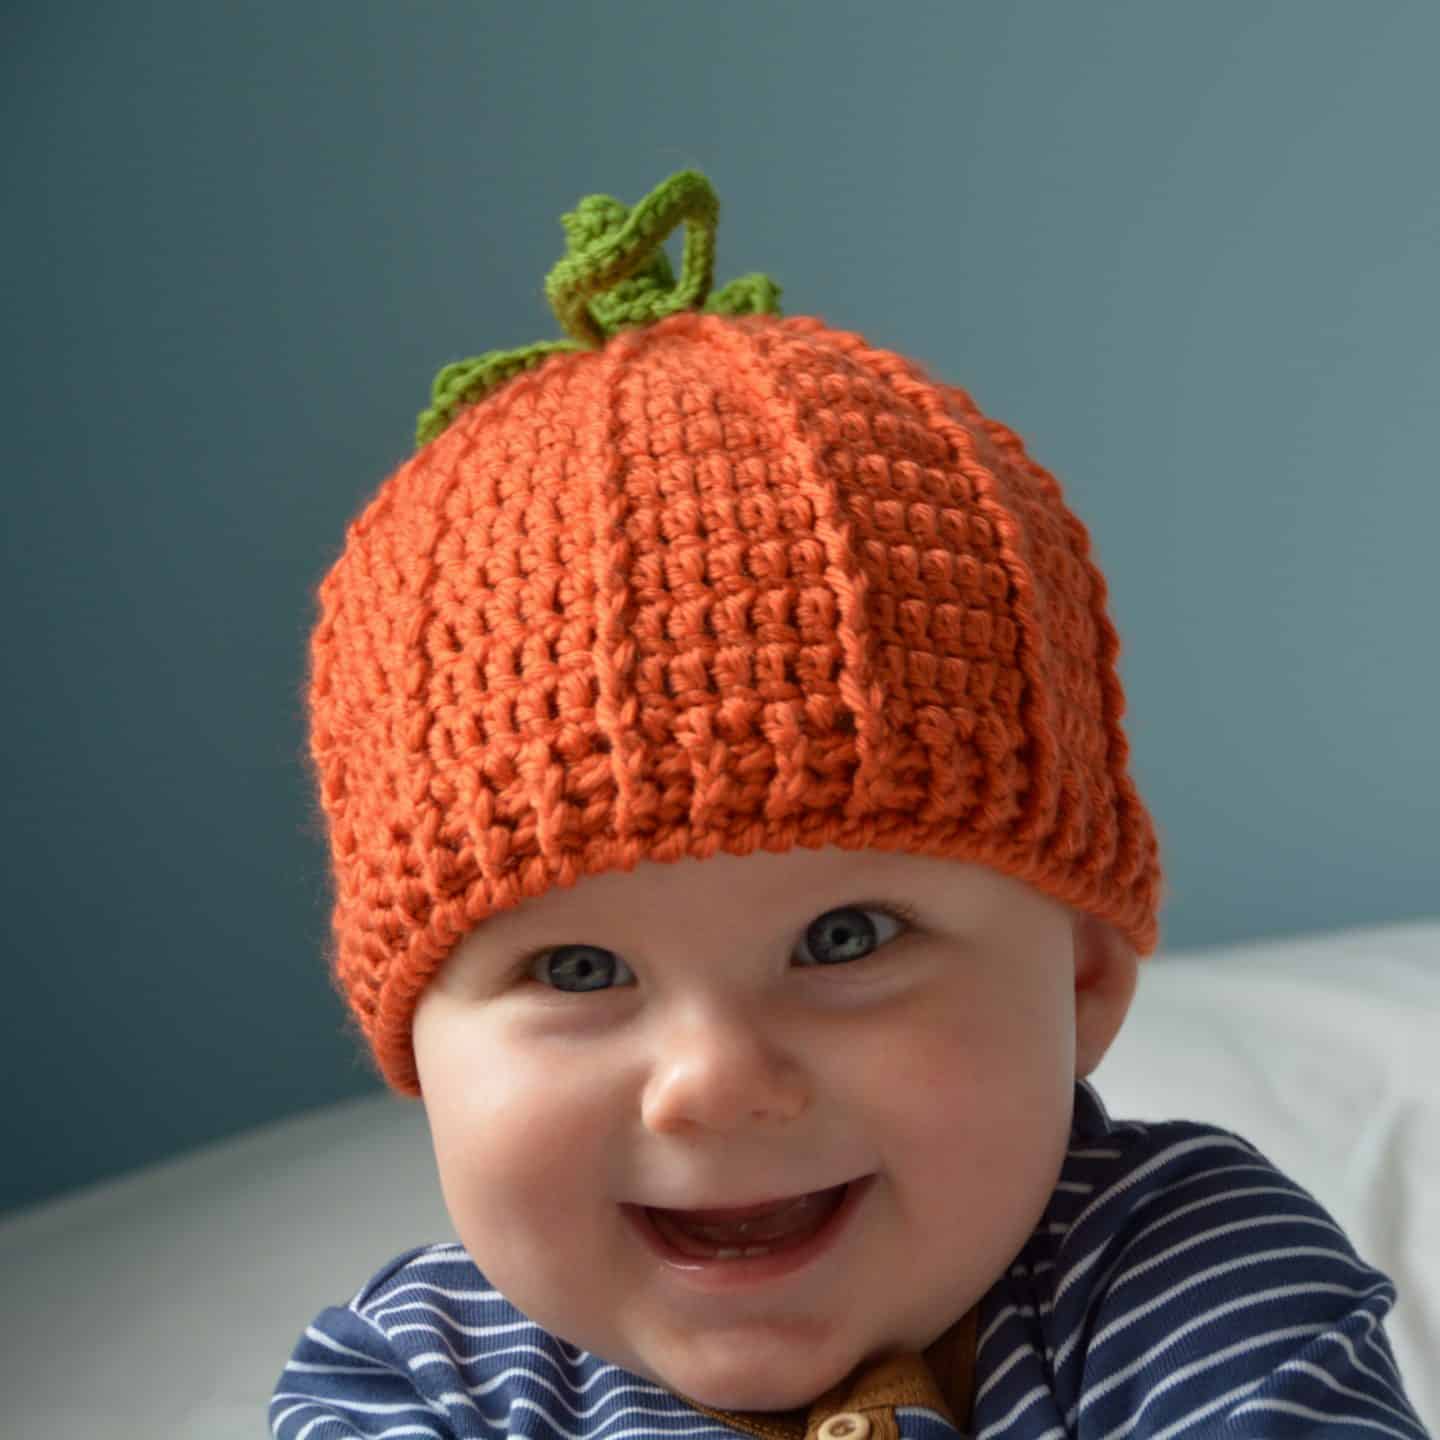
That’s all there is to it – Halloween and Autumn ready with your very own little crochet pumpkin hat!
If you enjoy crocheting projects for little ones then here are some other cute free patterns of mine I thought you might like:
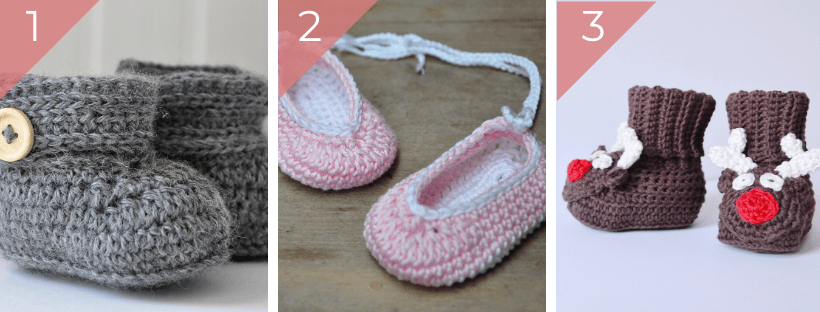
- Wrap Around Baby Boots (free pattern)
- Baby Ballet Pumps (free pattern)
- Baby Reindeer Boots (free pattern)
Other Winter Crochet Hats and Hood Patterns You Might Enjoy
A selection of some of my crochet hats and hoods to keep you warm and toasty!
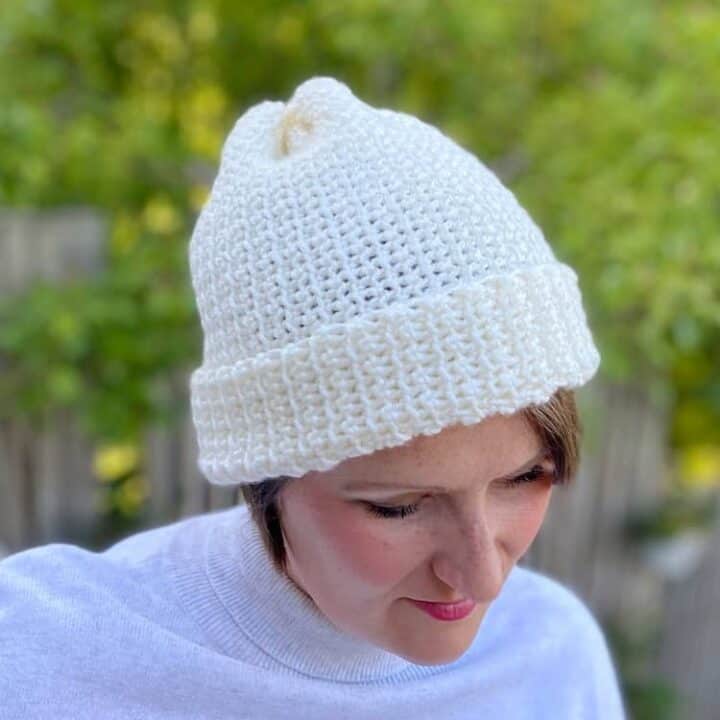
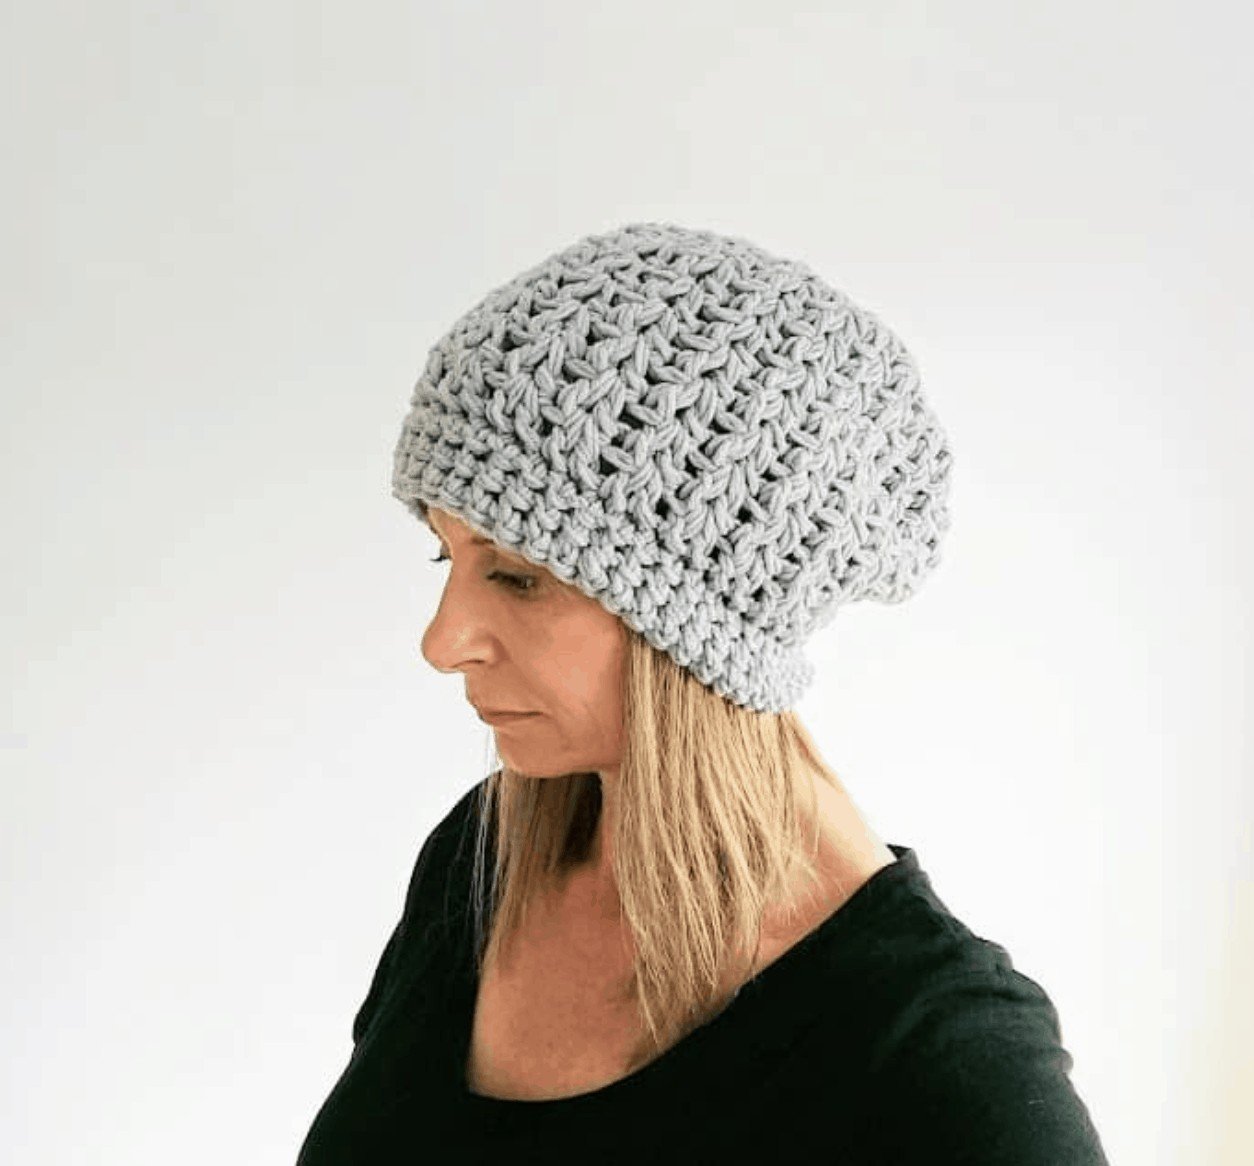
The Slip Stitch Beanie
Free Crochet Pattern
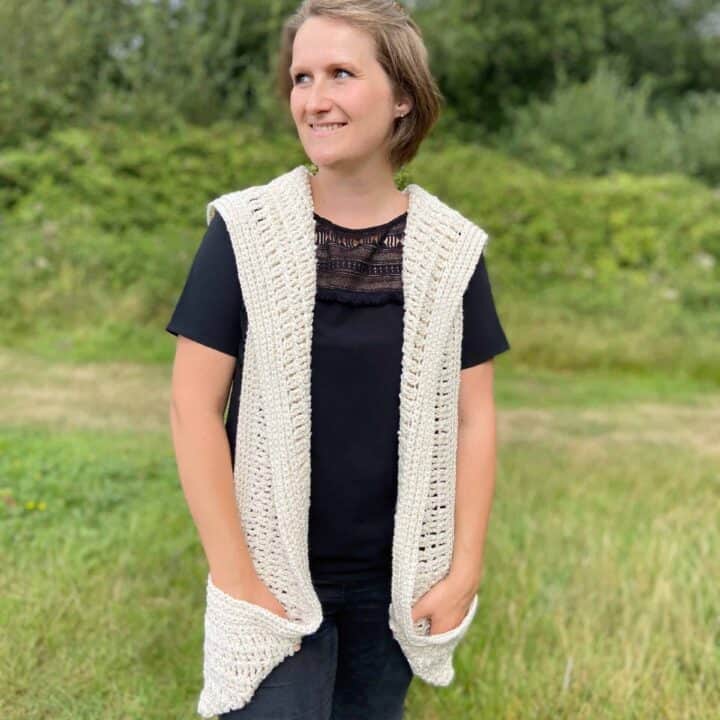
The Pickpocket Hood
Free Crochet Pattern

Neo Mint Hat
Paid Crochet Pattern
Join HanJan and Share Your Crochet With Us!
I’d love to hear from you and see your HanJan Crochet project! Here’s where you can do that:
📌 PIN THIS POST – save it to your Pinterest crochet board so you can come back to it again and make more!
↗️ SHARE – Share your yarn choices, progress pics, and finished projects on Facebook or Instagram (make sure to use the hashtag) #hanjancrochet
🧶 JOIN – Join thousands of amazing crafters in the HanJan Crochet Community Group on Facebook ready to cheer you on!
✉️📩📬 SUBSCRIBE – It’s an honour to be able to create and share my free crochet patterns with you. I’d love to stay connected and send you regular discount codes and free patterns! Please sign up for my subscriber list to get a free gift right now!