This post may contain affiliate links. Please see my full disclosure and privacy policy for details.

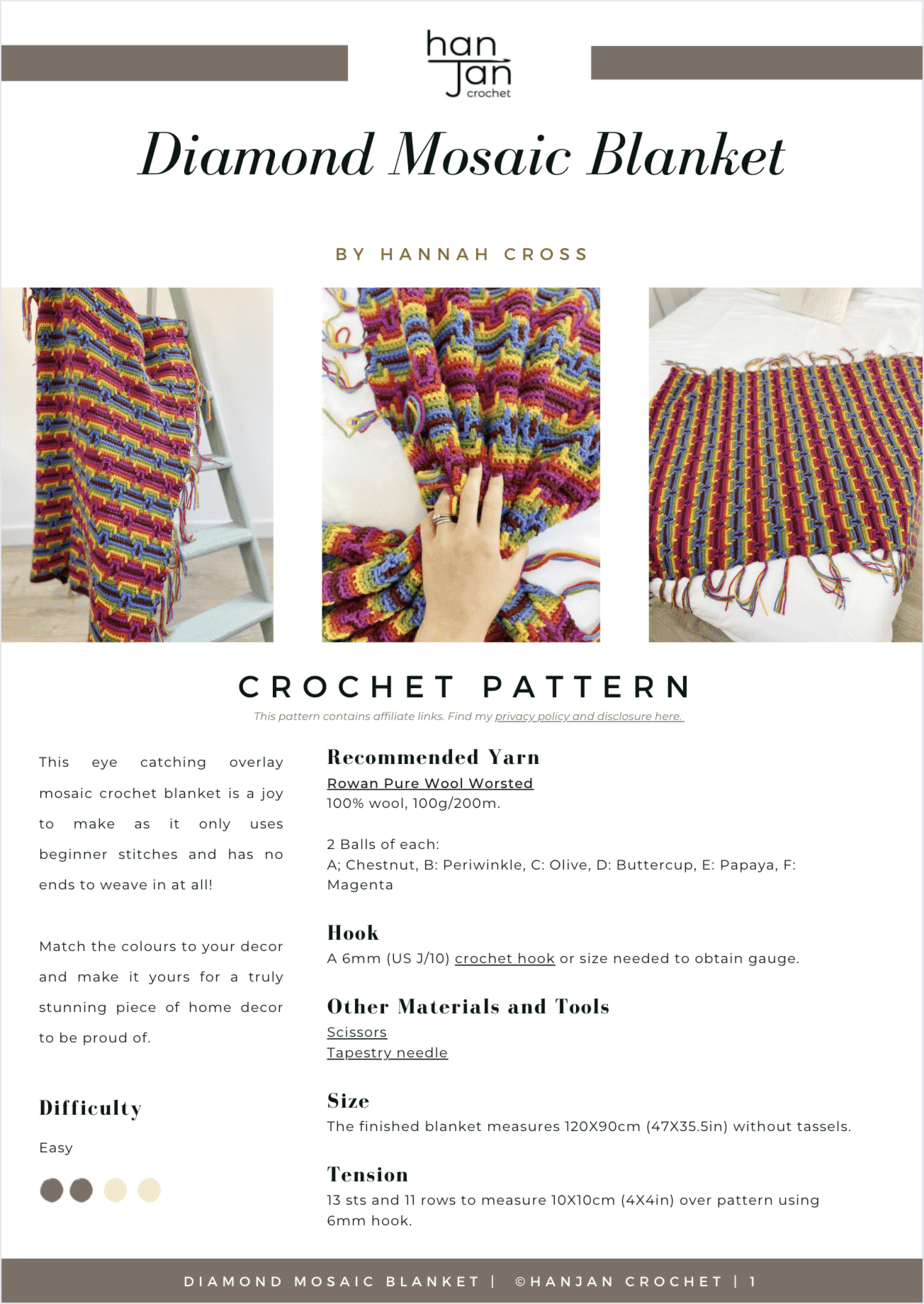
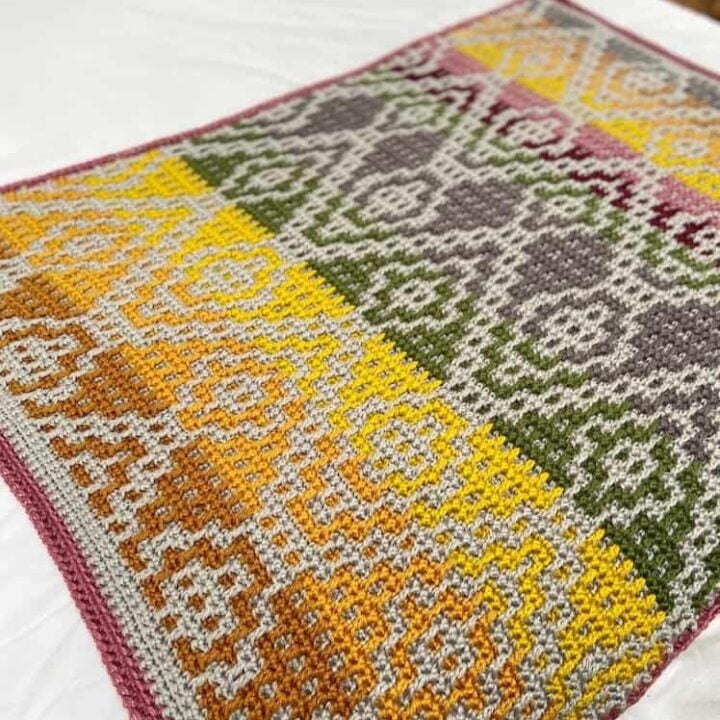
This easy overlay mosaic crochet blanket pattern is the perfect project for yarn stashbusting, mindfulness and so much more!
Using a simple stitch repeat that creates delicate diamonds that ripple through the entire blanket, you can style the colours to match your decor and change the look of it entirely.
With beginner crochet stitches, chart, written pattern and video tutorial, this is a crochet pattern that anyone can make and enjoy for the home.
This post may contain affiliate links. Please see my full disclosure and privacy policy for details.
You can carry on reading to find the free pattern here in this blogpost or purchase an ad-free, printable PDF version of the Diamond Overlay Mosaic Crochet Blanket in my pattern stores:
Want to remove Ads?
- Get ad-free access on all posts; 200+ patterns & tutorials!
- Member-only resource library with downloadable PDF guides
- Bonus eBook (Worth over $30)
Table of Contents
More about this mosaic crochet blanket pattern
If you know anything about me as both a maker and a designer then you’ll know that I love crochet techniques and patterns that look tricky but are actually really easy!
This is definitely the case with this one. We can achieve such an intricate pattern by knowing how to maneuver basic stitches.
If you already have knowledge of overlay mosaic then this’ll be a piece of cake for you. And if you’re a beginner, no need to fret because I’ve included all you’ll need to know.
How do you crochet a beautiful crochet blanket like this?
I understand that this blanket may appear complicated but what if I told you that you will only be using 1 colour of yarn for each row? And what if I also told you that you will only need to know how to crochet a US single crochet (UK double crochet) and US double crochet (UK treble)?
That’s it! All you need to know are the very first two stitches that most of us learn in crochet. The key is to know when and where you use them – that’s where the pattern and chart come in.
The other great thing is that you don’t have to worry about loads of ends to weave in – you just turn them into tassels!
And if that’s not enough to tempt you, the pattern tells you how to adjust the sizing to make any size blanket you want. The stitch repeat is a multiple of 12 + 1. To adjust the width just repeat stitches 2-13 as many times are you like. The row repeat is from Row 3-14. To adjust the height just repeat these rows as many times as you like before completing with the final 3 rows as per the chart.
Are you new to overlay mosaic crochet?
Learn all about the overlay mosaic crochet technique and find out that it’s really not as tricky as it looks in the mosaic crochet tutorial.
Oftentimes mosaic crochet is read from a chart rather than written instructions and this can be super intimidating at first! If it’s the mosaic crochet charts that have you running for the hills, then check out this blogpost all about how to read a mosaic crochet chart.
Once you’ve got the technique mastered, head on over to this collection of overlay mosaic crochet patterns and choose your next project!
Yarn
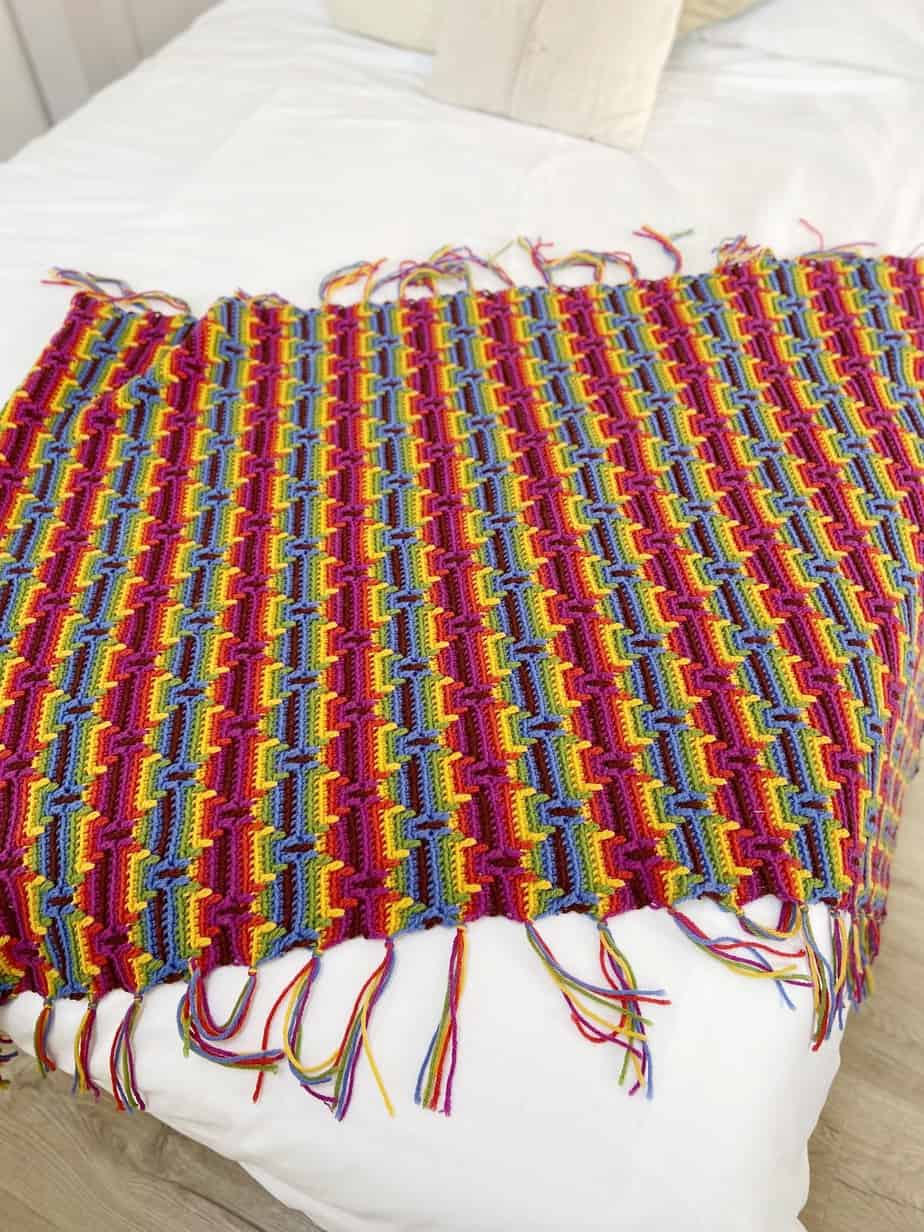
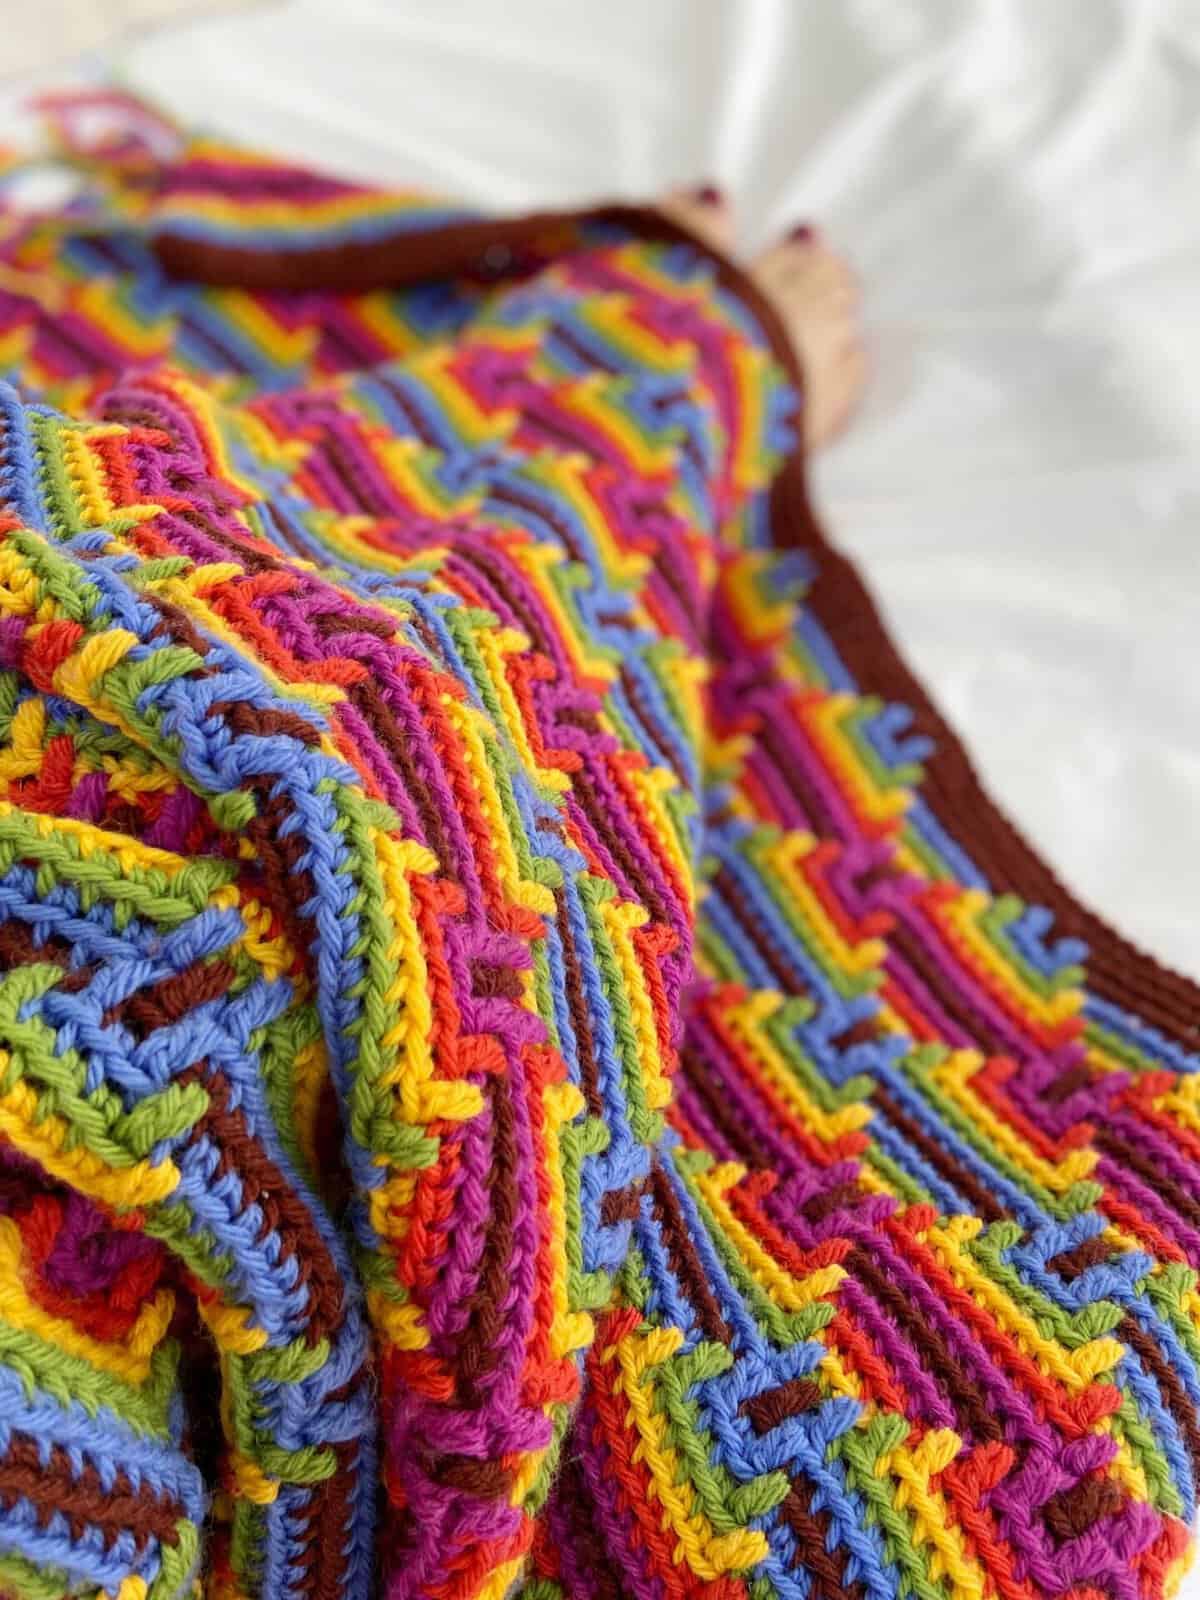
To make this crochet blanket, I used Rowan Pure Wool Worsted (100% wool, 100g/200m). I required 2 balls of each A: Chestnut, B: Periwinkle, C: Olive, D: Buttercup, E: Papaya, and F: Magenta.
Other than this, any #4/Aran/Worsted weight yarn will work great for this project. Here are some other options that I think would make wonderful crochet blankets:
- Heartland by Lion Brand (100% Acrylic; 252yds / 230m/140g)
- Swish Worsted by WeCrochet (100% Superwash Merino Wool; 110yds / 100m /50g)
- Color Theory by Lion Brand (100% Acrylic; 246yds / 225m / 100g)
Materials
Along with your yarn, you will need the following:
- 6 mm (US J) crochet hook (my favourites are Furls Streamline Swirl crochet hooks or Clover Amour crochet hooks)
- Scissors
- Tapestry needle
Pattern Options
Get this crochet pattern free in this blog post in both US and UK terms! You can also purchase an ad-free, printable PDF in US terms with added extras in my pattern stores:
Purchase and Print
Get the ad-free, printable PDF with added extras in my pattern stores:
Don’t forget to join HanJan Crochet to receive regular discount codes (and more free patterns!) and Pin this free mosaic baby blanket pattern to your crochet Pinterest board!
Glossary and Abbreviations
ch(s) – chain(s)
ss – slip stitch
RS – right side
rep – repeat
blo- back loop only
flo- front loop only
Stitches
Special Stitches
We’re using the mosaic overlay technique in this diamond blanket which gives it that unique texture. Overlay mosaic crochet uses rows or rounds of US single crochet/UK double crochet in the back loops only of each stitch. You then work a US double crochet/UK treble crochet into the front loop of stitches from lower rows as indicated in the pattern or the chart to form the design over the top of your rows.
You might have heard about the inset mosaic crochet technique too. This is different as it uses 2 rows of each colour and doesn’t work into back loops or front loops.
There are lots of opinions about if one is better or easier than the other and as with most things it’s up to personal preference! I like both and find they work really well for different projects.
If you want to make more crochet projects using the mosaic technique, I’ve got a few suggestions for you (and you can search my blog for more patterns too):
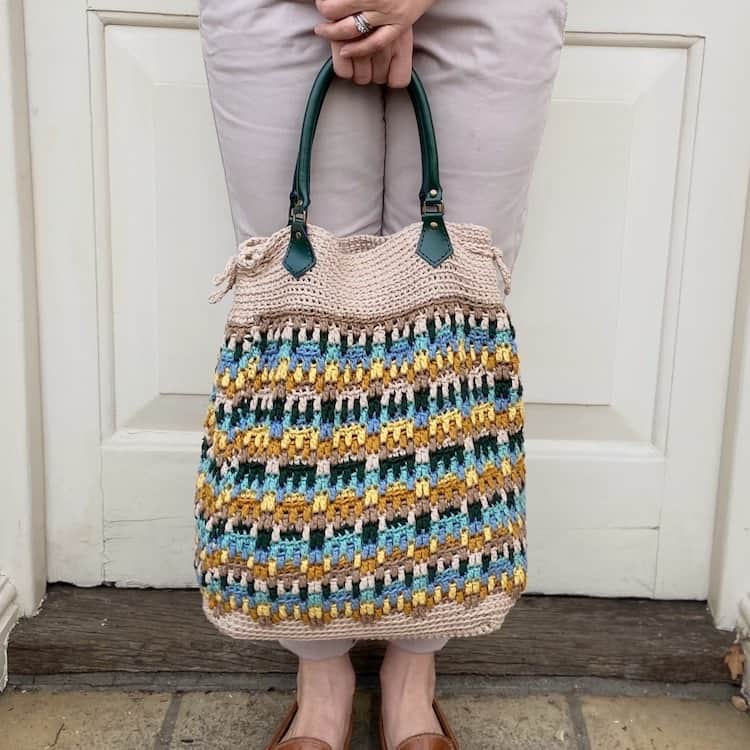
- Hayden Bag (this is worked in the round too)
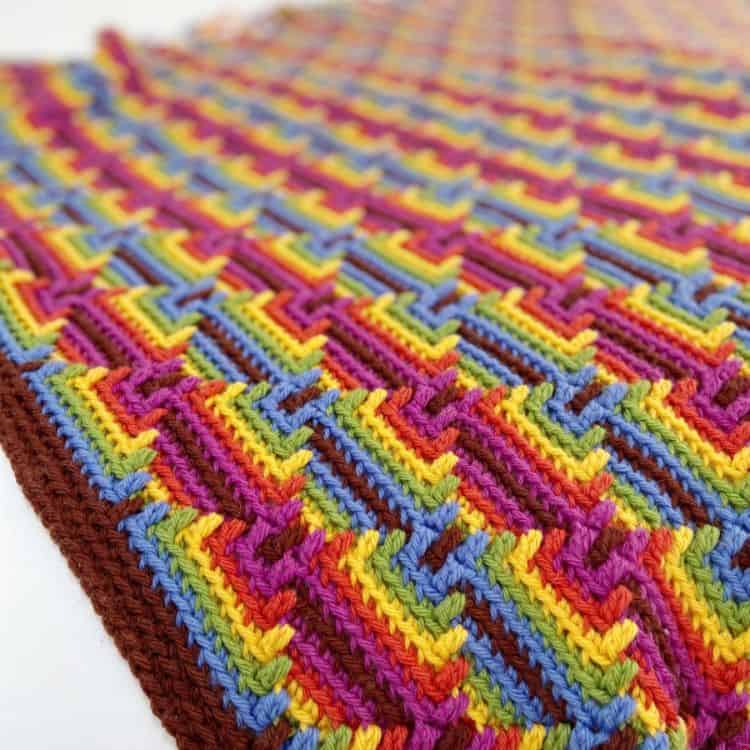
- Rainbow Splash Blanket (lots of vibrance and texture in this one)
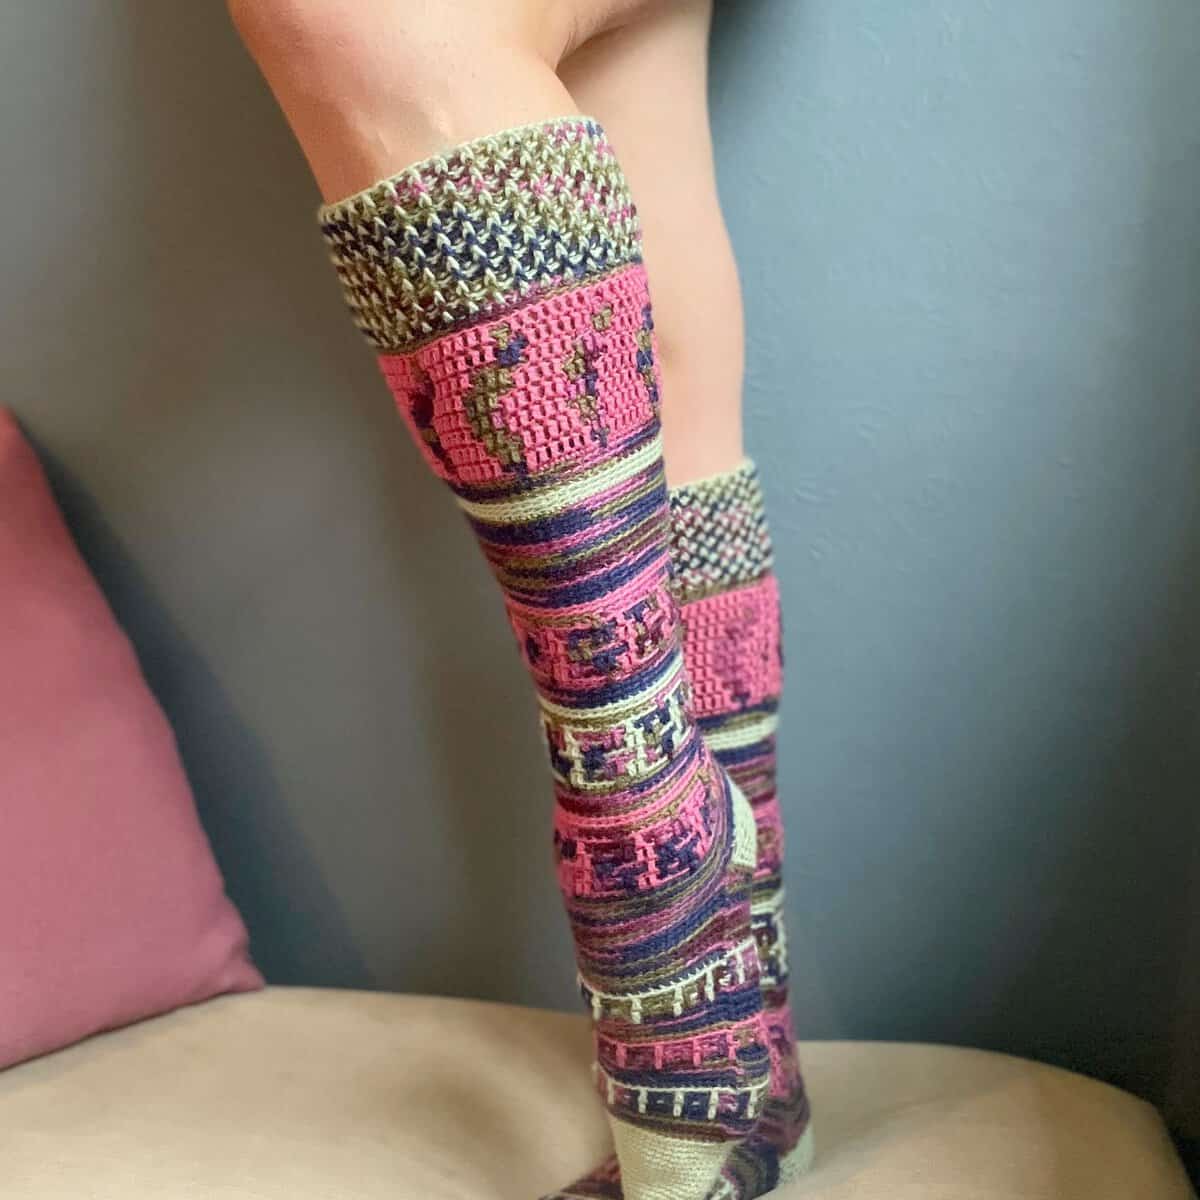
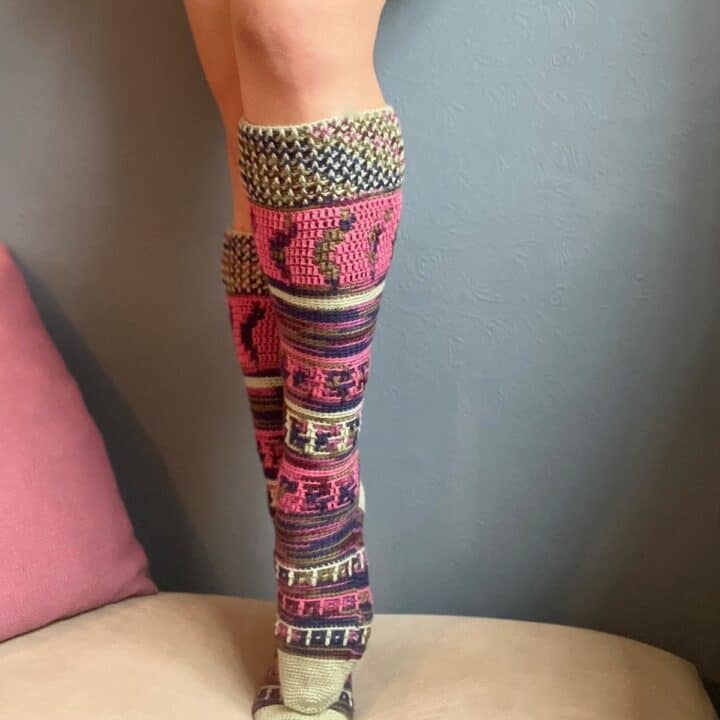
- Hydrangea Crochet Socks (you can make them any length you like)
Pattern Notes
You will work each US sc/UK dc in blo throughout.
Start with a multiple of 12 sts + 1 st for your first row.
Do not turn after every row, instead work every Row from RS, break yarn at end of each row and start with RS facing for next row.
Join new colour with a ss at start of each row.
Leave at least 18cm (7in) tail at the end of each row to make the tassels.
Gauge and Sizing
The gauge for the overlay mosaic crochet blanket is 13 sts and 11 rows of Main Set Pattern = 4″ by 4″ (10cm by 10cm) using 6mm hook.
The finished blanket will measure 120X90cm (47X35.5in) without tassels, unless you change the yarn weight and hook size. In which case, it will vary accordingly.
How do you read a Mosaic Crochet Chart?
I think that reading a mosaic crochet chart is one of the things that puts lots of people off trying this crochet technique. In all honesty, I can see why. It doesn’t look anything like the finished pattern does and can seem terribly complicated!
There are just a few simple rules to follow to make sure that you know how to read a mosaic crochet chart:
- The chart is read from right to left for each row as numbered up the right hand side. Rows are worked in the colours as indicated on the left column.
- The entire row is worked in the colour stated regardless of if there is a shaded box or not.
- Ignore the colours displayed in each box; this shows how the pattern will look when you have added the dropped down stitches into the front loops 2 rows below.
- You won’t change colour throughout a row.
- A blank box indicates you will work a US sc/UK dc in the back loop only.
- A box marked with an X indicates working a drop-down US double crochet/UK treble crochet.
Free Diamond Mosaic Blanket Crochet Pattern
UK Terminology
To unlock Exclusive Content on the HanJan Crochet Blog, all you need to do is click the box below and the Grow.me app will pop up, allowing you to enter your email and create a password.
Once you’ve created an account, every time you see Exclusive Content on my blog (or any others that use Grow), simply login to your Grow account. Be sure to switch to the login screen to enter your login credentials.
If you forget your password, click the “forgot password” link and follow the prompts. Please note that I’m unable to assist with resetting Grow passwords or accessing your Grow account, so be sure to save your login information in a safe place.
Thank you for subscribing and for joining me at HanJan Crochet! I hope you enjoy the exclusive content available on the site and I can’t wait to see what you create 🙂
Row 10: Using F – As Row 8.
Row 11: Using E – As Row 7.
Row 12: Using D – As Row 6.
Row 13: Using C – As Row 5.
Row 14: Using B – As Row 4.
Rows 3-14 form the pattern.
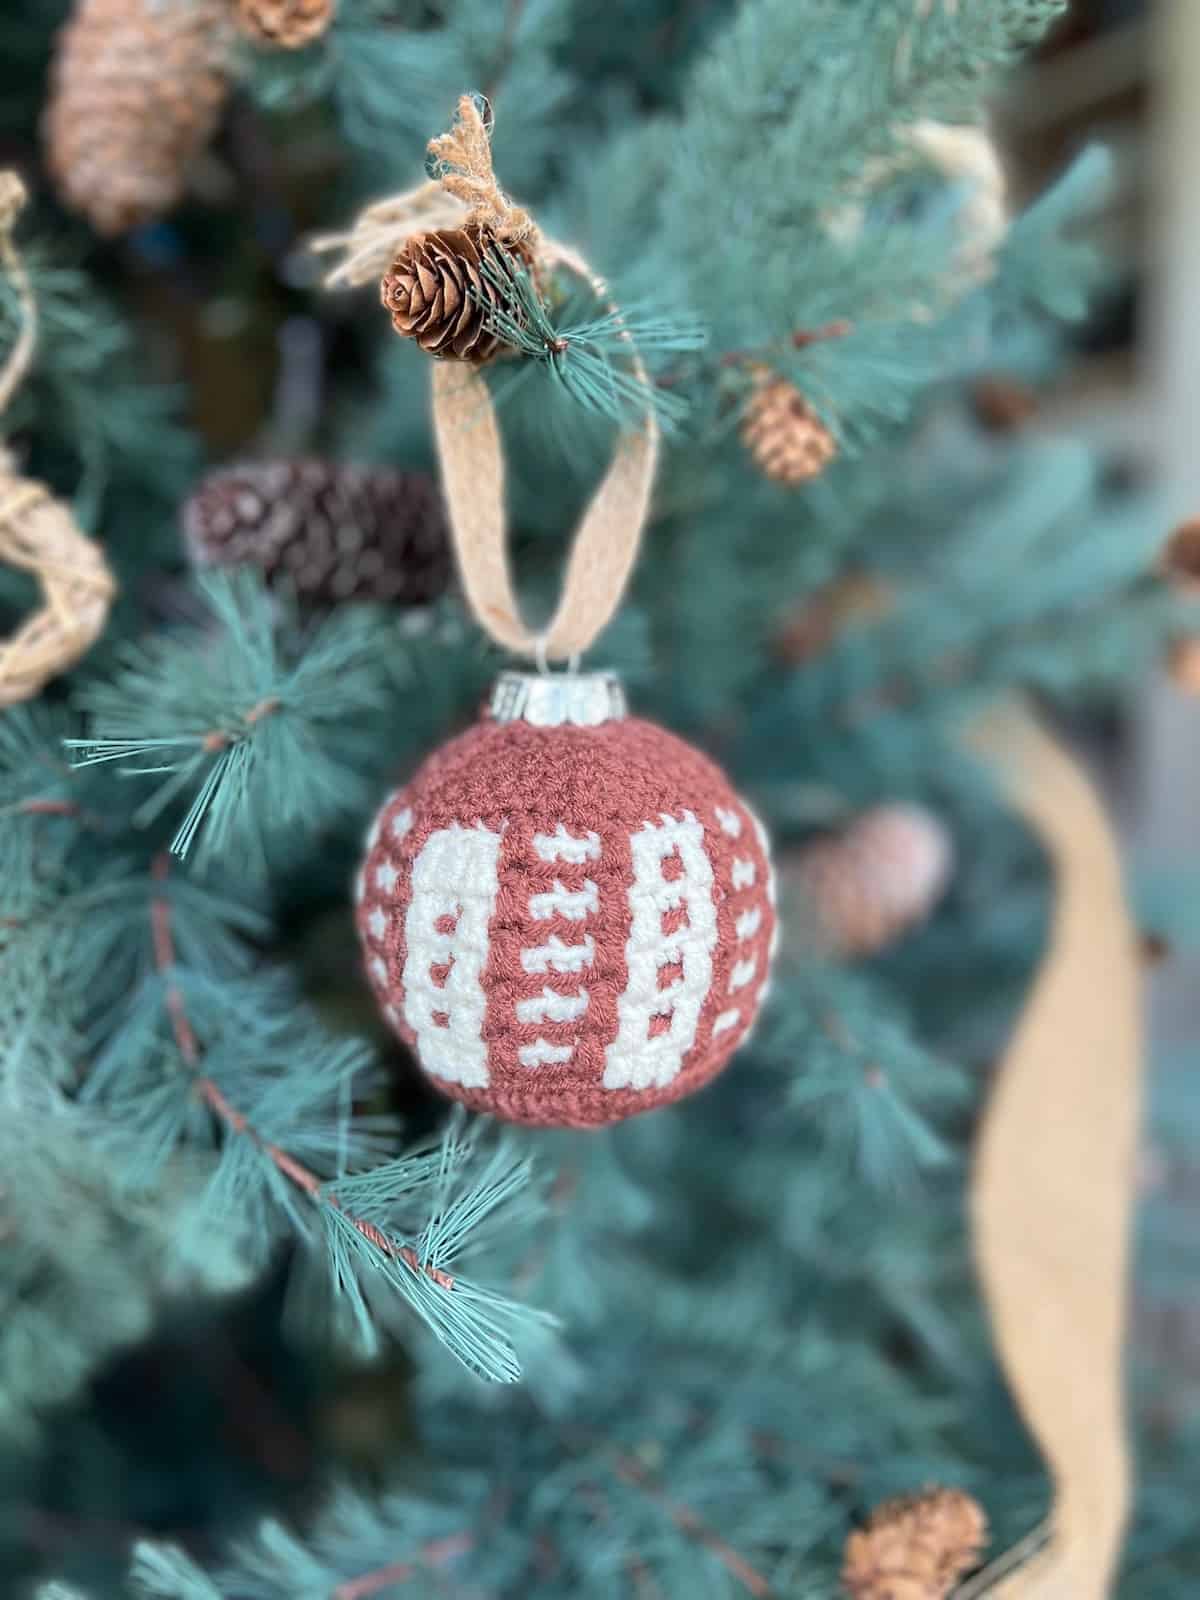
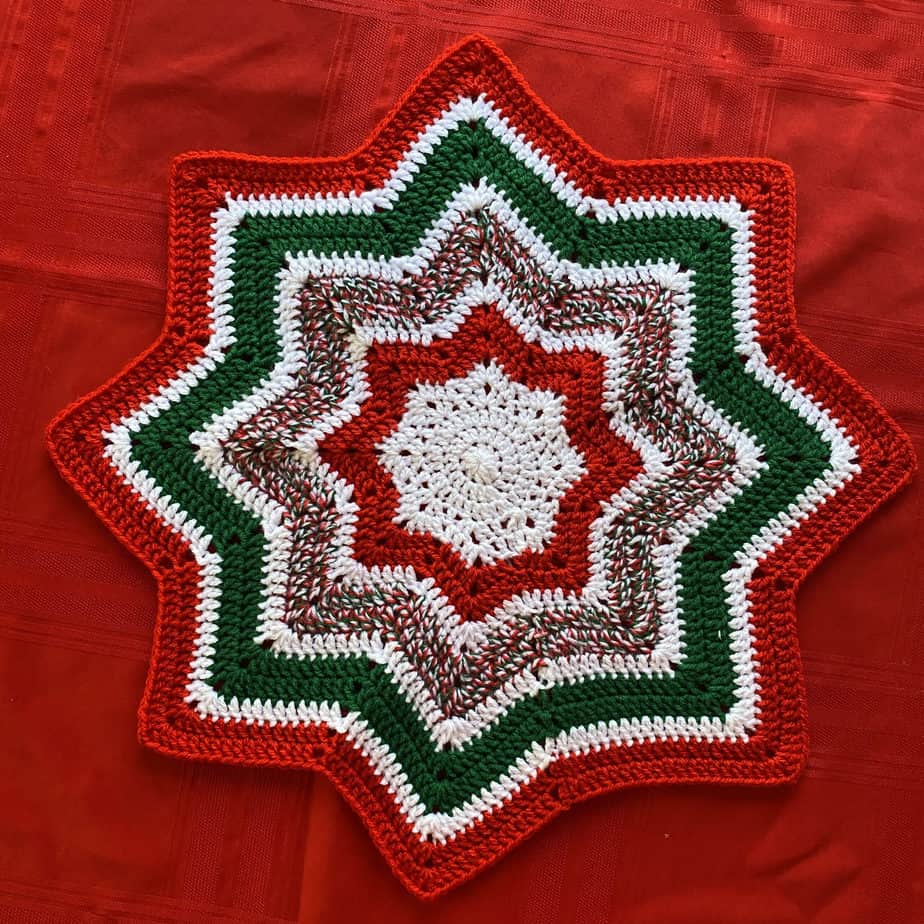
If you love creating special crochet seasonal decorations as much as me then I know you’ll love my bauble collection that includes this easy Christmas overlay mosaic crochet decoration pattern!
Rows 15-146: Repeat pattern 11 more times.
Row 147: Using A – As Row 3.
Rows 148-149: Using A – As Row 2.
To Finish
Weave in all colour A ends.
To create the tassels, knot together the ends of each repeat of Rows 4-8 (all colours except A) and each repeat of Rows 10-14 (all colours except A). Once tied, measure and trim each tassel to 15cm (6in).
US Terminology
Row 10: Using F – As Row 8.
Row 11: Using E – As Row 7.
Row 12: Using D – As Row 6.
Row 13: Using C – As Row 5.
Row 14: Using B – As Row 4.
Rows 3-14 form the pattern.
Rows 15-146: Repeat pattern 11 more times.
Row 147: Using A – As Row 3.
Rows 148-149: Using A – As Row 2.
To Finish
Weave in all colour A ends.
To create the tassels, knot together the ends of each repeat of Rows 4-8 (all colours except A) and each repeat of Rows 10-14 (all colours except A). Once tied, measure and trim each tassel to 15cm (6in).
Join HanJan Crochet and Share Your Crochet!
Purchase and Print
Get the ad-free, printable PDF with added extras in my pattern stores:
More Inset and Overlay Mosaic Crochet Patterns to Try
I’d love to show you some of my other designs using both overlay and inset mosaic crochet. Some of them are worked in the round (less ends to worry about!) and some are in flat rows.
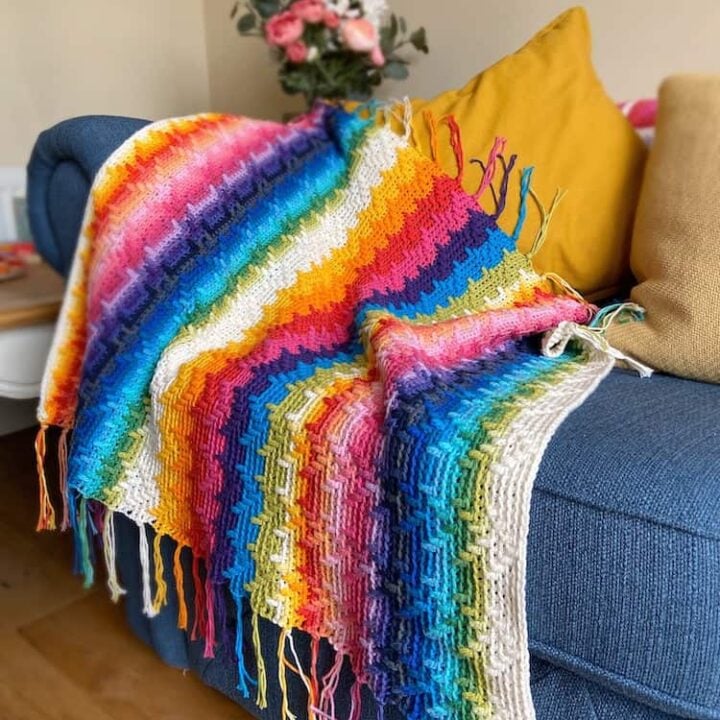
Rainbow Splash Blanket
A free overlay mosaic crochet blanket pattern that's even easier than this one!

14 Best Mosaic Crochet Patterns to Make
A round up of some fabulous mosaic crochet patterns from other designers
Wanderers Blanket
Free inset mosaic crochet blanket pattern. This one uses the other mosaic crochet technique and I have a full video tutorial to show you how to do it too!