
This post may contain affiliate links. Please see my full disclosure and privacy policy for details.
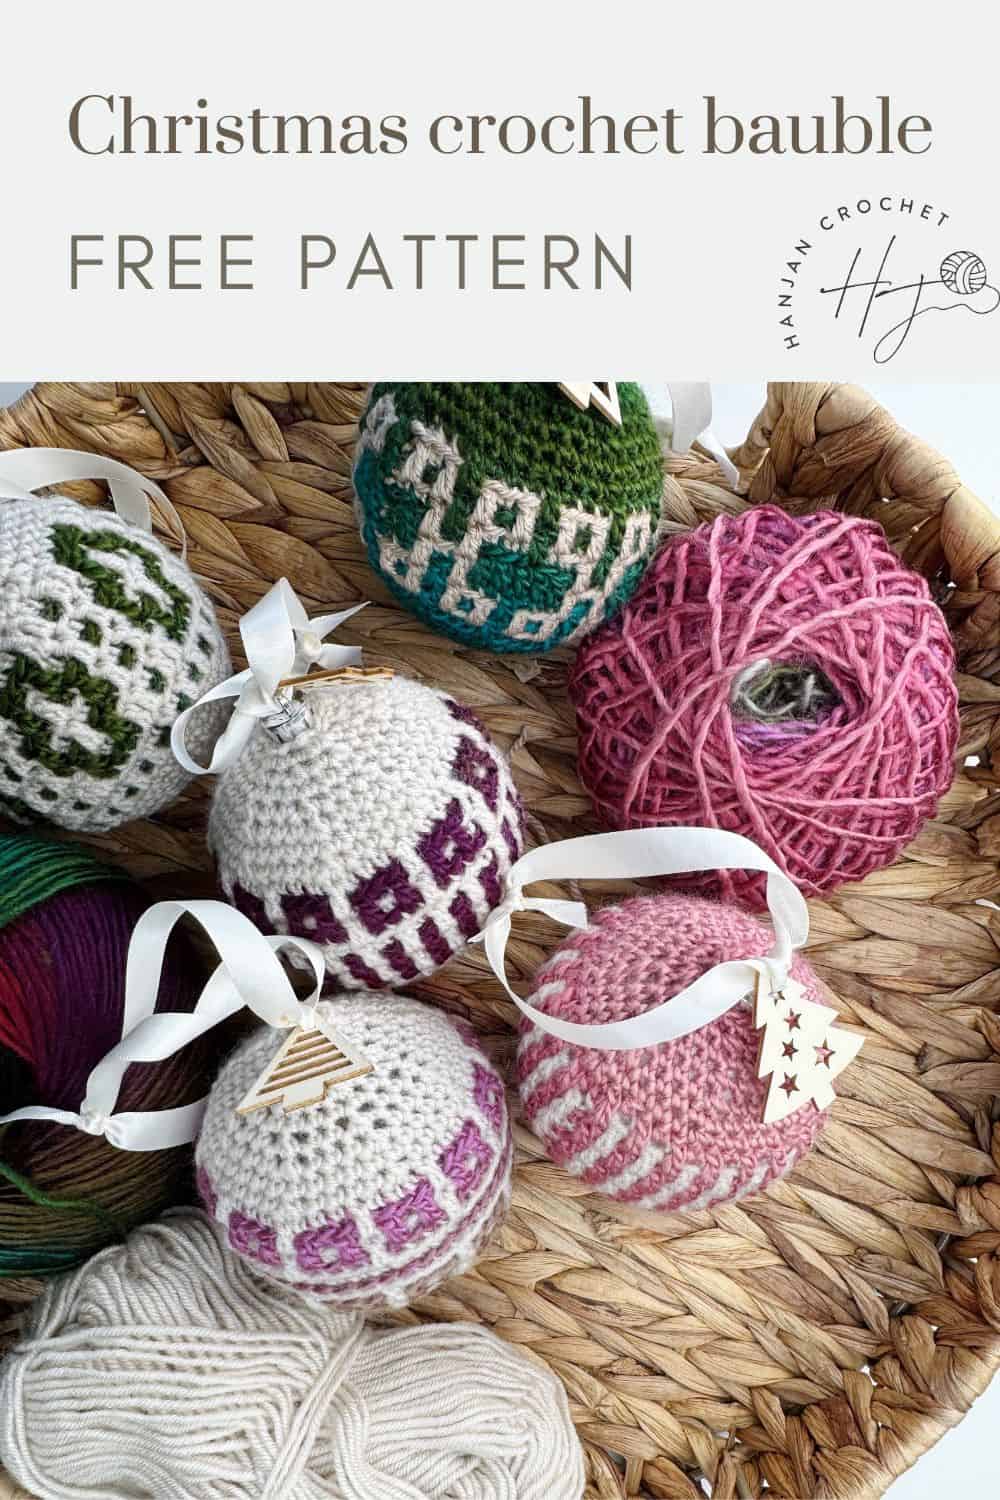
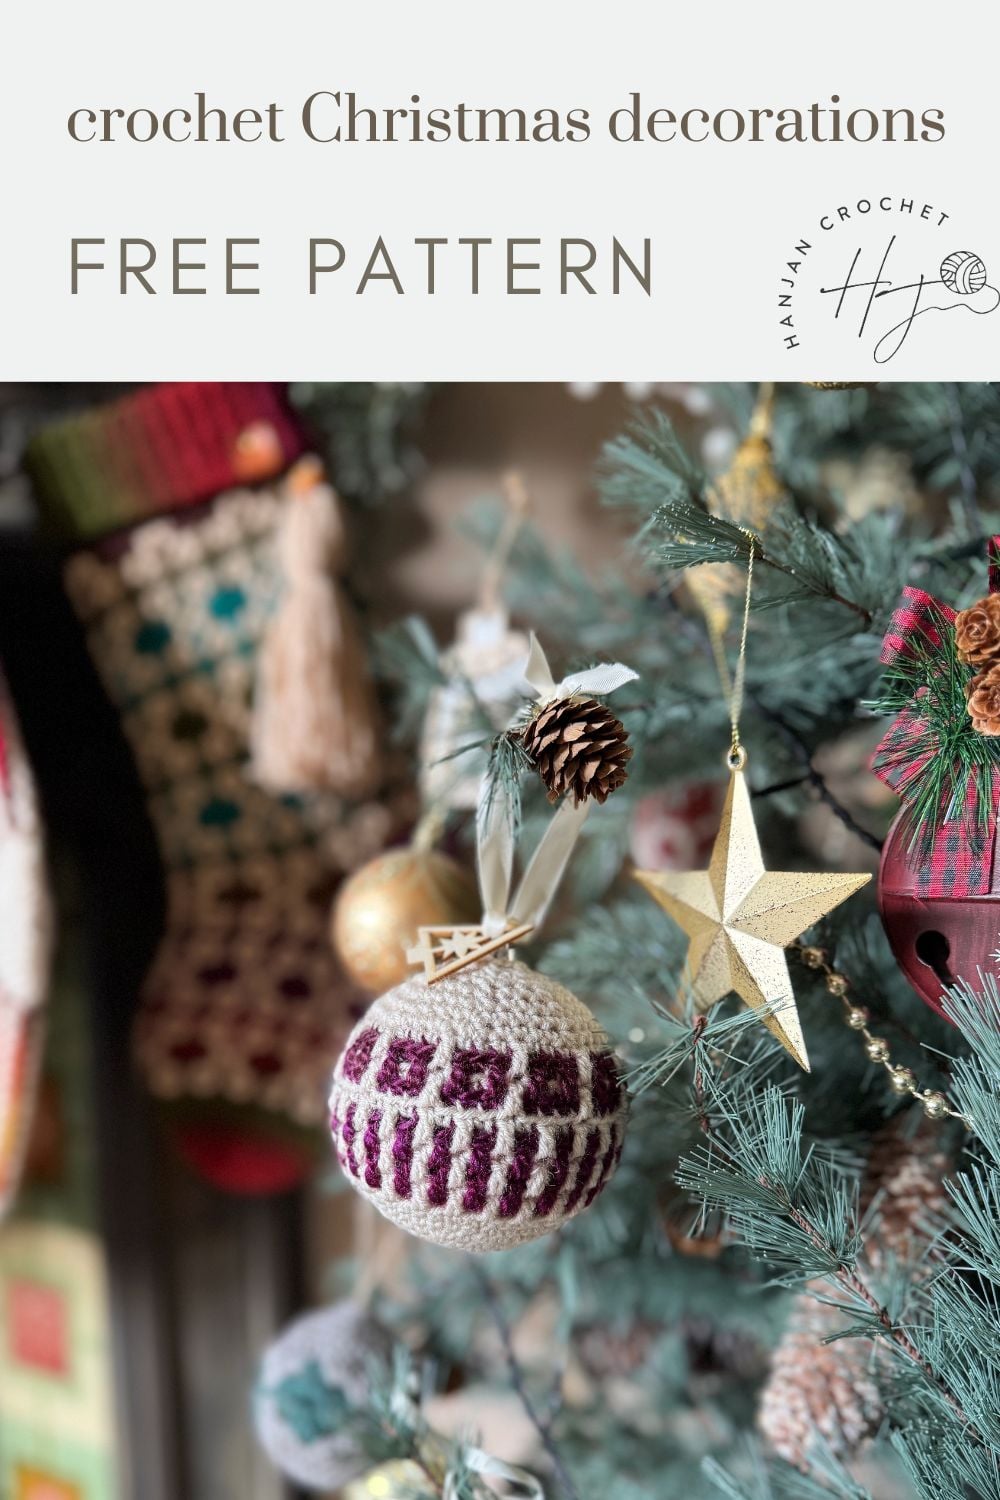
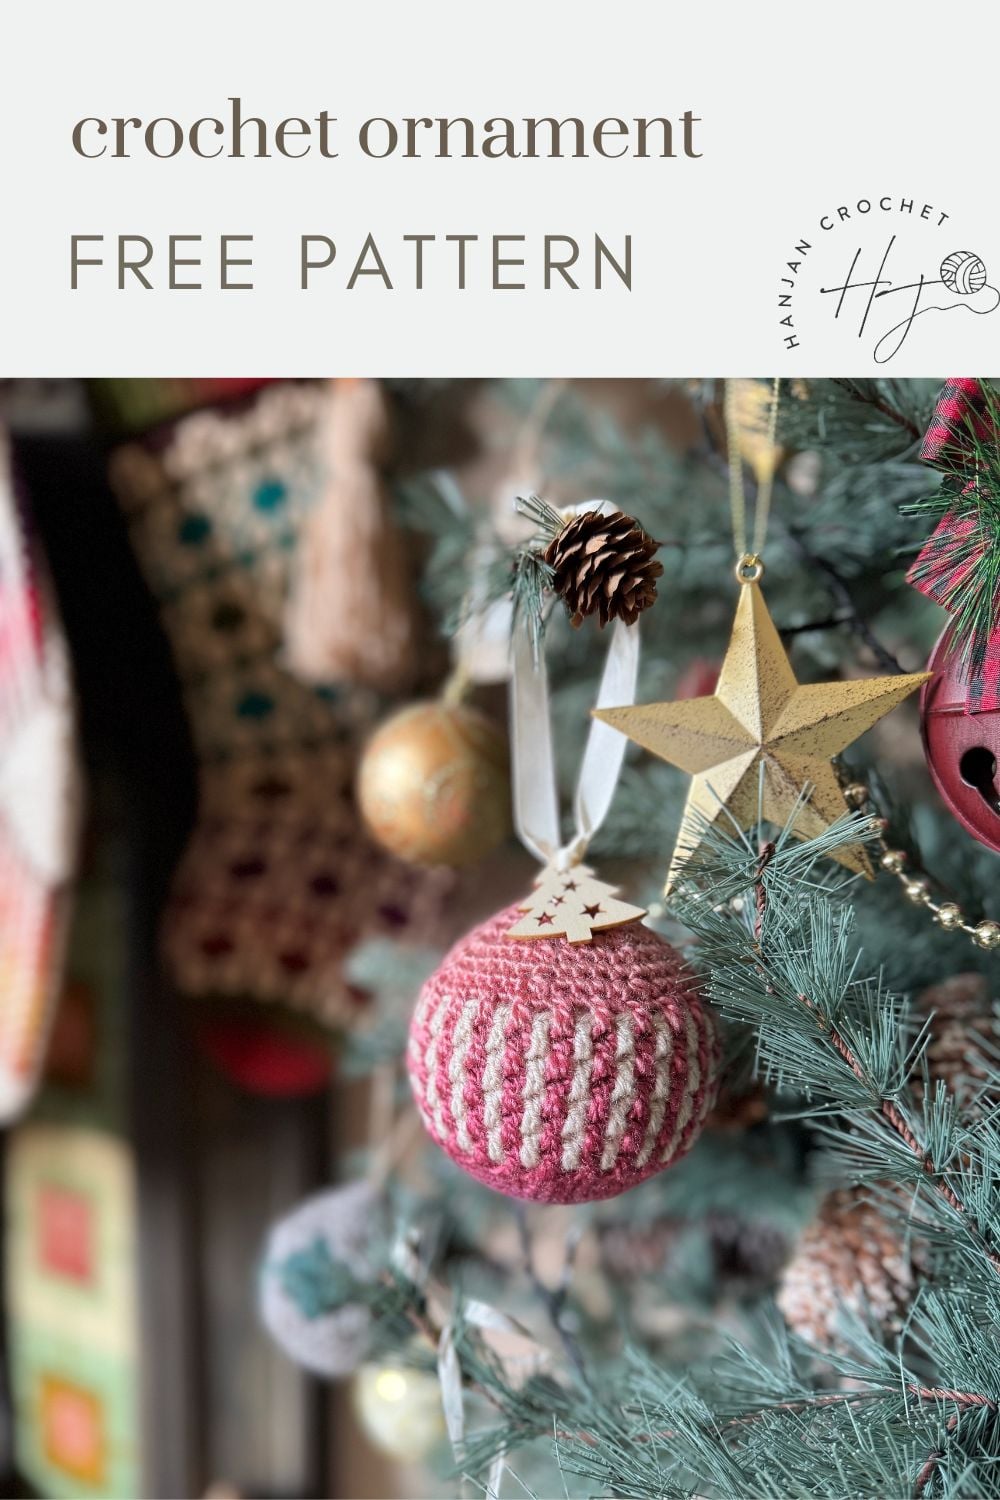
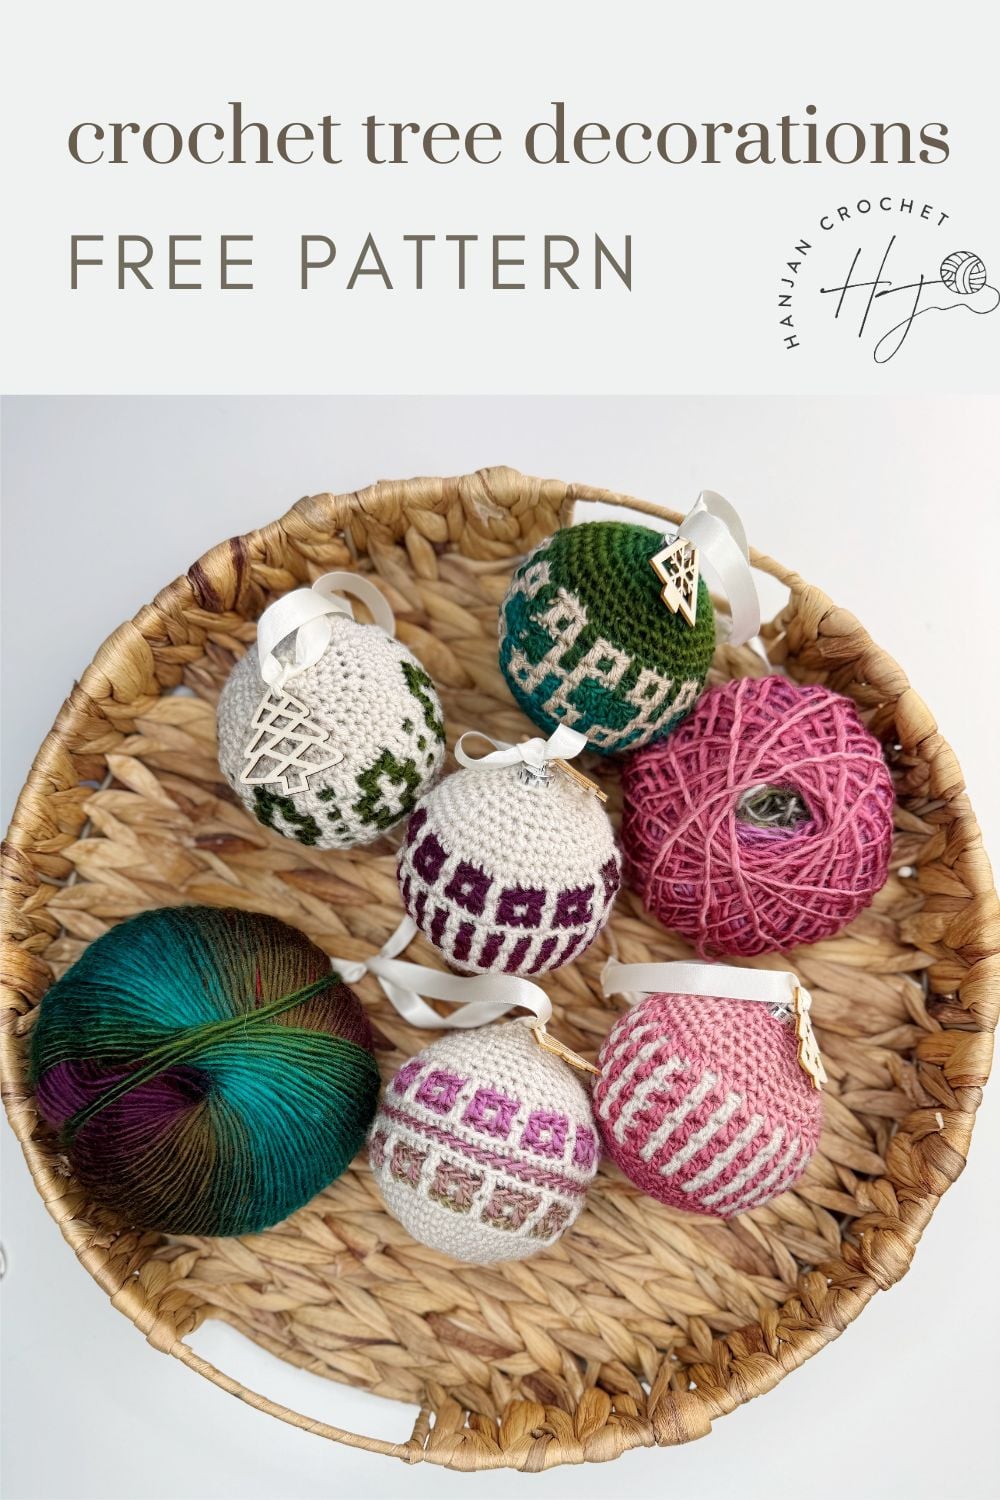
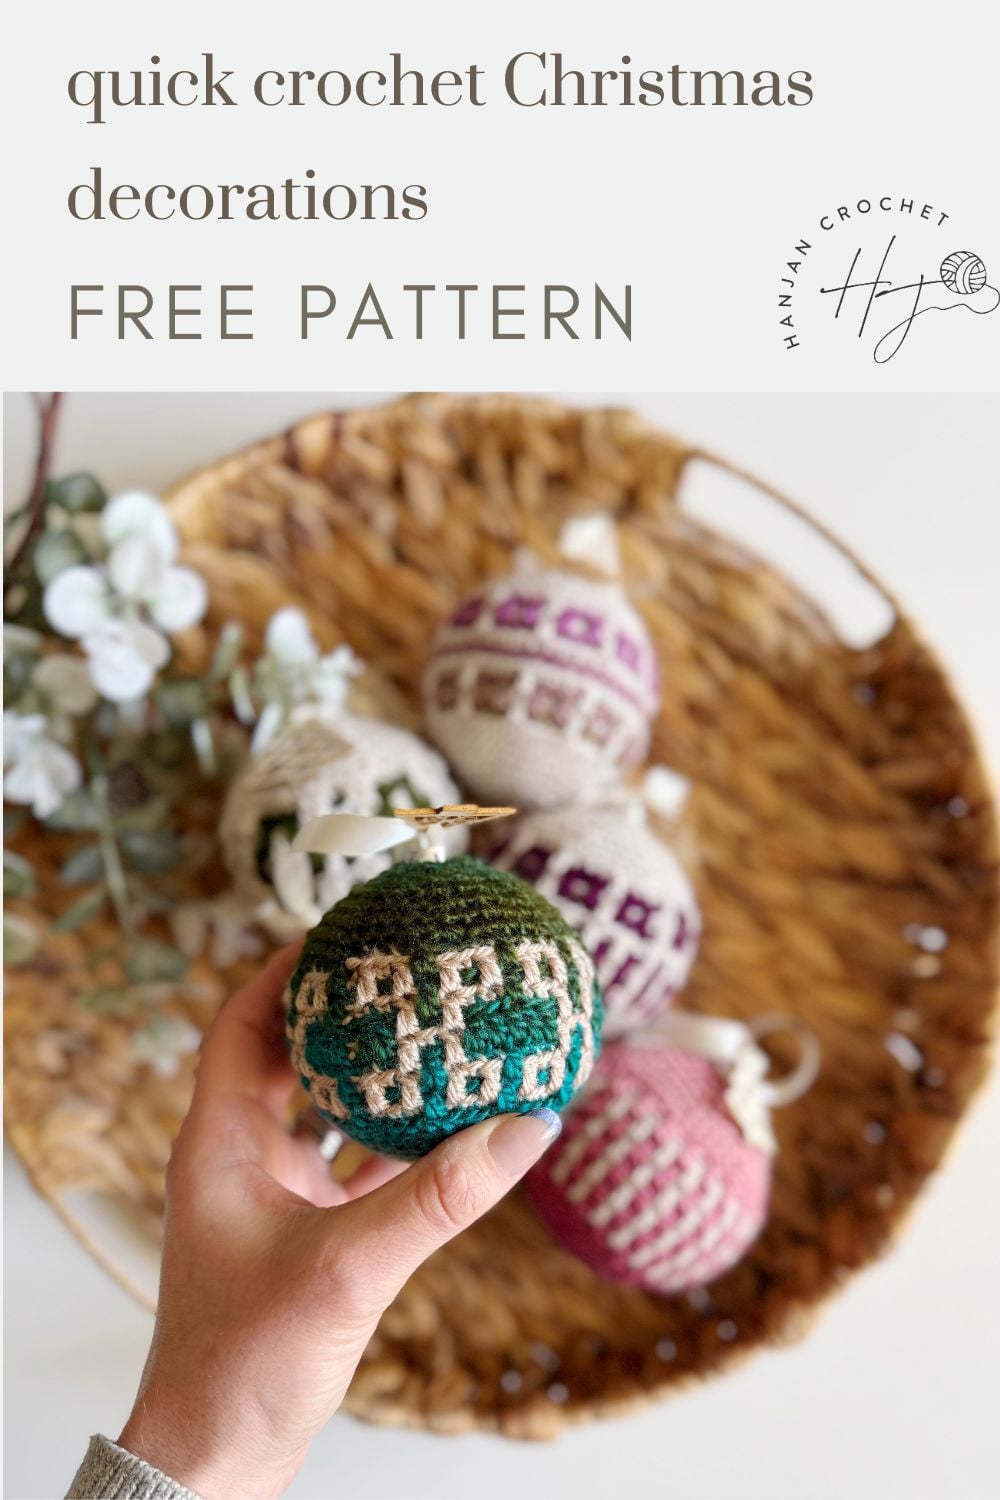
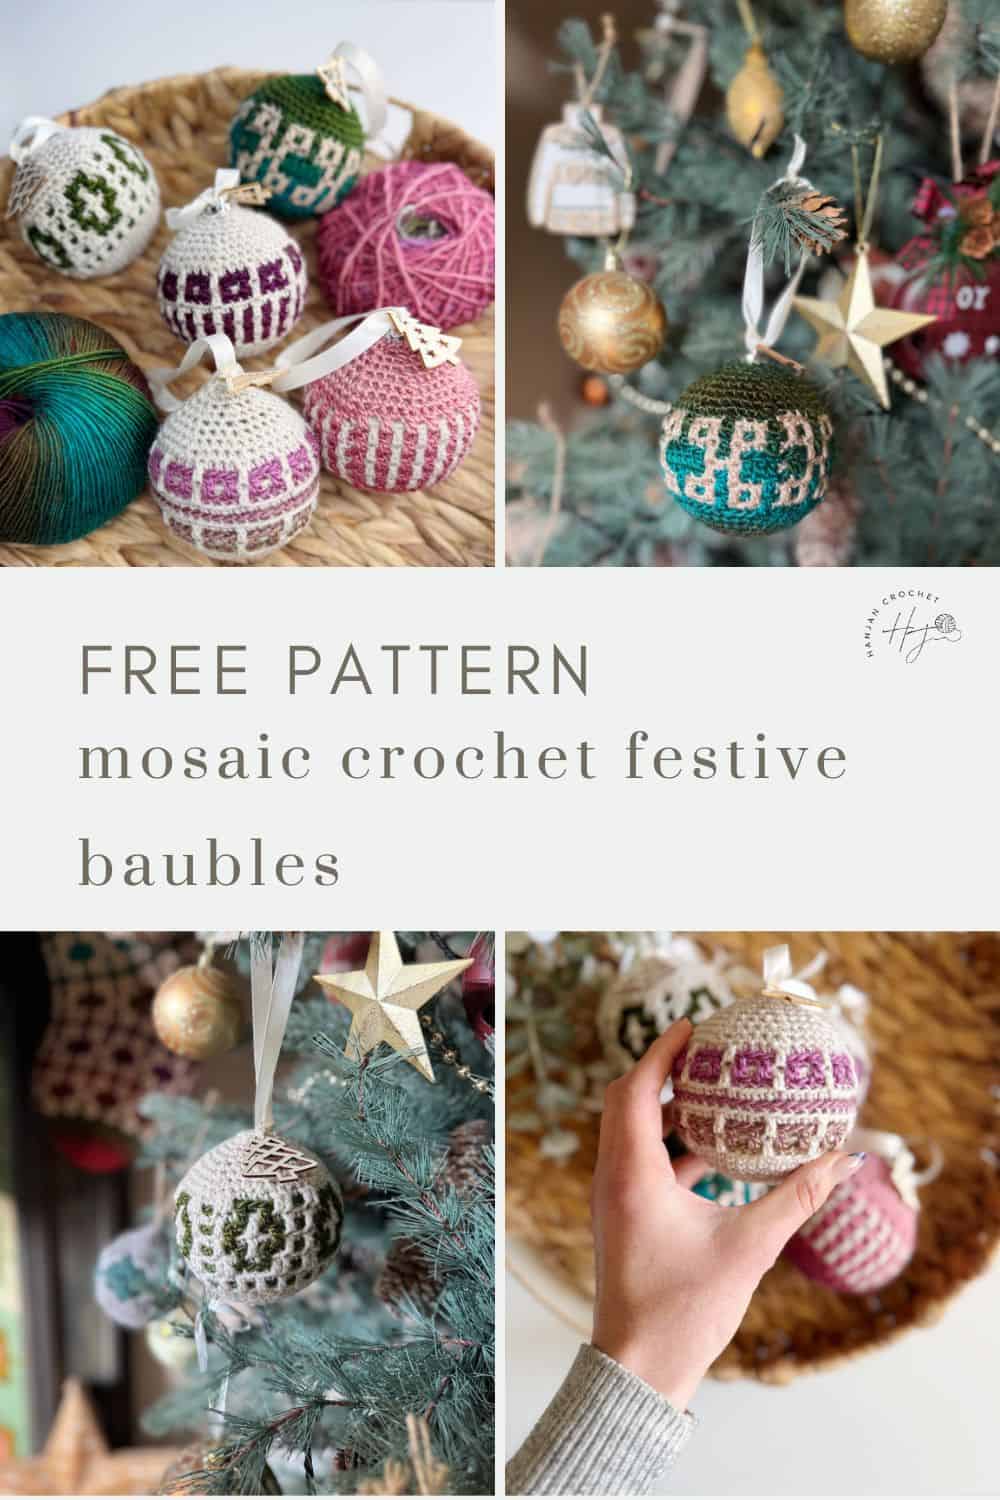
With five different designs, these overlay mosaic crochet tree decorations are going to take pride of place on your Christmas tree every year! They’re quick and easy to make, and give your festive ornaments a personal yet sophisticated look. They make a perfect little gift too, and you can co-ordinate them to whatever festive season colour scheme you like!
In this post you’ll find everything you need to make these overlay mosaic crochet ornaments, including materials, stitches, a detailed video tutorial and free written pattern for blog subscribers.
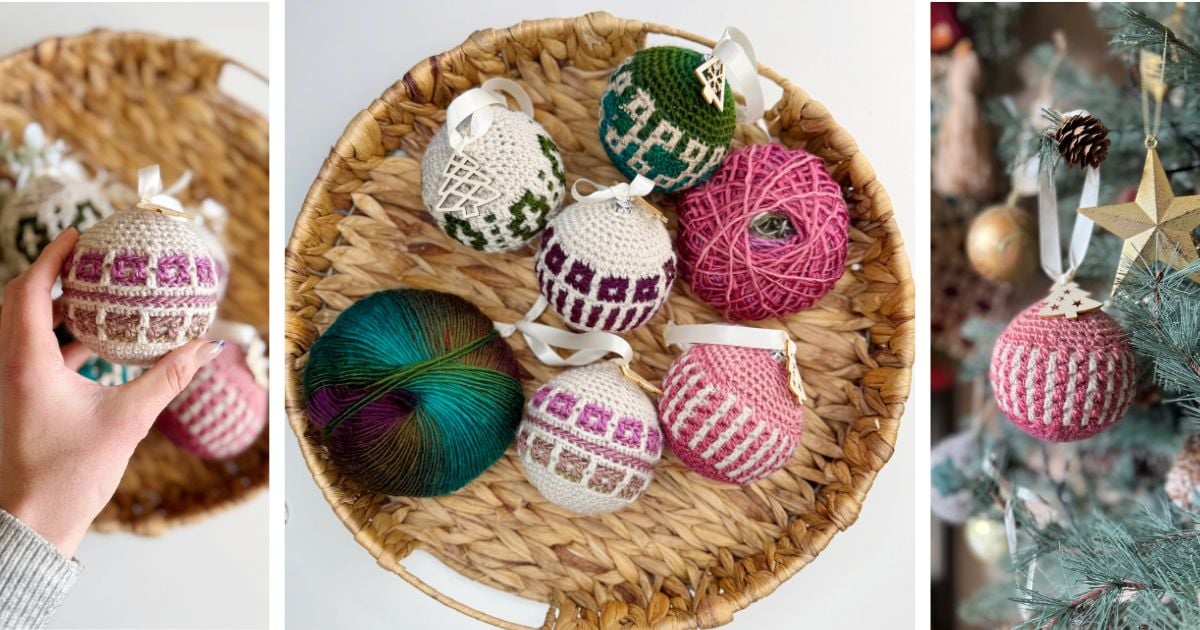
Christmas Crochet Tree Decorations Pattern Overview
Every year I like to add at least one new crochet tree decoration to our Christmas tree, and I wanted a collection that looked elegant without being difficult to make.
Overlay mosaic crochet was the perfect technique because it creates bold geometric designs using only one colour at a time. Working around a pre-formed bauble means the crochet ornaments keep their shape beautifully, making them decorations you’ll look forward to hanging on the tree every Christmas.
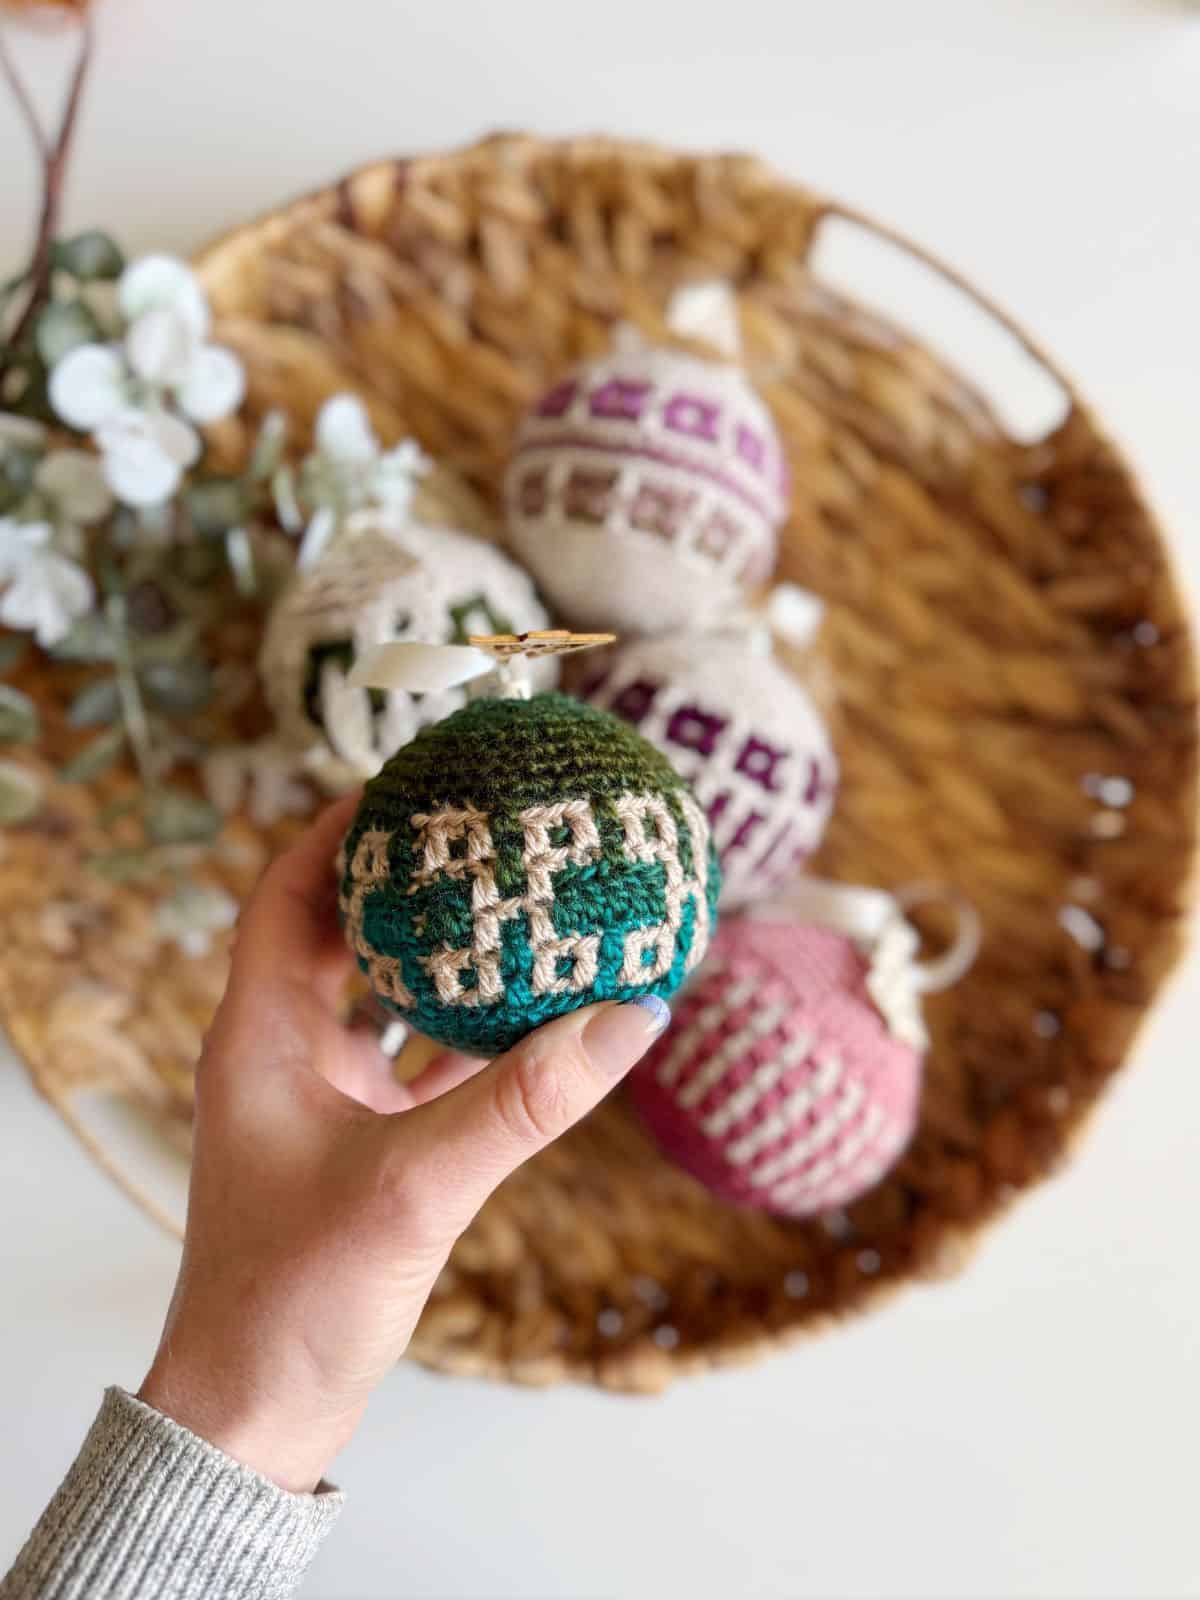
⭐⭐⭐ Difficulty level: Intermediate – but it’s so much easier than it looks!
💬 Hook Size: 3mm
📏 Size: Approx 3.15″/8cm in diameter
✨ Crochet Technique: Overlay mosaic crochet worked in the round using single crochet and mosaic double crochet stitches.
⚖️ Yarn Weight: DK Weight (category 3)
🧶 Yarn Used: Mellowspun and Prism DK
🕐 Approx Crochet Time: 1-2 hours depending on your pace
👍 Perfect For: decorating your Christmas tree, handmade Christmas gifts, learning overlay mosaic crochet, stash busting, and heirloom Christmas decorations
Table of Contents
In This Pattern You’ll Learn:
- overlay mosaic crochet in the round
- working around a bauble
- mosaic colour changes
- finishing ornaments neatly
What are the Best Crochet Tree Decorations?
The best crochet tree decorations are lightweight, durable and enjoyable to make. Overlay mosaic crochet ornaments are particularly popular crochet tree decorations because they create intricate colourwork using only one colour per round, resulting in detailed Christmas decorations that look far more complicated than they are.
These five ornament designs are worked around a pre-formed bauble to create long-lasting decorations that can be enjoyed year after year.
Not enjoying the ads? Want less distractions?
Join Us In The HanJan Crochet Club!
Join the online club and enjoy hundreds of Hannah’s crochet patterns ad-free, plus exclusive resources, a bonus Ebook and new free patterns added regularly.
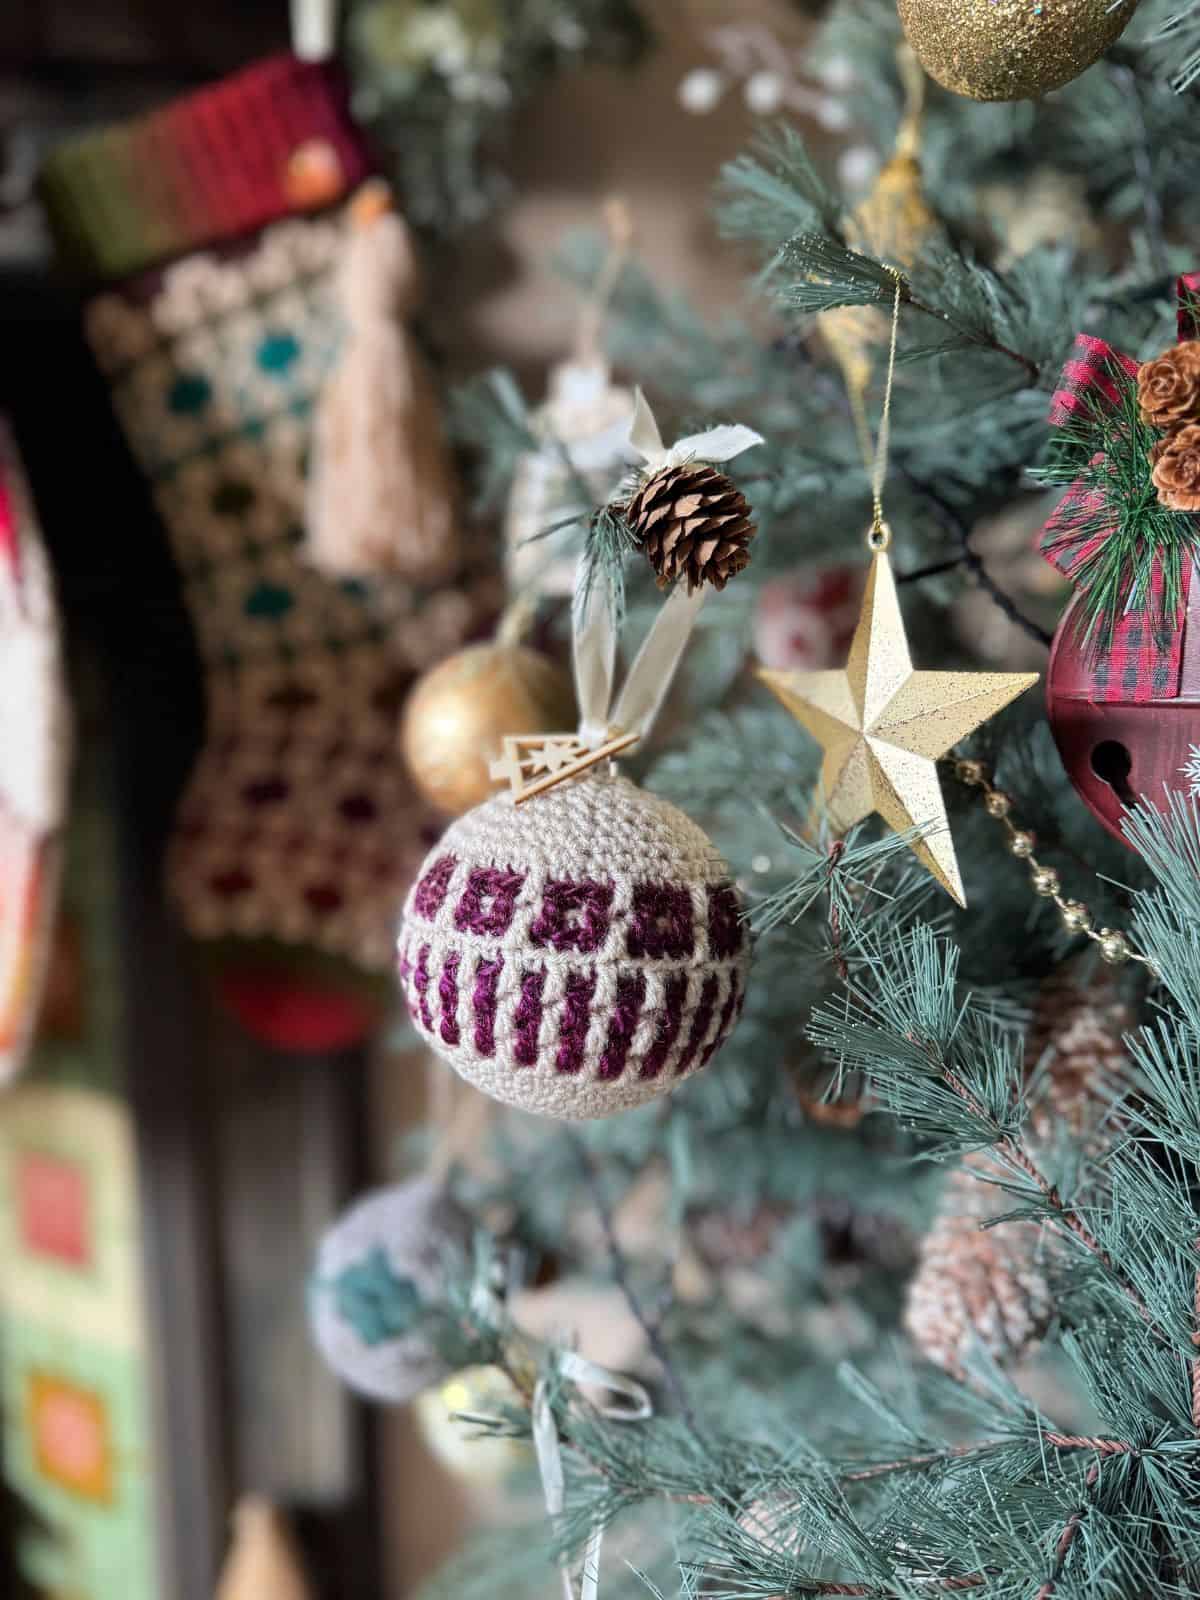
Things You’ll Love About this Crochet Christmas Ornament Pattern
Complete the Yuletide Mosaic Crochet Collection
Let’s create a whole host of matching Christmas mosaic crochet decorations this year! After all, there is nothing more special than creating handmade decorations and gifts!
To go with your crochet tree decorations, make some crochet Christmas Stockings to hang on your mantle!
And check out the Mini Crochet Christmas Stocking pattern too! The mini stockings will look fabulous alongside the baubles on your tree. Or why not use them as cutlery holders as part of your festive table setting?
Finally, if you’re looking for a larger project, then the Crochet Christmas Blanket pattern is for you. Featuring a festive tree, this one is perfect for snuggling up with a warm drink or adding a decorative touch to any holiday setting.
I have quite a selection of mosaic crochet patterns of different difficulties if you would like more inspiration. Give the crochet coffee sleeve pattern a go and try out mosaic crochet with these easy designs!
Video Tutorial for Your Crochet Christmas Ornament
[adthrive-in-post-video-player video-id=”inIkeXJU” upload-date=”2024-12-02T14:51:21+00:00″ name=”Yuletide Mosaic Ornaments Crochet Pattern” description=”” player-type=”default” override-embed=”default”]
Come along as I crochet a tree decoration and see just how easy it is in our step-by-step video tutorial.
Crochet Christmas Decorations Pattern Materials
- A 3mm(D) crochet hook or hook needed to meet gauge
- Scissors
- Tapestry needle
- Stitch markers
- Pre formed bauble (approx 3.15″ diameter)
Along with the above you will need the following yarn for your decorations:
Mellowspun DK, 100% Acrylic, 260m/284yds/100g for the solid colour.
Prism DK, 100% Acrylic, 265m/290yds/100g for the multi-colour yarn.
You will require approximately 60 metres, 65 yards of yarn A. 1 ball of the recommended solid colour yarn.
You will require approximately 42 metres, 45 yards of yarn B. 1 ball of the recommended multi-colour yarn.
You could also use Premier Anti-Pilling Everyday DK which is 100% Acrylic, 250m/273yds/100g for the solid colour, and ColorFusion DK which is 100% Acrylic, 298m/325yds/100g for the multi-colour yarn. I used these for the large stockings in the collection.
These are all category 3, light weight yarns which gives a soft and delicate feel to the baubles. Check our handy yarn weight chart and guide to find out more about yarn weights and categories.
Yarn Substitutes
You can use any yarn that you like bearing in mind that you need to make sure you meet the gauge. Some other great options are:
- Solid Colour Yarn A: Paintbox Simply DK, 100% acrylic, 302yds/100g or Premier Basix DK, 100% acrylic, 306yds/100g
- Multi Colour Yarn B: Lion Brand Mandala Ombre, 100% acrylic, 344yds/150g or King Cole Riot DK, 70% acrylic, 30% wool, 322yds/100g
Why Overlay Mosaic Crochet is Perfect for Christmas Ornaments
Did you know that overlay mosaic crochet only uses single and double crochet stitches? They are just ever so cleverly placed in the front and back loops to create wonderful designs and patterns.
The real beauty of this pattern is that it uses just basic crochet stitches (just single crochet and double crochet). Once you get to grips with the overlay mosaic crochet technique, these Christmas ornaments really are so simple to crochet.
Sizing
Each crochet ornament pattern is designed to fit a pre formed bauble of approx. 3.15″/8cm in diameter.
Glossary and Abbreviations
- beg – beginning
- blo – back loop only
- ch(s) – chain(s) (chain stitch tutorial)
- ch-sp(s) – chain space(s)
- flo – front loop only
- rep – repeat
- RS – right side
- sp – space
- ss/sl st – slip stitch (how to crochet a slip stitch)
- st(s) – stitch(es)
- tog – together
- WS – wrong side
- Yoh – yarn over hook
Learn About The Mosaic Crochet Technique
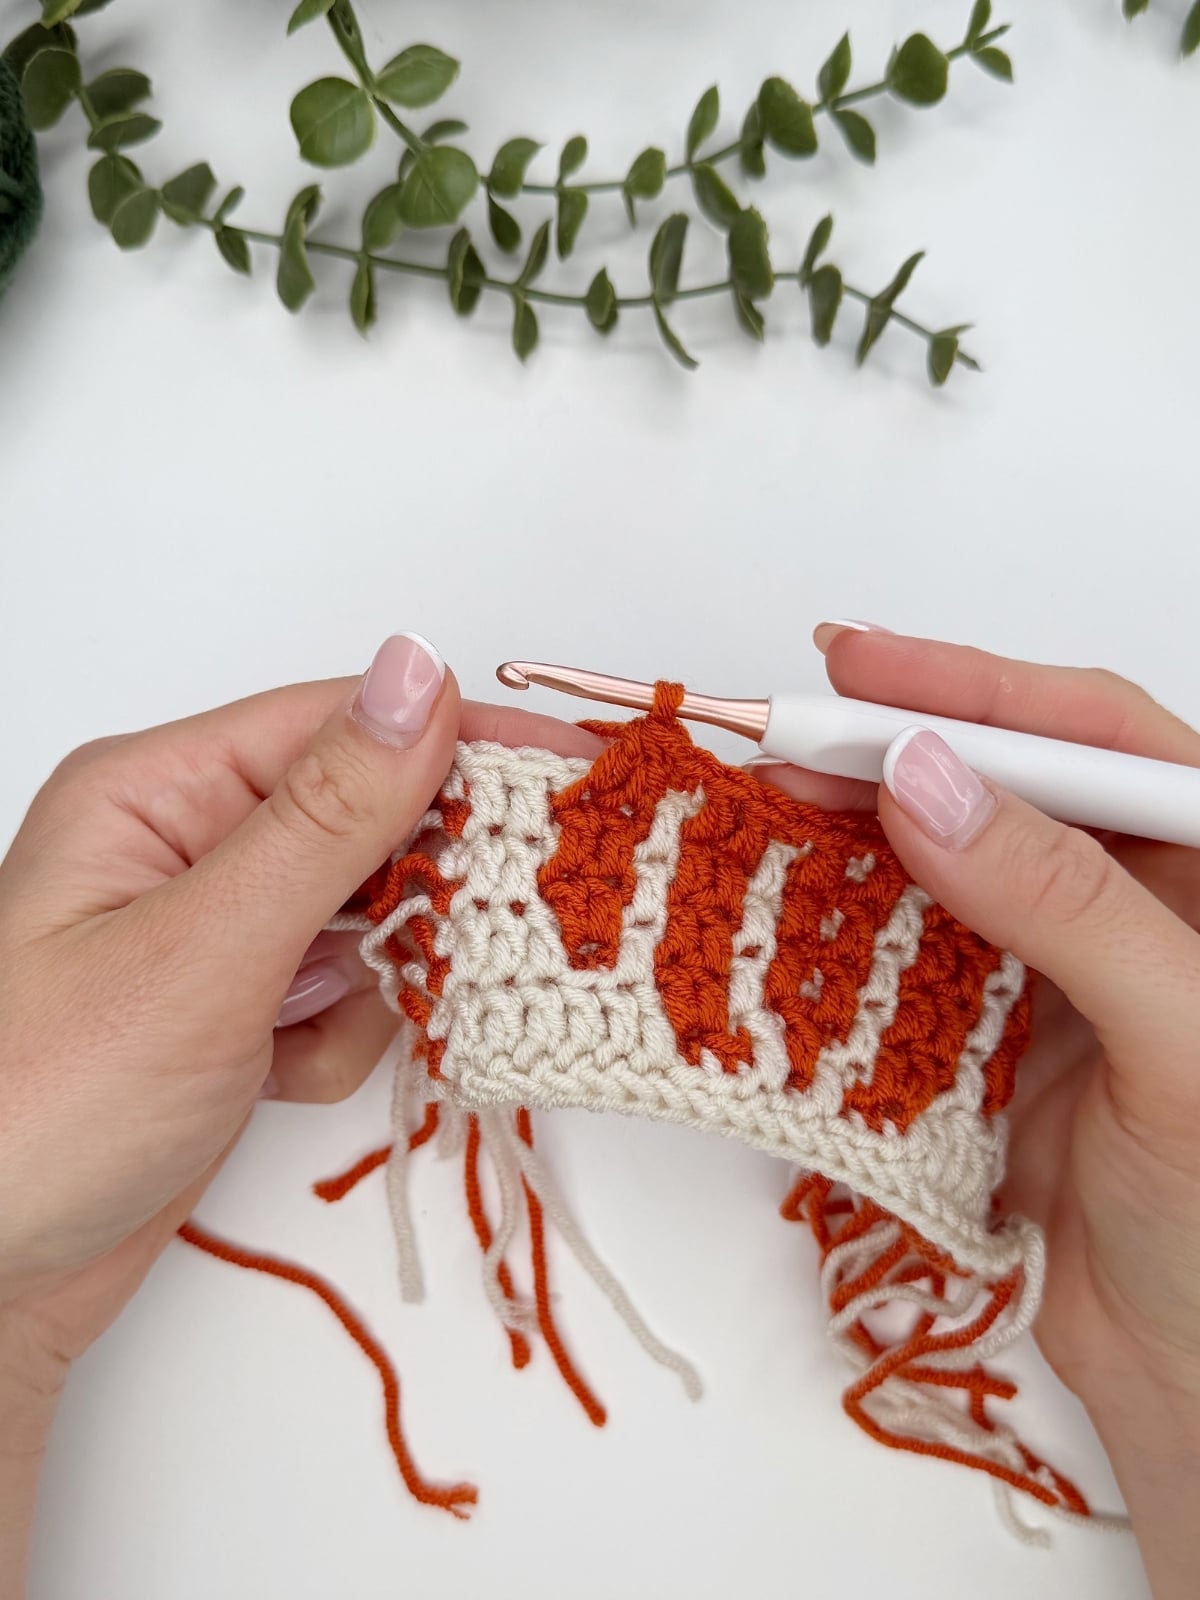
If you’re new to overlay mosaic crochet, here are some useful resources to help you get to grips with the technique before you start, plus don’t forget there are video tutorials throughout the pattern to support you as you make.
Mosaic Crochet Tutorial – what’s the difference between inset and overlay?
Mosaic Double Crochet Stitch – learn how to place a regular double crochet in mosaic
How To Read A Mosaic Chart – it’s much easier than you might think!
Mosaic Crochet Stitches – I have a step by step guide for how to work all the shaping stitches we use in this pattern and more!
Stitches
The pattern is written in standard US terms and uses the following crochet stitches:
sc – single crochet (how to single crochet stitch)
Mdc – Mosaic double crochet (how to work a mosaic double crochet)
Mosaic Crochet Stitches
You will need to know all the principles of working overlay mosaic crochet but don’t worry! It uses only beginner stitches and I have a step by step guide all about mosaic crochet stitches for you to follow along with.
SINGLE CROCHET 2 TOGETHER (sc2tog)
Step 1: Insert hook into stitch and pull through a loop.
Step 2: Insert hook into next stitch and pull through a loop.
Step 3: Yarn over, pull through through all 3 loops on hook.
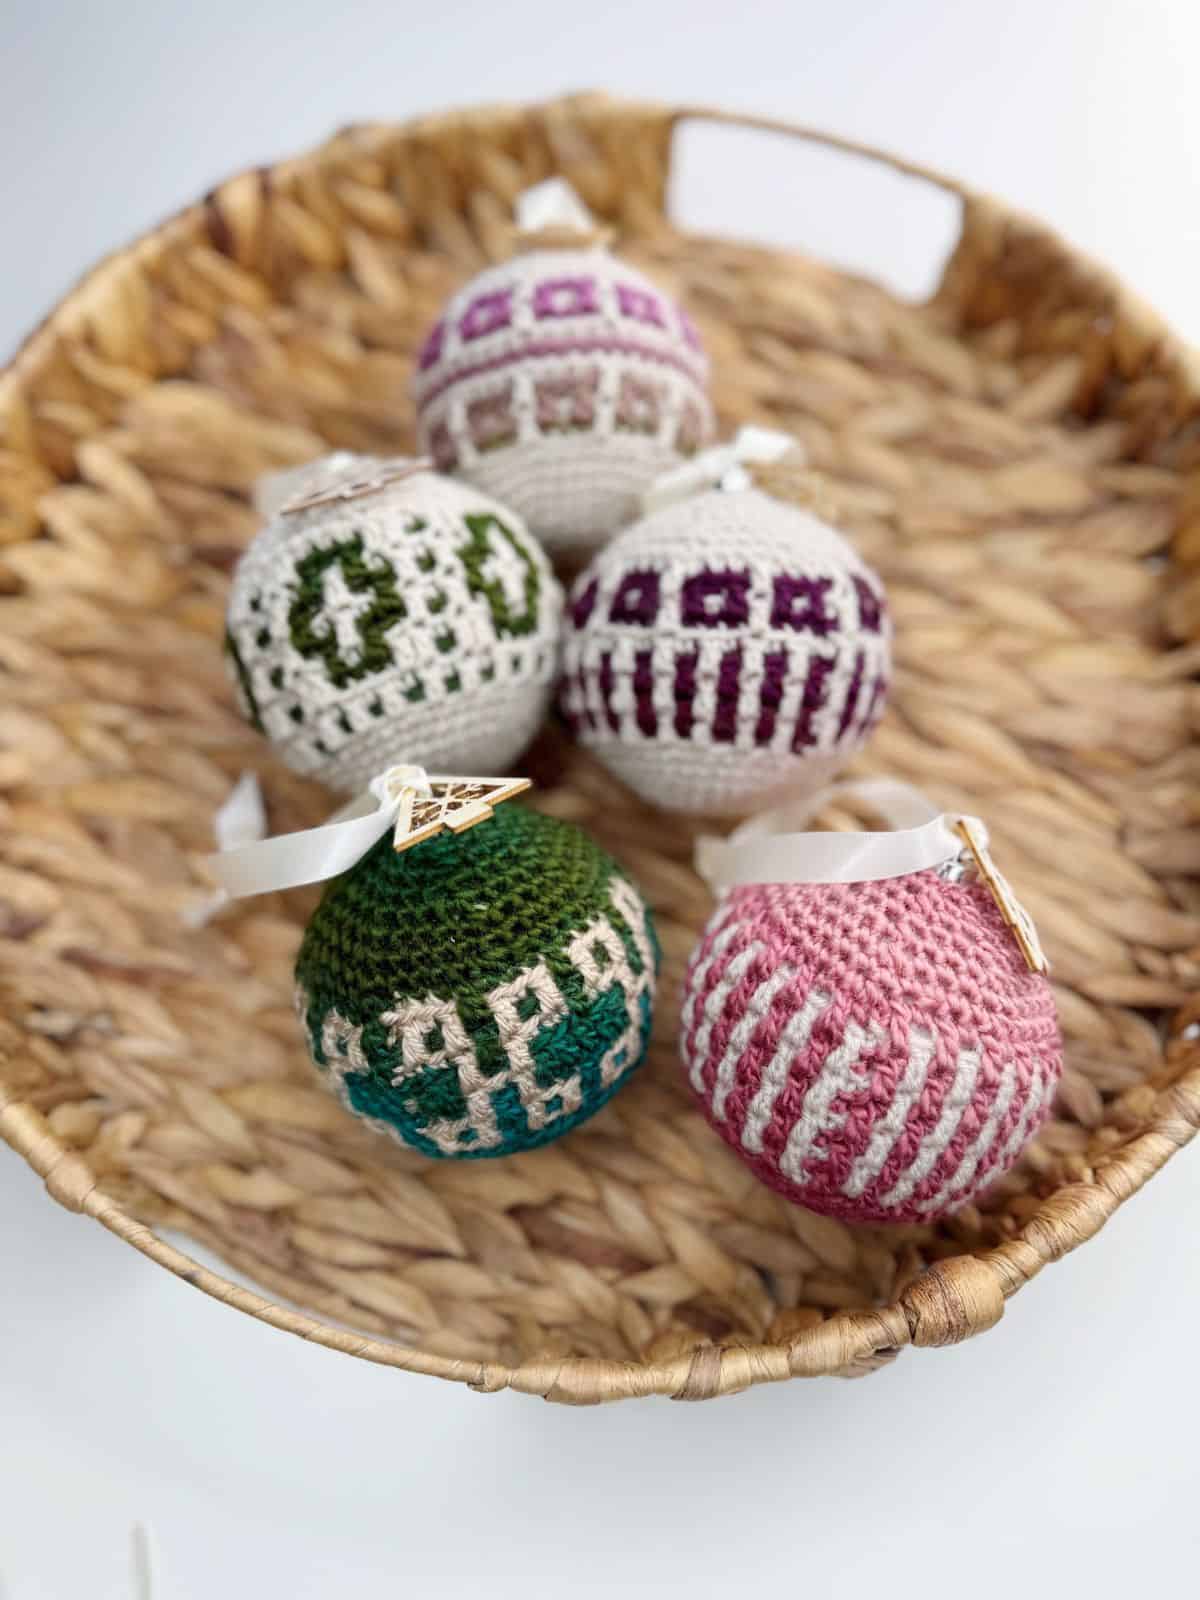
How these Crochet Tree Decorations are Constructed
The ornaments are made from the bottom up in rounds. The Base and Top use single crochet stitches.
The Centre is made using overlay mosaic crochet in the round.
Customisation
The best way to alter the size of the ornament is to change the hook and yarn weight that you use.
The heavier the yarn weight the larger your bauble will be. Make sure to use a hook size smaller than the yarn recommends as you will want the stitches to be tight.
Pattern Gauge
8 rounds of sc for bauble base = 3″ diameter using 3mm hook
Making a crochet gauge swatch is particularly important when crocheting projects (and even more so for garments) to ensure that it ends up the desired size.
Before you jump into crocheting your quick crochet Christmas decorations, take a moment to read through the pattern notes—it’s a game-changer!
These handy insights will not only simplify your pattern-reading journey but also ensure a smoother crochet experience. You’ll find helpful tips on deciphering the sizing, customisation and more.
Trust me, a quick peek at these notes will set you up for crochet success!
- The pattern is worked in rounds using the overlay mosaic crochet technique for the Centre.
- All stitches in the Mosaic Sections are worked as sc in blo or Mdc.
- Each Round uses just one colour.
- A ch1 at the beginning or end of a Round does not count as a stitch.
- The Base and Top are worked in continuous Rounds.
- Read through the entire pattern before beginning.
- Make sure that you are familiar with all of the stitches in the abbreviations list before you begin.
- Stitch counts are given in [ ] at the end of each round. If no stitch count is given, then the count is the same as the previous round.
- If following charts for the Mosaic Sections then you will need to follow the written pattern for the Base and Top.
Free Crochet Tree Decorations Pattern
There are a few options for you to access and enjoy this crochet pattern:
- View the free pattern on the blog – all blog subscribers will be able to view the written pattern supported by ads by logging into their Grow account.
- Purchase the individual pattern on Etsy or Ravelry as a beautifully formatted PDF with extra stitch charts, schematic and colour information page and more!
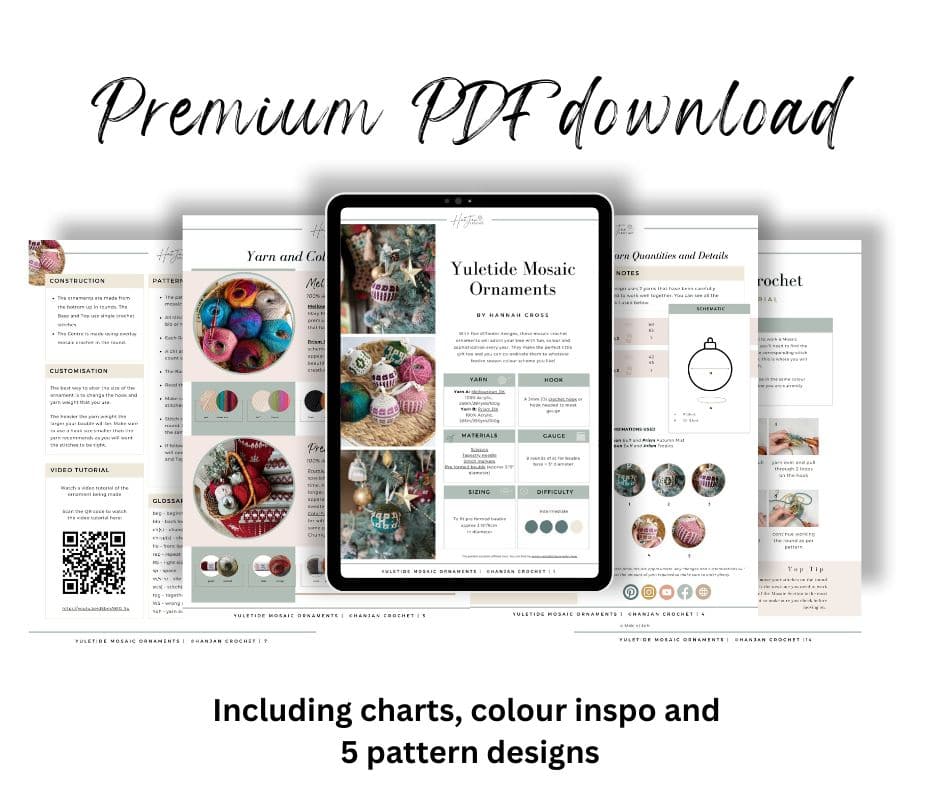
Upgrade to the ad-free PDF download (includes mosaic charts!)
Perfect to print out or use on any device, with added schematic and charts, colour inspiration and stitch tutorials!
Pattern Support
I am delighted to invite you to join the HanJan Crochet Community Facebook Group where we host all pattern support queries and love to see your progress, yarn choices and finished projects!
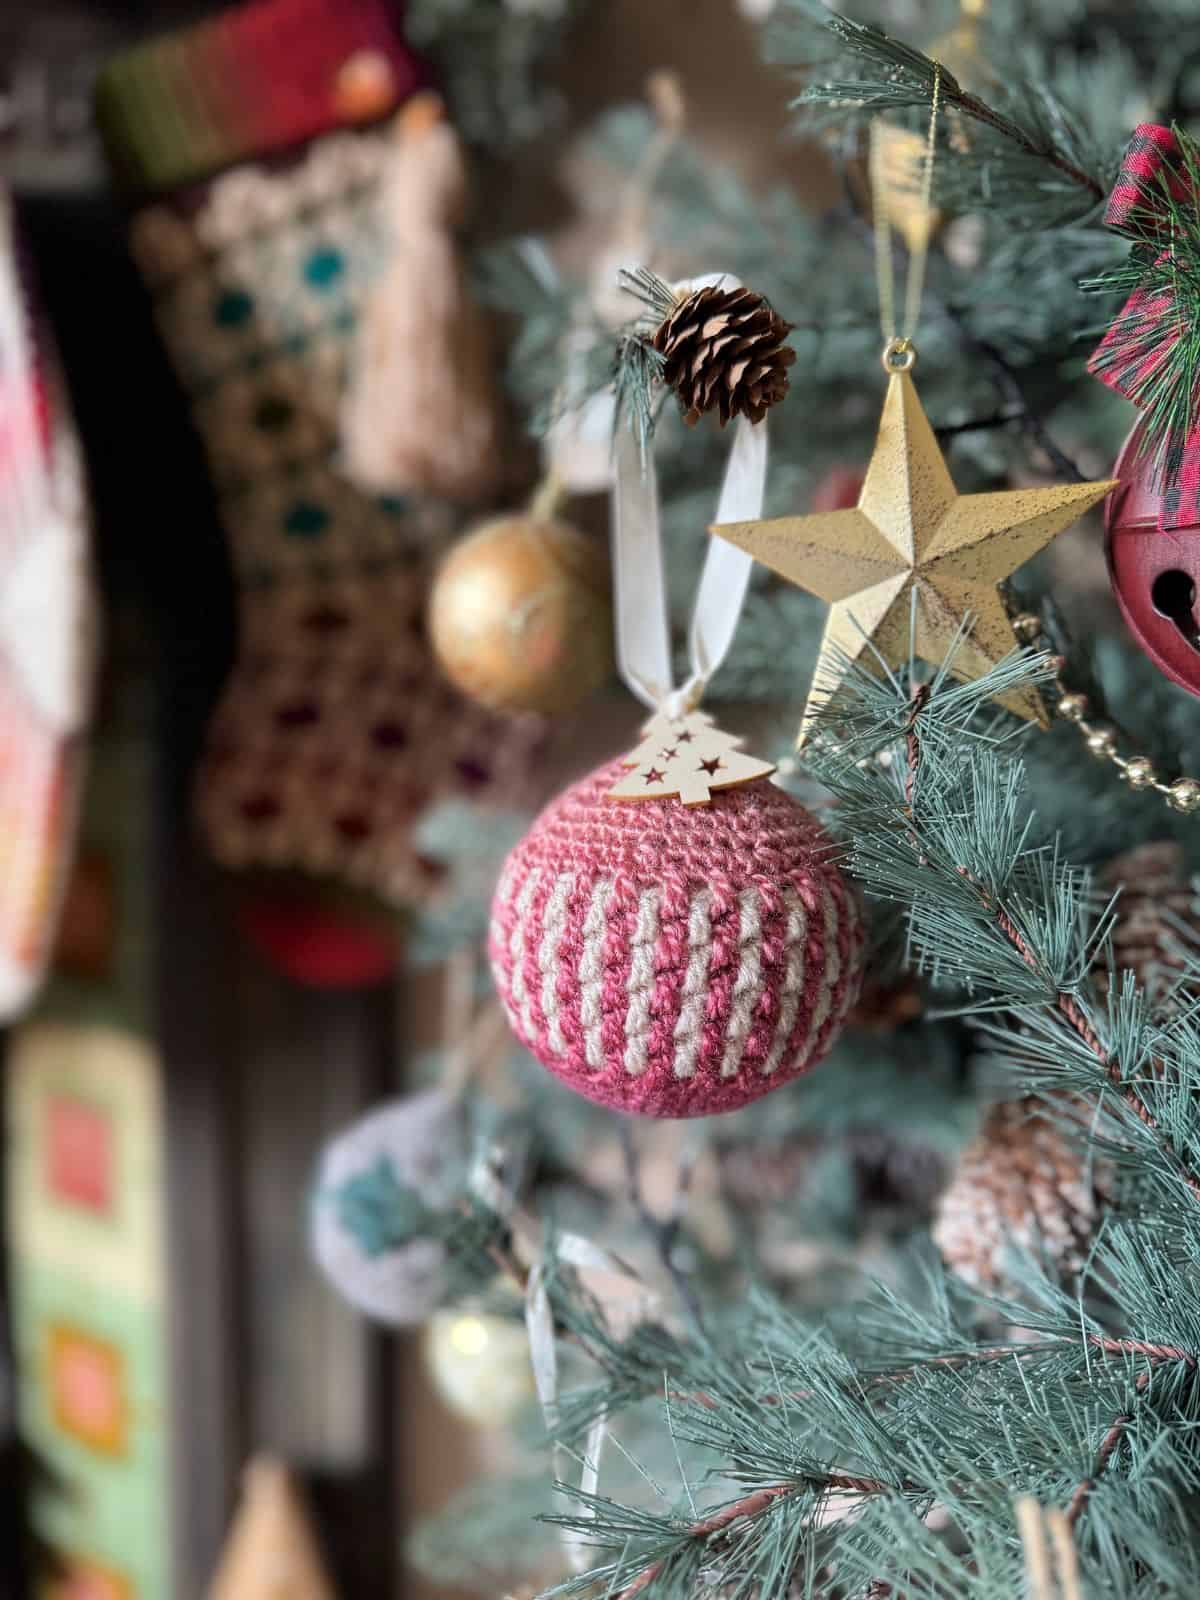
Not ready to start yet? Summarise and Save For Later:
US Terminology
To unlock Exclusive Content on the HanJan Crochet Blog, all you need to do is click the box below and the Grow.me app will pop up, allowing you to enter your email and create a password.
Once you’ve created an account, every time you see Exclusive Content on my blog (or any others that use Grow), simply login to your Grow account. Be sure to switch to the login screen to enter your login credentials.
If you forget your password, click the “forgot password” link and follow the prompts. Please note that I’m unable to assist with resetting Grow passwords or accessing your Grow account, so be sure to save your login information in a safe place.
Thank you for subscribing and for joining me at HanJan Crochet! I hope you enjoy the exclusive content available on the site and I can’t wait to see what you create 🙂
IN LANES ORNAMENT

For the In Lanes Ornament, I used Mellowspun Buff and Prism Tropics.
BASE
Using Yarn A, make a Magic Ring to begin.
Round 1: 8sc into the Magic Ring [8] working in continuous Rounds.
Round 2: 2sc in each st around. [16]
Round 3: *2sc in next st, sc in next st; rep from * around. [24]
Round 4: sc in each st around. [24]
Round 5: *2sc in next st, sc in next 2 sts; rep from * around. [32]
Round 6: *2sc in next st, sc in next 3 sts; rep from * around. [40]
Round 7: sc in each st around. [40]
Round 8: *2sc in next st, sc in next 4 sts; rep from * around, ss in 1st to join, change to B. [48]
Work in joined rounds now.
Continue for Centre. Follow the written pattern below or the Mosaic Chart (page 15).
CENTRE
Work all sc in blo, work all Mdc in flo of st 2 rounds below.
Round 9: B: ch1, sc in each st around, ss in blo of 1st st and change to A.
Round 10: A: ch1, *Mdc in next st, sc in next st; rep from * around, ss in blo of 1st st and change to B.
Round 11: B: ch1, *sc in next st, Mdc in next st; rep from * around, ss in blo of 1st st and change to A.
Round 12: A: Rep Round 10.
Rounds 13-18: Rep Rounds 11-12.
At the end of Round 18 continue working in A. Do not slip stitch to join and work in continuous rounds for the Top now.
TOP
Working in continuous rounds now in the full part of the stitch.
Round 19: *sc2tog, sc in next 4 sts; rep from * around. [40]
Round 20: sc in each st around. [40]
Round 21: *sc2tog, sc in next 3 sts; rep from * around. [32]
Insert your pre formed bauble here and then continue to decrease the Top.
Round 22: *sc2tog, sc in next 2 sts; rep from * around. [24]
Round 23: sc in each st around. [24]
Round 24: *sc2tog, sc in next st; rep from * around. [16]
Round 25: sc in each st around. [16]
If your ornament has a cap then you will find that you can stop here. If you feel you need another round to close then work the following:
Round 26: sc2tog around. [8]
Seam the last round together, pull tight and secure. Weave in all ends to finish.
BOX IT ORNAMENT
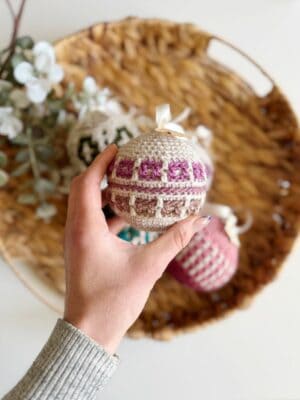
For the Box It Ornament, I used Mellowspun Buff and Prism Tropics.
BASE
Using Yarn A, make a Magic Ring to begin.
Round 1: 8sc into the Magic Ring [8] working in continuous Rounds.
Round 2: 2sc in each st around. [16]
Round 3: *2sc in next st, sc in next st; rep from * around. [24]
Round 4: sc in each st around. [24]
Round 5: *2sc in next st, sc in next 2 sts; rep from * around. [32]
Round 6: *2sc in next st, sc in next 3 sts; rep from * around. [40]
Round 7: sc in each st around. [40]
Round 8: *2sc in next st, sc in next 4 sts; rep from * around, ss in 1st to join, change to B. [48]
Work in joined rounds now.
Continue for Centre. Follow the written pattern below or the Mosaic Chart (page 15).
CENTRE
Work all sc in blo, work all Mdc in flo of st 2 rounds below.
Round 9: B: ch1, sc in each st around, ss in blo of 1st st and change to A.
Round 10: A: ch1, *sc in next 3 sts, Mdc in next st; rep from * around, ss in blo of 1st st and change to B.
Round 11: B: ch1, *Mdc in next st, sc in next st; rep from * around, ss in blo of 1st st and change to A.
Round 12: A: Rep Round 10.
Round 13: B: Rep Round 9.
Round 14: A: Rep Round 9.
Round 15: B: Rep Round 9.
Rounds 16-18: Rep Rounds 10-12.
At the end of Round 18 continue working in A. Do not slip stitch to join and work in continuous rounds for the Top now.
TOP
Working in continuous rounds now in the full part of the stitch.
Round 19: *sc2tog, sc in next 4 sts; rep from * around. [40]
Round 20: sc in each st around. [40]
Round 21: *sc2tog, sc in next 3 sts; rep from * around. [32]
Insert your pre formed bauble here and then continue to decrease the Top.
Round 22: *sc2tog, sc in next 2 sts; rep from * around. [24]
Round 23: sc in each st around. [24]
Round 24: *sc2tog, sc in next st; rep from * around. [16]
Round 25: sc in each st around. [16]
If your ornament has a cap then you will find that you can stop here. If you feel you need another round to close then work the following:
Round 26: sc2tog around. [8]
Seam the last round together, pull tight and secure. Weave in all ends to finish.
BOXES AND LANES ORNAMENT
Would you like to save this?
You can unsubscribe at any time.
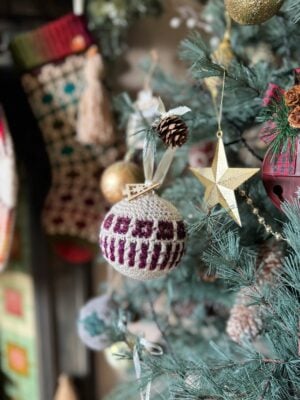
For the Boxes and Lanes Ornament, I used Mellowspun Buff and Prism Autumn Mist.
BASE
Using Yarn A, make a Magic Ring to begin.
Round 1: 8sc into the Magic Ring [8] working in continuous Rounds.
Round 2: 2sc in each st around. [16]
Round 3: *2sc in next st, sc in next st; rep from * around. [24]
Round 4: sc in each st around. [24]
Round 5: *2sc in next st, sc in next 2 sts; rep from * around. [32]
Round 6: *2sc in next st, sc in next 3 sts; rep from * around. [40]
Round 7: sc in each st around. [40]
Round 8: *2sc in next st, sc in next 4 sts; rep from * around, ss in 1st to join, change to B. [48]
Work in joined rounds now.
Continue for Centre. Follow the written pattern below or the Mosaic Chart (page 16).
CENTRE
Work all sc in blo, work all Mdc in flo of st 2 rounds below.
Round 9: B: ch1, sc in each st around, ss in blo of 1st st and change to A.
Round 10: A: ch1, *sc in next st, Mdc in next st, sc in next st; rep from * around, ss in blo of 1st st and change to B.
Round 11: B: ch1, *Mdc in next st, sc in next st; rep from * around, ss in blo of 1st st and change to A.
Round 12: A: Rep Round 10.
Rounds 13-14: Rep Rounds 11-12.
Round 15: B: Rep Round 9.
Round 16: A: ch1, *sc in next 3 sts, Mdc in next st; rep from * around, ss in blo of 1st st and change to B.
Round 17: B: ch1, *Mdc in next st, sc in next st; rep from * around, ss in blo of 1st st and change to A.
Round 18: A: Rep Round 16.
At the end of Round 18 continue working in A. Do not slip stitch to join and work in continuous rounds for the Top now.
Join our pattern support group!
We’ve built an amazing community always ready to help each other. Join today!
TOP
Working in continuous rounds now in the full part of the stitch.
Round 19: *sc2tog, sc in next 4 sts; rep from * around. [40]
Round 20: sc in each st around. [40]
Round 21: *sc2tog, sc in next 3 sts; rep from * around. [32]
Insert your pre formed bauble here and then continue to decrease the Top.
Round 22: *sc2tog, sc in next 2 sts; rep from * around. [24]
Round 23: sc in each st around. [24]
Round 24: *sc2tog, sc in next st; rep from * around. [16]
Round 25: sc in each st around. [16]
If your ornament has a cap then you will find that you can stop here. If you feel you need another round to close then work the following:
Round 26: sc2tog around. [8]
Seam the last round together, pull tight and secure. Weave in all ends to finish.
FLAT DIAMOND ORNAMENT
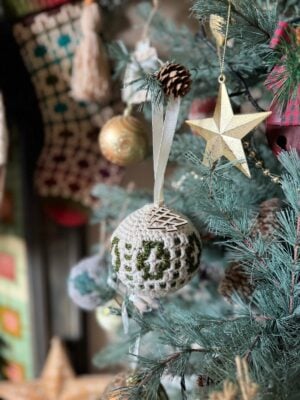
For the Flat Diamond Ornament, I used Mellowspun Buff and Prism Autumn Mist.
BASE
Using Yarn A, make a Magic Ring to begin.
Round 1: 8sc into the Magic Ring [8] working in continuous Rounds.
Round 2: 2sc in each st around. [16]
Round 3: *2sc in next st, sc in next st; rep from * around. [24]
Round 4: sc in each st around. [24]
Round 5: *2sc in next st, sc in next 2 sts; rep from * around. [32]
Round 6: *2sc in next st, sc in next 3 sts; rep from * around. [40]
Round 7: sc in each st around. [40]
Round 8: *2sc in next st, sc in next 4 sts; rep from * around, ss in 1st to join, change to B. [48]
Work in joined rounds now.
Continue for Centre. Follow the written pattern below.
Fancy another overlay mosaic crochet project? Have a go at this mosaic crochet sweater pattern.
CENTRE
Work all sc in blo, work all Mdc in flo of st 2 rounds below.
Round 9: B: ch1, sc in each st around, ss in blo of 1st st and change to A.
Round 10: A: ch1, *sc in next st, Mdc in next st; rep from * around, ss in blo of 1st st and change to B.
Round 11: B: Rep Round 9.
Round 12: A: ch1, *sc in next st, Mdc in next 2 sts, sc in next 3 sts, Mdc in next 2 sts; rep from * around, ss in blo of 1st st and change to B.
Rounds 13: B: ch1, *sc in next 3 sts, Mdc in next st, sc in next st, Mdc in next st, sc in next 2 sts; rep from * around, ss in blo of 1st st and change to A.
Round 14: A: ch1, *sc in next st, (Mdc in next st, sc in next 2 sts) twice, Mdc in next st; rep from * around, ss in blo of 1st st and change to B.
Round 15: B: ch1, *sc in next 2 sts, Mdc in next st, sc in next 3 sts, Mdc in next st, sc in next st;
rep from * around, ss in blo of 1st st and change to A.
Round 16: A: Rep Round 14.
Round 17: B: Rep Round 13.
Round 18: A: Rep Round 12.
At the end of Round 18 continue working in A. Do not slip stitch to join and work in continuous rounds for the Top now.
TOP
Working in continuous rounds now in the full part of the stitch.
Round 19: *sc2tog, sc in next 4 sts; rep from * around. [40]
Round 20: sc in each st around. [40]
Round 21: *sc2tog, sc in next 3 sts; rep from * around. [32]
Insert your pre formed bauble here and then continue to decrease the Top.
Round 22: *sc2tog, sc in next 2 sts; rep from * around. [24]
Round 23: sc in each st around. [24]
Round 24: *sc2tog, sc in next st; rep from * around. [16]
Round 25: sc in each st around. [16]
If your ornament has a cap then you will find that you can stop here. If you feel you need another round to close then work the following:
Round 26: sc2tog around. [8]
Seam the last round together, pull tight and secure. Weave in all ends to finish.
KNOT ORNAMENT
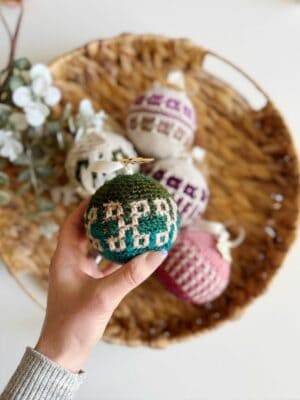
For the Knot Ornament, I used Mellowspun Buff and Prism Autumn Mist.
BASE
Using Yarn A, make a Magic Ring to begin.
Round 1: 8sc into the Magic Ring [8] working in continuous Rounds.
Round 2: 2sc in each st around. [16]
Round 3: *2sc in next st, sc in next st; rep from * around. [24]
Round 4: sc in each st around. [24]
Round 5: *2sc in next st, sc in next 2 sts; rep from * around. [32]
Round 6: *2sc in next st, sc in next 3 sts; rep from * around. [40]
Round 7: sc in each st around. [40]
Round 8: *2sc in next st, sc in next 4 sts; rep from * around, ss in 1st to join, change to B. [48]
Work in joined rounds now.
Continue for Centre. Follow the written pattern below or the Mosaic Chart (page 16).
CENTRE
Work all sc in blo, work all Mdc in flo of st 2 rounds below.
Round 9: B: ch1, sc in each st around, ss in blo of 1st st and change to A.
Round 10: A: ch1, *Mdc in next st, sc in next 3 sts; rep from * around, ss in blo of 1st st and change to B.
Round 11: B: ch1, *sc in next st, Mdc in next st; rep from * around, ss in blo of 1st st and change to A.
Round 12: A: Rep Round 10.
Rounds 13: B: ch1, * sc in next 3 sts, Mdc in next st, sc in next st, Mdc in next st, sc in next 2 sts; rep from * around, ss in blo of 1st st and change to A.
Round 14: A: ch1, *Mdc in next 3 sts, sc in next 3 sts, Mdc in next 2 sts; rep from * around, ss in blo of 1st st and change to B.
Round 15: B: Rep Round 13.
Round 16: A: Rep Round 12.
Round 17: B: Rep Round 11.
Round 18: A: Rep Round 10.
At the end of Round 18 continue working in A. Do not slip stitch to join and work in continuous rounds for the Top now.
TOP
Working in continuous rounds now in the full part of the stitch.
Round 19: *sc2tog, sc in next 4 sts; rep from * around. [40]
Round 20: sc in each st around. [40]
Round 21: *sc2tog, sc in next 3 sts; rep from * around. [32]
Insert your pre formed bauble here and then continue to decrease the Top.
Round 22: *sc2tog, sc in next 2 sts; rep from * around. [24]
Round 23: sc in each st around. [24]
Round 24: *sc2tog, sc in next st; rep from * around. [16]
Round 25: sc in each st around. [16]
If your ornament has a cap then you will find that you can stop here. If you feel you need another round to close then work the following:
Round 26: sc2tog around. [8]
Seam the last round together, pull tight and secure. Weave in all ends to finish.
HANGING TIE FOR TREE
You can add any kind of hanging tie to your bauble that you like. I used simple satin ribbon for mine but a piece of twine would be beautiful too.
You can either hang them on a tree or create a garland for your mantle or door with them.
Congratulations on crocheting your very own crochet tree decorations! 🌟 Now that you’ve crafted this fun project, why stop here? Dive into my other Christmas crochet patterns, each waiting to be transformed into your next crochet masterpiece.
Get your free guide!
Subscribe to get your free guide to choosing and combining colours!
Join HanJan and Share Your Crochet With Us!
I’d love to hear from you and see your HanJan Crochet project! Here’s where you can do that:
📌 PIN THIS POST – save it to your Pinterest crochet board so you can come back to it again and make more!
↗️ SHARE – Share your yarn choices, progress pics, and finished projects on Facebook or Instagram (make sure to use the hashtag) #hanjancrochet
🧶 JOIN – Join thousands of amazing crafters in the HanJan Crochet Community Group on Facebook ready to cheer you on!
✉️📩📬 SUBSCRIBE – It’s an honour to be able to create and share my free crochet patterns with you. I’d love to stay connected and send you regular discount codes and free patterns! Please sign up for my subscriber list to get a free gift right now!
Frequently Asked Questions About Christmas Crochet Tree Decorations
These crochet tree decorations use only single crochet and mosaic double crochet stitches, so the stitches themselves aren’t difficult. If you’ve never tried overlay mosaic crochet before, the included video tutorial will guide you through the technique. The only part that may feel new is working in the round around the bauble.
You can of course use different yarns, and these crochet baubles make great stash busters. Just bear in mind that using a different weight yarn will change the size of the finished thing.
Whilst the easiest option in my opinion is to use a pre-formed bauble, there are other options. Maybe you have an old bauble lying around that’s seen better days that you could use. Or try stuffing it with fibre fill.
It really doesn’t take very long to make one. Somewhere between 30 minutes to 2 hours depending on experience and pace.
Absolutely! I love making a matching set of these crochet tree decorations as gifts because they’re quick to crochet and become keepsakes that can be brought out every Christmas. They’re also lovely as gift toppers before becoming part of the recipient’s own Christmas tree.
The mosaic charts are included in the paid PDF version of the pattern, which you can upgrade to if you wish.
If you’ve enjoyed making this crochet Christmas tree decorations pattern, then why not try a few more? Here’s a few other of my designs you might like:
- Easy mosaic crochet bauble – continue your love of mosaic crochet with this cute bauble
- Easy crochet stocking pattern – using the granny stitch.
- Christmas crochet gnome pattern – an adorable decoration to make