This post may contain affiliate links. Please see my full disclosure and privacy policy for details.
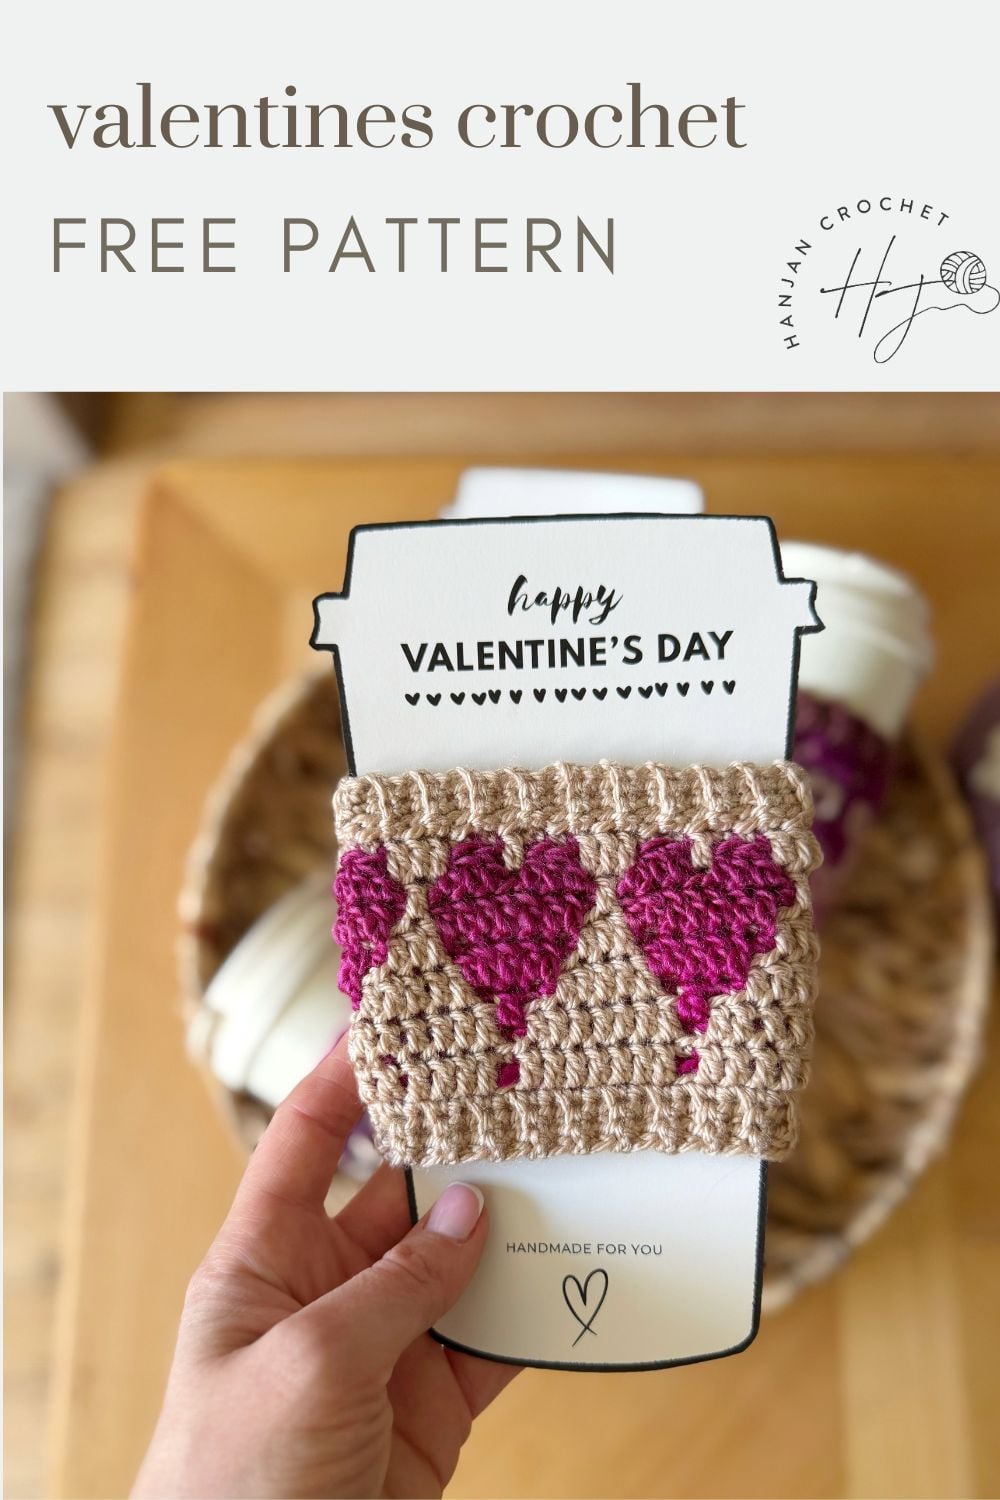
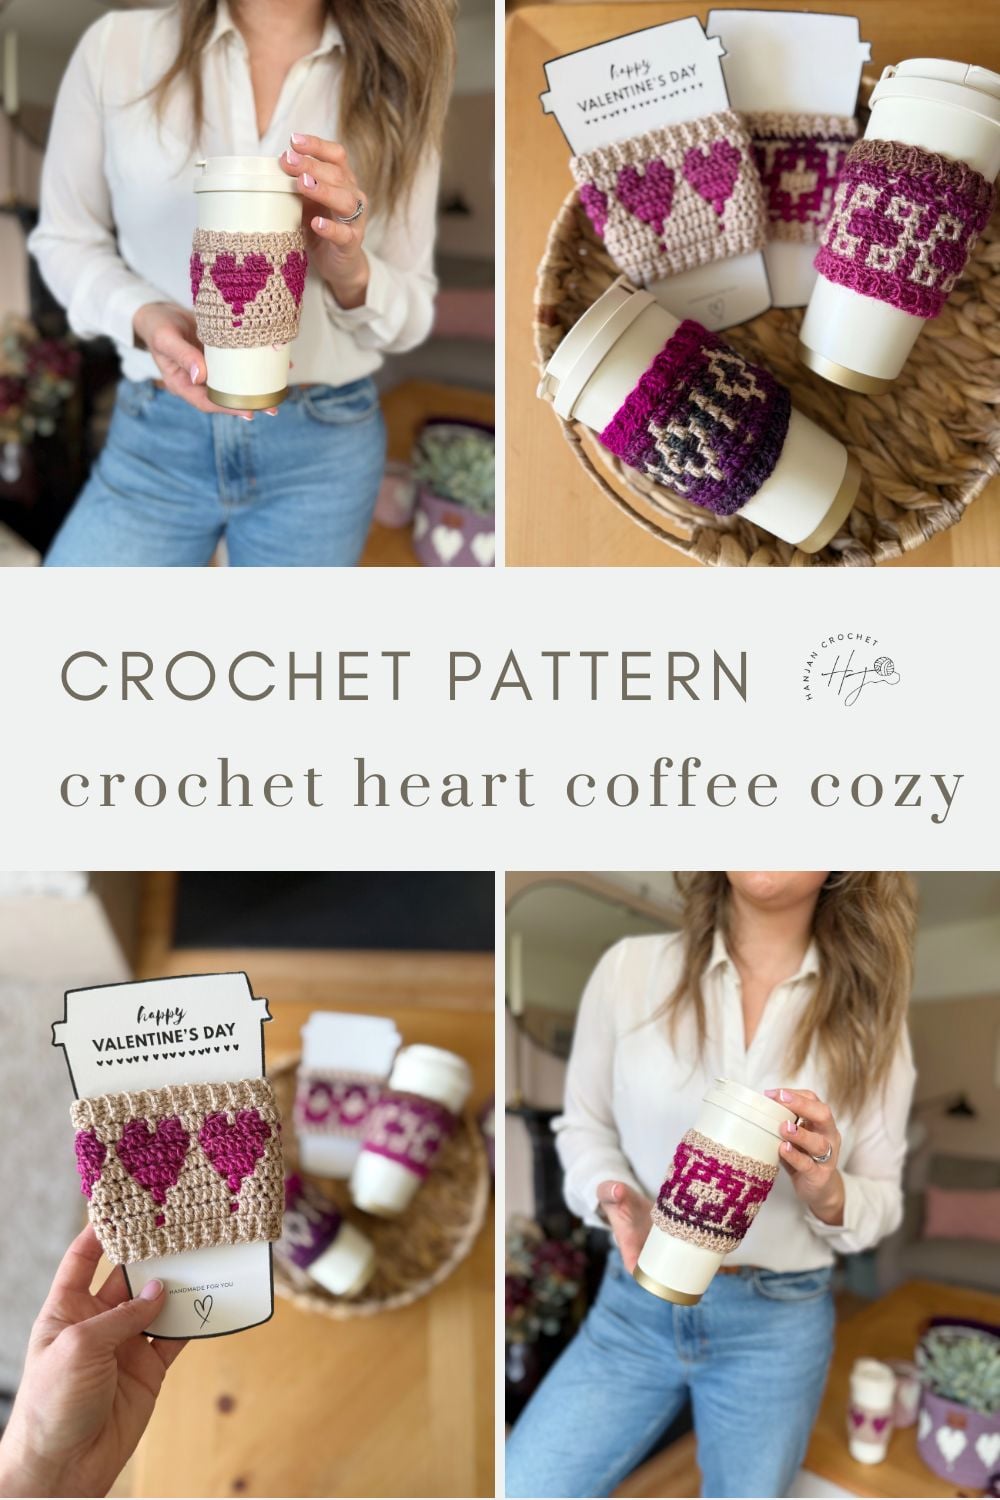
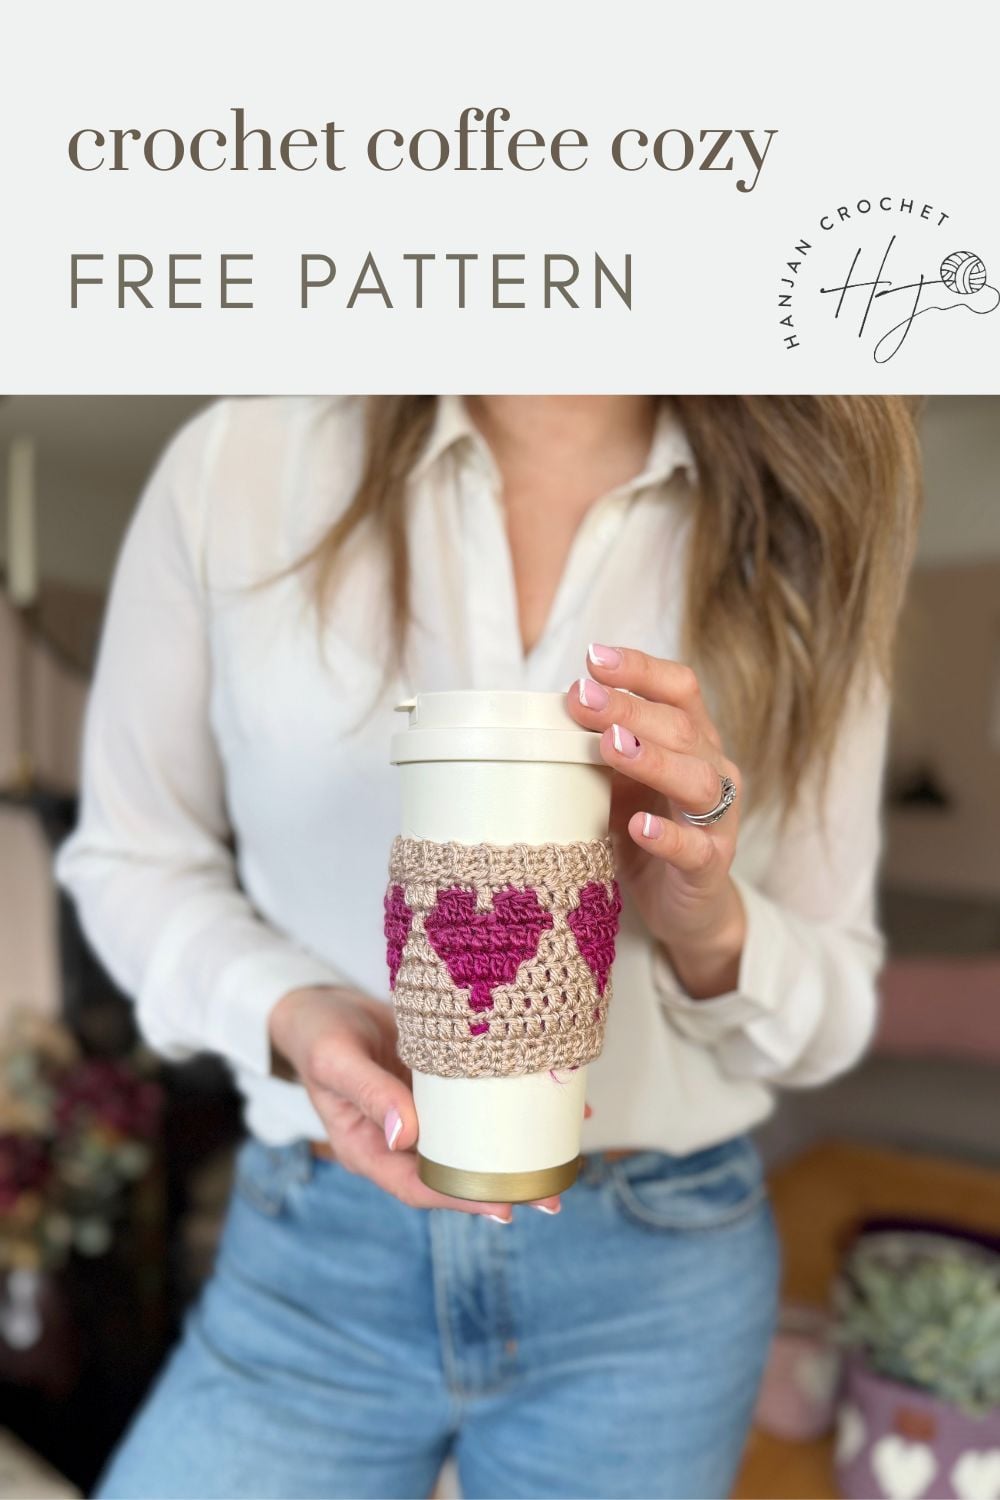
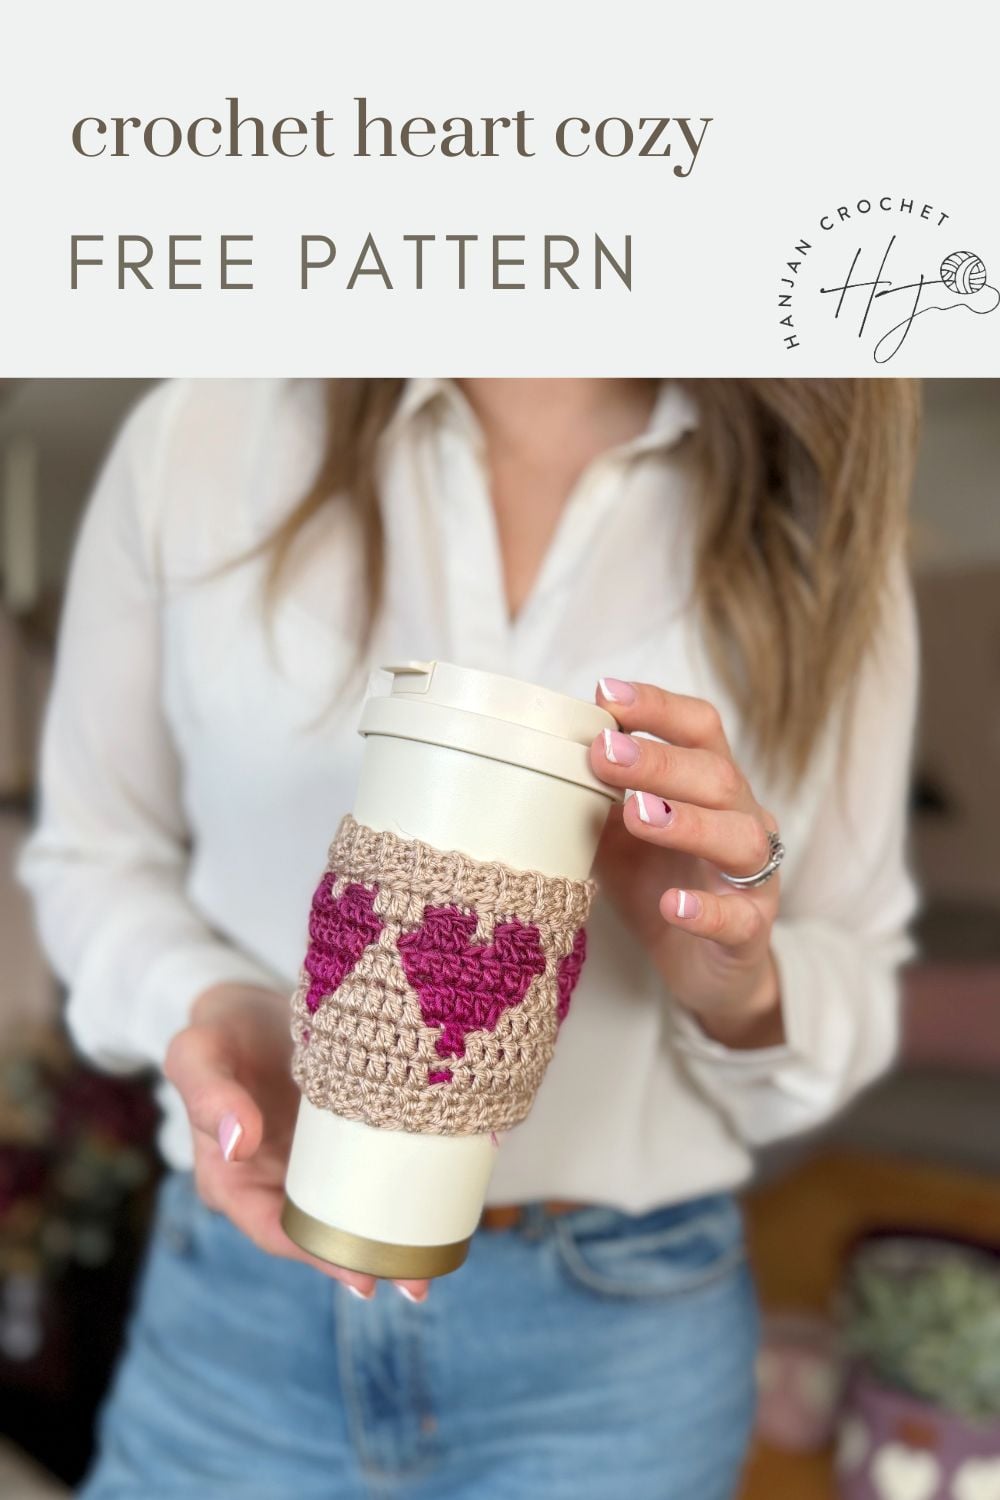
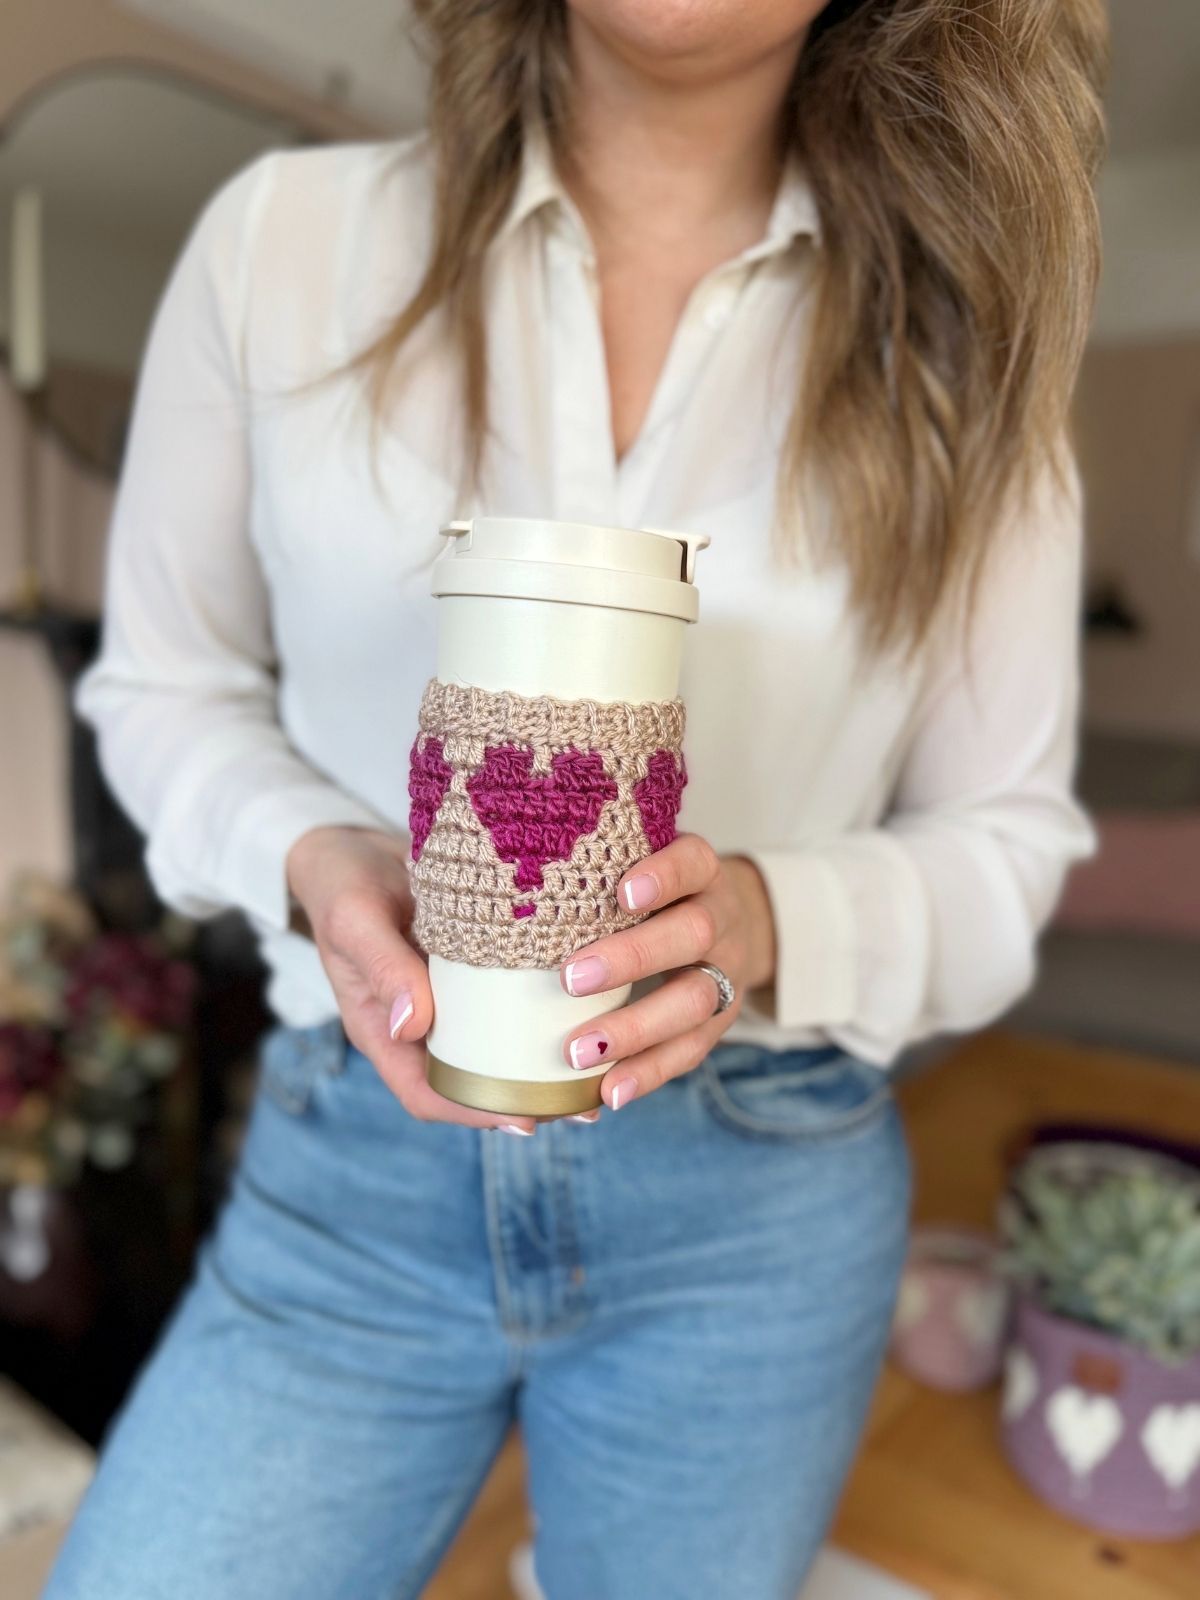
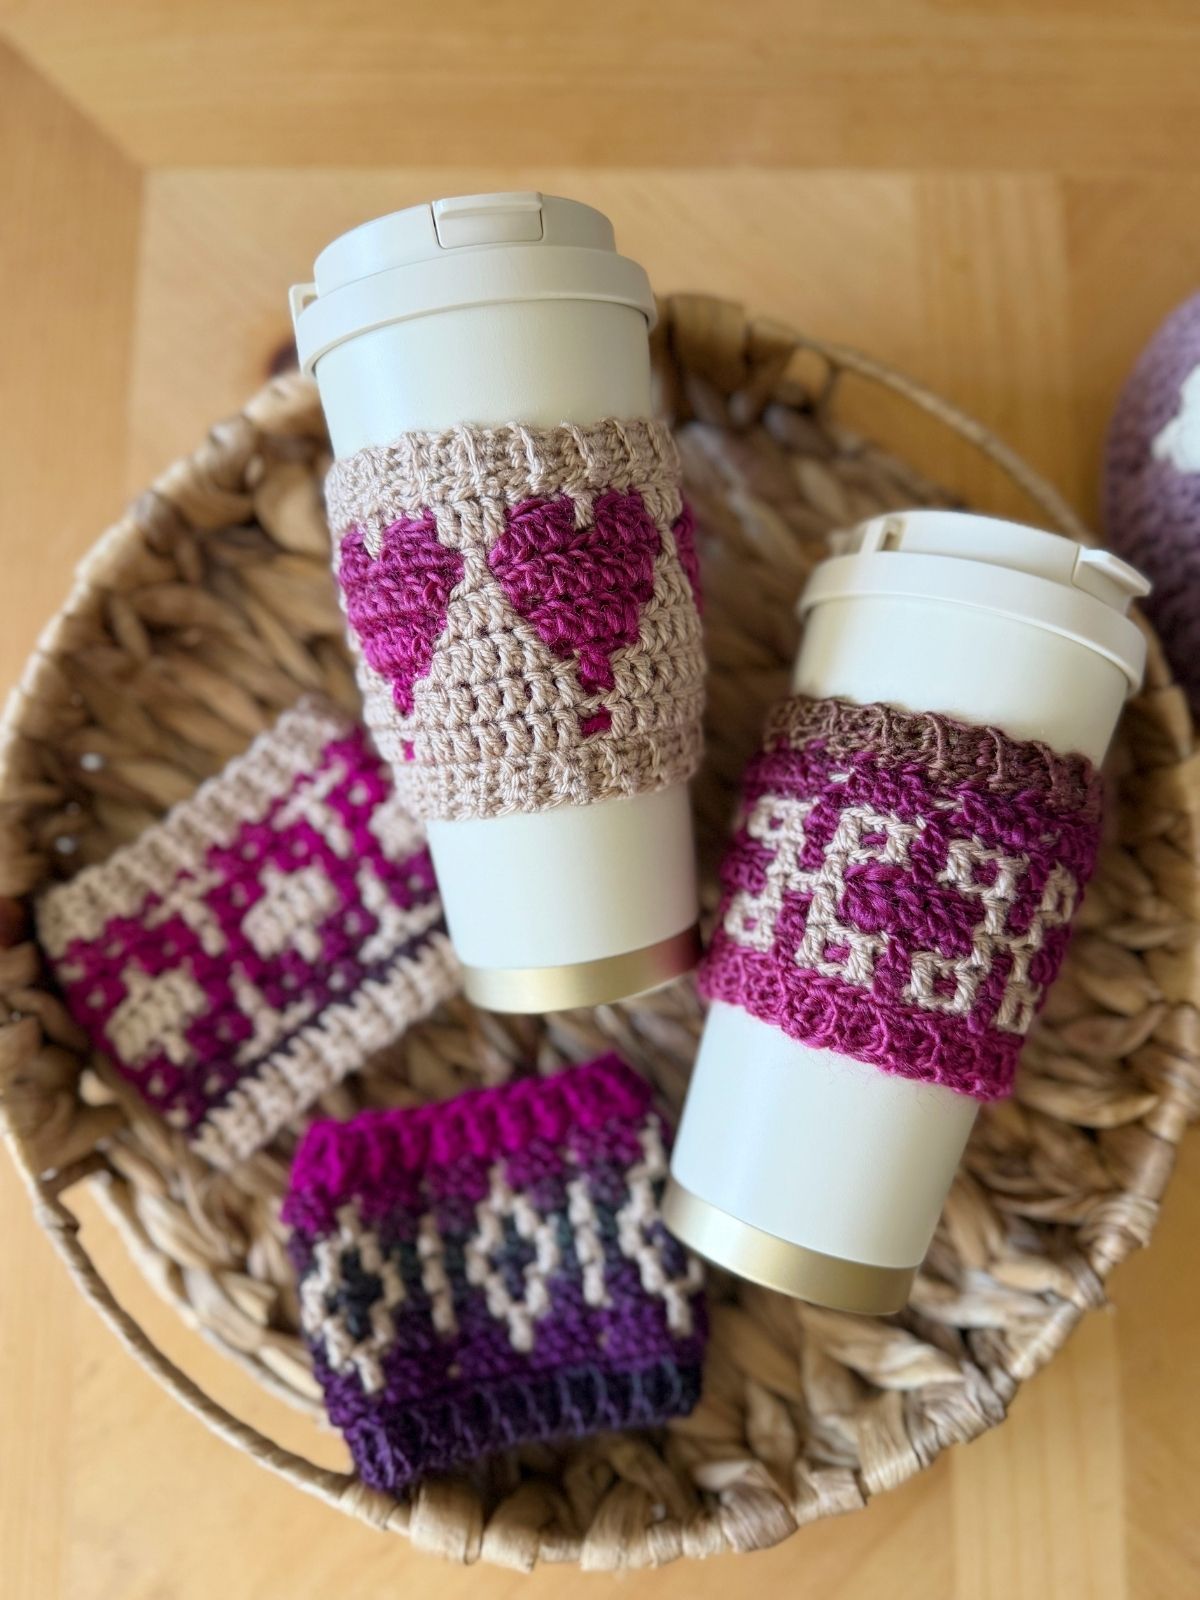
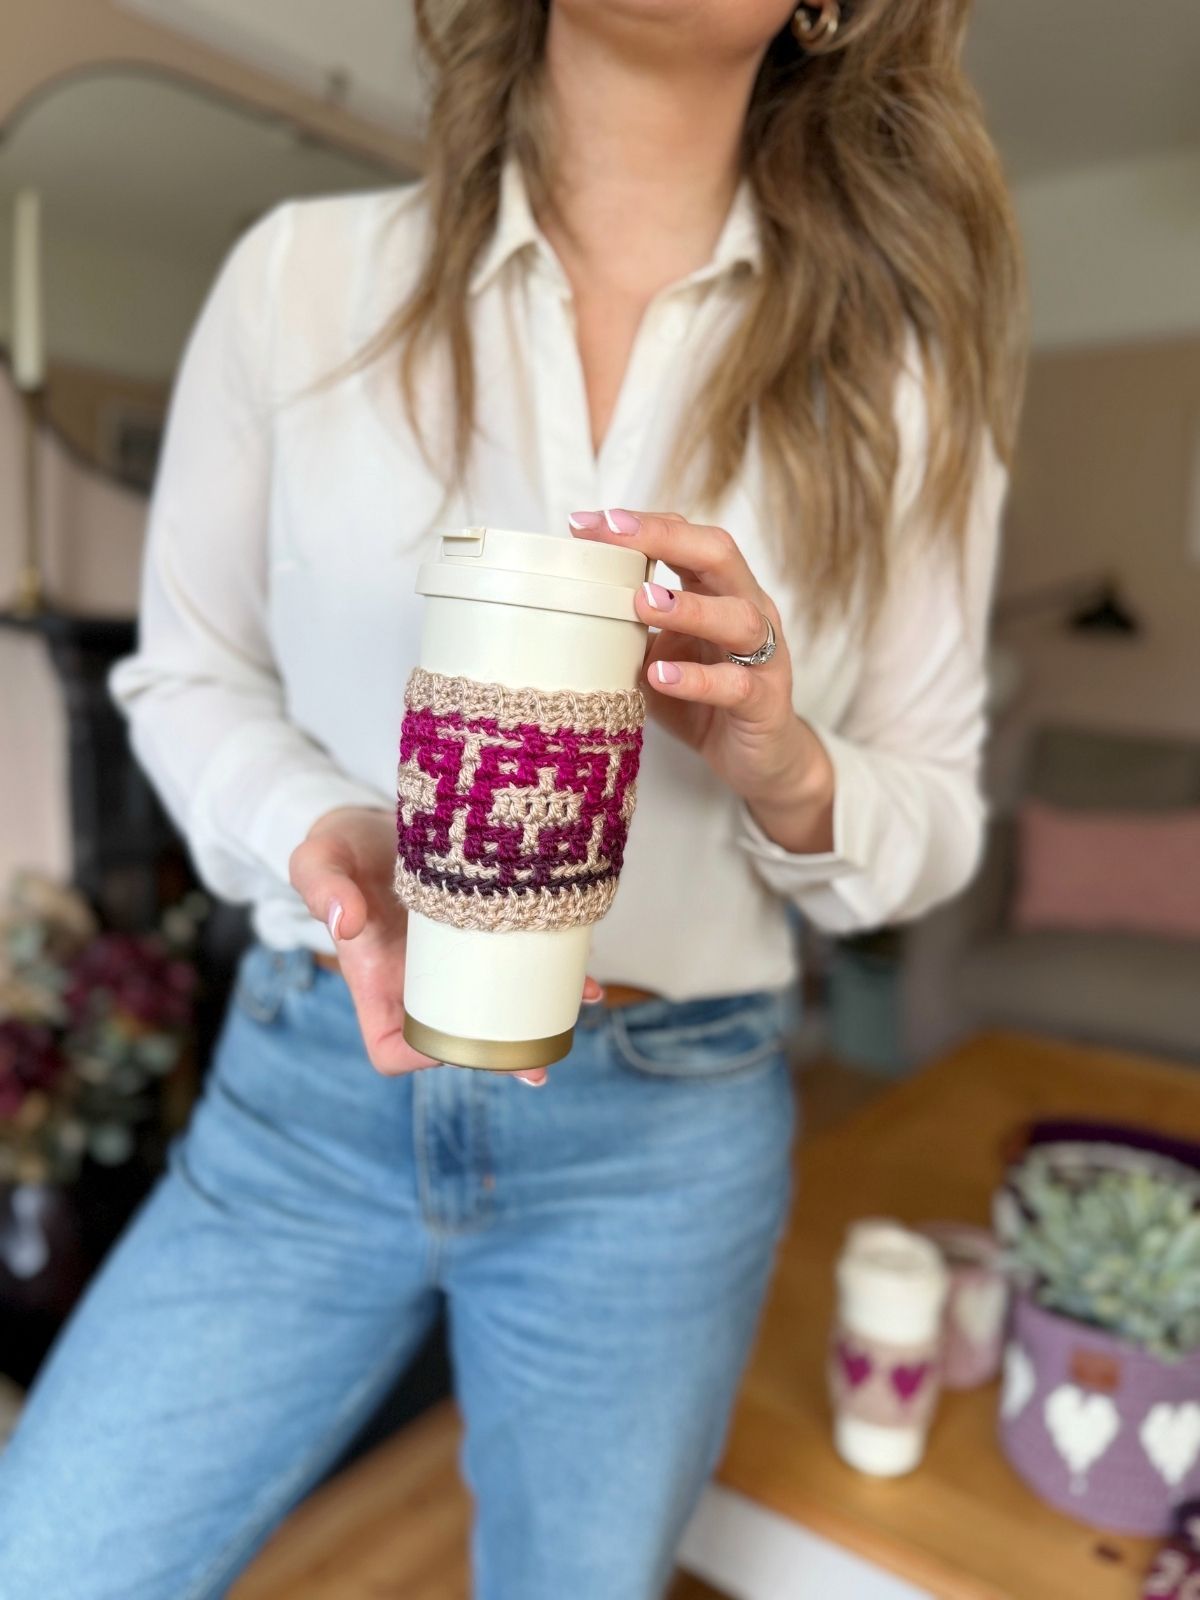
Wrap your cup in a little handmade warmth with this cute crochet coffee cup cozy with heart motifs: they’re quick, easy and full of love! Plus find three other designs for quick Valentine’s gift too!
In this post you’ll find everything you need to know how to make a crochet coffee cozy step by step, including materials, stitches, a detailed video tutorial and free written pattern for blog subscribers.
Pattern Overview: Crochet Heart Coffee Cozy
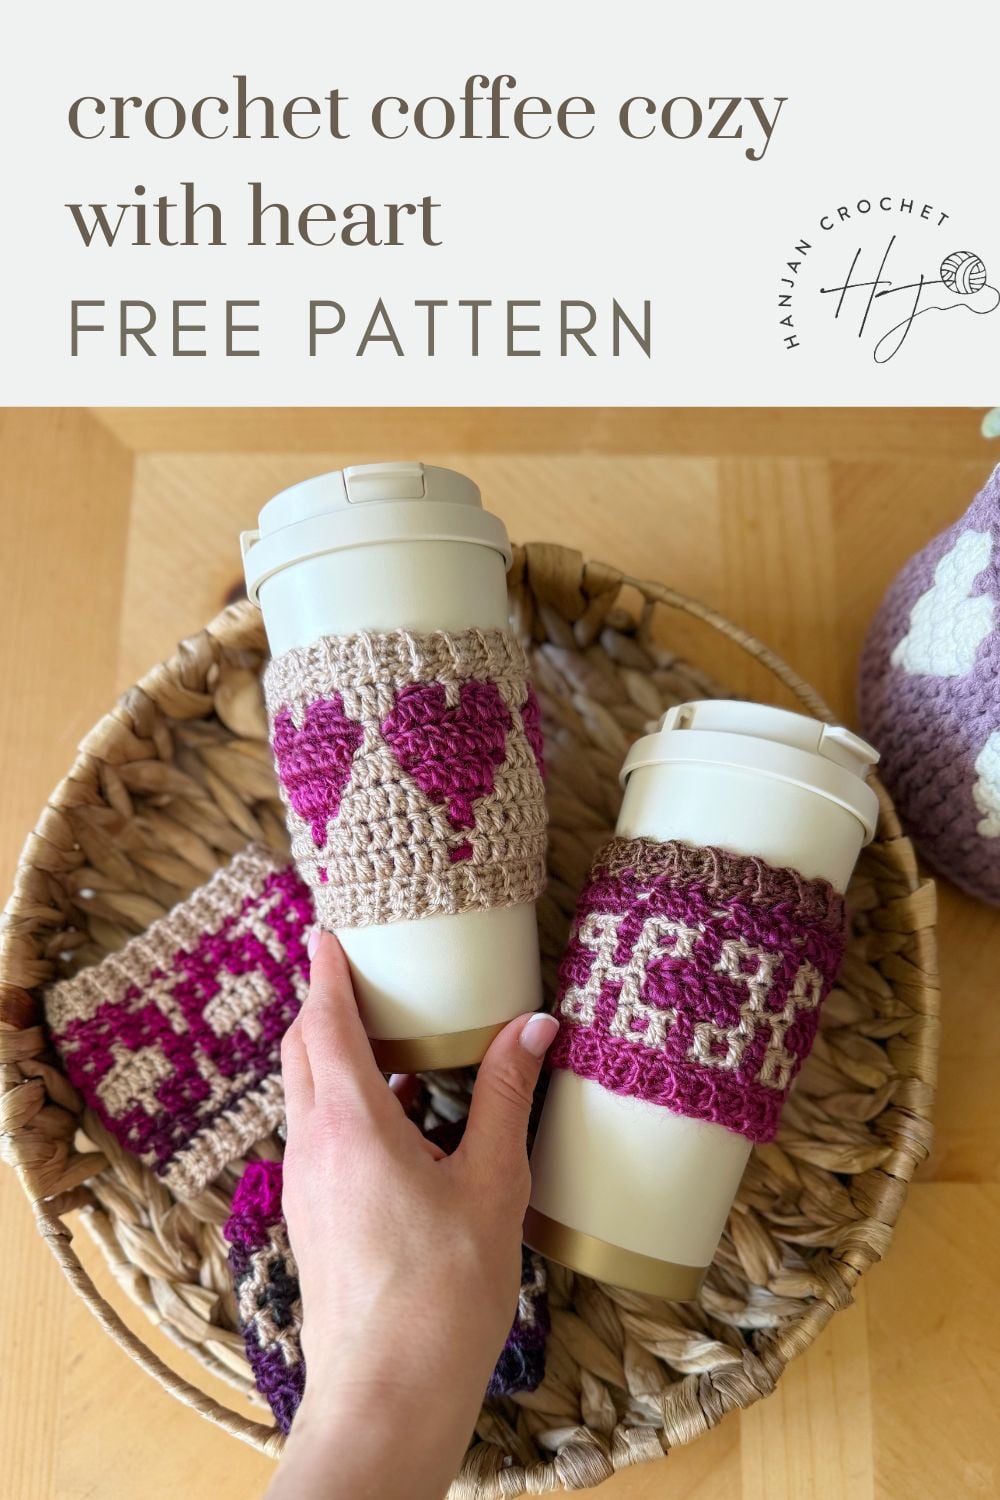
Pattern for: a crochet heart cozy with 4 different designs
Yarn used: 100% acrylic DK weight in 2 colours
Difficulty level: Intermediate – but super quick and easy to make.
Stitches used: This crochet coffee cozy uses overlay mosaic crochet to create the beautiful heart motifs.
Hannah’s Notes: Wrap your cup in a little handmade warmth with the Happy Hearts Coffee Cup Cozies. Packed with playful mosaic patterns and charming details, they’re the perfect fast make for gifting, selling, or simply treating yourself.
Summarise and Save For Later:
Table of Contents
Things you’ll love about this quick Valentines crochet pattern
Yarn
Yarn A: Mellowspun DK, 100% Acrylic, 260m/284yds/100g
Yarn B: Prism DK, 100% Acrylic, 265m/290yds/100g
It’s a category 3, DK weight yarn which is what gives this hat its glorious detail. Find out more about yarn weights and categories with our handy yarn weight chart.
You only need a small amount of each yarn colour, so it’s perfect to raid your stash! Details of the colours I used are: Mellowspun Sand and Prism Succulent.
See my other crochet patterns using DK yarn – you might find your next project there too!
Yarn Substitutes
You can use any yarn that you like bearing in mind that you need to make sure you meet the gauge. Some other great options are:
- Solid Colour Yarn A: Premier Anti-Pilling Everyday DK, 100% Acrylic, 250m/273yds/100g
- Multi Colour Yarn B: Premier Colorfusion DK, 100% Acrylic, 298m/325yds/100g
Sizing
8” circumference x 4″ high (adaptable to other sizes)
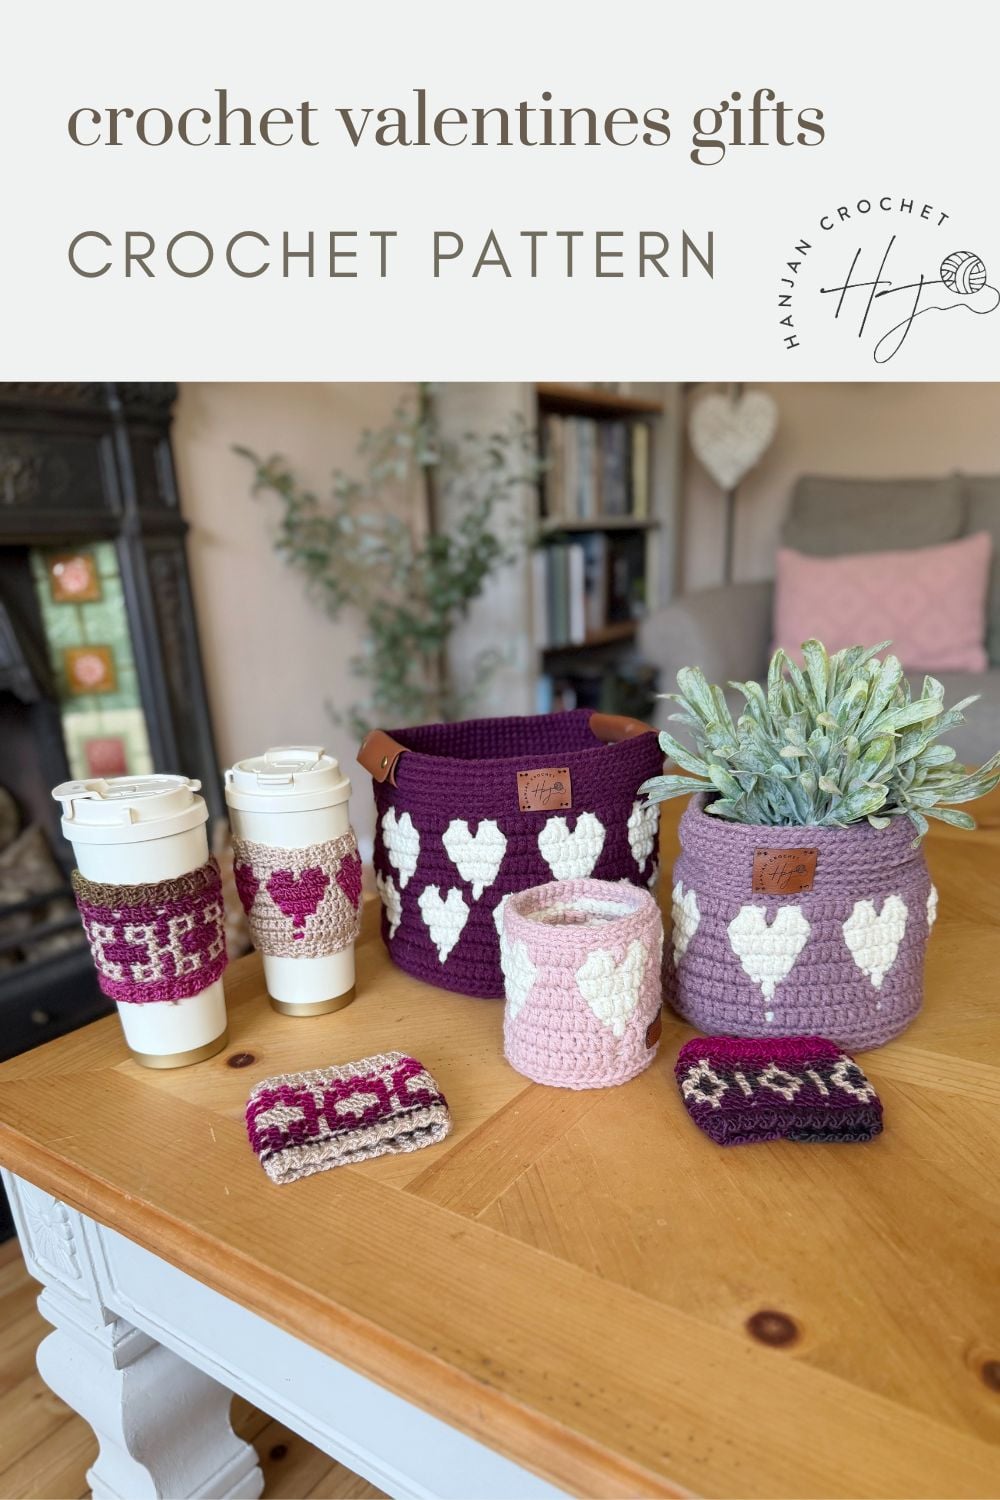
You can make any of these 4 cup cozies in the image below – they all use the same fun technique!
How Much Yarn do I Need to Crochet these Crochet Valentines Gifts?
This design uses 2 yarn colours, A and B. You only need a small amount of each so it’s perfect to raid your stash!
You will require approximately 55 metres, 60 yards of yarn A to crochet the coffee cozy.
This is 1 ball of the recommended yarn A.
You will also require approximately 36 metres, 40 yards of yarn B to crochet the coffee cozy.
This is also 1 ball of the recommended yarn B.
Other Materials
Along with your yarn, you will need the following:
- A 4.5mm(G+) and 4mm(G) crochet hook or hook needed to meet gauge
- Scissors
- Tapestry needle
- Stitch markers
Glossary and Abbreviations
beg – beginning
blo – back loop only
ch(s) – chain(s) (chain stitch tutorial)
ch-sp(s) – chain space(s)
rep – repeat
RS – right side
sp – space
ss/sl st – slip stitch (how to crochet a slip stitch)
st(s) – stitch(es)
tog – together
WS – wrong side
Yoh – yarn over hook
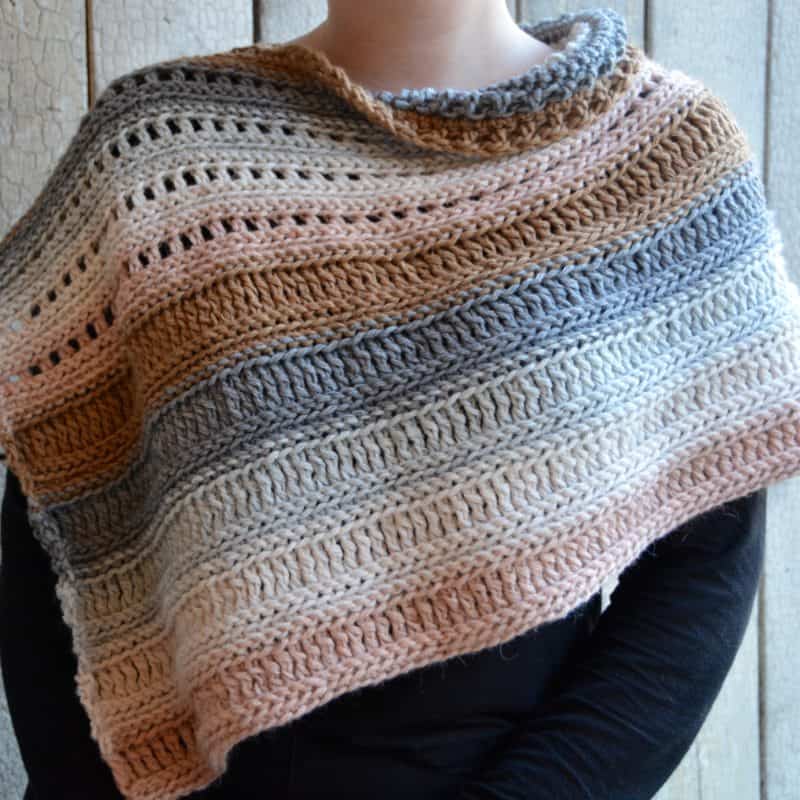
If you like this heart pattern, you might also like the others in the Happy Hearts collection:
- Crochet heart beanie, which has the same stunning heart motifs!
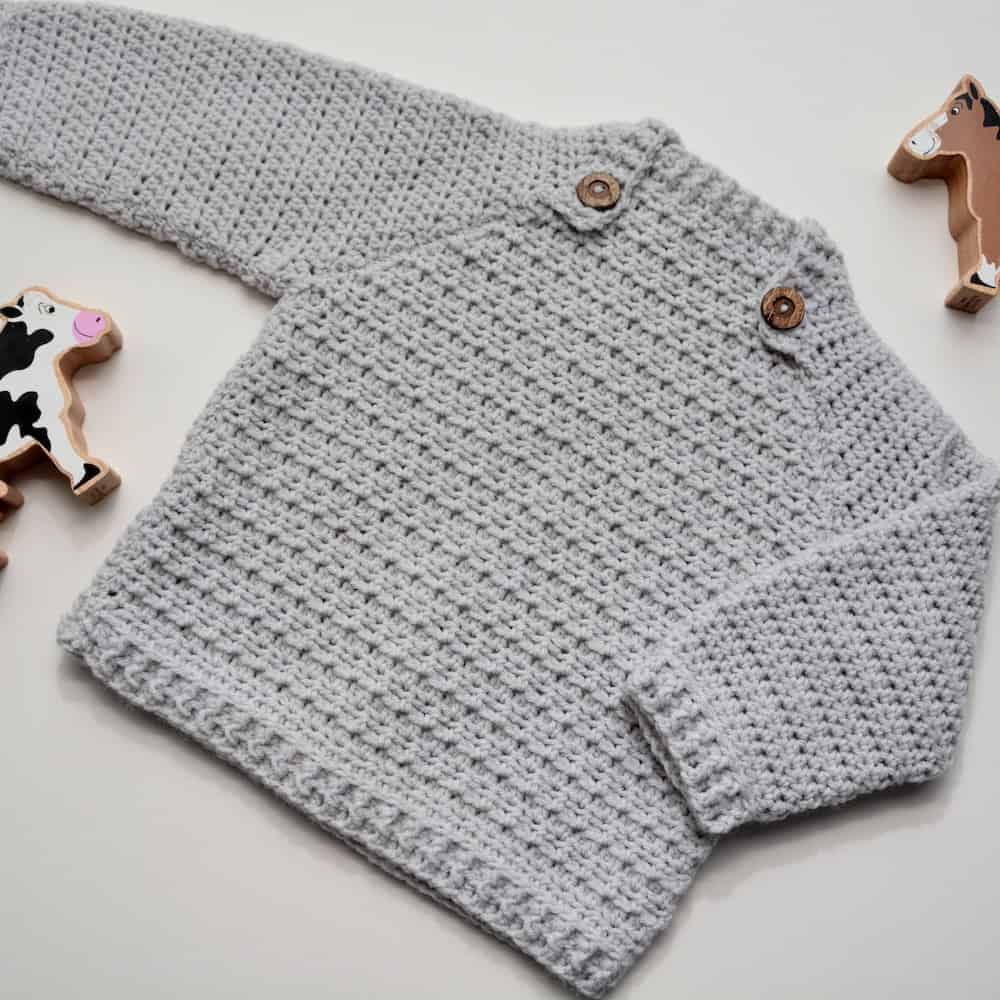
- Heart crochet sweater pattern for a cosy, wearable mosaic heart design.
- Quick and simple heart crochet baskets for your home!
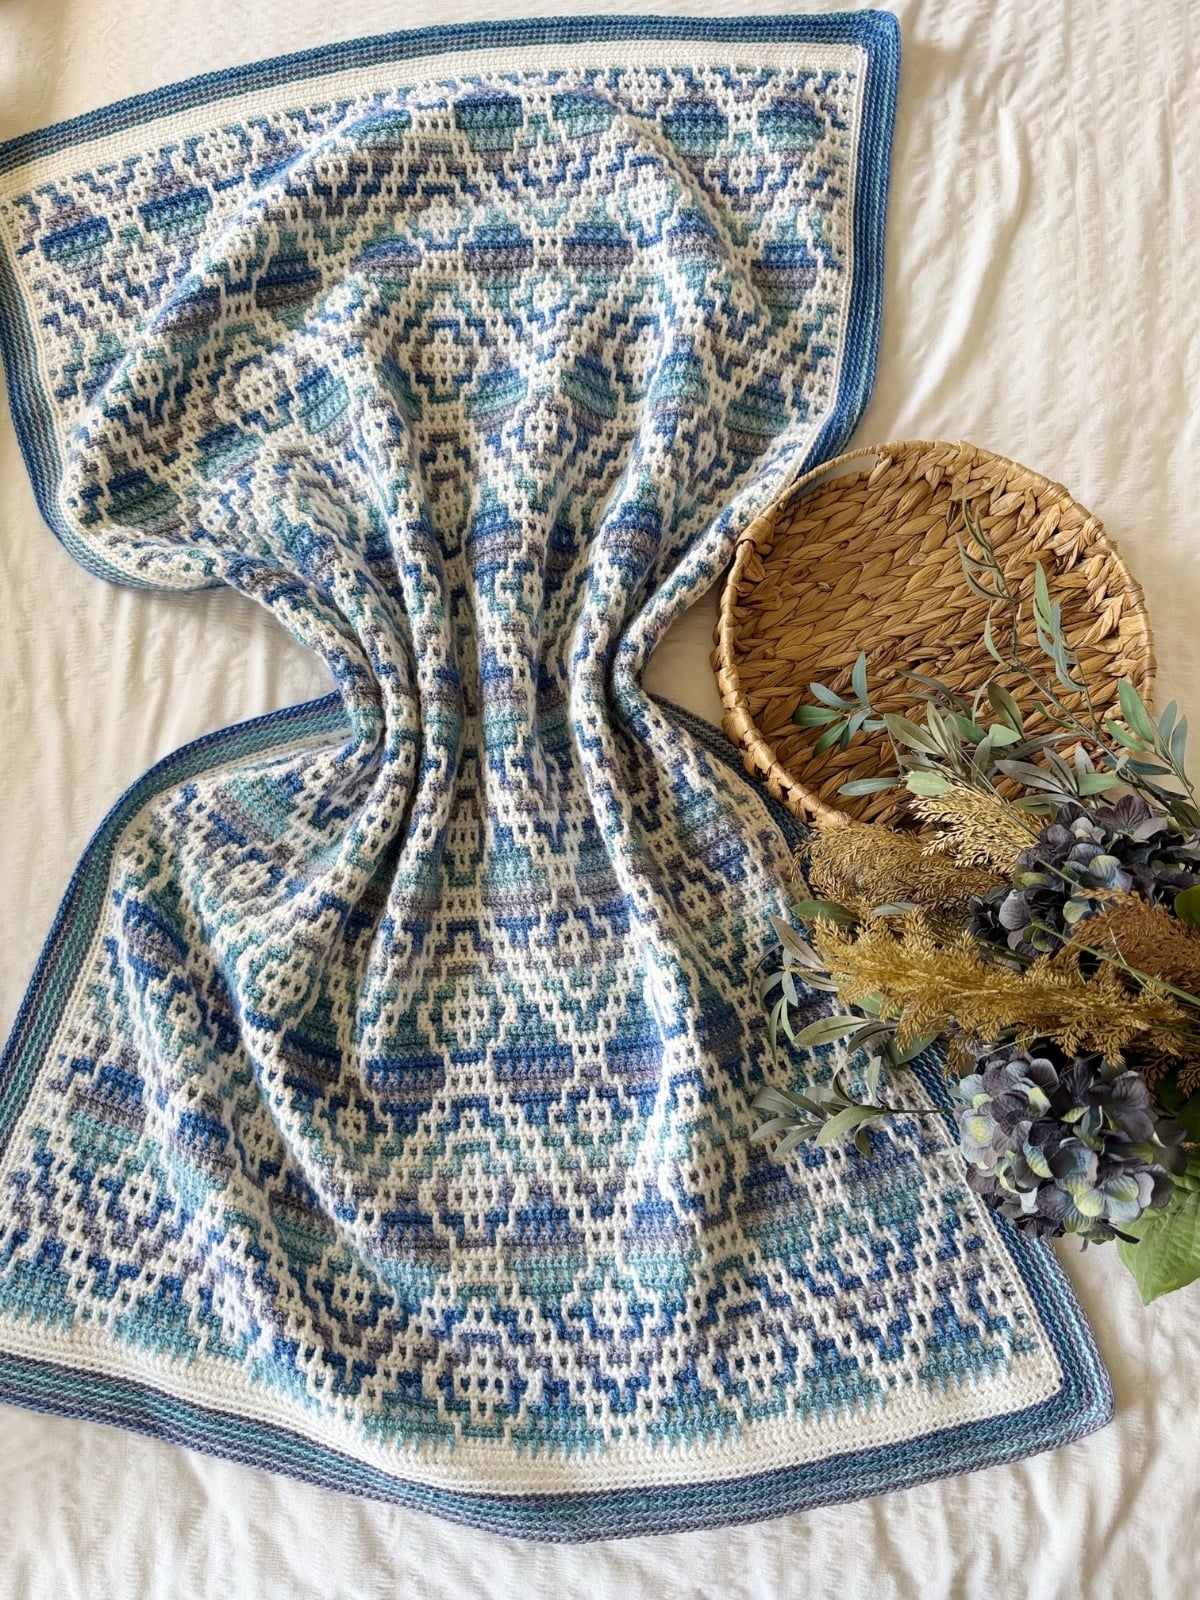
- Heart crochet blanket pattern with repeating mosaic hearts.
If you’ve not tried this technique before, check out this overlay mosaic crochet tutorial.
Stitches
The pattern is written in standard US terms and uses the following crochet stitches:
sc – single crochet (how to do a single crochet stitch)
Mdc – Mosaic double crochet (mosaic double crochet stitch tutorial)
Special Stitches
SINGLE CROCHET (sc) always worked in back loop only (blo).
Insert hook from front to back through stitch to be worked. Yarn over and pull through stitch. Yarn over and pull through both loops on the hook.
Want to remove Ads?
- Get ad-free access on all posts; 200+ patterns & tutorials!
- Member-only resource library with downloadable PDF guides
- Bonus eBook (Worth over $30)
MOSAIC DOUBLE CROCHET (Mdc)
Yarn over and insert hook into front loop of stitch two rounds below. Yarn over and pull through the stitch. Yarn over and pull through two loops on the hook.* Yarn over and pull through remaining two loops on the hook.
The stitch behind the Mdc on the current round is left unworked.
MOSAIC DOUBLE CROCHET 2 TOGETHER (Mdc2tog) – current and next st
Begin working a Mdc in the current st but stop at *. Now begin another Mdc in the next st and complete by yarning over and pulling through all the loops on the hook.
MOSAIC DOUBLE CROCHET 2 TOGETHER (Mdc2tog) – previous and current st
Begin working a Mdc in the previous st but stop at *. Now begin another Mdc in the current st and complete by yarning over and pulling through all the loops on the hook.
2 MOSAIC DOUBLE CROCHET (2Mdc)
Work two mosaic double crochet stitches in the front loop of the stitch 2 rounds below. In the heart motif this helps to shape the sides. It does not increase the stitch count as you will be skipping a stitch either before or after.
How do you Make a Crochet Heart Cozy?
- The Coffee Cup Sleeve is made from the bottom up starting with the bottom band that is joined to form a ring.
- The body is then worked into the sides of the rows in rounds.
- We then add a Join As You Go band to the top to complete.
Pattern Gauge
Gauge: 20 sts and 18 rounds = 4″ by 4″ using 4.5mm hook
Making a crochet gauge swatch is important when crocheting projects to ensure that it ends up the desired size.
However the project is so quick that I would recommend just making one and seeing if you meet the gauge.
This is also a great way to get used to the stitches used in the project and practise getting your stitches nice and neat.
Before you jump into crocheting your crochet coffee cozy with heart, take a moment to read through the pattern notes—it’s a game-changer!
These handy insights will not only simplify your pattern-reading journey but also ensure a smoother crochet experience. You’ll find helpful tips on deciphering the sizing, customisation and more.
Trust me, a quick peek at these notes will set you up for crochet success!
- The pattern is worked in rows and rounds using the overlay mosaic crochet technique for the main body.
- All stitches in the Mosaic Sections are worked as sc in blo or Mdc.
- Each Round uses just one colour.
- A ch1 at the beginning or end of a Round does not count as a stitch.
- Read through the entire pattern before beginning.
- Make sure that you are familiar with all of the stitches in the abbreviations list before you begin.
- Stitch counts are given in [ ] at the end of each round. If no stitch count is given, then the count is the same as the previous round.
- If following charts for the mosaic sections then you will need to follow the written pattern for the bottom and top cuffs.
Crochet Heart Coffee Cozy Pattern Free
There are a few options for you to access and enjoy this crochet pattern:
- View the free pattern on the blog – all blog subscribers will be able to view the patterns supported by ads by logging into their Grow account.
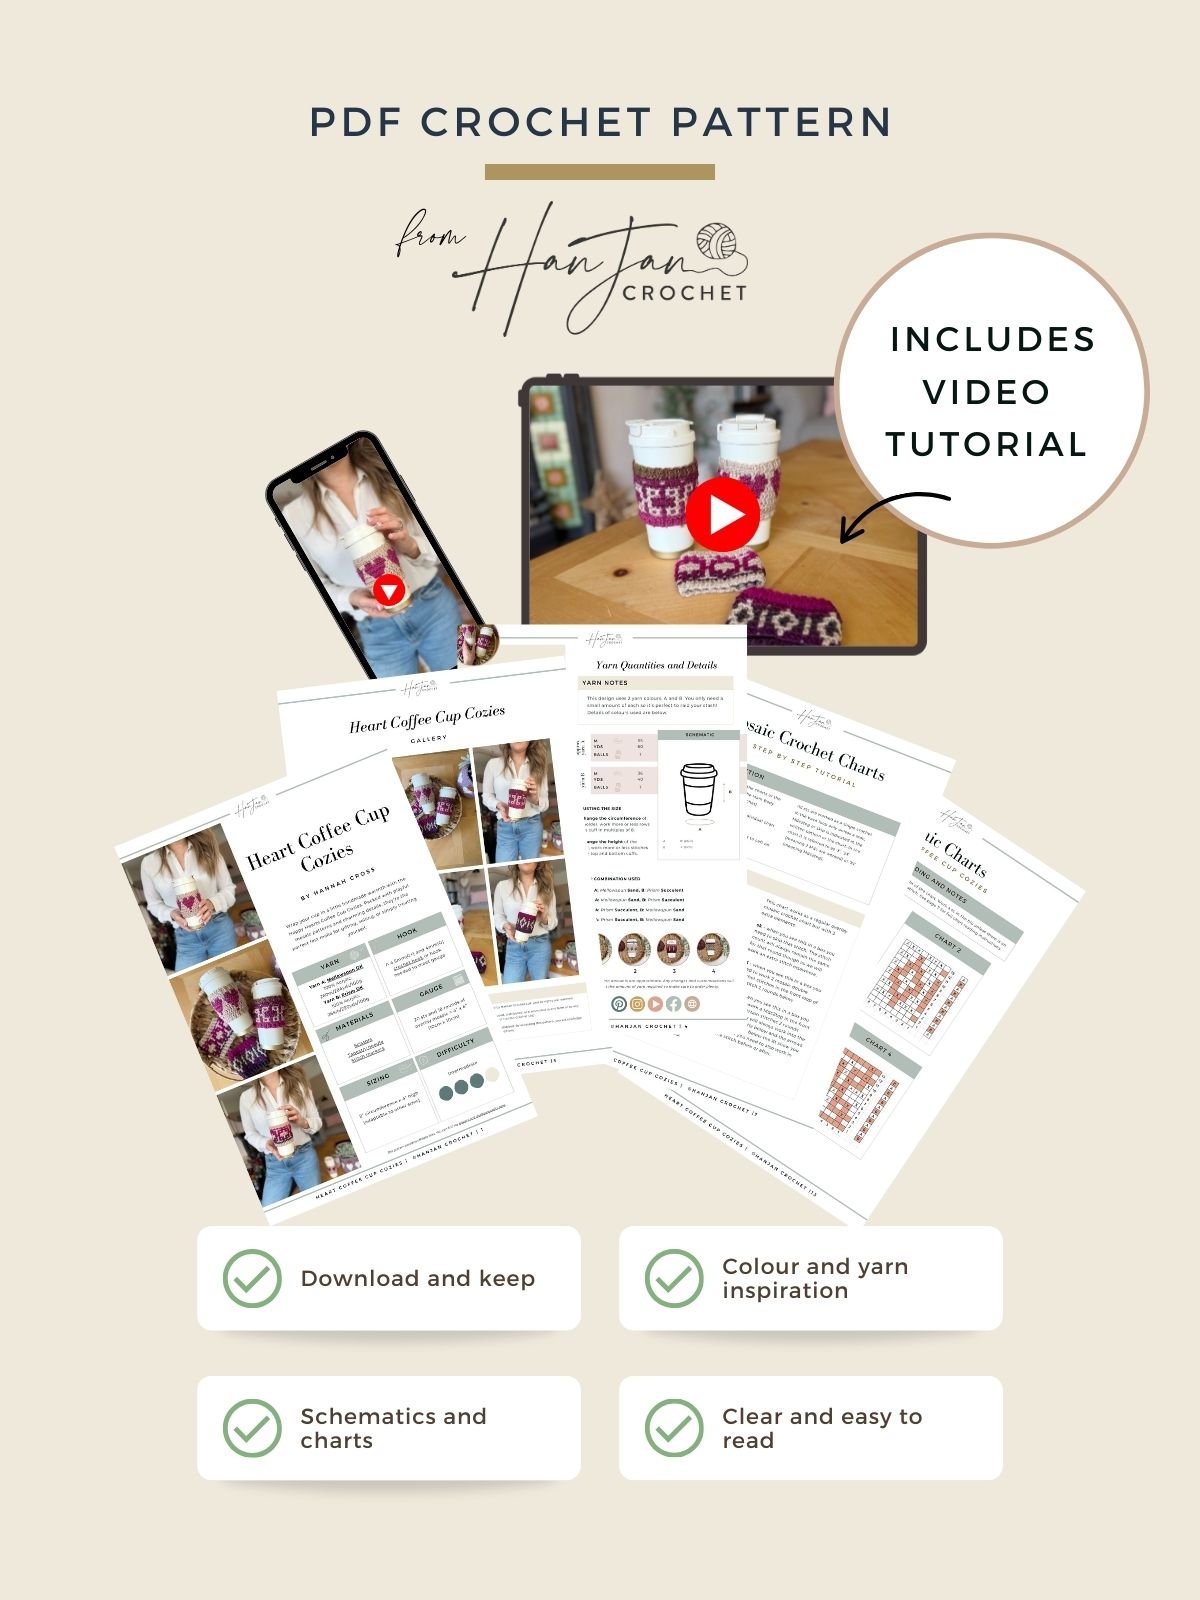
- Purchase the individual pattern on Etsy or Ravelry as a beautifully formatted PDF with extra stitch charts, schematic and colour information page and more!
Get this pattern ad free
Get the PDF Pattern!
Perfect to print out or use on any device, with added schematic and charts, colour inspiration and stitch tutorials.
Pattern Support
I am delighted to invite you to join the HanJan Crochet Community Facebook Group where we host all pattern support queries and love to see your progress, yarn choices and finished projects!
Crochet Pattern Free for Blog Subscribers to View
US Terminology
To unlock Exclusive Content on the HanJan Crochet Blog, all you need to do is click the box below and the Grow.me app will pop up, allowing you to enter your email and create a password.
Once you’ve created an account, every time you see Exclusive Content on my blog (or any others that use Grow), simply login to your Grow account. Be sure to switch to the login screen to enter your login credentials.
If you forget your password, click the “forgot password” link and follow the prompts. Please note that I’m unable to assist with resetting Grow passwords or accessing your Grow account, so be sure to save your login information in a safe place.
Thank you for subscribing and for joining me at HanJan Crochet! I hope you enjoy the exclusive content available on the site and I can’t wait to see what you create 🙂
Step by Step Video Tutorial
Come along as I make this mosaic crochet coffee sleeve pattern and see just how easy it is in our step-by-step video tutorial.
Option 2: Diamond
Using the smaller hook (0.5mm smaller than the hook you met gauge with) and yarn A, make the Bottom Band.
Foundation chain: ch4, turn.
Row 1: sc in the 2nd ch from hook and each across, turn. [3]
Rows 2-40: ch1, sc in blo of each st, turn.
At the end of the final row, join the final row to the first row with a slip stitch seam to form the Bottom Band shape.
Continue with yarn A but switch to the larger hook for the Main Body.
Fancy another coffee sleeve project for your list?! This crochet coffee sleeve pattern is perfect for Christmas time with 4 festive designs using mosaic crochet!
MAIN BODY
Working all sc in blo throughout this section now. Refer to Mosaic Chart (you will need to return to the written pattern once the Main Body is complete for the Top Band instructions) or use the written instructions as follows.
Change colour at the end of each round as indicated when you slip stitch into the blo of the first st to join. Do not break your yarn at the end of each round, just pick it up again when you need it.
Round 1: A: RS: ch1, sc in the side of each row of the Bottom Band, ss in blo of 1st st and change to B. [40]
Round 2: B: ch1, sc in each st around, ss in blo of 1st st and change to A.
Round 3: A: ch1, *sc in next st, Mdc in next 3 sts; rep from * around, ss in blo of 1st st and change to B.
Round 4: B: ch1, *sc in next 4 sts, Mdc in next st, sc in next 3 sts; rep from * around, ss in blo of 1st st and change to A.
Round 5: A: ch1, *sc in next st, Mdc in next 2 sts, sc in next 3 sts, Mdc in next 2 sts; rep from * around, ss in blo of 1st st and change to B.
Round 6: B: ch1, *Mdc in next st, sc in next 2 sts, Mdc in next st, sc in next st, Mdc in next st, sc in next 2 sts; rep from * around, ss in blo of 1st st and change to A.
Round 7: A: ch1, *sc in next st, Mdc in next st, sc in next 2 sts, Mdc in next st, sc in next 2 sts, Mdc in next st; rep from * around, ss in blo of 1st st and change to B.
Round 8: B: ch1, *Mdc in next st, sc in next st, Mdc in next st, sc in next 3 sts, Mdc in next st, sc in next st; rep from * around, ss in blo of 1st st and change to A.
Round 9: A: ch1, *sc in next st, Mdc in next st, (sc in next 2 sts, Mdc in next st) twice; rep from * around, ss in blo of 1st st and change to B.
Round 10: B: Rep Round 6.
Round 11: A: Rep Round 5.
Round 12: B: Rep Round 4.
Round 13: A: Rep Round 3.
Continue in Yarn A and change to the smaller hook to make the Join As You Go Top Band.
Row 1: ch 4, sc in 2nd ch from the hook and in each along, ss into next st of the Last Round, turn. [3]
Row 2: sc in blo of each st, turn.
Row 3: ch1, sc in blo of each st, ss in next 2 sts of the Last Round, turn.
Rep Rows 2 and 3 along the Last Round. Once complete, join the First Row to the Last Row of the Top Band with a slip stitch seam. Fasten off and weave in ends.
Join our pattern support group!
We’ve built an amazing community always ready to help each other. Join today!
Option 3: Knot
Using the smaller hook (0.5mm smaller than the hook you met gauge with) and yarn A, make the Bottom Band.
Foundation chain: ch4, turn.
Row 1: sc in the 2nd ch from hook and each across, turn. [3]
Rows 2-40: ch1, sc in blo of each st, turn.
At the end of the final row, join the final row to the first row with a slip stitch seam to form the Bottom Band shape.
Continue with yarn A but switch to the larger hook for the Main Body.
MAIN BODY
Working all sc in blo throughout this section now. Refer to Mosaic Chart (you will need to return to the written pattern once the Main Body is complete for the Top Band instructions) or use the written instructions as follows.
Change colour at the end of each round as indicated when you slip stitch into the blo of the first st to join. Do not break your yarn at the end of each round, just pick it up again when you need it.
Round 1: A: RS: ch1, sc in the side of each row of the Bottom Band, ss in blo of 1st st and change to B. [40]
Round 2: B: ch1, sc in each st around, ss in blo of 1st st and change to A.
Round 3: A: ch1, *Mdc in next st, sc in next 3 sts; rep from * around, ss in blo of 1st st and change to B.
Round 4: B: ch1, *sc in next st, Mdc in next st; rep from * around, ss in blo of 1st st and change to A.
Round 5: A: Rep Round 2.
Round 6: B: ch1, *sc in next 3 sts, Mdc in next st, sc in next st, Mdc in next st, sc in next 2 sts; rep from * around, ss in blo of 1st st and change to A.
Round 7: A: ch1, *Mdc in next 3 sts, sc in next 3 sts, Mdc in next 2 sts; rep from * around, ss in blo of 1st st and change to B.
Round 8: B: Rep Round 6.
Round 9: A: Rep Round 3.
Round 10: B: Rep Round 4.
Round 11: A: Rep Round 3.
Round 12: B: Rep Round 2.
Round 13: A: ch1, *sc in next st, Mdc in next 3 sts; rep from * around, ss in blo of 1st st and continue in A.
Continue in Yarn A and change to the smaller hook to make the Join As You Go Top Band.
Row 1: ch4, sc in 2nd ch from the hook and in each along, ss into next st of the Last Round, turn. [3]
Row 2: sc in blo of each st, turn.
Row 3: ch1, sc in blo of each st, ss in next 2 sts of the Last Round, turn.
Rep Rows 2 and 3 along the Last Round. Once complete, join the First Row to the Last Row of the Top Band with a slip stitch seam. Fasten off and weave in ends.
Create a stunning showstopper with this fun mosaic crochet mitten pattern in sizes for toddlers, children and adults. Using just one colour per round it’s amazingly simple to crochet and toasty warm to wear too!
Option 4: Labyrinth
Using the smaller hook (0.5mm smaller than the hook you met gauge with) and yarn A, make the Bottom Band.
Foundation chain: ch4, turn.
Row 1: sc in the 2nd ch from hook and each across, turn. [3]
Rows 2-40: ch1, sc in blo of each st, turn.
At the end of the final row, join the final row to the first row with a slip stitch seam to form the Bottom Band shape.
Continue with yarn A but switch to the larger hook for the Main Body.
MAIN BODY
Working all sc in blo throughout this section now. Refer to Mosaic Chart (you will need to return to the written pattern once the Main Body is complete for the Top Band instructions) or use the written instructions as follows.
Change colour at the end of each round as indicated when you slip stitch into the blo of the first st to join. Do not break your yarn at the end of each round, just pick it up again when you need it.
Round 1: B: RS: ch1, sc in the side of each row of the Bottom Band, ss in blo of 1st st and change to A. [40]
Round 2: A: ch1, sc in each st around, ss in blo of 1st st and change to B.
Round 3: B: ch1, *sc in next st, Mdc in next st, sc in next 5 sts, Mdc in next st; rep from * around, ss in blo of 1st st and change to A.
Round 4: A: ch1, *sc in next 4 sts, Mdc in next st, sc in next 3 sts; rep from * around, ss in blo of 1st st and change to B.
Round 5: B: ch1, *sc in next st, Mdc in next st; rep from * around, ss in blo of 1st st and change to A.
Round 6: A: ch1, *Mdc in next st, sc in next 3 sts; rep from * around, ss in blo of 1st st and change to B.
Round 7: B: ch1, *sc in next 3 sts, Mdc in next st, sc in next st, Mdc in next st, sc in next 2 sts; rep from * around, ss in blo of 1st st and change to A.
Round 8: A: ch1, *Mdc in next 3 sts, sc in next 3 sts, Mdc in next 2 sts; rep from * around, ss in blo of 1st st and change to B.
Round 9: B: Rep Round 7.
Round 10: A: Rep Round 6.
Round 11: B: Rep Round 5.
Round 12: A: Rep Round 4.
Round 13: B: Rep Round 3.
Continue in Yarn A and change to the smaller hook to make the Join As You Go Top Band.
Row 1: ch4, sc in 2nd ch from the hook and in each along, ss into next st of the Last Round, turn. [3]
Row 2: sc in blo of each st, turn.
Row 3: ch1, sc in blo of each st, ss in next 2 sts of the Last Round, turn.
Rep Rows 2 and 3 along the Last Round. Once complete, join the First Row to the Last Row of the Top Band with a slip stitch seam. Fasten off.
Weave in all crochet ends to finish.
Get your free guide!
Subscribe to get your free guide to choosing and combining colours!
Join HanJan and Share Your Crochet With Us!
I’d love to hear from you and see your HanJan Crochet project! Here’s where you can do that:
📌 PIN THIS POST – save it to your Pinterest crochet board so you can come back to it again and make more!
↗️ SHARE – Share your yarn choices, progress pics, and finished projects on Facebook or Instagram (make sure to use the hashtag) #hanjancrochet
🧶 JOIN – Join thousands of amazing crafters in the HanJan Crochet Community Group on Facebook ready to cheer you on!
✉️📩📬 SUBSCRIBE – It’s an honour to be able to create and share my free crochet patterns with you. I’d love to stay connected and send you regular discount codes and free patterns! Please sign up for my subscriber list to get a free gift right now!
Ready for your next crochet home decor pattern?
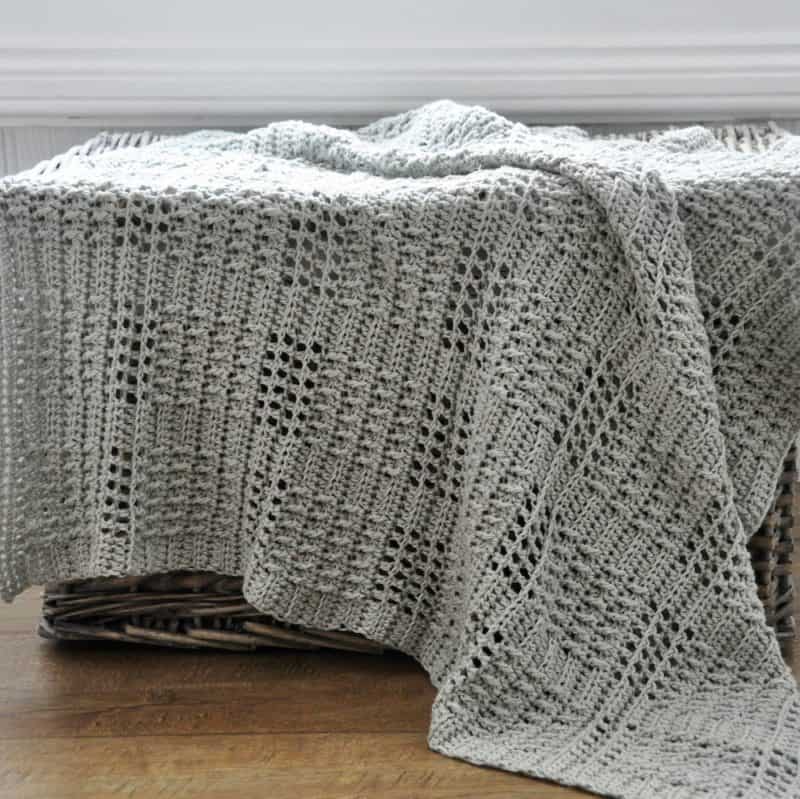
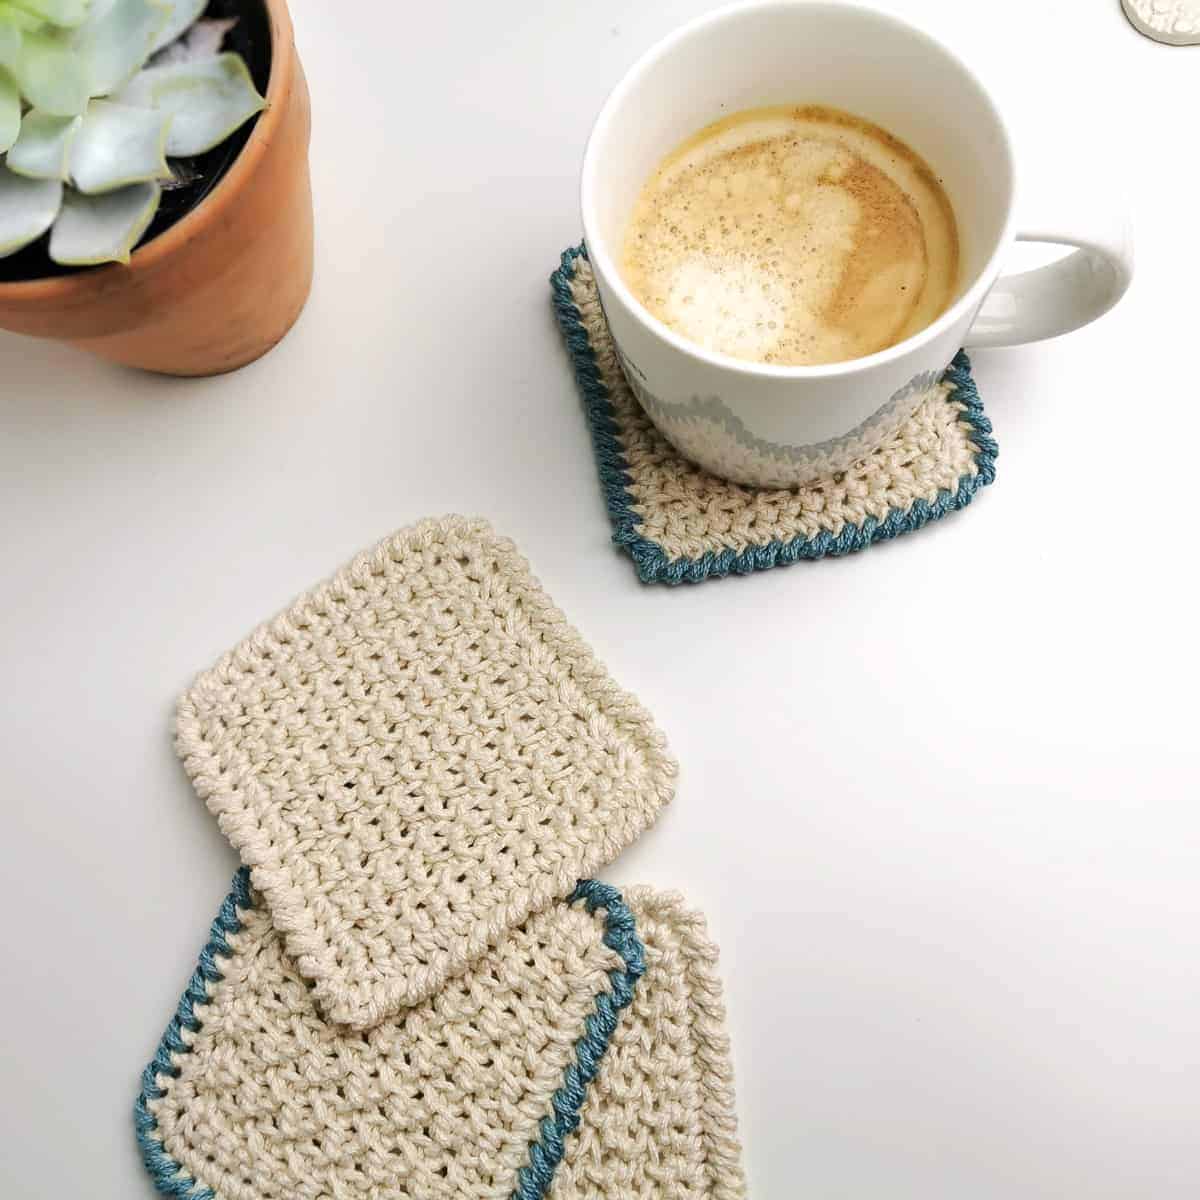
Try your hand at inset mosaic crochet with these 5 crochet washcloth patterns. Stylish yet practical, these eye-catching cloths are perfect for elevating your home or gifting.
Congratulations on crocheting your very own crochet heart coffee cozy! 🌟 Now that you’ve crafted this fun project, why stop here? Dive into my other crochet home decor patterns, each waiting to be transformed into your next crochet masterpiece.