This post may contain affiliate links. Please see my full disclosure and privacy policy for details.

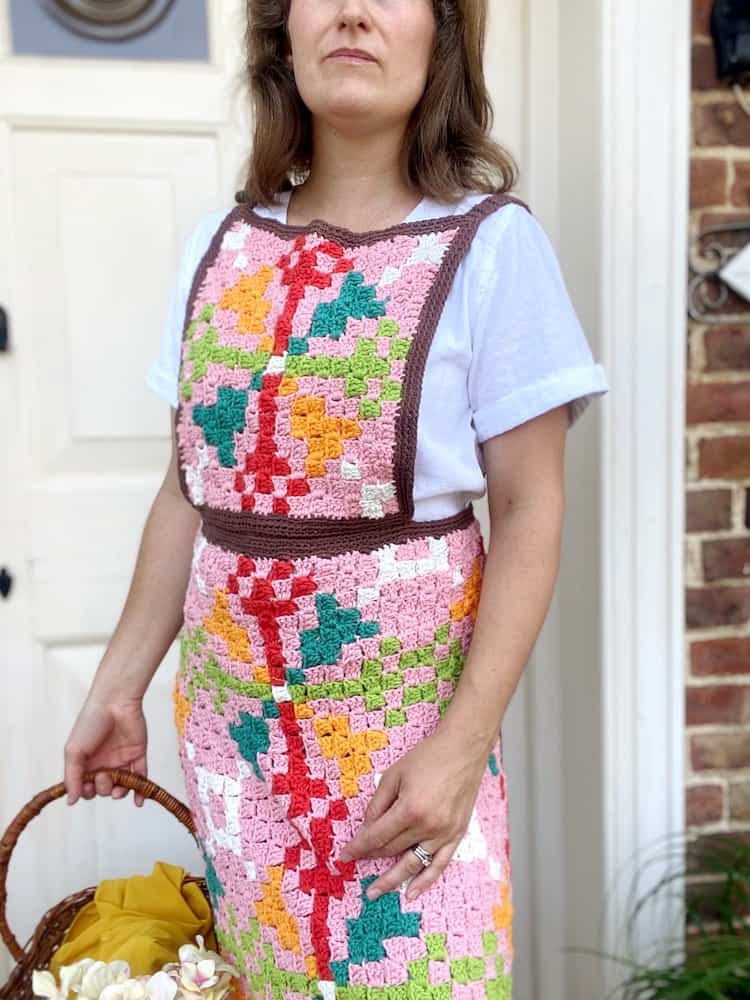
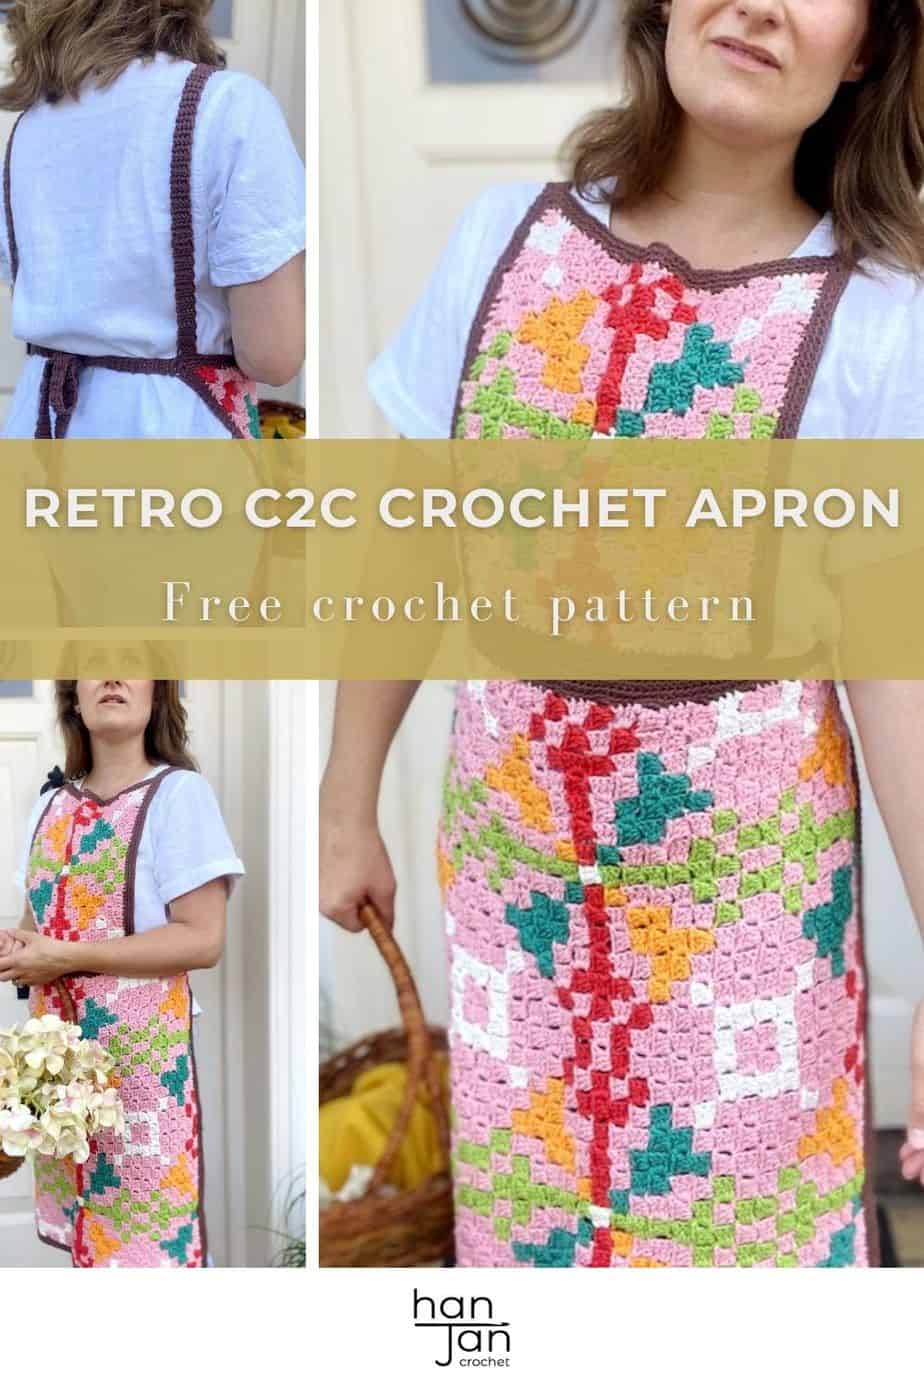
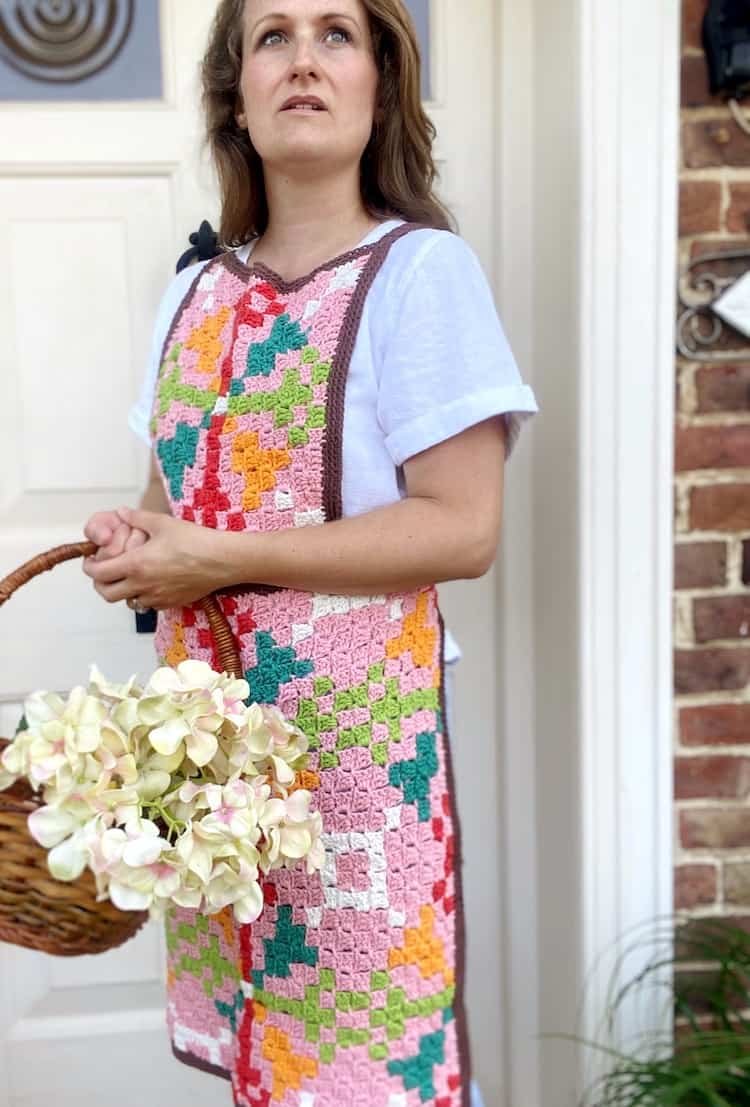
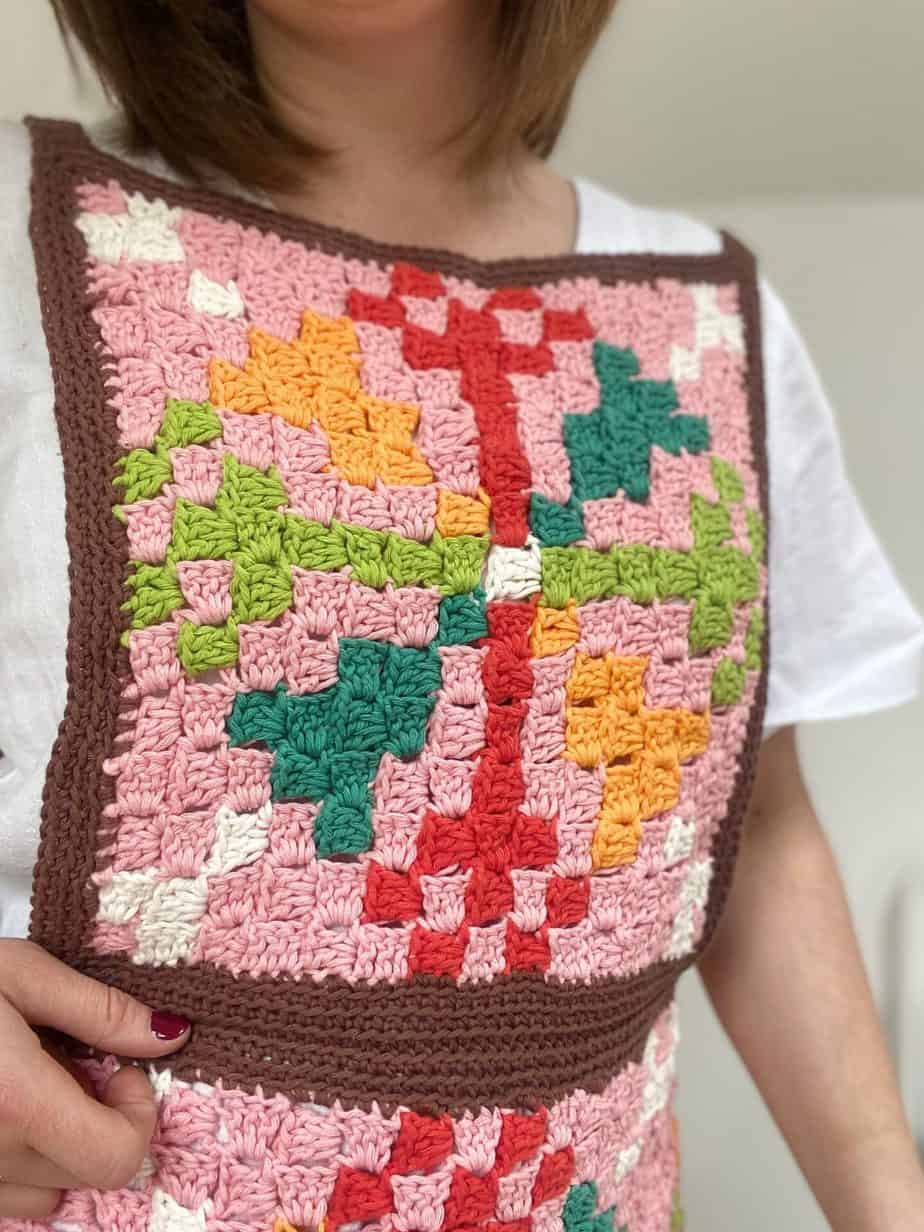
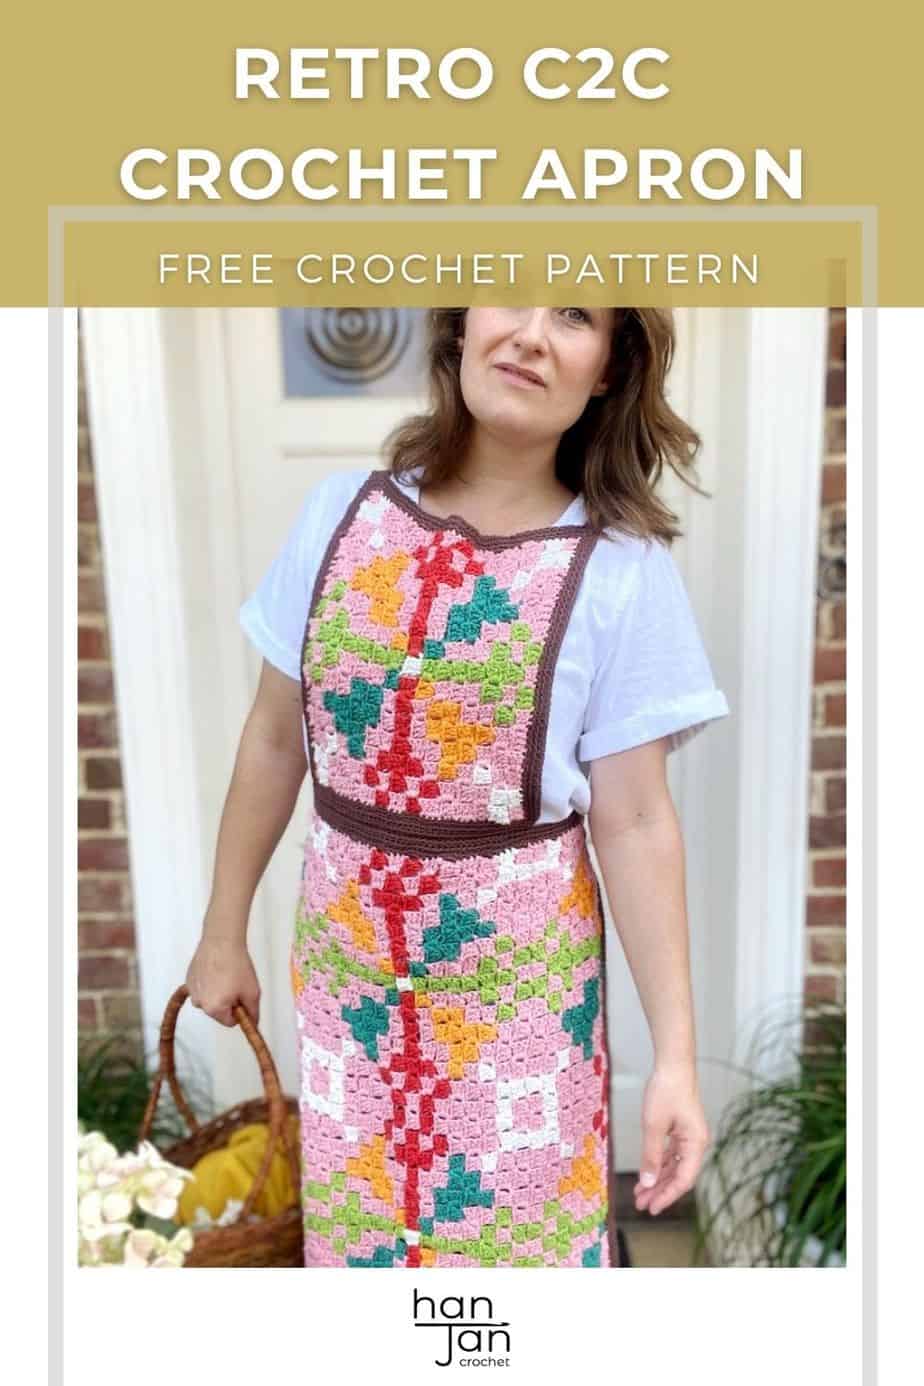
Who doesn’t need a retro C2C crochet apron to go about their work in? This fun geometric crochet pattern uses the C2C crochet method and a simple 2-panel construction to make just the thing for vintage lovers.
Simply switch the colours out and make either a modern or a Christmas crochet apron if you prefer; it’s super easy to customise.
The pattern is an easy level and uses colour work in the corner to corner crochet method which I love! I’ll show you how I neatly change colours in my crochet too to make sure you get nice crisp edges to your squares.
You can carry on reading to find the free pattern here in this blogpost or purchase an ad-free, printable PDF version of the c2c crochet apron pattern in my stores to download and print.
Want to remove Ads?
- Get ad-free access on all posts; 200+ patterns & tutorials!
- Member-only resource library with downloadable PDF guides
- Bonus eBook (Worth over $30)
Table of Contents
About the Martha C2C Crochet Apron Pattern
I have long been a lover of the corner to corner crochet technique which is a great technique that lets you work increasing and decreasing blocks diagonally.
You can keep them simple with a couple of colours or you can really go for it and use a whole host of colours as I have done here.
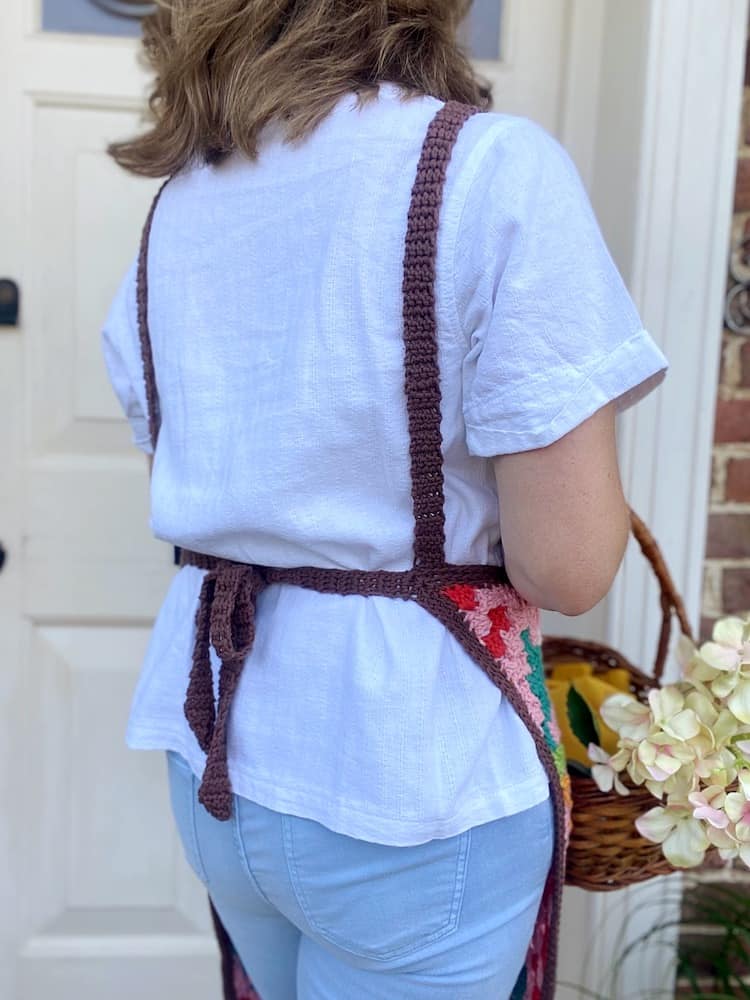
I was commissioned to design this retro crochet apron a few years ago for Simply Crochet and it was so much fun! I wanted the apron construction to be really simple to make the c2c pattern really shine. It also means that you can make the straps as long or as short as you like to tailor to your shape and size.
One thing I did think about was making a Christmas crochet apron for myself in more festive colours but using the same design – I think it would look fabulous!
Pattern Options
This C2C crochet pattern is a free crochet pattern on the blog for everyone to enjoy, just scroll down to find it.
There are a few ways you can access and enjoy this crochet pattern:
Purchase and Print
Get the ad-free, printable PDF with added extras in my pattern stores:

Join and save>>> Join HanJan Crochet and receive regular discount codes (and more free patterns too!)
Pin for later >>> Pin the pattern to your crochet Pinterest board.
Other Patterns You Might Enjoy
I love doing colour work just like in this apron! So before you get going with your apron, here are some more fun colourful crochet patterns you might enjoy and want to add to your list to make!
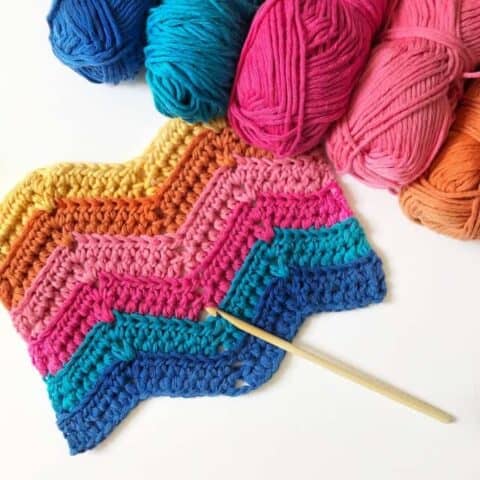
So if you’re a lover of c2c crochet (and not just aprons!) then you might also enjoy these:
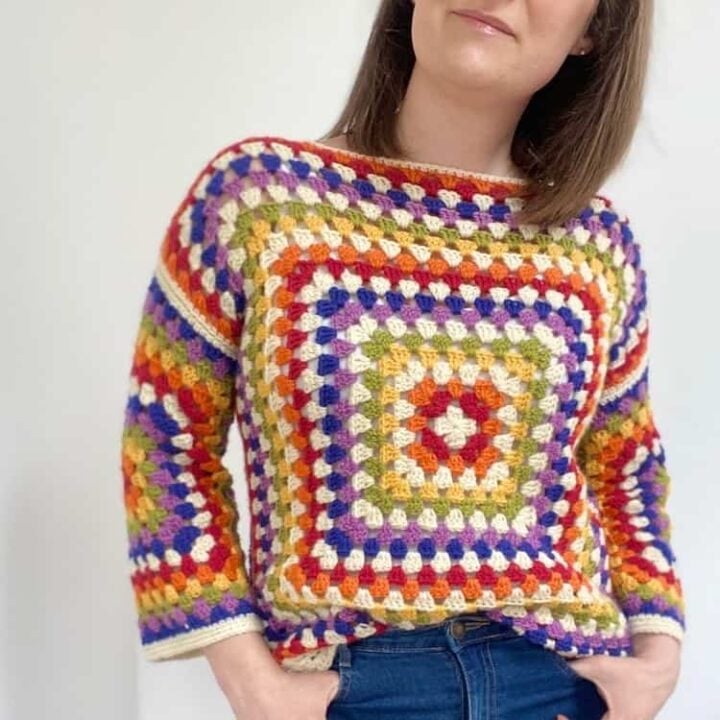
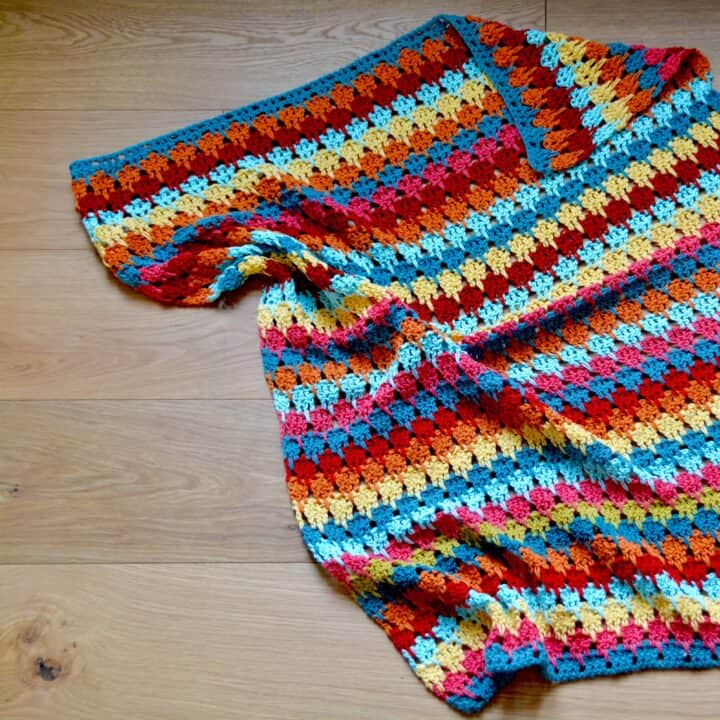
The Diamond Trees Scarf– The Diamond Trees C2C crochet scarf is the ultimate in sumptuous, cosy layering. Made from three simple corner to corner crochet panels and fringed with sophisticated tassels, this is a real statement piece that you will love to wear!
Widcombe Hat- Stylish and modern, easy to wear, great fun to make and with an unusual construction, this hat is guaranteed to be a go-to pattern year after year. In sizes from Baby to Large Adult you can make one for the whole family to enjoy.
The Colourful c2c Pillow pattern – this awesome cushion cover is an absolute riot of colours and is a fabulous project to really get your teeth (or should I say hook) into colourwork.
C2C Cocoon Cardigan Crochet Pattern – Constructed from a simple lace corner to corner square, this flattering crochet cocoon cardigan pattern is a breeze to make and effortless wear.
Yarn
To make the Martha Retro Apron I used Paintbox Yarns Cotton Aran yarn.
It is a 100% cotton yarn at 85m/50g per ball. Here is breakdown of each colour you will need:
5 balls of Yarn E Blush Pink (654)
2 balls of Yarn A Coffee Bean (611)
1 ball of each:
Yarn B Rose Red (614)
Yarn C Lime Green (629)
Yarn D Mandarin Orange (618)
Yarn F Slate Green (627)
Yarn G Champagne White (603)
I would definitely recommend using a cotton yarn for this project rather than any other fibre. Some great alternative cotton yarns are Scheepjes Cahlista yarn (also 100% cotton Aran) and Dishie yarn by WeCrochet (100% cotton worsted weight).
The great thing about all three of these yarns is that they come in a huge selection of colours! You can have great fun choosing them.
Tension and Sizing
One size fits all for this c2c crochet pattern: 96cm length, 56cm at widest point.
The straps are really easy to customise and as you’ll see from the images have plenty of ease in them to allow you to adjust it to fit nicely.
Tension : 6×6 c2c blocks measure 10x10cm.
Materials
Along with your yarn, you will need the following:
- 4.5mm (US G+) crochet hook – my favourites are Furls Streamline Swirl crochet hooks or Clover Amour crochet hook
- Tapestry needle
- Scissors
Glossary and Abbreviations
ch(s) – chain(s)
sp – space
ss – slip stitch
beg – beginning
sk – skip
BLO- back loop only
st(s) – stitch(es)
RS – right side
WS – wrong side
rep – repeat
yrh – yarn round hook
Crochet Stitches
The c2c apron pattern uses the following crochet stitches:
| Standard UK Crochet Term | Standard US Crochet Term |
| dc – double crochet | sc – single crochet |
| tr – treble | dc – double crochet |
Pattern Notes
The apron is made up of 2 panels, which are then joined together. The panels are constructed corner-to-corner, in blocks of (ch3, 3tr).
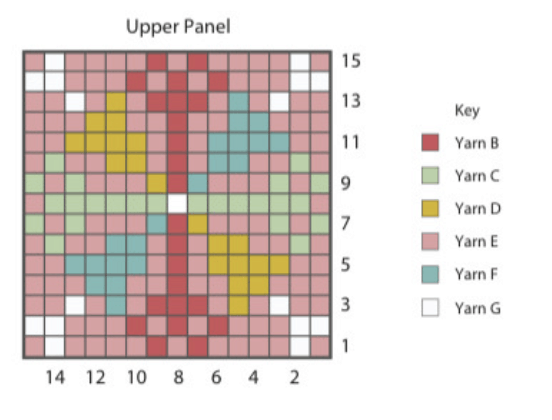
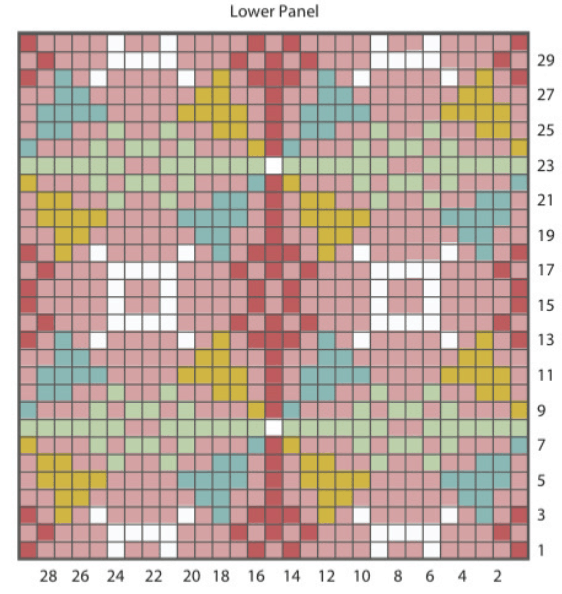
There are two charts which you will need to refer to for the colour changes.
On the charts, each square represents 1 c2c block. Read the charts from the bottom right-hand corner, where Row 1 is.
Each row is read diagonally, with even-numbered rows read from bottom left to top right and odd-numbered rows read from top right to bottom left. I have written out the first 3 rows with the colour changes for guidance.
Change colour in the yrh (yarn round hook) of the ss at the beginning of the new block.
Charts
Video Tutorial – changing colour in c2c crochet
If you’ve ever tried c2c crochet with lots of colours you will know just how easy it is to get yourself in a tangle and how difficult it is to get neat colour changes with your yarn.
I have put together a little video of my tips and tricks to make sure that your colour blocks stay neat and sharp.
It will feel very strange to start with but I promise it will make all the difference to your finished apron. It will make the geometric crochet style really sing!
Watch my video tutorial >>> how to neatly change colour in c2c crochet patterns.
Martha C2C Retro Apron Crochet Pattern
Standard UK Crochet Terms
To unlock Exclusive Content on the HanJan Crochet Blog, all you need to do is click the box below and the Grow.me app will pop up, allowing you to enter your email and create a password.
Once you’ve created an account, every time you see Exclusive Content on my blog (or any others that use Grow), simply login to your Grow account. Be sure to switch to the login screen to enter your login credentials.
If you forget your password, click the “forgot password” link and follow the prompts. Please note that I’m unable to assist with resetting Grow passwords or accessing your Grow account, so be sure to save your login information in a safe place.
Thank you for subscribing and for joining me at HanJan Crochet! I hope you enjoy the exclusive content available on the site and I can’t wait to see what you create 🙂
Fasten off and weave in ends.
LOWER PANEL
Refer to the lower panel chart on page 5 for colour changes.
Using Yarn B, ch6.
Row 1 (RS): Tr in fourth ch from hook, tr in next 2 ch, turn. [1 c2c block]
Rows 2-29: Ch6, tr in fourth ch from hook, tr in next 2 ch, *ss into ch-3 sp; rep from *across, turn. [29 c2c blocks]
Row 30: Ss into next 3 sts, ss into ch-3 sp on previous block made, *ch3, 3tr into same sp, ss into next ch-3 sp across; repeat from * across, turn. [29 c2c blocks]
Rows 31-58: Ss into next 3 sts. ss into ch-3 sp on previous block made, *ch3, 3tr into same sp, ss into next ch-3 sp, ss into ch-3 sp, turn.
Fasten off and weave in ends.
Repeat Rounds 1-3 of Border on the Lower Panel
JOIN PANELS
Place the Upper Panel above the Lower Panel and pin together, making sure there are 7 c2c blocks on the Lower Panel each side of the join. With WS facing, whipstitch the panels together using Yarn A.
WAIST STRAPS
With WS facing, join Yarn A into the top right corner of the Lower Panel.
Row 1 (WS): Ch1, dc in corner sp, dc in next 3 sts down side of Lower Panel, turn. [4 sts]
Row 2 (RS): Ch1, dc in each st across, turn. Repeat Row 2 until the strap measures 50cm.
Fasten off and weave in ends.
With RS facing join Yarn A into the top left-hand corner of the lower Panel.
Repeat the instructions above to make the second strap.
SHOULDER STRAPS
With RS facing, join Yarn A into the top right corner of the Upper Panel.
Row 1 (RS): Ch1, dc in corner sp, dc in next 3 sts across top of Upper Panel, turn.
Row 2 (WS): Ch1, dc in each st across, turn. Repeat Row 2 until the Strap measures 45cm.
Fasten off leaving a long tail.
Sew the end of the Shoulder Strap to the top right corner of the Lower Panel making sure the Strap doesn’t twist. You can use the images as a guide.
With WS facing, join Yarn A into the top left corner of the Upper Panel. Repeat the instructions for the first Shoulder Strap
Standard US Crochet Terms
Fasten off and weave in ends.
BORDER
With RS facing, join Yarn A into any st.
Round 1 Ch1, *(sc in each st to next ch-3 sp, 3sc in ch-3 sp) across to corner, ch1; repeat from * around ss to first sc to join. [180 sts]
Rounds 2-3: (Working in BLO), ch1, *sc in each st to ch-1 corner sp, (sc, ch1, sc) in corner sp; repeat from *around, ss to first sc to join. [196 sts]
Fasten off and weave in ends.
LOWER PANEL
Refer to the lower panel chart on page 5 for colour changes.
Using Yarn B, ch6.
Row 1 (RS): Dc in fourth ch from hook, dc in next 2 ch, turn. [1 c2c block]
Rows 2-29: Ch6, dc in fourth ch from hook, dc in next 2 ch, *ss into ch-3 sp; rep from *across, turn. [29 c2c blocks]
Row 30: Ss into next 3 sts, ss into ch-3 sp on previous block made, *ch3, 3dc into same sp, ss into next ch-3 sp across; repeat from * across, turn. [29 c2c blocks]
Rows 31-58: Ss into next 3 sts. ss into ch-3 sp on previous block made, *ch3, 3 dc into same sp, ss into next ch-3 sp, ss into ch-3 sp, turn.
Fasten off and weave in ends.
Repeat Rounds 1-3 of Border on the Lower Panel
JOIN PANELS
Place the Upper Panel above the Lower Panel and pin together, making sure there are 7 c2c blocks on the Lower Panel each side of the join. With WS facing, whipstitch the panels together using Yarn A.
WAIST STRAPS
With WS facing, join Yarn A into the top right corner of the Lower Panel.
Row 1 (WS): Ch1, sc in corner sp, sc in next 3 sts down side of Lower Panel, turn. [4 sts]
Row 2 (RS): Ch1, sc in each st across, turn. Repeat Row 2 until the strap measures 50cm.
Fasten off and weave in ends.
With RS facing join Yarn A into the top left-hand corner of the lower Panel.
Repeat the instructions above to make the second strap.
SHOULDER STRAPS
With RS facing, join Yarn A into the top right corner of the Upper Panel.
Row 1 (RS): Ch1, sc in corner sp, sc in next 3 sts across top of Upper Panel, turn.
Row 2 (WS): Ch1, sc in each st across, turn. Repeat Row 2 until the Strap measures 45cm.
Fasten off leaving a long tail.
Sew the end of the Shoulder Strap to the top right corner of the Lower Panel making sure the Strap doesn’t twist. You can use the images as a guide.
With WS facing, join Yarn A into the top left corner of the Upper Panel. Repeat the instructions for the first Shoulder Strap
Join HanJan and Share Your Crochet!
I’d love to stay connected with you so please do sign up for my subscriber list if you’d like to. Looking forward to hearing from you and sending you your free gift!
Thank you so much for being here to share in my free crochet patterns and supporting my blog. It’s such an honour to be able to create and share my craft with you.
I’d love to see your finished crochet projects and so please share them with me in one (or all!) of the following ways:
- Share a picture on Instagram and tag me #hanjancrochet
- Share your projects on Ravelry
- Share your projects on LoveCrafts
- Share a picture in the HanJan Crochet Facebook group