This post may contain affiliate links. Please see my full disclosure and privacy policy for details.
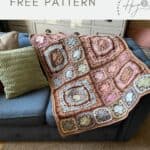

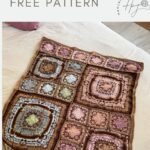
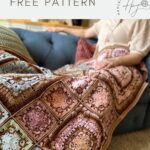
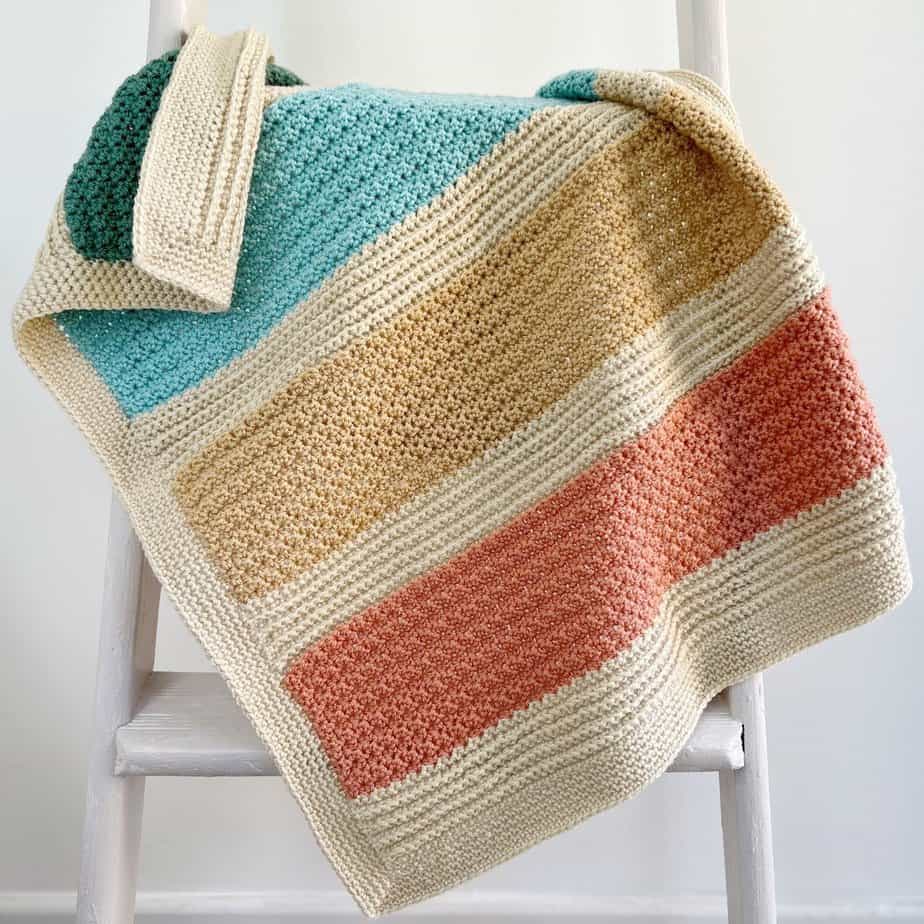
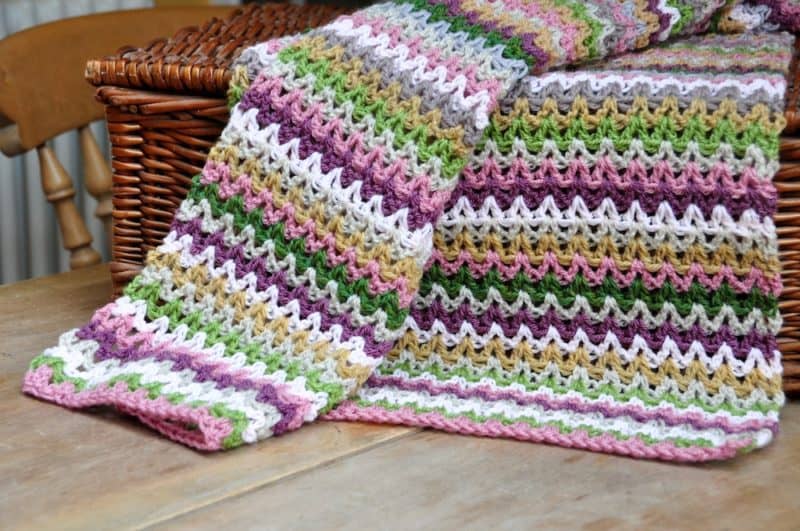
This beautiful crochet blanket pattern is an heirloom-style project made from 3 different sized crochet motifs that can be arranged in endless ways.
Unlike traditional crochet squares blanket patterns that repeat the same motif, this design combines different motif sizes so you can mix and match them to create a completely unique crochet blanket.
In this post you’ll find everything you need to know how to make this unique crochet blanket step by step, including materials, stitches, a detailed video tutorial and free written pattern for blog subscribers.
Pattern Overview: Beautiful Crochet Blanket
Pattern for: Spring into Bloom blanket – a beautiful crochet blanket made from squares.
Yarn used: Sport weight acrylic yarn
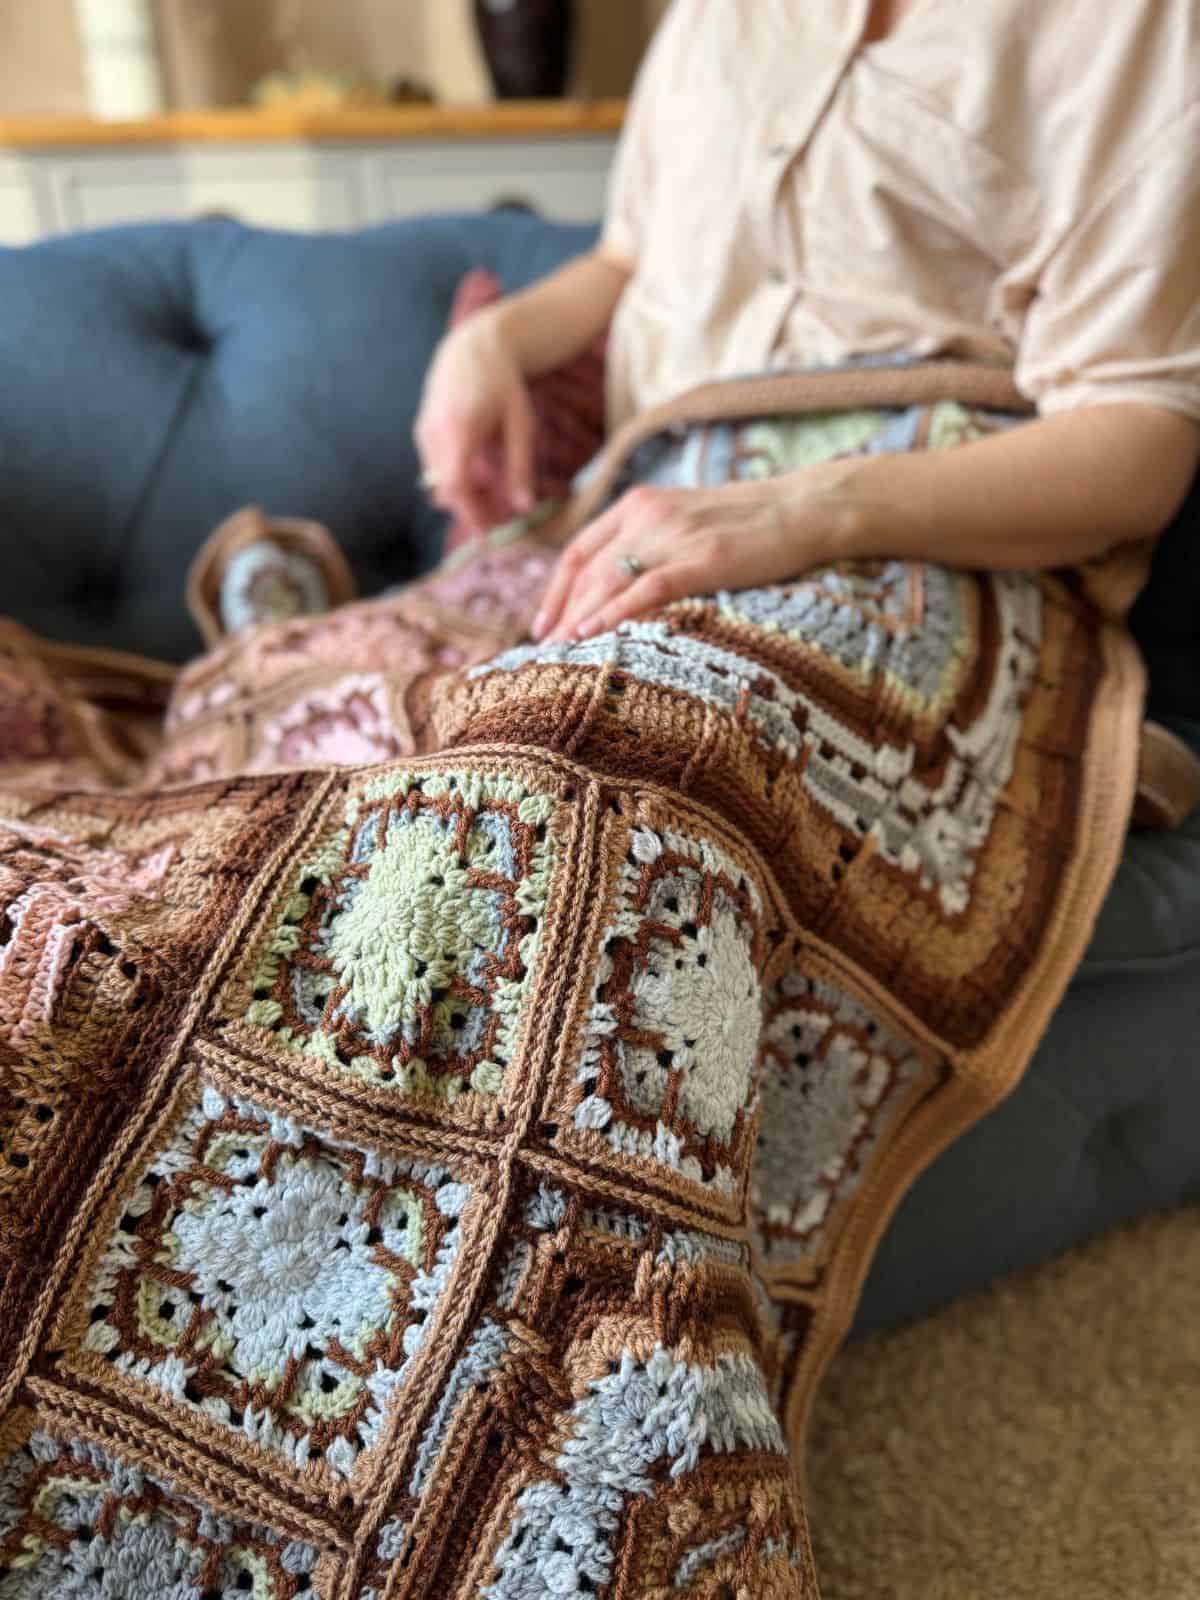
Difficulty level: Intermediate – with lots of interesting stitches and texture.
Stitches used: post stitches, clusters and trebles sit side by side with the basic stitches.
Hannah’s Notes: The really exciting thing about this crochet blanket is that I’ve designed it so that the 3 different sized squares can tesselate perfectly to form the main body before adding the final border. Plus, it’s a great stash buster too! Use your scrap yarn to create a truly unique crochet blanket, full of meaning and memories!
SUMMARIZE & SAVE THIS CONTENT ON
Table of Contents
Things you’ll love about this unique crochet blanket pattern
Crochet Blanket Pattern Materials
- A 4mm(G) crochet hook or hook needed to meet gauge
- Scissors
- Tapestry needle
- Stitch markers
To make this crochet squares blanket pattern, I used both Heatherly Sport, which is 80% acrylic, 20% Merino Wool, (328yds/300m/100g); and Brava Sport, which is 100% premium acrylic, (340yds/310m/100g).
The colours I used were Sweetheart (A), Peach Fuzz (B), Sweet Bing (C), Key Lime (D) and Bedtime (E) in Heatherly Sport, and Clarity (F), Almond (G), Brindle (H) and Sienna (I) in Brava Sport.
They are both category 2, sport weight yarns, which gives the blanket a really lovely drape. Check our handy yarn weight chart and guide to find out more about yarn weights and categories.
The beauty of motif blankets though is that you can pretty much use any yarn and hook to create your very own masterpiece! By changing to a thicker/thinner yarn and larger/smaller hook sizes you can make your blanket perfect for you.
You will require approximately 275 metres, 300 yards of each of the following colours: Sweetheart (A), Peach Fuzz (B), Sweet Bing (C), Key Lime (D), Bedtime (E), and Clarity (F). This is 1 ball each of the recommended yarn.
You will also need 550 metres, 600 yards of Almond (G) (2 balls); and 510 metres, 560 yards of each of Brindle (H) and Sienna (I). That’s 2 balls of each of these colours too.
In total for the blanket, this is 3220 metres, 3520 yards.
Yarn Substitutes
Here are some lovely yarns that I think would work brilliantly!:
- Mellowspun DK, 100% Acrylic, 284yds/260m/100g
- Premier Anti-Pilling Yarn, 100% Acrylic, 273yds/250m/100g
- Stylecraft special DK, 100% Acrylic, 323yds/295m/100g
- Lion Brand Wool-Ease DK, 80% Acrylic, 20% Wool, 232yds/212m/85g
Sizing
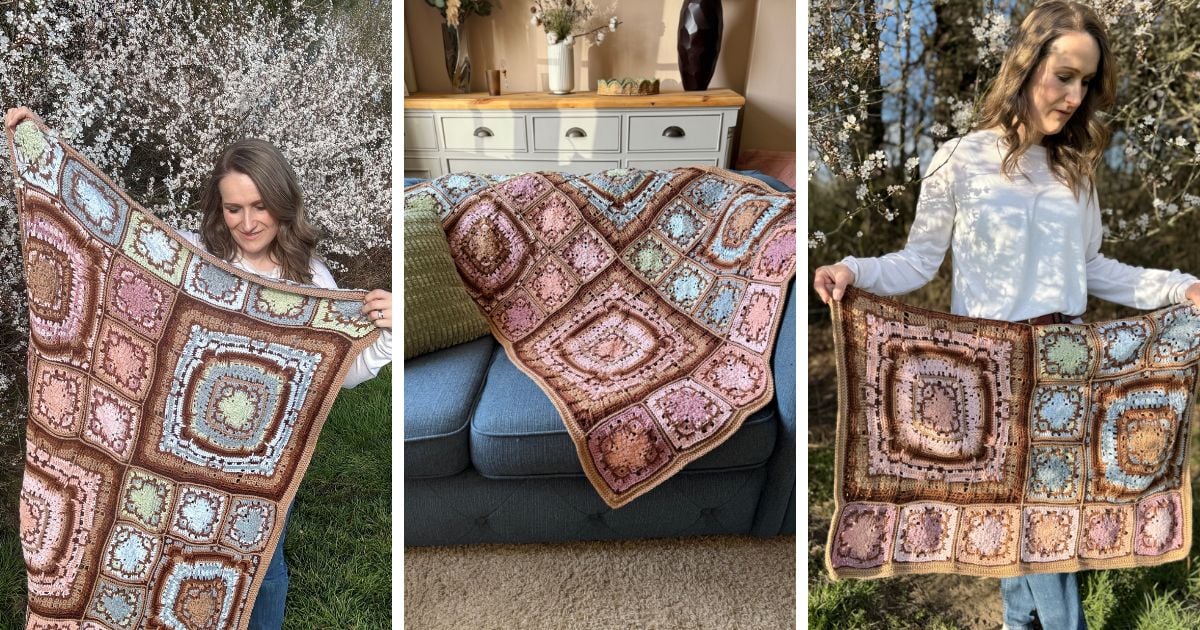
The finished blanket measures 38″ by 50″ but you can adjust to lots of different sizes.
If you’re enjoying making this crochet blanket from squares, then why not try a few more? Here’s a few other of my designs you might like:
- Hexagon Crochet Blanket Pattern – a celebration of flowers and geometry
- Textured Crochet Blanket Pattern – with cleverly textured square motifs
- Chunky Crochet Blanket Pattern – quick to make in bulky yarn
Glossary and Abbreviations
- blo – back loop only (how to work in the back loop only)
- ch(s) – chain(s) (chain stitch tutorial)
- ch-sp(s) – chain space(s)
- rep – repeat
- sp – space
- ss/sl st – slip stitch (how to crochet a slip stitch)
- st(s) – stitch(es)
- Yoh – yarn over hook
Stitches
The pattern is written in standard US terms and uses the following crochet stitches:
Insert the hook into the next stitch, yarn over, and pull through the stitch and the active loop on the hook.
- Insert the hook into the next stitch.
- Yarn over and pull up a loop.
- Yarn over again, and pull the yarn through both loops on the hook.
- Yarn over, and insert the hook into the next stitch.
- Yarn over and pull up a loop.
- Yarn over again, and pull the yarn through all three loops on the hook.
Front Post Stitches (FP)
Work your stitch as usual, but insert the hook around the post of the stitch of the previous round/indicated round rather than the top of the stitch as you would normally.
- Yarn over and insert the hook into the next stitch.
- Yarn over and pull up a loop.
- Yarn over again, and pull the yarn through two loops on the hook.
- Yarn over again, and pull the yarn through remaining two loops on the hook.
Treble Crochet (tr)
- Yarn over twice, and insert the hook into the next stitch.
- Yarn over and pull up a loop.
- (Yarn over again, and pull the yarn through two loops on the hook), twice.
- Yarn over again, and pull the yarn through remaining loops on the hook.
3 double crochet cluster stitch (3dc-Cl)
- Yarn over, and insert the hook into the next stitch.
- Yarn over and pull up a loop.
- Yarn over again, and pull the yarn through two loops on the hook, rep from Step 1 two more times in same stitch.
- Yarn over again, and pull the yarn through all loops on the hook.
If you like this pattern, you might also like this modern crochet blanket pattern using worsted weight yarn.
How do you Make a Crochet Squares Blanket?
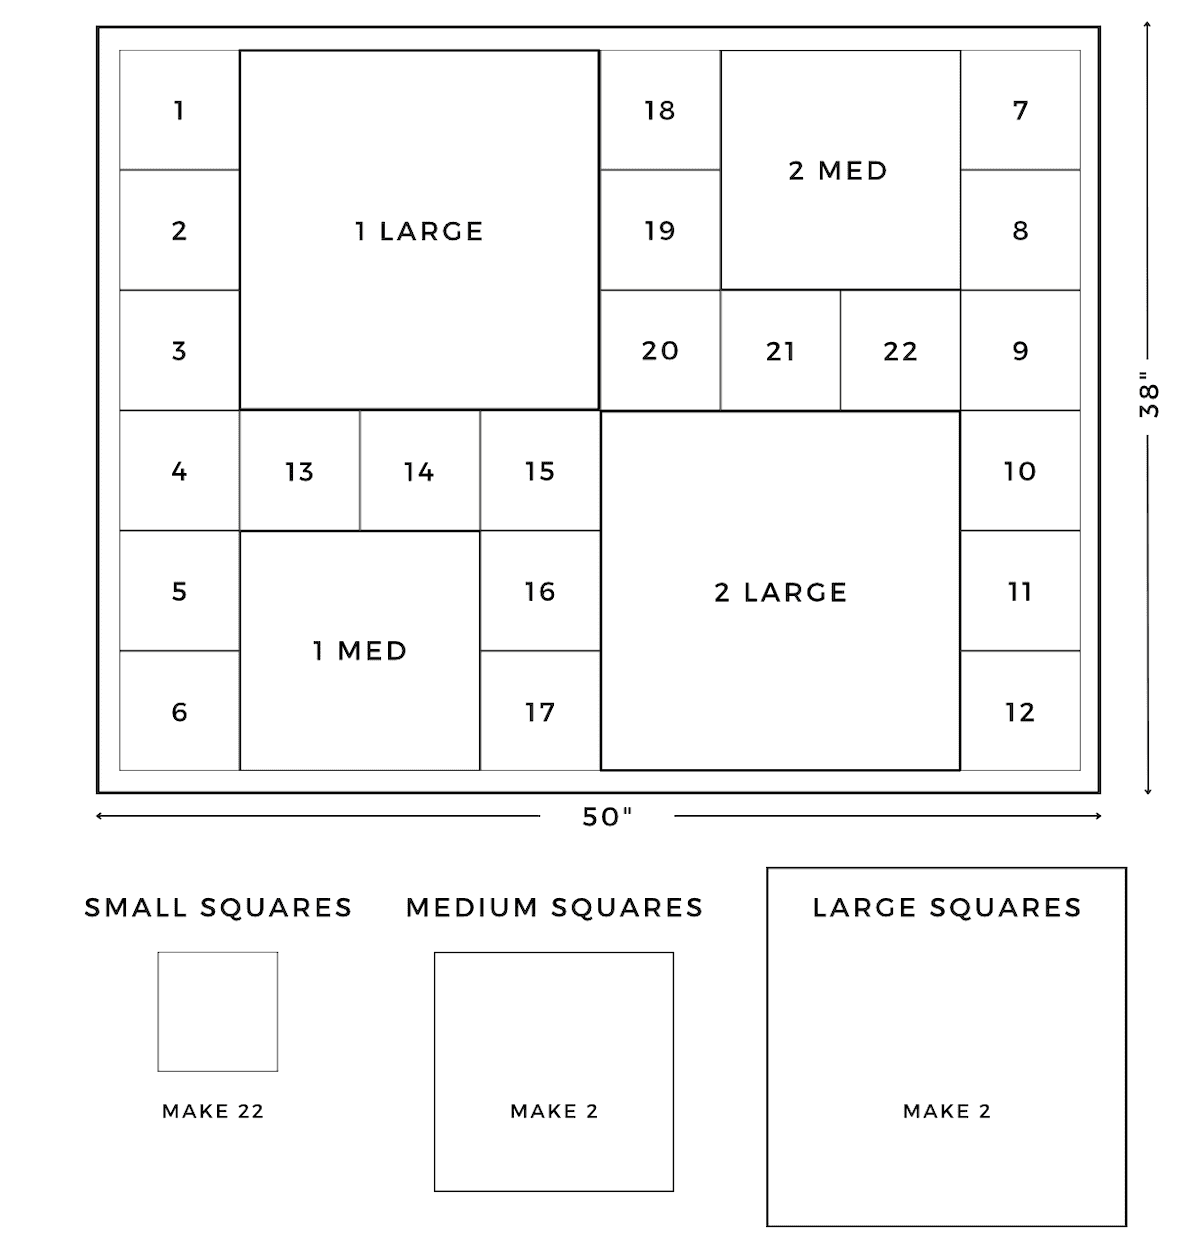
The blanket is designed using 3 different sized square motifs:
small (6″), medium (12″) and large (18″).
These are joined together to form the body of the blanket and a simple border is then added to the entire blanket to finish.
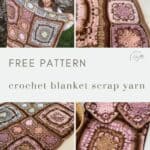
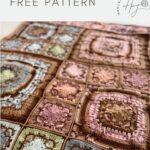
Below is the layout that I used but there are so many other options using the squares if you’d like to try something different!
Pattern Gauge
Gauge: Each Small Square Motif measures 6″ by 6
To make the swatch you’ll need to crochet Rounds 1-9 of the Small Square Motif.
Adjust your hook size to get your swatch as close to the gauge measurements as you can.
Making a crochet gauge swatch is particularly important when crocheting projects (and even more so for garments) to ensure that it ends up the desired size.
Making Your Crochet Blanket Perfect For You
One of the beauties of this blanket is how versatile it can be.
In my version, I made 22 small squares, 2 medium squares and 2 large squares. You can arrange these in any way you like, although I share my version below. You can of course also mix it up and make a different number of each square and create a completely new version!
CHANGING THE SIZE
The blanket is designed so that the squares can tesselate perfectly to form the main body before adding the final border. If you’d like to change the size of your blanket, here are a few ideas of how you can do it:
Change the Yarn Weight: Changing the weight of yarn that you use and then following the pattern exactly will easily adjust the size of your blanket. When you work your first small square for your gauge swatch take the measurements and compare them to the ones in the pattern. If you are happy with the drape of your swatch (you may need a larger or smaller hook to suit your yarn weight) then you are good to go.
You can calculate the size that your blanket will be by adding your small square measurements together in the layout you’d like.
Make More/Less Squares: The world really is your oyster here! You can make as many of each size of square as you like to give yourself any size (square or rectangle) or combination of blanket that you want.
You just need to make sure to plan out your squares first remembering that your proportions are in thirds. You will fit 3 small or 1 medium and 1 small along the side of a large for example.
Change the Border: A really simple way to change your blanket is to work a much deeper border for it. This can just be by continuing to repeat the border instructions as they are written or how about trying something else?
You could work the border until it has enough stitches that are a multiple of 24 (the number of stitches along the small square side). Then you could make more small squares to add around the edge of the entire blanket. This would be amazing in block colours to really make them pop!
Get Creative!
The best thing about blankets that are made in motifs like this is that you can pick and choose the parts that you want to use!
You could even find other crochet squares that use the same stitch count on each edge of 24 (small), 48 (medium) and 72 (large) and mix those into your blanket too!
What will you choose to do? I can’t wait to see!
Before you jump into crocheting your blanket squares, take a moment to read through the pattern notes—it’s a game-changer!
These handy insights will not only simplify your pattern-reading journey but also ensure a smoother crochet experience. You’ll find helpful tips on deciphering the sizing, customisation and more.
Trust me, a quick peek at these notes will set you up for crochet success!
- Ch1 at the beginning of the round does not count as a stitch.
- When a stitch is worked into a stitch on a round/s below then the corresponding st of the round is skipped and does not need working into.
- You can work into the actual chains throughout the pattern as I do if desired or into the chain spaces.
- At the beginning of a round where it states e.g. FPdc in next st, for the first time of working work in the st that you are already in at the beginning of the round. On the repeat of the instruction work into the next st.
- The pattern is worked in rounds.
- Read through the entire pattern before beginning.
- Make sure that you are familiar with all of the stitches in the abbreviations list before you begin.
- Stitch counts are given in [ ] at the end of each round. If no stitch count is given, then the count is the same as the previous Round.
- Colour changes are indicated below should you wish to replicate my sequence.
Beautiful Crochet Blanket from Squares
There are a few options for you to access and enjoy this crochet pattern:
- View the free pattern on the blog – all blog subscribers will be able to view the patterns supported by ads by logging into their Grow account.
- Purchase the individual pattern on Etsy or Ravelry as a beautifully formatted PDF with extra stitch charts, schematic and colour information page and more!
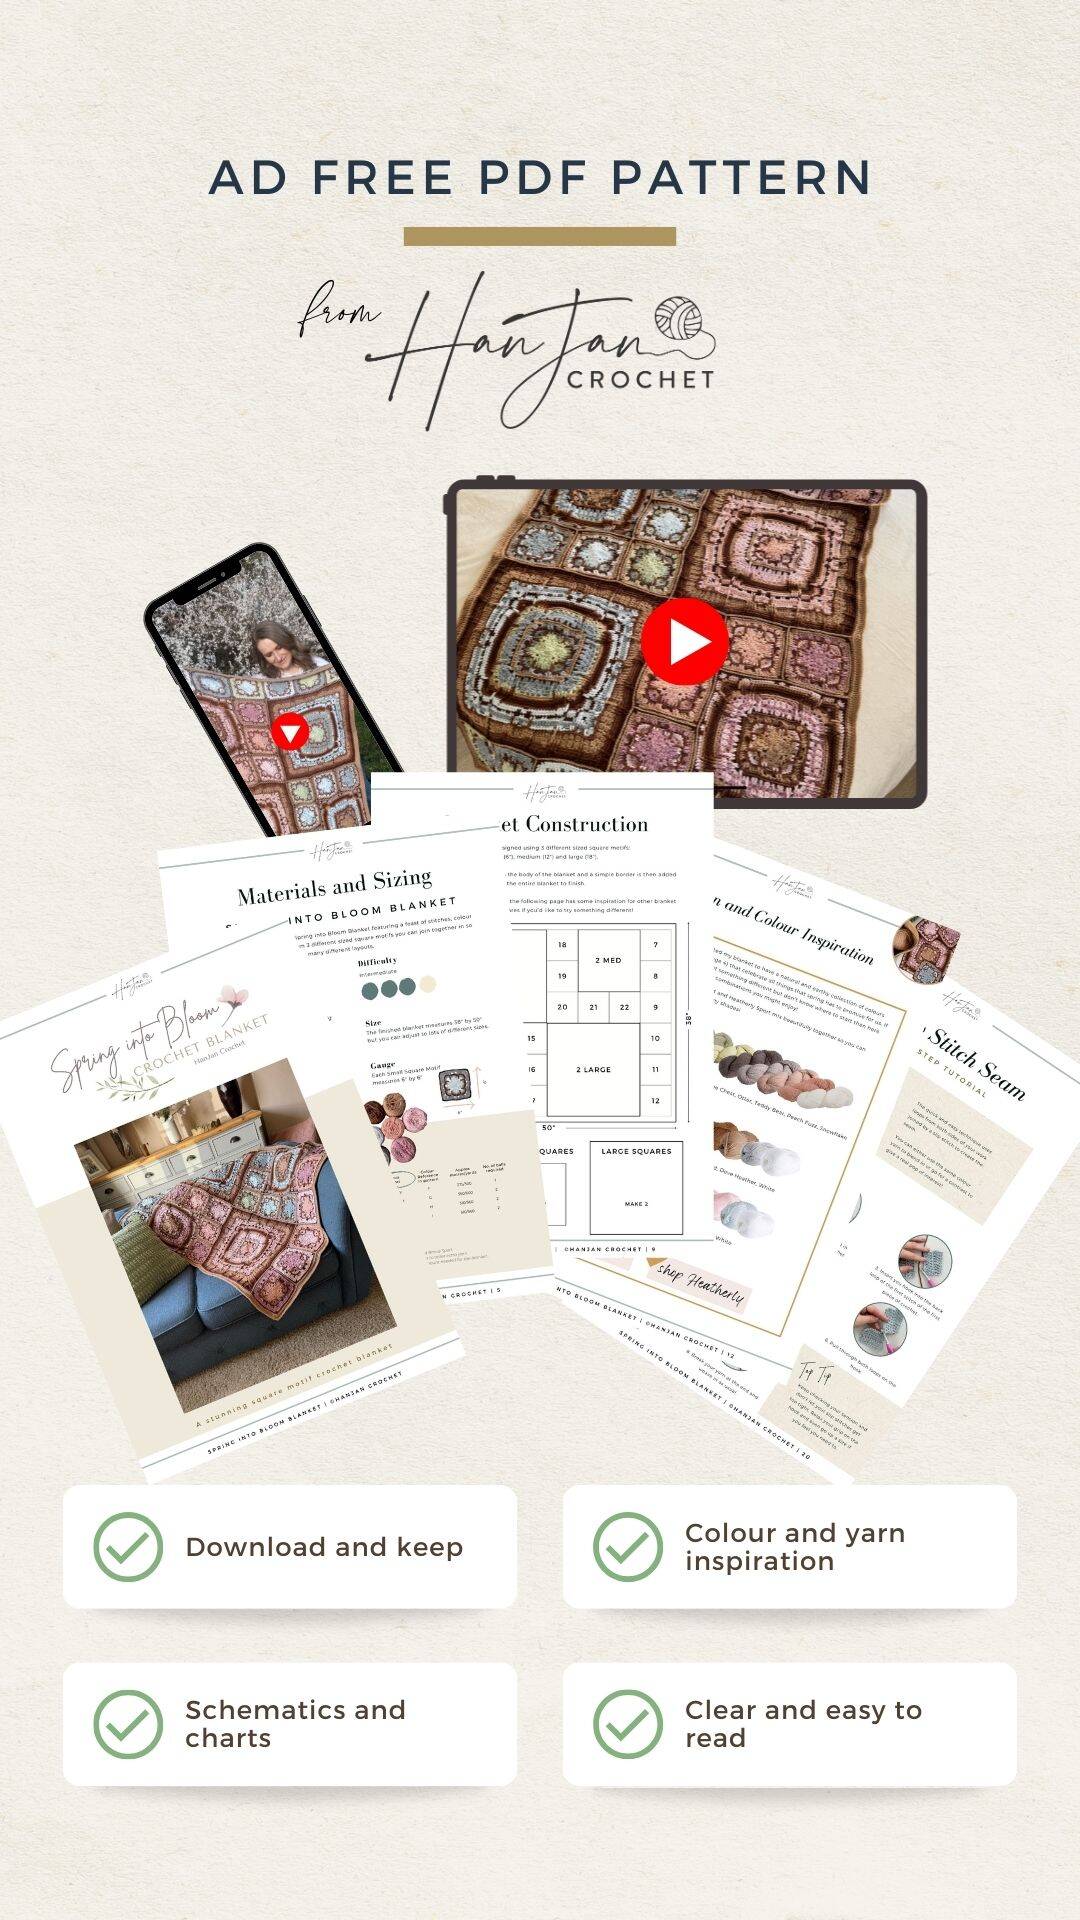
Get this pattern ad free
Get the PDF Pattern!
Get the ad-free Ebook for my blanket with 21 pages including extra layout options, customisation ideas and more colour inspiration!
Pattern Support
I am delighted to invite you to join the HanJan Crochet Community Facebook Group where we host all pattern support queries and love to see your progress, yarn choices and finished projects!
Crochet Pattern Free for Blog Subscribers to View
US Terminology
To unlock Exclusive Content on the HanJan Crochet Blog, all you need to do is click the box below and the Grow.me app will pop up, allowing you to enter your email and create a password.
Once you’ve created an account, every time you see Exclusive Content on my blog (or any others that use Grow), simply login to your Grow account. Be sure to switch to the login screen to enter your login credentials.
If you forget your password, click the “forgot password” link and follow the prompts. Please note that I’m unable to assist with resetting Grow passwords or accessing your Grow account, so be sure to save your login information in a safe place.
Thank you for subscribing and for joining me at HanJan Crochet! I hope you enjoy the exclusive content available on the site and I can’t wait to see what you create 🙂
COLOUR CHANGES
Here are the details of colour changes used throughout the blanket. You can of course change colours wherever you like though!
KEY – A: Sweetheart, B: Peach Fuzz, C: Sweet Bing, D: Key Lime, E: Bedtime, F: Clarity, G: Almond, H: Brindle, I: Sienna
For each square the sequence of letters will tell you which colour to use for each round. See above for the layout.
Small Squares
SQUARE 1: B, B, B, B, C, H, C, C, I
SQUARE 2: C, C, C, C, A, H, A, A, I
SQUARE 3: A, A, A, A, B, H, B, B, I
SQUARE 4: B, B, B, B, A, H, A, A, I
SQUARE 5: C, C, C, C, B, H, B, B I
SQUARE 6: A, A, A, A, C, H, C, C, I
SQUARE 7: D, D, D, D, F, H, F, F, I
SQUARE 8: F, F, F, F, E, H, E, E, I
SQUARE 9: F, F, F, F, D, H, D, D, I
SQUARE 10: E, E, E, E, F, H, F, F, I
SQUARE 11: D, D, D, D, E, H, E, E, I
SQUARE 12: E, E, E, E, D H, D, D, I
SQUARE 13: E, E, E, E, D, H, E, G, I
SQUARE 14: F, F, F, F, D, H, F, G, I
SQUARE 15: D, D, D, D, E, H, D, G, I
SQUARE 16: F, F, F, F, E, H, F, G, I
SQUARE 17: E, E, E, E, F, H, E, G, I
SQUARE 18: C, C, C, C, B, H, C, G, I
SQUARE 19: B, B, B, B, A, H, B, G, I
SQUARE 20: A, A, A, A, C, H, A, G, I
SQUARE 21: B, B, B, B, C, H, B, G, I
SQUARE 22: C, C, C, C, A, H, C, G, I
Square 1: Step by Step Video Tutorial
Come along as I crochet the first square for this unique crochet blanket and see just how easy it is in our step-by-step video tutorial.
Medium Squares
SQUARE 1: G, G, G, G, E, H, G, H, I, E, F, E, F, G, H, H, I, H, G, E, I
SQUARE 2: G, G, G, G, A, H, G, H, I, A, C, A, C, G, H, H, I, H, G, A, I
Large Squares
SQUARE 1: B, B, B, B, A, H, A, G, I, A, A, A, B, G, H, H, I, H, B, B, I, A, B, A, H, G, G, H, H, I, I
SQUARE 2: D, D, D, D, E, H, E, G, I, E, E, E, D, G, H, H, I, H, F, F, I, F, E, F, H, G, G, H, H, I, I
Joining and Border
JOINING: USE G THROUGHOUT
BORDER: USE G THROUGHOUT
PATTERN
SMALL SQUARE
Make 22 (6″ by 6″ each)
The written pattern will assume that you will follow the colour changes but feel free to change and work as you would like.
Any instructions that state to break yarn at the end of a round do so because we rejoin in a different place to begin the next round.
If no such instruction is written then you can change colour on the last yarn over and pull through of the last st of the round before slip stitching in the first stitch to join.
Make a Magic Ring.
Round 1: 12dc into Magic Ring, ss in 1st st to join. [12dc]
Round 2: ch1, *3dc-Cl in each of the next 3 sts, ch3; rep from * around, ss in 1st st to join [12 x 3dc-Cl, 4x 3ch-sps]
Round 3: ss in between 1st and 2nd 3dc-Cl, ch1, 3dc-Cl in same place, 3dc-Cl between next two 3dc-Cl, ch1, (2dc, ch3, 2dc) in ch3-sp, ch1, *(3dc-Cl in between next two 3dc-Cl) twice, ch1, (2dc, ch3, 2dc) in ch3-sp, ch1; rep from * 2 more times, ss in 1st st to join [8 x 3dc-Cl, 16dc, 8 x ch1-sp, 4 x ch3-sp]
Round 4: ss in between 1st and 2nd 3dc-Cl, ch1, *3dc-Cl in between next two 3dc-Cl stitches, ch1, dc in next 2sts, ch1, skip next st, (2dc, ch3, 2dc) in ch3-sp, ch1, skip next st, dc in next 2sts, ch1; rep from * around, ss in 1st st to join [4 x 3dc-Cl, 32dc, 16 x ch1-sp, 4 x ch3-sp]. Break yarn.
Round 5: Join yarn to any ch3-sp, ch1, *3hdc in ch3-sp, hdc in next 2sts, ch1, skip next st, FPdc in next 2sts, ch3, skip (ch1, 3dc-Cl, ch1), FPdc in next 2sts, ch1, skip next st, hdc in next 2sts; rep from * around, ss in 1st st to join [16FPdc, 28hdc, 8 x ch1-sp, 4 x ch3-sp]
Round 6: ch1, *hdc in next st, (hdc, ch1, hdc) in next st, hdc in next 3sts, FPtr around st below in Round 3, FPdc in next 2sts, 3hdc in ch3-sp, FPdc in next 2sts, FPtr around st below in Round 3, hdc in next 2sts; rep from * around, ss in 1st st to join [8FPtr, 16FPdc, 44hdc, 4 x ch1-sp] Break yarn.
Round 7: join to any corner ch1-sp, ch1, *3dc-Cl in ch1-sp, ch2, skip next st, dc in next 3sts, FPdc in next 2sts, ch2, skip next 2sts, 3dc-Cl in next st, ch2, skip next 2sts, FPdc in next 2sts, dc in next 3sts, ch2, skip next st; rep from * around, ss in 1st st to join. [20sts each side: 8 x 3dc-Cl, 16FPdc, 24dc, 16 x ch2-sp]
Round 8: ch1, *(hdc, ch2, hdc) in 3dc-Cl, 3dc-Cl in next ch2-sp, ch1, hdc in next 15sts, ch1, 3dc-Cl in next ch2-sp; rep from * around, ss in 1st st to join [23sts each side: 8 x 3dc-Cl, 68hdc, 4 x ch2-sp, 8 x ch1-sp]
Round 9: ch1, sc in same st, *3sc in next ch2-sp, sc in next 21sts; rep from * two more times, 3sc in next ch2-sp, sc in next 20sts, ss in 1st to join [24sts each side: 96sc] Break yarn.
Square 2: Step by Step Video Tutorial
Come along as I crochet the second square for this unique crochet blanket and see just how easy it is in our step-by-step video tutorial.
MEDIUM SQUARE
Make 2 (12″ by 12″ each)
Rounds 1-9: work as for Small Square.
Round 10: join to centre sc of 3sc in ch2-sp, ch1, *(dc, ch1, dc) in same st (next st on rep), dc in next st, FPdc in next st 2 rounds below, (ch1, skip next st, dc in next 2sts) twice, ch1, skip next st, dc in next st, ch1, skip next st, 3dc-Cl in next st, ch1, skip next st, dc in next st, (ch1, skip next st, dc in next 2sts) twice, ch1, skip next st, FPdc in next st 2 rounds below, dc in next st; rep from * around, ss in 1st st to join [26sts each side: 4 x 3dc-Cl, 8FPdc, 56dc, 36 x ch1-sp]
Round 11: ch1, *hdc in next st, (hdc, ch2, hdc) in ch1-sp, hdc in next st, FPdc in next 2sts, ch1, skip next st, hdc in next st, ch1, skip next st, 3dc-Cl in ch1-sp, ch2, skip next 2sts, (3dc-Cl in ch1-sp, ch1, skip next st) 3 times, 3dc-Cl in next ch1-sp, ch2, skip next 2sts, 3dc-Cl in next ch1-sp, ch1, skip next st, hdc in next st, ch1, skip next st, FPdc in next 2sts; rep from * around, ss in 1st st to join [29 sts each side: 24 x 3dc-Cl, 16FPdc, 24hdc, 12 x ch2-sp, 28 x ch1-sp]
Round 12: ch1, *hdc in next st, ch1, skip next st, (3dc-Cl, ch1, 3dc-Cl) in ch2-sp, ch1, skip next st, hdc in next st, FPdc in next 2sts, hdc in next st, ch1, skip next st, FPtr in next st 2 rounds below, ch1, skip next st, 2hdc in next ch2-sp, (ch1, skip next st, 3dc-Cl in next ch1-sp) 3 times, ch1, skip next st, 2hdc in next ch2-sp, ch1, skip next st, FPtr in next st 2 rounds below, ch1, skip next st, hdc in next st, FPdc in next 2sts; rep from * around, ss in 1st st to join [30sts each side: 20 x 3dc-Cl, 8FPtr, 16FPdc, 32hdc, 44 x ch1-sp]
Round 13: ch1, *FPdc in next st, 3dc-Cl in next ch1-sp, ch1, skip next st, (dc, ch3, dc) in ch1-sp, ch1, skip next st, 3dc-Cl in next ch1-sp, FPdc in next 3sts, ch1, skip next st, dc in next ch1-sp, FPdc in next st, dc in next ch1-sp, ch2, skip next 2sts, (hdc in next ch1-sp, ch1, skip next st) 3 times, hdc in next ch1-sp, ch2, skip next 2sts, dc in next ch1-sp, FPdc in next st, dc in next ch1-sp, ch1, skip next st, FPdc in next 2sts; rep from * around, ss in 1st st to join [34sts each side: 8 x 3dc-Cl, 32FPdc, 24dc, 16hdc, 4 x ch3-sp, 8 x ch2-sp, 28 x ch1-sp]
Round 14: ch1, *FPdc in next st, ch1, skip next st, 3dc-Cl in next ch1-sp, ch1, skip next st, (3dc-Cl, ch2, 3dc-Cl) in ch3-sp, ch1, skip next st, 3dc-Cl in ch1-sp, ch1, skip next st, FPdc in next 3sts, ch1, skip next st, hdc in next st, ch1, skip next st, hdc in next st, 2hdc in next ch2-sp, 2hdc in each of next 3 ch1-sps, 2hdc in next ch2-sp, hdc in next st, ch1, skip next st, hdc in next st, ch1, skip next st, FPdc in next 2sts; rep from * around, ss in 1st st to join [34sts each side: 16 x 3dc-Cl, 24FPdc, 56hdc, 4 x ch2-sp, 32 x ch1-sp]
Round 15: ch1, *sc in next 5sts, 3sc in ch2-sp, sc in next 7sts, FPtr in next st 3 rounds below, sc in next 16sts, FPtr in next st 3 rounds below, sc in next 2sts; rep from * around, ss in 1st st to join [35sts each side: 8FPtr, 132sc]

Round 16: ch1, *FPdc in st 2 rounds below, sc in next 5sts, 2sc in next st, sc in next 5sts, FPdc in next 3sts 2 rounds below, sc in next 18sts, FPdc in next 2sts 2 rounds below; rep from * around, ss in 1st st to join [36sts each side: 24FPdc, 120sc]
Round 17: ch1, *FPdc in next st, tr in next st 4 rounds below (this is a 3dc-Cl), ch2, skip next 2sts, hdc in next 3sts, ch3, hdc in next 3sts, ch2, skip next 2sts, tr in next st 4 rounds below (this is a 3dc-Cl), FPdc in next 3sts, ch1, skip next st, hdc in next 16sts, ch1, skip next st, FPdc in next 2sts; rep from * around, ss in 1st st to join [39sts each side: 24FPdc, 8tr, 88hdc, 4 x ch3-sp, 8 x ch2-sp, 8 x ch1-sp]
Round 18: ch1, *FPdc in next 2sts, ch1, skip next st, tr in 3dc-Cl 5 rounds below (already has a tr in it), hdc in next 3sts, (2hdc, ch2, 2hdc) in ch3-sp, hdc in next 3sts, tr in 3dc-Cl 5 rounds below (already has a tr in it), ch1, skip next st, FPdc in next 3sts, ch1, skip next st, hdc in next 18sts, ch1, skip next st, FPdc in next st; rep from * around, ss in 1st st to join [42sts each side: 24FPdc, 8tr, 112hdc, 4 x ch2-sp, 16 x ch1-sp]
Round 19: ch1, *FPdc in next 2sts, skip next st, FPdc in next st, ch1, tr in next st 3 rounds below, hdc in next 4sts, (hdc, ch2, hdc) in ch2-sp, hdc in next 4sts, tr in next st 3 rounds below, ch1, FPdc in next st, skip next st, FPdc in next 2sts, ch1, skip next st, hdc in next 9sts, ch2, skip next 2sts, hdc in next 9sts, ch1, skip next st; rep from * around, ss in 1st st to join [44sts each side: 24FPdc, 8tr, 112hdc, 8 x ch2-sp, 16 x ch1-sp]
Round 20: ch1, *FPdc in next 3sts, ch1, skip next 2sts, dc in next 4sts, ch1, skip next st, (2dc, ch1, 2dc) in ch2-sp, ch1, skip next st, dc in next 4sts, ch1, skip next 2sts, FPdc in next 3sts, hdc in next 8sts, ch2, skip next 2sts, hdc in next 2sts, ch2, skip next 2sts, hdc in next 8sts; rep from * around, ss in 1st st to join [45sts each side: 24FPdc, 48dc, 72hdc, 8 x ch2-sp, 20 x ch1-sp]
Round 21: ch1, *sc in next 3sts, FPdc in next st 2 rounds below, hdc in next 4sts, FPdc in next st 2 rounds below, hdc in next 2sts, (hdc, ch2, hdc) in ch1-sp, hdc in next 2sts, FPdc in next st 2 rounds below, hdc in next 4sts, FPdc in next st 2 rounds below, sc in next 11sts, dc in next 2sts 2 rounds below, sc in next 2sts, dc in next 2sts 2 rounds below, sc in next 8sts; rep from * around, ss in 1st st to join [48sts each side: 16FPdc, 16dc, 56hdc, 96sc, 4 x ch2-sp] Break yarn.
Get your free guide!
Subscribe to get your free guide to choosing and combining colours!
FAQs
Yes — because the blanket uses modular motifs in different sizes, you can rearrange them to create square or rectangular blankets in any size.
This pattern is designed for intermediate crocheters who are comfortable working different motif sizes and joining crochet pieces, but if you’re a confident beginner, why not give it a go?
Whilst I used sport weight yarn, this is the perfect crochet pattern to dive into your stash. Choose yarns of the same weight and then pick a colour scheme.
The motifs are joined with a slip stitch seam, which you will find a video tutorial on above.
Join HanJan and Share Your Crochet With Us!
I’d love to hear from you and see your HanJan Crochet project! Here’s where you can do that:
📌 PIN THIS POST – save it to your Pinterest crochet board so you can come back to it again and make more!
↗️ SHARE – Share your yarn choices, progress pics, and finished projects on Facebook or Instagram (make sure to use the hashtag) #hanjancrochet
🧶 JOIN – Join thousands of amazing crafters in the HanJan Crochet Community Group on Facebook ready to cheer you on!
✉️📩📬 SUBSCRIBE – It’s an honour to be able to create and share my free crochet patterns with you. I’d love to stay connected and send you regular discount codes and free patterns! Please sign up for my subscriber list to get a free gift right now!
Congratulations on crocheting your very own crochet blanket! 🌟 Now that you’ve crafted this fun project, why stop here? Dive into my other crochet blanket patterns each waiting to be transformed into your next crochet masterpiece.
Ready for your next spring crochet pattern? Here are some other patterns you might like to try next:
- Deidra Fingerless Mitts – with easy short row thumbs
- Short-sleeve Crochet Top – using the treble stitch
- Crochet Coffee Cup Cozy – with heart motifs