
This post may contain affiliate links. Please see my full disclosure and privacy policy for details.
If you’ve been wondering how to make a border in crochet that looks beautifully neat from both sides, and means you don’t have to weave a gazillion ends in, an envelope border is such a useful technique to have tucked away in your crochet toolbox.
And despite often being associated with overlay mosaic crochet, a crochet envelope border isn’t just for mosaic crochet – and it definitely isn’t just for blankets.
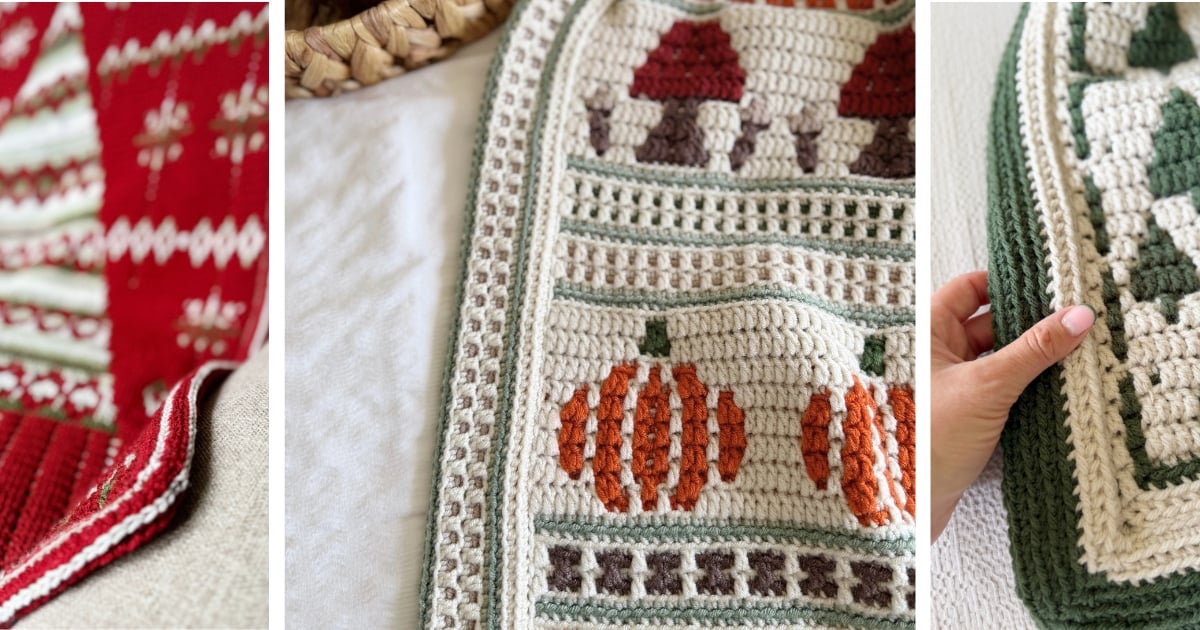
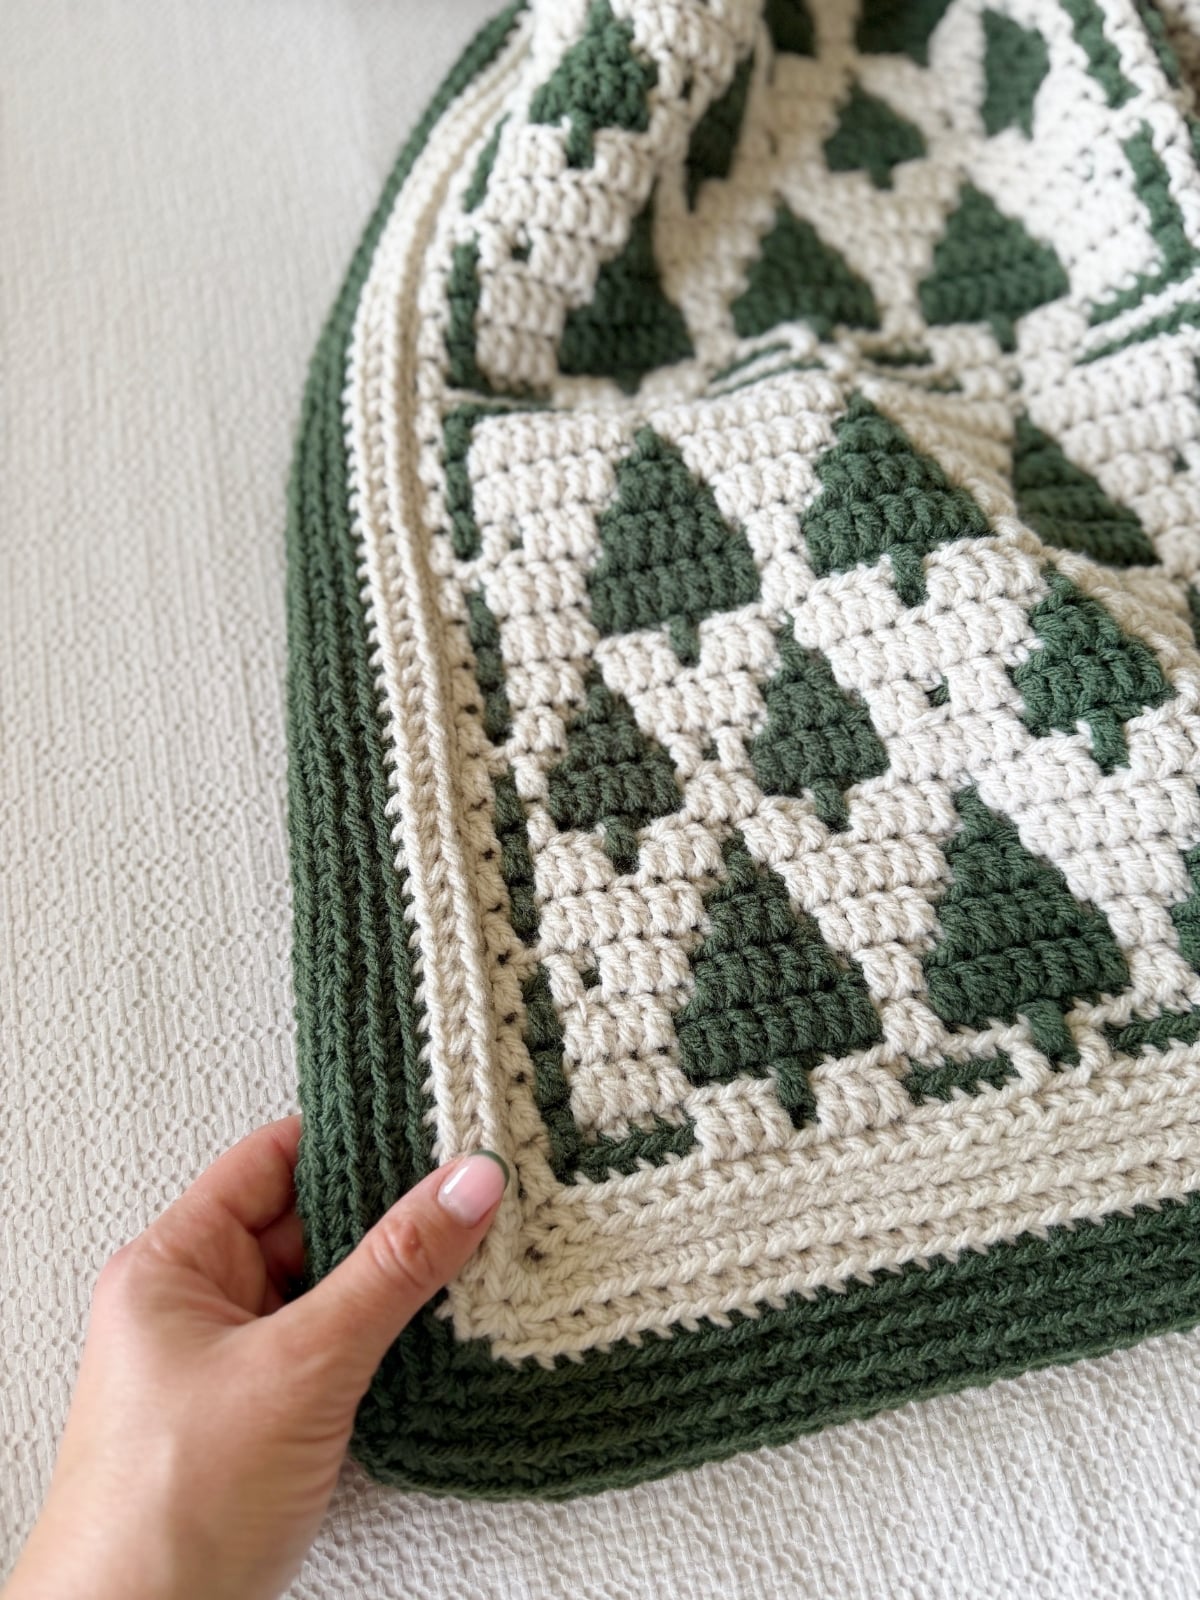
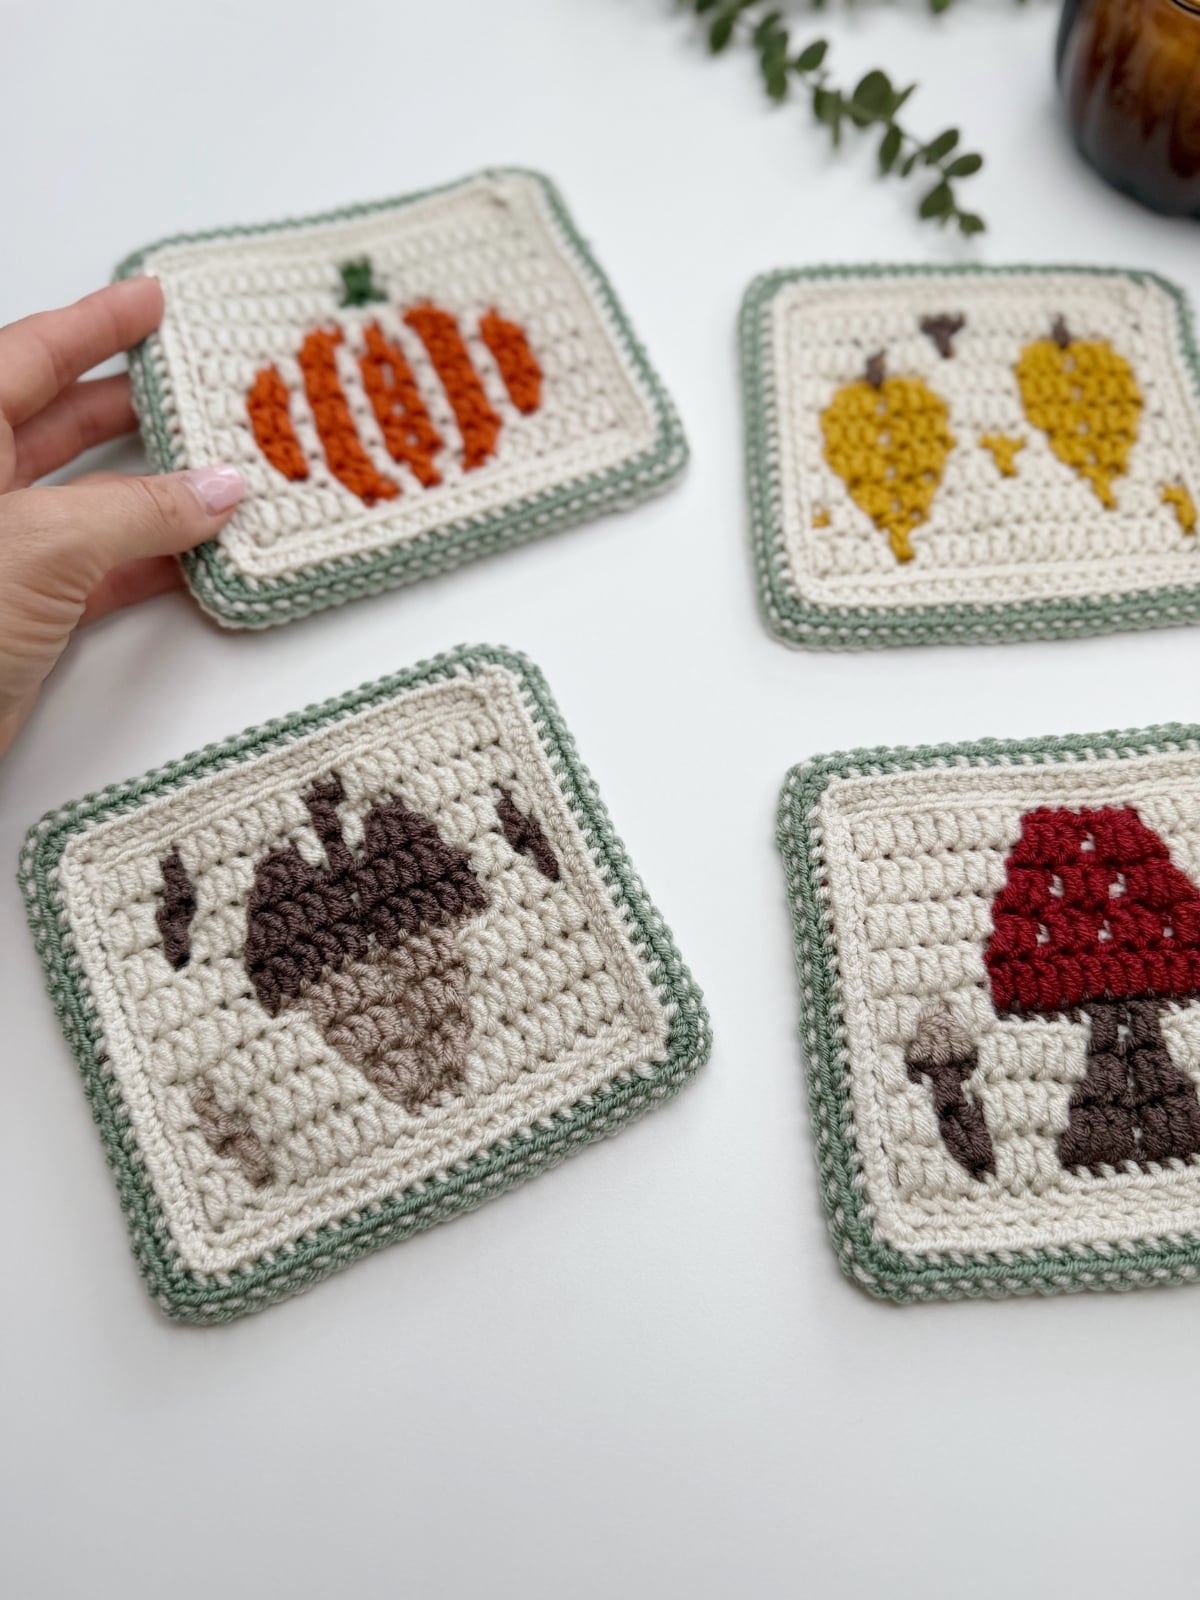
I’ve used this same technique on everything from large crochet blankets (like my Twinkling Trees Christmas crochet afghan pattern) to my little Fall Into Place pumpkin crochet coaster. You can add an envelope border to all sorts of crochet projects whenever you want a neat, substantial double-layered edge.
It just happens to be particularly fabulous for overlay mosaic crochet because we can hide all those yarn ends inside it rather than weaving them in individually. And if you’ve ever finished a mosaic blanket with hundreds of ends hanging around the edges, you’ll understand why I’m quite so enthusiastic about that bit. 😂
Not enjoying the ads? Want less distractions?
Join Us In The HanJan Crochet Club!
Join the online club and enjoy hundreds of Hannah’s crochet patterns ad-free, plus exclusive resources, a bonus Ebook and new free patterns added regularly.
You can keep your envelope border completely plain, use different crochet stitches to change the look, or even add colourwork and a mosaic crochet border stitch to make the border part of the design itself.
So I’m going to explain how the technique works, how you can adapt it for different crochet projects and, finally, exactly how I’ve used it to finish my Fall Into Place Blanket.
Making the Fall Into Place Blanket?
You made it! 🙌 I’d love for you to have a read up below for my tips and tricks how to crochet an envelope border in general or skip straight down to the Fall Into Place Mosaic Crochet Border for the exact instructions for your blanket.
Table of Contents
What You’ll Learn in This Crochet Envelope Border Tutorial
An envelope border is such a useful finishing technique, and it’s much easier than you might think! Here’s what we’ll cover:
What Is a Crochet Envelope Border?
A crochet envelope border is essentially a double-layered crochet border.
You create one layer at the front of your work and another at the back, then join the two layers together around their outer edge.
The result is almost like a little pocket – or envelope – running around the outside of your project.
Anything you need to conceal can sit safely between those two layers, which is why this technique is so useful for crochet projects with lots of yarn ends.
But that’s only one reason to use it.
Even if you don’t have a single yarn end to hide, you can still add an envelope border simply because you like the finish it creates. It can add structure, straighten the edges of a project and create a beautifully substantial frame around your crochet.
You may also come across the terms double border, dual border or pocket border. The exact method and stitches can vary, but the basic principle is the same: we’re creating two layers and joining them together.
Is an Envelope Border Only for Mosaic Crochet?
Absolutely not.
You’ll see envelope borders mentioned a lot in connection with overlay mosaic crochet because they’re such a handy solution to the ends created when working mosaic crochet in rows.
But the envelope itself has nothing to do with mosaic crochet.
It’s a method of constructing a border, rather than a particular crochet stitch or colourwork technique.
That means you can use the idea anywhere that a double-layered border would work well.
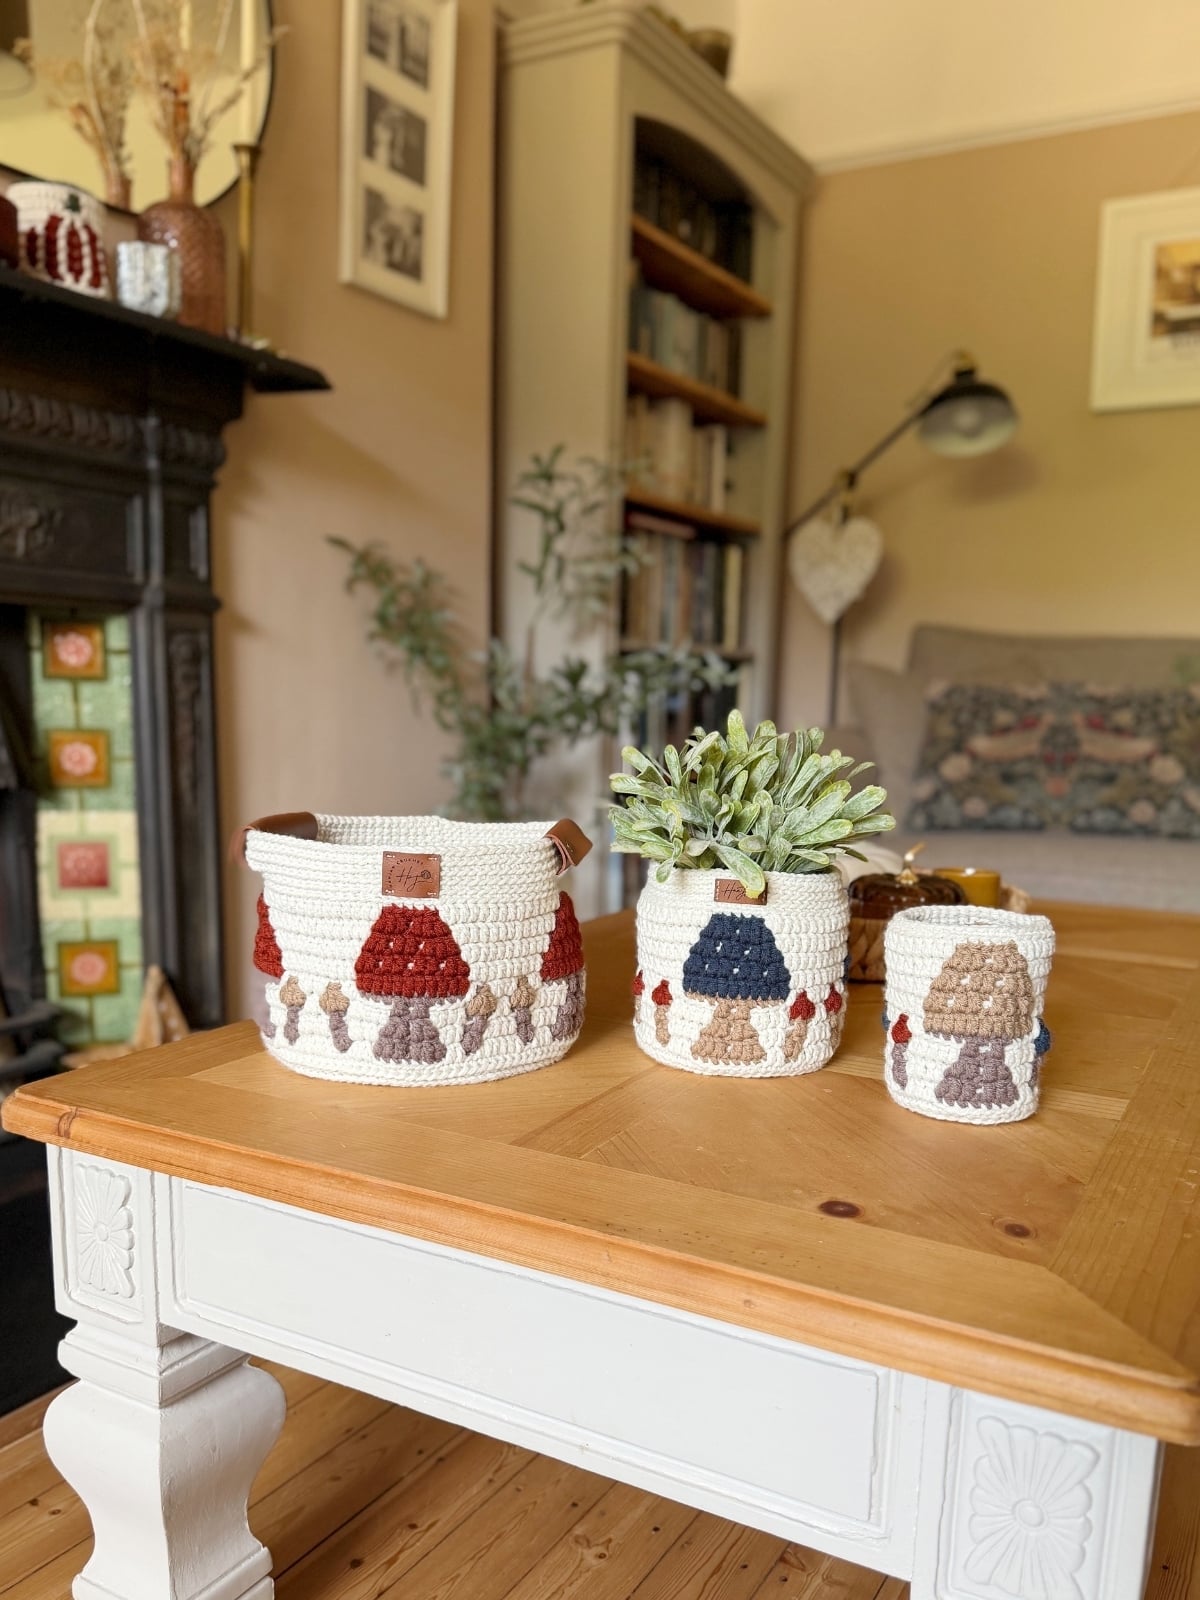
I’ve used an envelope border on my Fall Into Place crochet mushroom coasters, for example, where that little double edge gives the finished coaster a really neat, sturdy finish.
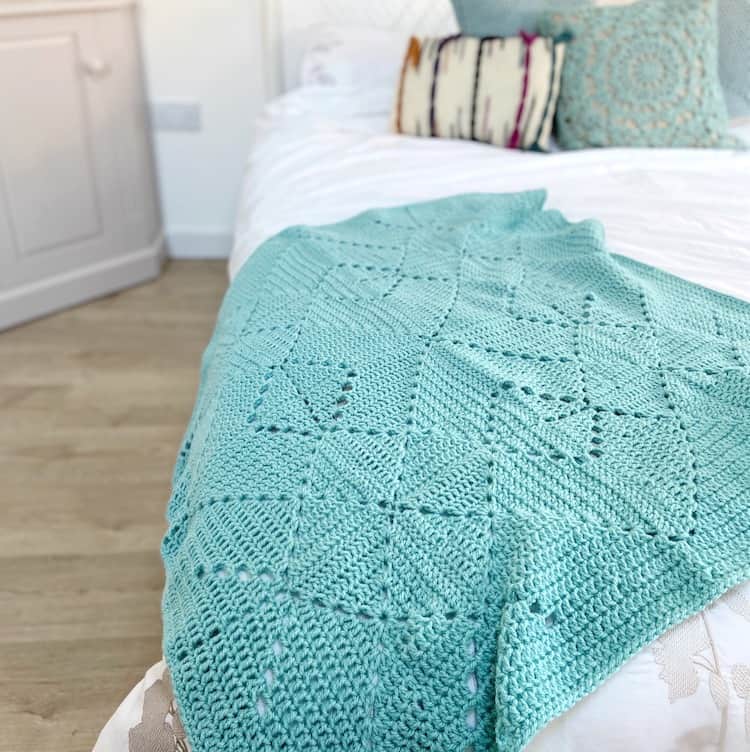
Or if blankets are your thing, you could use it on this simple crochet blanket pattern or my lacy crochet blanket even though they aren’t mosaic pattern.
You could use the same principle around other crochet blankets, colourwork projects, smaller homewares and plenty of other crochet pieces.
So if you’ve landed here without a mosaic crochet blanket anywhere in sight, stay right where you are! You can absolutely use this technique too.
Why Are Envelope Borders So Good for Mosaic Crochet?
Now, having said that they’re not only for mosaic crochet, there is a very good reason the two are such good friends.
When I work overlay mosaic crochet flat, I use the cut-and-start method. I keep the right side facing me, work one colour at a time, break my yarn at the end of the row and return to the beginning for the next one.
It’s a wonderfully straightforward way to create what can look like really intricate colourwork.
There is just one tiny consequence…
ENDS. So many ends. 😂 Here’s a peek of what it looks like before adding the border….
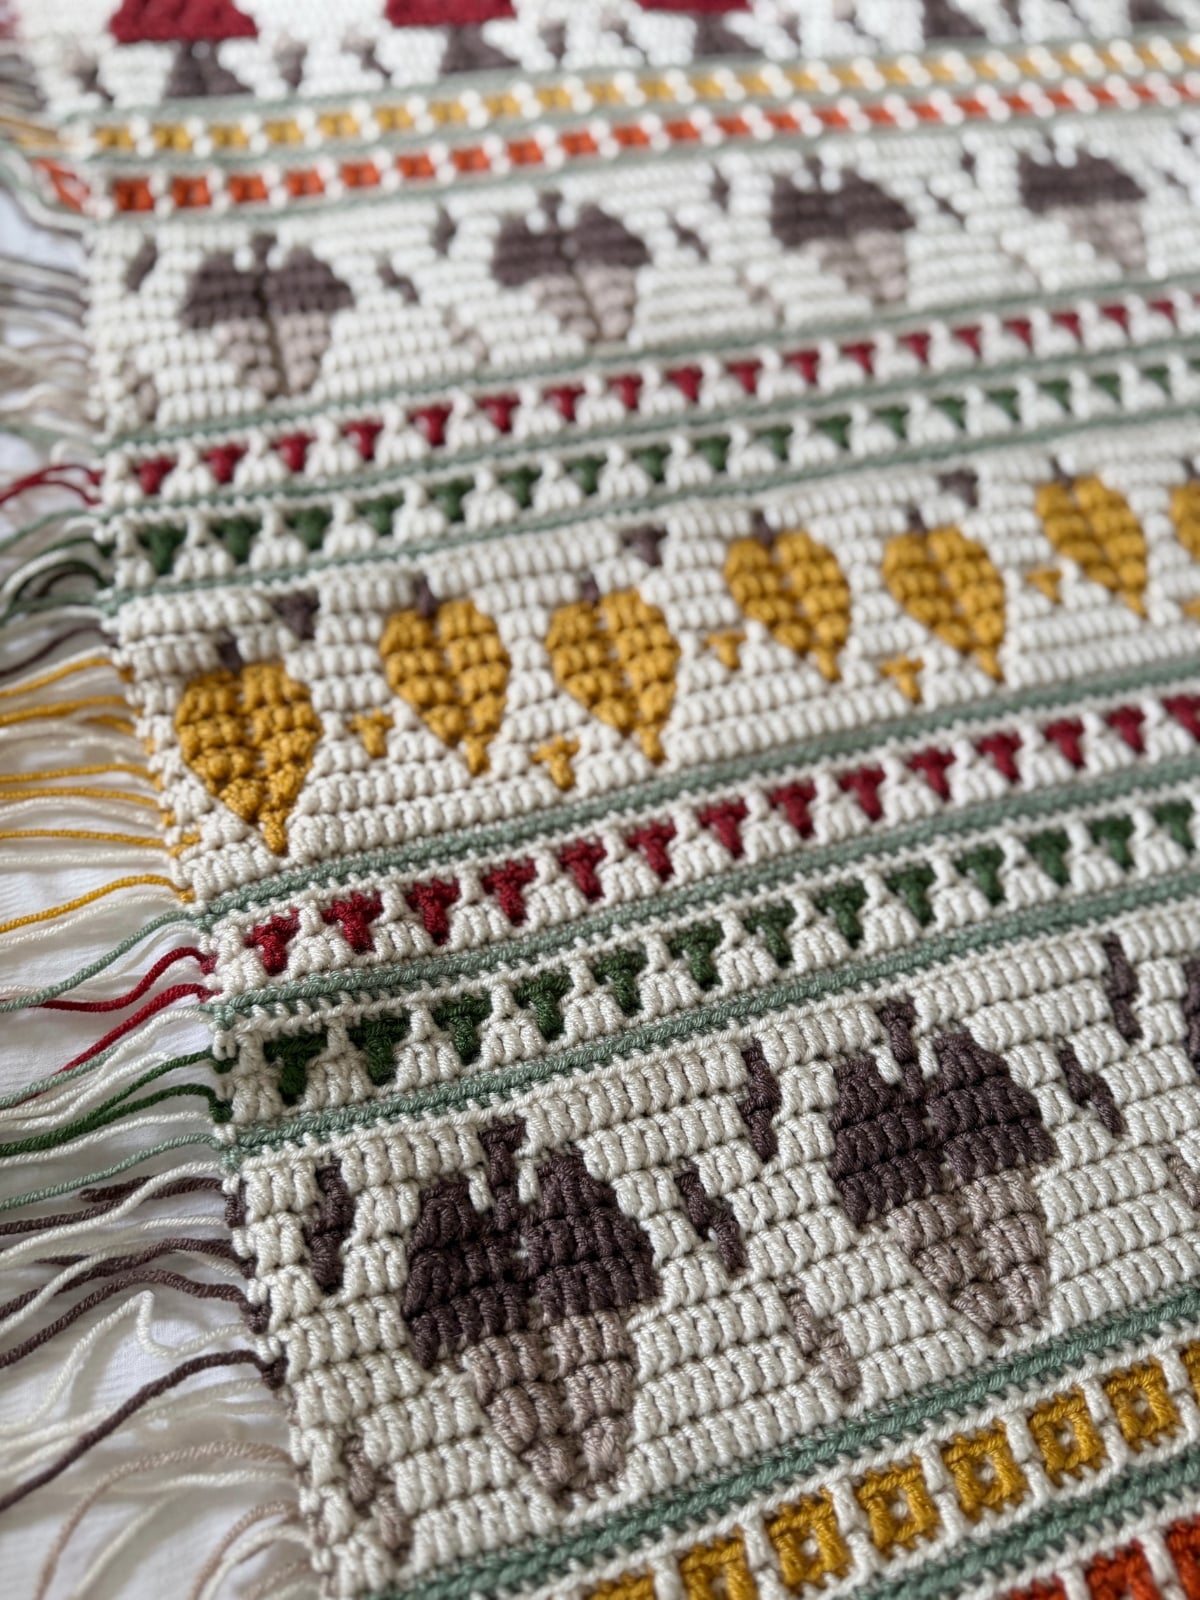
Rather than weaving every single one into the fabric, we can secure and trim them and then enclose them inside our envelope border.
Suddenly that pile of ends becomes somebody else’s problem.
Or, more accurately, the border’s problem. 🙌
That’s why you’ll see a mosaic crochet border worked this way so often, but remember that hiding ends is a benefit of the technique rather than its definition.
What Can I Add a Crochet Envelope Border To?
Think beyond blankets here.
A crochet envelope border can work anywhere you have a suitable edge to build it from and where a double layer makes sense for the finished project.
I’ve used the technique on both blankets and coasters, but the principle can be adapted for other crochet projects too – how about adding it to this easy washcloth pattern for a fun little finish?
You might choose one because you need to hide colourwork ends, because you want to add a little more structure, because your edges need tidying up or simply because you love the finished look.
The scale doesn’t really matter.
The important part is understanding how the envelope is constructed. Once you’ve got that, you can start thinking about how to adapt the width, stitch pattern, colours and finishing method to suit whatever you’ve made.
Does a Crochet Envelope Border Have to Use Mosaic Crochet In It?
No – and this is an important distinction.
The envelope describes the construction.
The stitches you put inside that construction are up to you.
A simple border could be made using stitches such as single crochet, half double crochet or double crochet. Depending on the project, that may be all you need.
Or you can treat that border as another opportunity to add pattern and colour.
That’s what I’ve done with Fall Into Place blanket.
Rather than finishing the blanket with a plain envelope border, I’ve continued the design into the border using overlay mosaic crochet. So it still performs exactly the same job – two layers enclosing the edges and ends – but the front becomes a decorative mosaic crochet border in its own right.
There isn’t one compulsory mosaic crochet border stitch that you need to use. Your design can be as simple or as detailed as you like.
More exciting still – your back and front of the border don’t have to be the same design! As long as they have the same stitch count and height you can do whatever you want with them!
🎥 How to Crochet an Envelope Border – Video Tutorial
If you’d rather see the whole process happening in front of you, I’ve made a complete crochet envelope border video tutorial for the Fall Into Place Blanket too.
In the video, I’ll show you how I add an envelope border to my Fall Into Place Blanket, from preparing those edges and dealing with the yarn ends through to creating the two layers and joining everything together.
I’m demonstrating the technique on a mosaic crochet blanket, but the construction itself can be adapted for other crochet projects too.
So even if you’re adding your border to a completely different blanket or project, you can use the video alongside the written tutorial below to see exactly how the different layers come together.
[adthrive-in-post-video-player video-id=”0FhVWLhi” upload-date=”2026-08-28T11:25:20+00:00″ name=”How To Crochet An Envelope Border Tutorial” description=”” player-type=”default” override-embed=”default” orientation=”horizontal”]
How to Make a Border in Crochet Using the Envelope Method
There are different ways to construct an envelope border, and different designers use different stitches and methods.
For this tutorial, I’m going to show you the method I use for my crochet patterns.
The basic process is:
Prepare the edge → secure any ends → create one border layer → create the second layer → enclose everything inside → join the layers.
Once you understand those building blocks, it’s a wonderfully adaptable technique.
Let’s look at the parts of an envelope border so it’s easier to envisage the process:
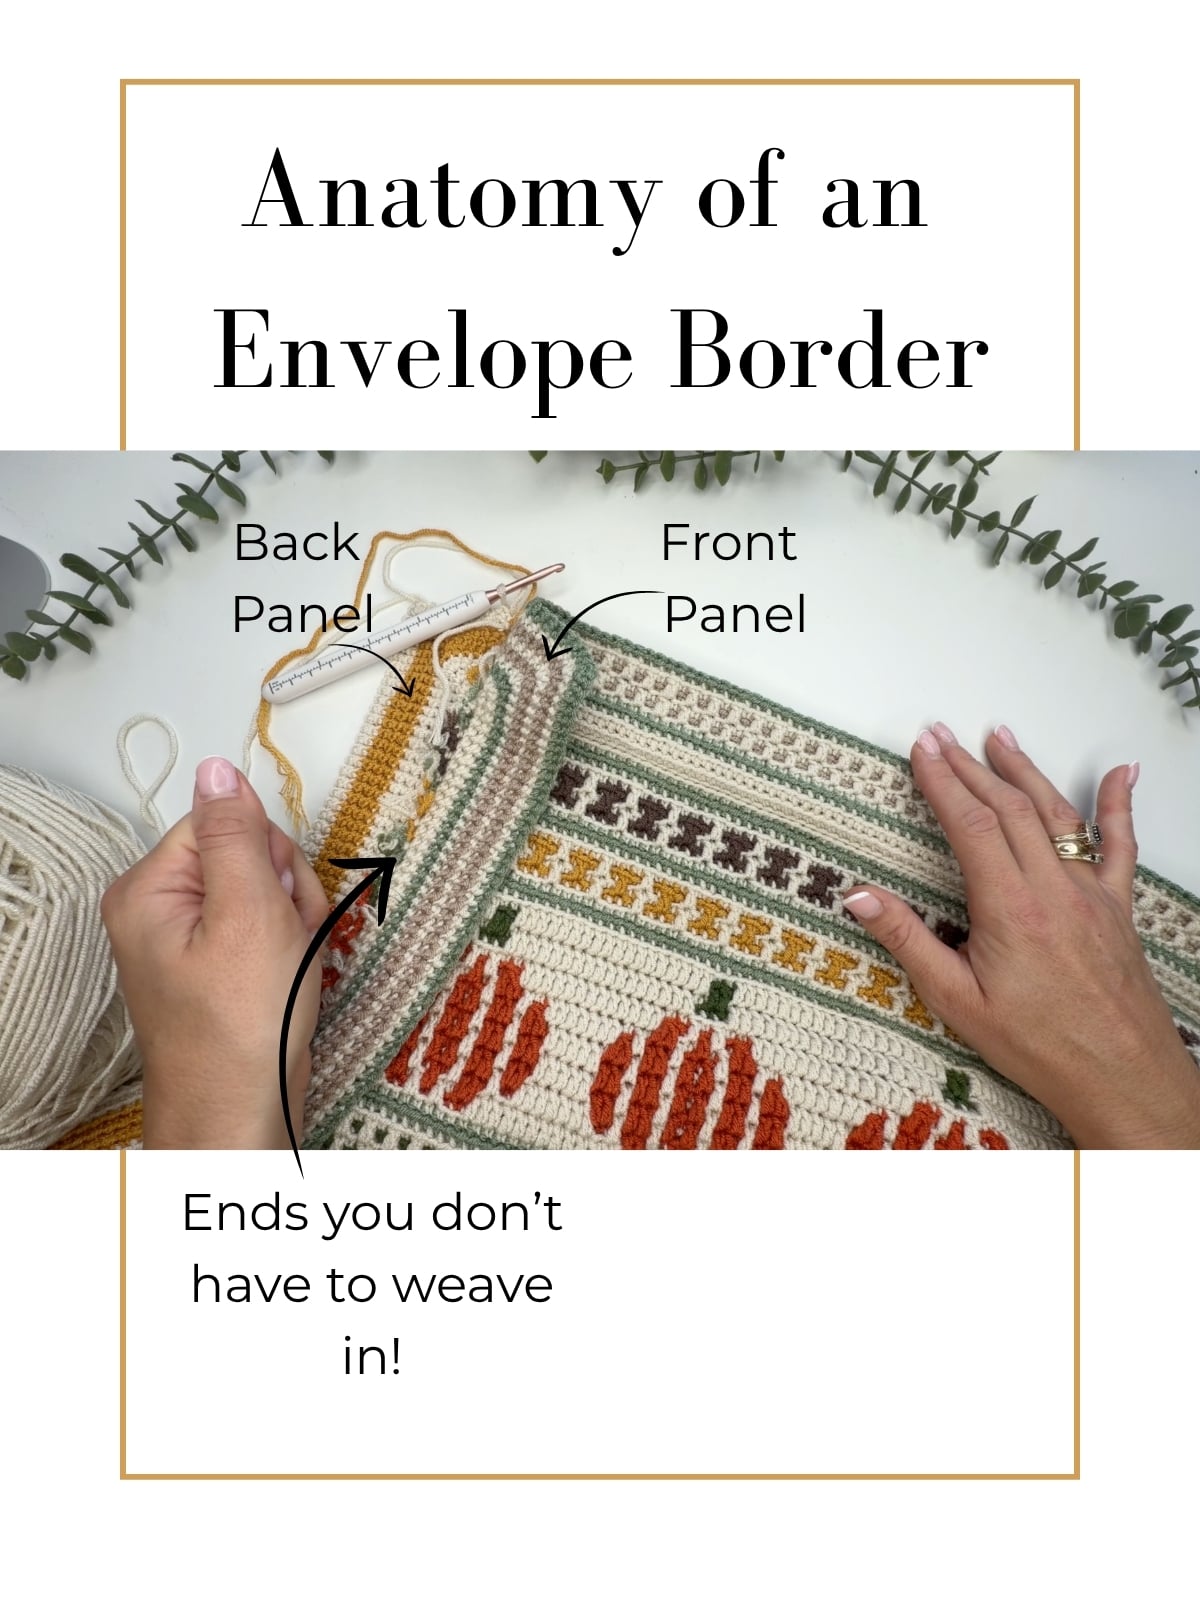
Don’t worry too much about the length of your ends – they will all be hidden within the border 🙂
Step 1: Create a Foundation Around Your Crochet
Before we make either side of the envelope, we need a neat foundation to work from.
For my Fall Into Place Blanket, I create this using slip stitches around the outside of the blanket.
Across the top and bottom, we already have stitches to work into. Along the sides, we’re working into the ends of the rows instead, so this is where it’s worth slowing down and making sure your stitches are evenly spaced.
Your foundation is important because both layers of the envelope will ultimately rely on this edge.
If it’s pulling tightly, adding the rest of the border won’t magically fix it. Likewise, if you’ve squeezed too many stitches along an edge and it’s beginning to ripple, that ripple is likely to become more noticeable as you add more rounds.
Get this bit sitting nicely and everything that follows becomes much easier.
For my mosaic patterns, I work 1 stitch per row, but if you were working this border around a granny stitch blanket for example I would work 2 stitches per row to make sure it was even.
Step 2: Deal With Any Yarn Ends
You may not have any!
If you’re adding an envelope border purely because you like the finish, you can happily move on.
If you do have ends that you’re planning to enclose, make sure they’re secure before you hide them away.
For my mosaic crochet blankets, I tie the ends together in pairs before trimming them, leaving enough length that I’m confident they’re secure.
Then we get to leave them there.
No weaving hundreds of perfectly innocent little yarn tails into individual stitches. 😂
Step 3: Crochet the First Layer
Now we can begin creating one side of our envelope.
Would you like to save this?
You can unsubscribe at any time.
This is where the technique becomes really adaptable. I generally start with the front first but technically you could do them in either order.
Your layer could consist of just a few rounds of simple crochet stitches, or it could be much wider and more decorative.
The important thing is that you’re creating a separate flap of crochet around the edge of your project.
Step 4: Crochet the Second Layer
The second layer is created on the opposite side of your foundation.
You should now have two separate pieces of crochet sitting around the edge of your project with a space between them.
And that’s our envelope.
If you’re hiding yarn ends, make sure they’re all tucked comfortably inside as you go.
Step 5: Join the Two Layers
Finally, line up the corresponding stitches from your two border layers and join them together around the outer edge. You can use a slip stitch seam, a reverse single crochet, a regular single crochet, anything you like to achieve this!
This seals the envelope and gives you that lovely substantial finished border.
From the front: neat.
From the back: neat.
All the chaos inside: nobody needs to know. 😂
How to Add a Mosaic Crochet Border Stitch
Once you’ve understood the basic envelope construction, you can start having a bit more fun with what’s happening on those layers.
If I’m working on a mosaic crochet project, I particularly like making the front of the envelope part of the overall design rather than treating it as something completely separate.
You can combine your usual mosaic techniques – such as back-loop single crochet and mosaic double crochet stitches – to create a repeating mosaic crochet border stitch around the outside.
Your back layer can remain much simpler.
This is worth remembering because the two layers don’t have to look the same. They simply need to work together so that they can be joined neatly around the outside.
The envelope is the construction.
The mosaic crochet is the decoration.
And once you separate those two ideas, there are so many ways you can use the technique.
Before You Make The Border: Mosaic Crochet Stitch Basics
Before we get into our border using some mosaic crochet stitches, there are a couple of basics you’ll need to be comfortable with first.
Don’t worry if these are completely new to you – I’ve got separate step-by-step tutorials for each one:
Front and back loops in crochet – how to find them and why those unused front loops are so important in overlay mosaic crochet.
Single crochet stitches – in mosaic crochet our regular single crochet stitches are worked in the back loop only (BLO), unless your pattern tells you otherwise.
Mosaic double crochet stitch (Mdc) – the stitch that reaches down into the available front loop two rows below and creates so much of our mosaic design.
Fall Into Place Mosaic Crochet Border – Written Pattern
Right then, Fall Into Place makers – this is your bit! 🍂
If you’ve worked your way through all those crosses, pumpkins, dots, mushrooms, squares, acorns, T’s and leaves, you have finally reached the moment when we get to do something about the frankly impressive collection of yarn ends running down the sides of your blanket. 😂
For this blanket, we’re going to make a decorative mosaic crochet envelope border, so we’re not just hiding the ends – we’re adding one final piece of pattern around the blanket too.
Of course if you happened on this post and haven’t started a blanket yet then go for it! Follow along with the Autumn crochet blanket pattern and then pop back here for the border when you’re ready.
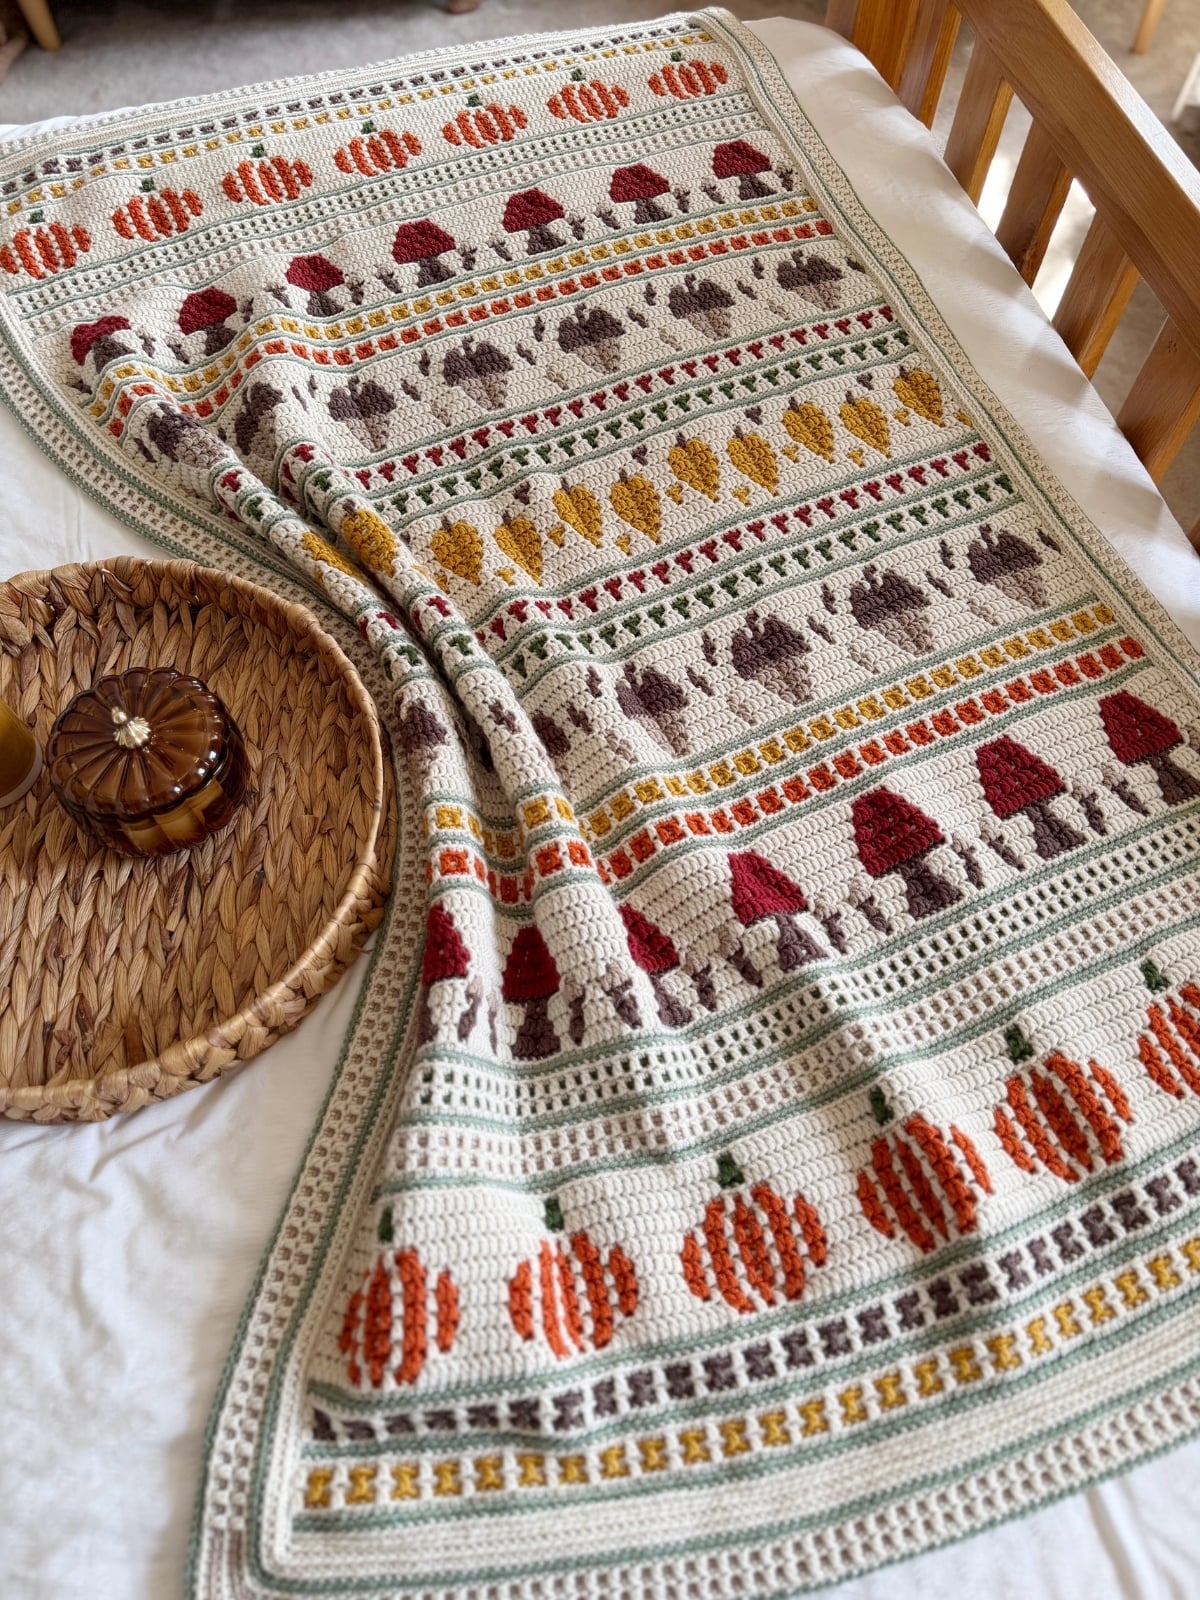
Written Pattern
Before beginning the envelope border, tie ends at sides of rows in sets of two to secure and trim short (approx a third of an inch).
With the RS facing, use your MC to work a slip stitch border around the edge of the Blanket.
Slip Stitch Border: With RS facing, join MC to blo of 2nd st from top right corner, ss in 140 sts (leaving 1 remaining at end of row), ch1, rotate to work along side of blanket now.
Working in between the last and second to last st of the row, ss in each row to bottom left hand corner, ch1.
Ss in blo of 140 stitches of the first row of the blanket, ch1, rotate to work along side of blanket now.
Working in between the first and second st of the row, ss in each row to top right hand corner, ch1, ss in 1st to join.
FRONT BORDER – all sc worked in blo
Round 1: MC: ch1, sc in each ss to next ch1, (sc, ch1, sc) in ch1, *sc in each ss to next ch1, (sc, ch1, sc) in ch1; rep from * around, ss in 1st to join.
Round 2: MC: ch1, sc in each st to next ch1, (sc, ch1, sc) in ch1, *sc in each st to next ch1, (sc, ch1, sc) in ch1; rep from * around, ss in 1st to join. Change to CC1 at the end of the round.
Round 3: CC1: Rep Round 2. Change to MC.
Round 4: MC: Rep Round 2. Change to CC6.
Round 5: CC6: Rep Round 2. Change to MC.
Round 6: MC: ch1, *(sc in next st, Mdc in next st) across next 140 sts, sc in each st to next ch1, (sc, ch1, sc) in ch1, sc in next 5 sts, Mdc in next st, (sc in next st, Mdc in next st) across next 224 sts, sc in each st to next ch1, (sc, ch1, sc) in ch1, sc in next 5 sts; rep from * once more, ss in 1st to join. Change to CC6.
Round 7: CC6: Rep Round 2. Change to MC.
Round 8: MC: ch1, *(sc in next st, Mdc in next st) across next 140 sts, sc in each st to next ch1, (sc, ch1, sc) in ch1, sc in next 7 sts, Mdc in next st, (sc in next st, Mdc in next st) across next 224 sts, sc in each st to next ch1, (sc, ch1, sc) in ch1, sc in next 7 sts; rep from * once more, ss in 1st to join. Change to CC1.
Round 9: CC1: Rep Round 2. Break yarn at end of Round 9.
BACK BORDER
With WS facing we now need to repeat the instructions for the Front Border (in any colur sequence you like) with Round 1 into the remaining loops on the opposite side of the Slip Stitch Border.
At the end of Round 9 continue with the yarn to join the Front and Back Borders.
JOIN THE FRONT AND BACK BORDERS
With the WS facing and your choice of yarn colour (I used the MC), join the Front Border to the Back Border using a slip stitch seam in the back loops of corresponding stitches.
Break yarn and weave in ends to finish.
Crochet Envelope Border FAQs
No. You can adapt the technique for smaller crochet projects too. I’ve used an envelope border on my Fall Into Place coasters as well as blankets. What matters is having a suitable edge from which you can create the two layers.
Not at all. It’s particularly useful for overlay mosaic crochet because it can enclose all those cut yarn ends, but the envelope technique itself can be used on other crochet projects too.
No. You can add one purely because you like the look, weight or structure of the double border.
Hiding ends is a very handy bonus rather than a requirement.
If you’re using the border specifically to enclose your ends, that’s rather the beauty of it – you don’t need to weave each one in individually. They do need to be properly secured before they’re enclosed. In my Fall Into Place Blanket, I tie mine in pairs and trim them before enclosing them inside the border.
There isn’t one particular envelope border stitch.
You can use simple crochet stitches such as single crochet, half double crochet or double crochet, or add colourwork and mosaic stitches to make the border more decorative.
Your choice will depend on the project, yarn, width and finished look you want.
Absolutely. Your blanket has already got plenty going on, so you may decide that a beautifully simple border is exactly what it needs. The border can still hide your mosaic crochet ends without containing any mosaic stitches itself.
There isn’t a set width that every envelope border needs to be. Think about the scale of your project, how much you need to conceal inside the border and how substantial you want the finished edge to feel. A small coaster may only need a delicate border, whereas a large blanket can comfortably take something much wider.
This usually comes back to the number or spacing of stitches around the edge. Too many stitches can make your border ripple outwards; too few can cause the edge to pull in. Pay particular attention when working along the sides of rows, where you don’t have an existing stitch sitting there to tell you exactly where the next one should go. Getting that foundation sitting flat before you continue is time very well spent.
One Technique, Lots of Possibilities
Hopefully you can see why I love this finishing method so much.
Yes, a crochet envelope border is an absolutely brilliant answer to “what on earth am I going to do with all these crochet ends?” 😂
But it’s so much more useful than that.
You can use it on a blanket, scale it down for a coaster, keep it completely plain, add colour, introduce a mosaic crochet border stitch, make it narrow and delicate or turn it into a real feature of the finished project.
Once you understand that you’re simply creating two layers around your crochet and joining them together, you’ve got a technique that you can adapt again and again.
And if you’re here finishing your Fall Into Place Blanket…
YOU DID IT! 🍂🙌
After 225 rows and rather a lot of pumpkins, mushrooms, leaves and ends, I think you’re allowed to sit and admire it for a while.
Crochet Blankets Perfect To Add An Envelope Border To:
- Free Crochet Heart Blanket Pattern – A lovely repeating heart design if you fancy something a little simpler.
- Crochet Christmas Blanket Pattern – Take your mosaic crochet into Christmas with a wonderfully festive design. 🎄
- Christmas Crochet Afghan – Another bigger project for putting those mosaic skills to work.
- Free Mosaic Crochet Blanket – the Wildflower uses inset mosaic but you can still add it to that!
- Chunky Crochet Blanket Pattern – this one is super quick to work up
Want Even More?
Still looking for your next project? Explore all my mosaic crochet patterns and see what takes your fancy. 🧶
Get your free guide!
Subscribe to get your free guide to choosing and combining colours!
Join HanJan and Share Your Crochet With Us!
I’d love to hear from you and see your HanJan Crochet project! Here’s where you can do that:
📌 PIN THIS POST – save it to your Pinterest crochet board so you can come back to it again and make more!
↗️ SHARE – Share your yarn choices, progress pics, and finished projects on Facebook or Instagram (make sure to use the hashtag) #hanjancrochet
🧶 JOIN – Join thousands of amazing crafters in the HanJan Crochet Community Group on Facebook ready to cheer you on!
✉️📩📬 SUBSCRIBE – It’s an honour to be able to create and share my free crochet patterns with you. I’d love to stay connected and send you regular discount codes and free patterns! Please sign up for my subscriber list to get a free gift right now!