This post may contain affiliate links. Please see my full disclosure and privacy policy for details.
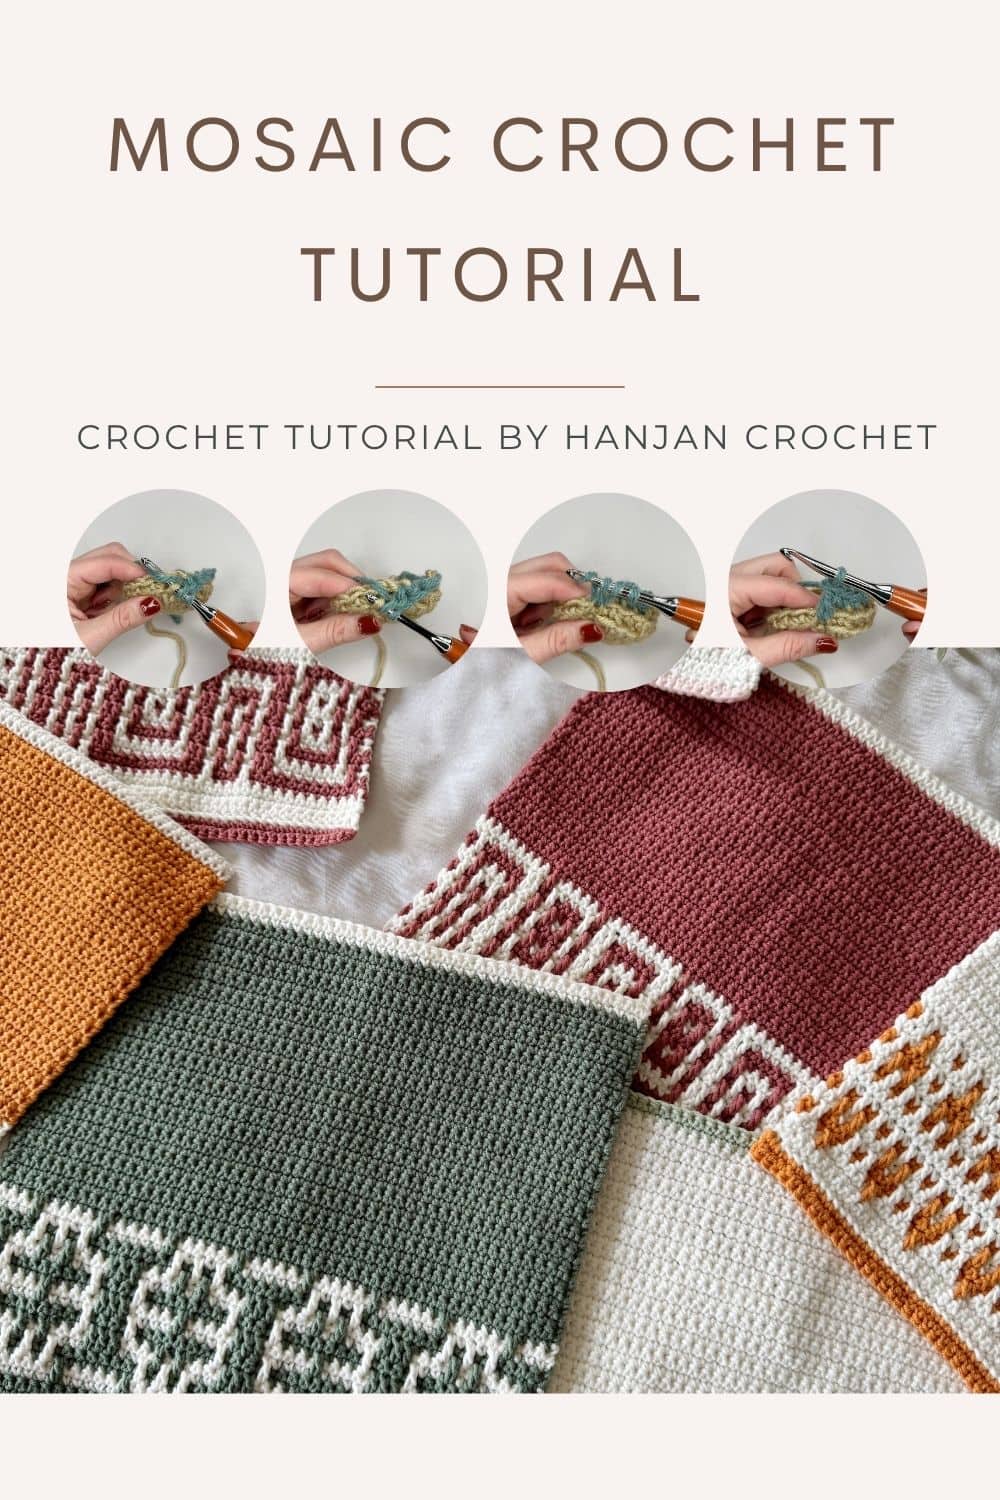
Mosaic crochet is a clever and beautiful colourwork technique used to create bold patterns in two colours! Whilst it looks super complicated, you actually only use one colour per row, and I’m going to show you how in this mosaic crochet tutorial.
There are two different types of mosaic crochet, which people often get confused about, but I’m here to unravel the mystery!
I’ll be taking you step by step through the two different mosaic crochet techniques with lots of pictures and a video too!
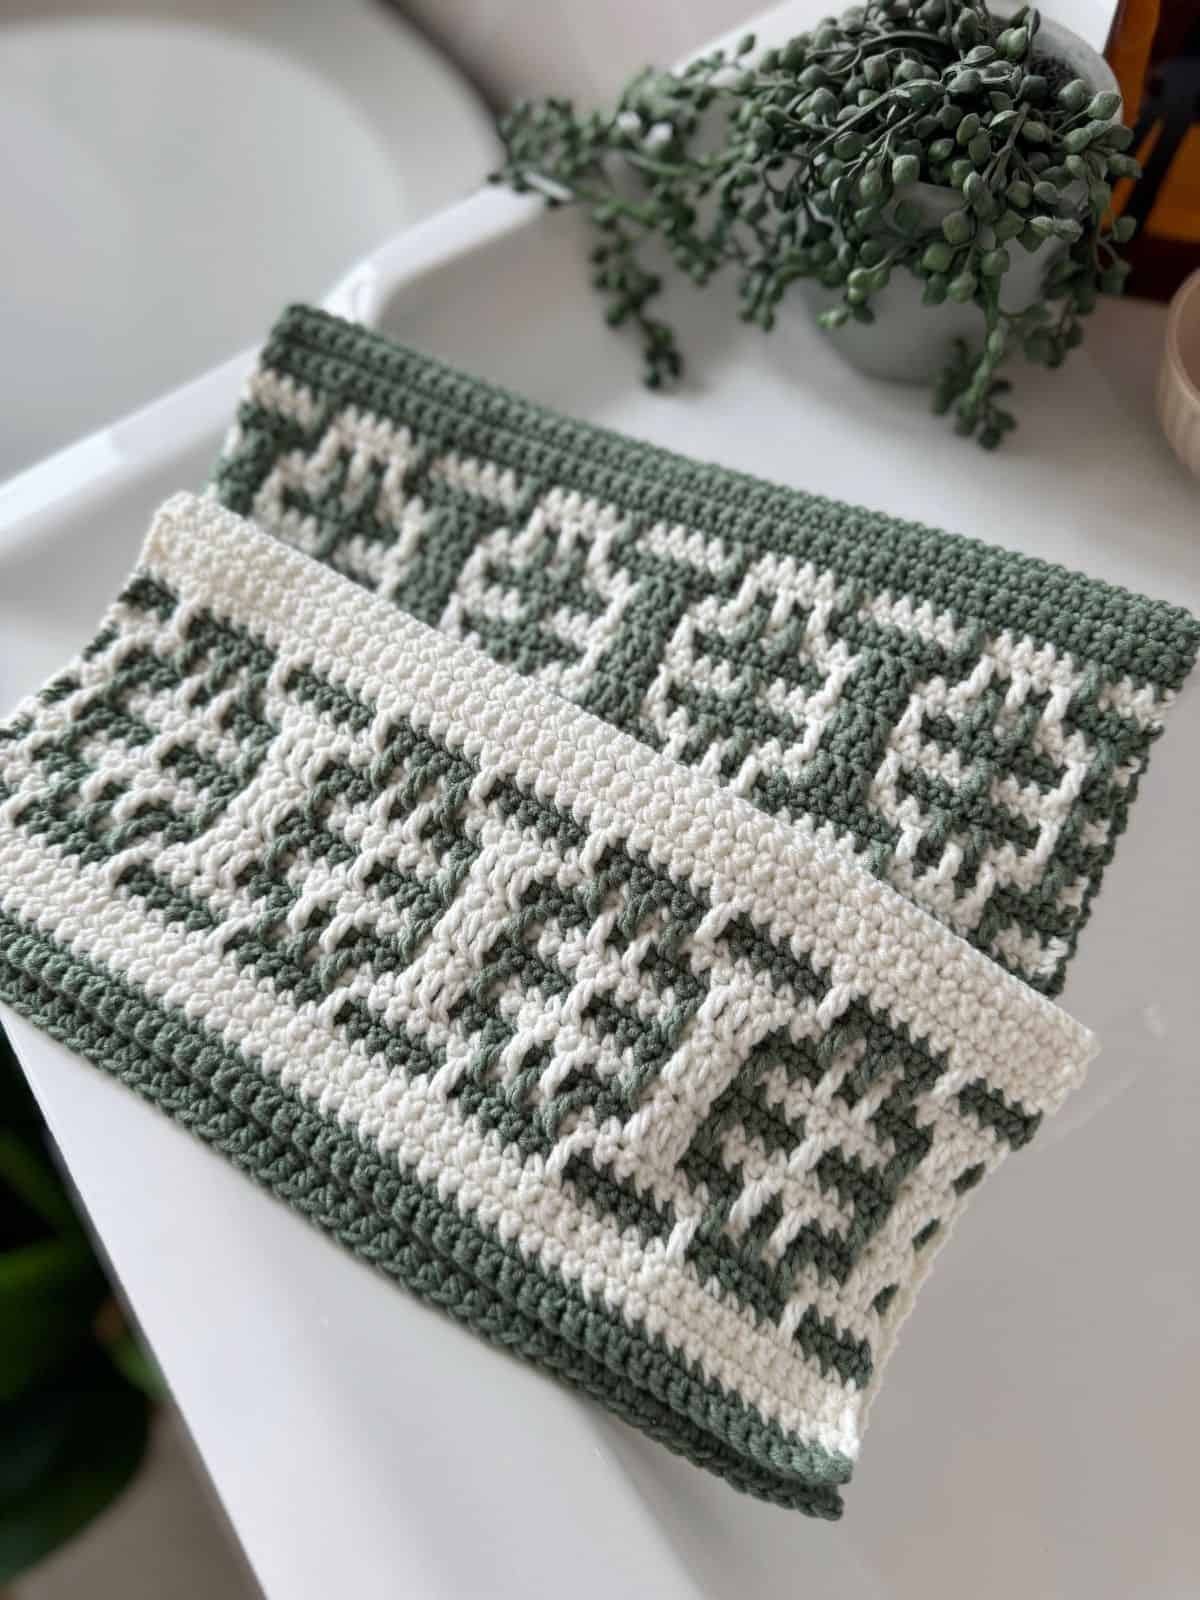
Table of Contents
Overlay vs Inset Mosaic Crochet?
The 2 types of mosaic crochet are called overlay and inset mosaic crochet. There are a few distinct differences between the two techniques, but first let’s look at the similarities.
A key feature of mosaic crochet is that each row is worked in a single colour only so there are no colour changes mid-row.
Both techniques use US single crochet (UK double crochet) and US mosaic double crochet (UK mosaic treble crochet) stitches to create the patterns.
So how are they different?
Overlay Mosaic Crochet
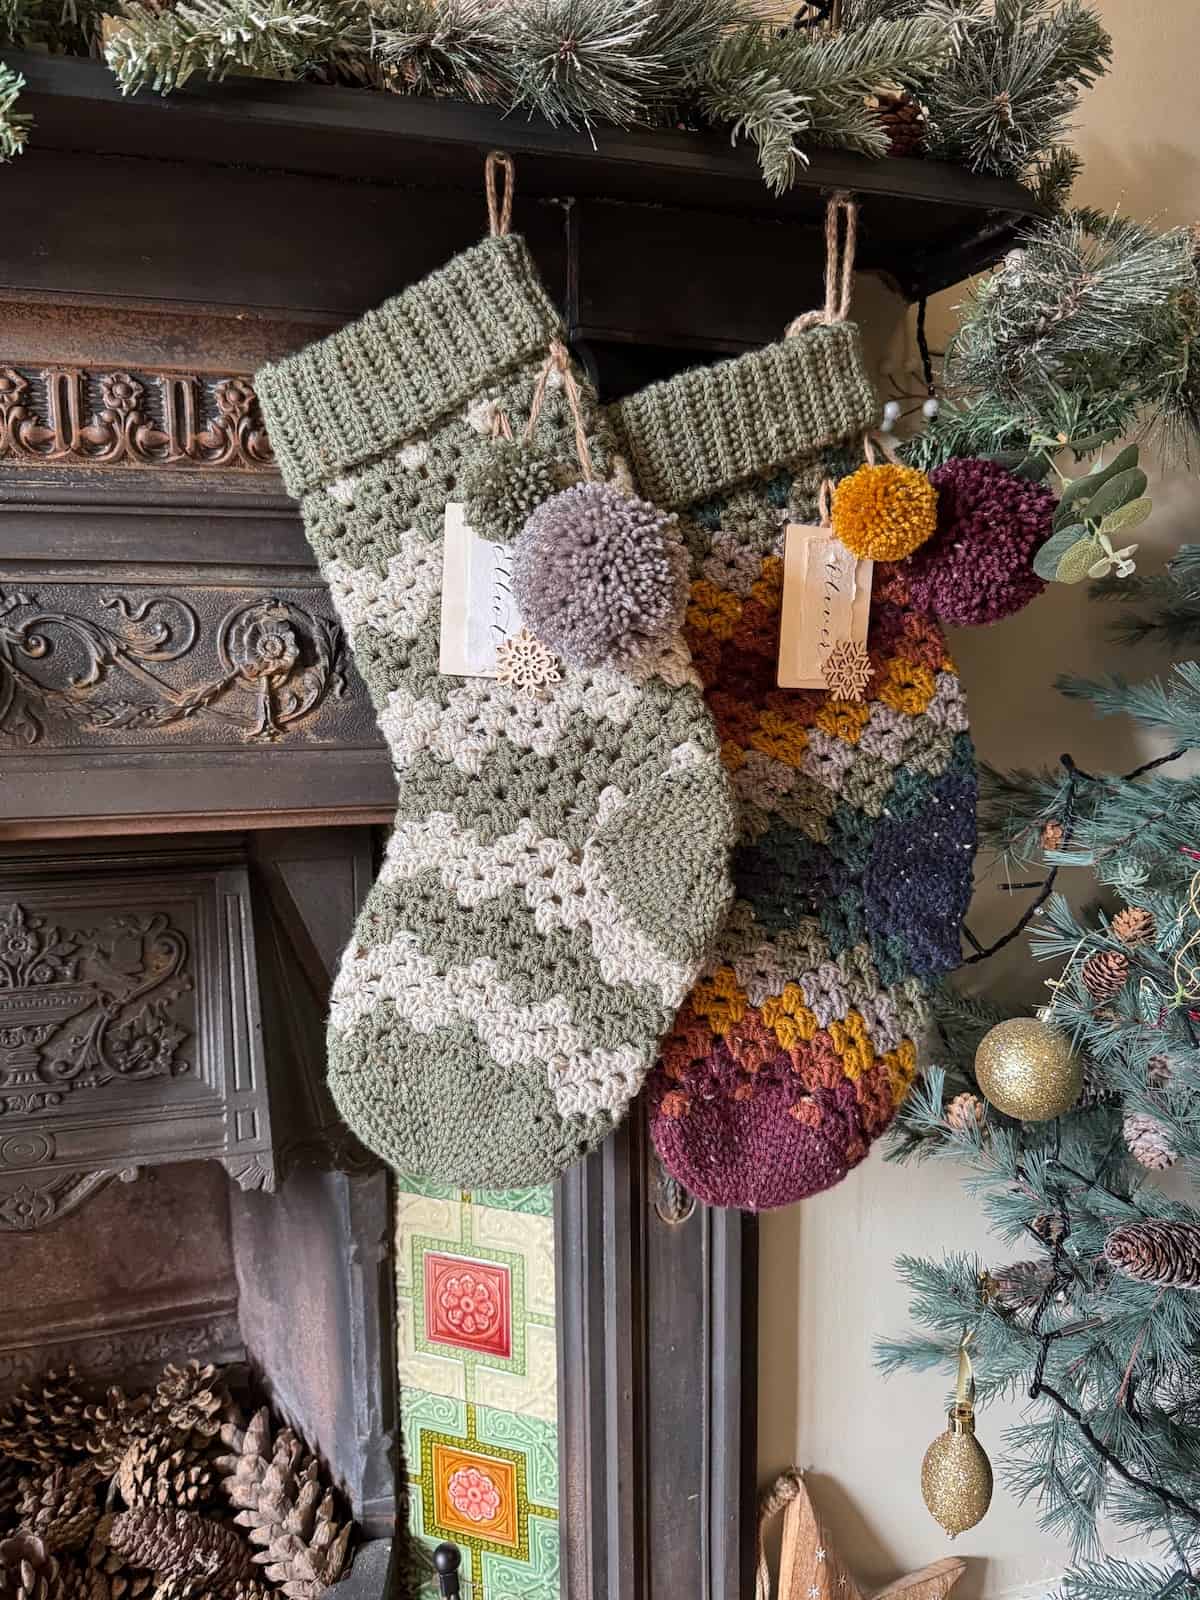
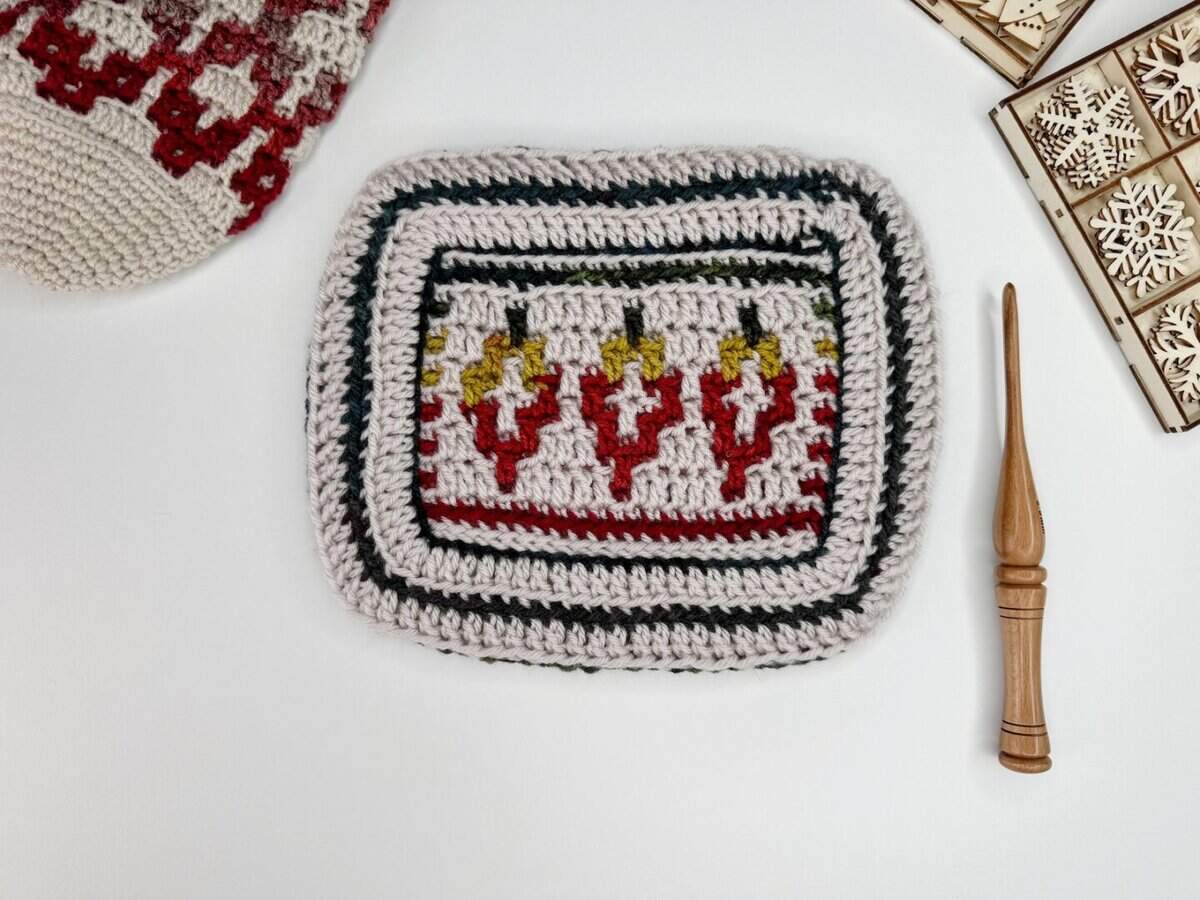
Overlay mosaic crochet is worked on one side of the project only. Right-handers work from right to left (left-handers from left to right), joining our yarn at the start of the row and fastening off at the end of each row. An example of it is my Yuletide Mosaic Blanket Pattern, but don’t worry – they aren’t all that tricky looking!
Note that when working in rounds, like in the Yuletide Mosaic Stocking Pattern, we can carry the yarn up the inside of the work instead of fastening off each time.
In this technique, we change colour every row or round and we work either a single crochet into the back loop only of the stitch, or we work a mosaic double crochet stitch into the front loop of the stitch 2 rows or rounds below.
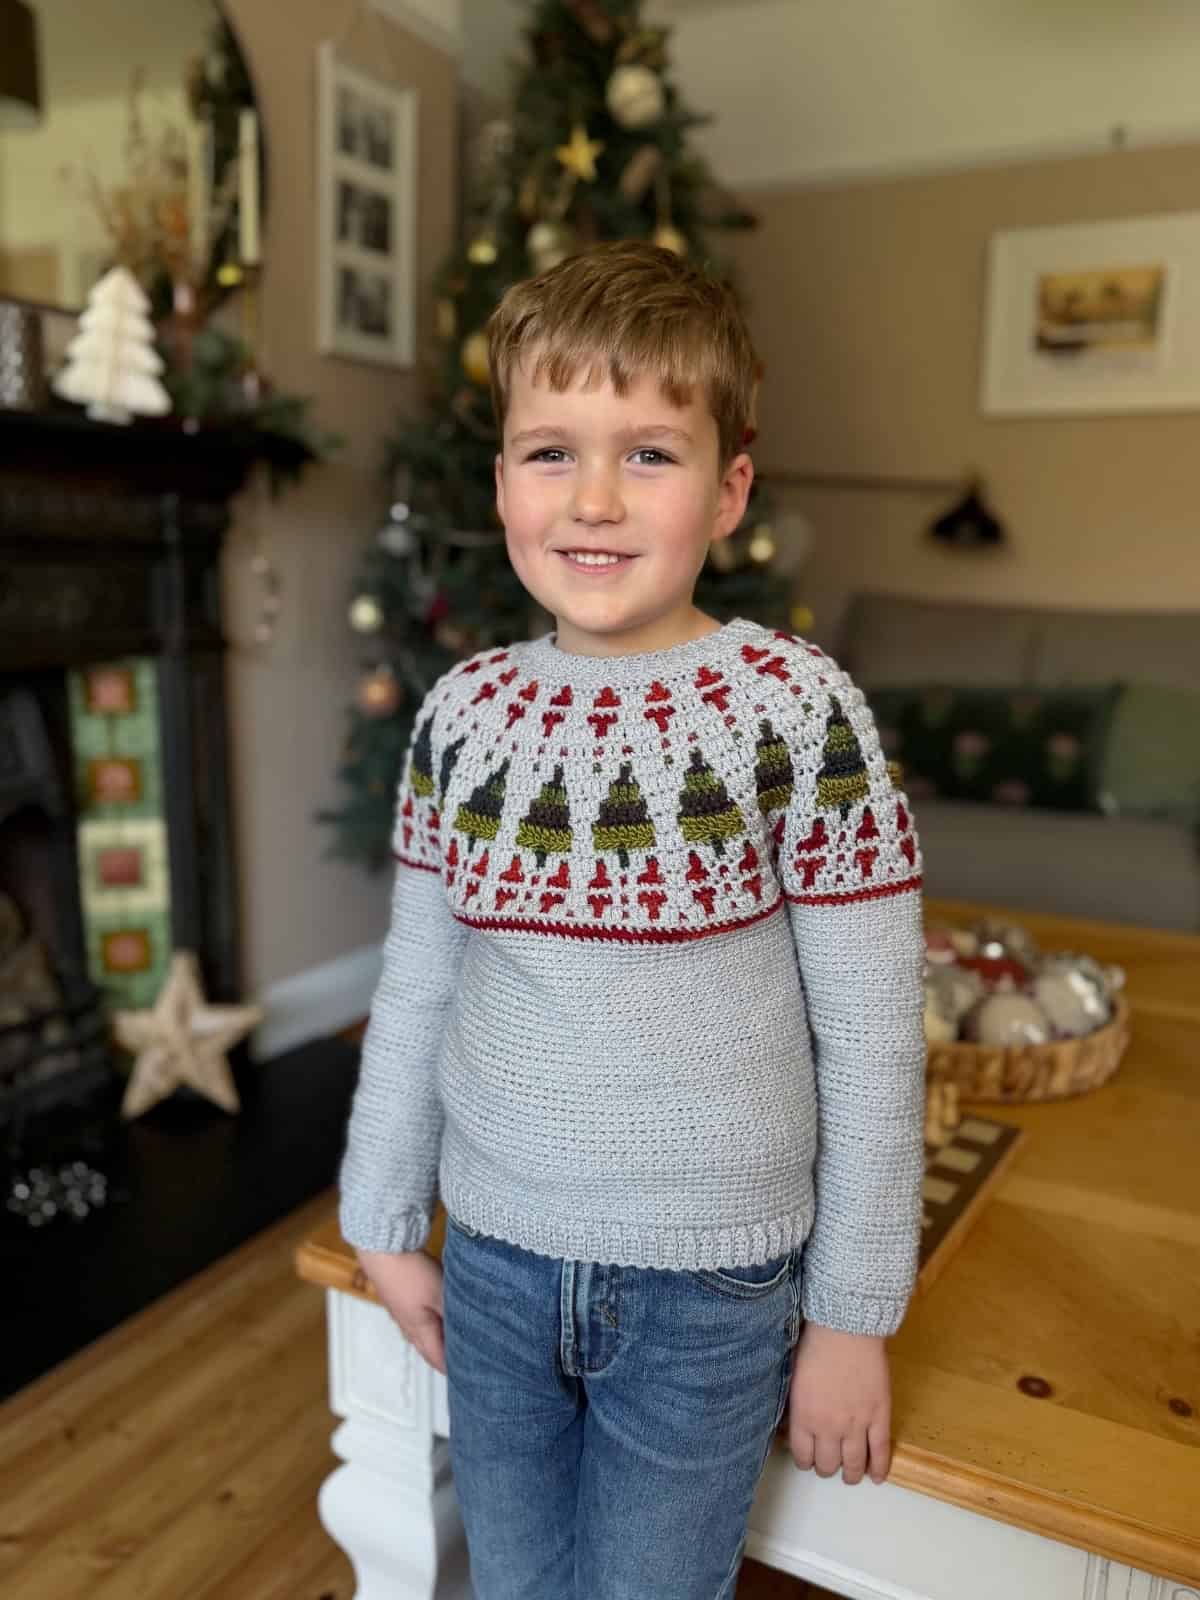
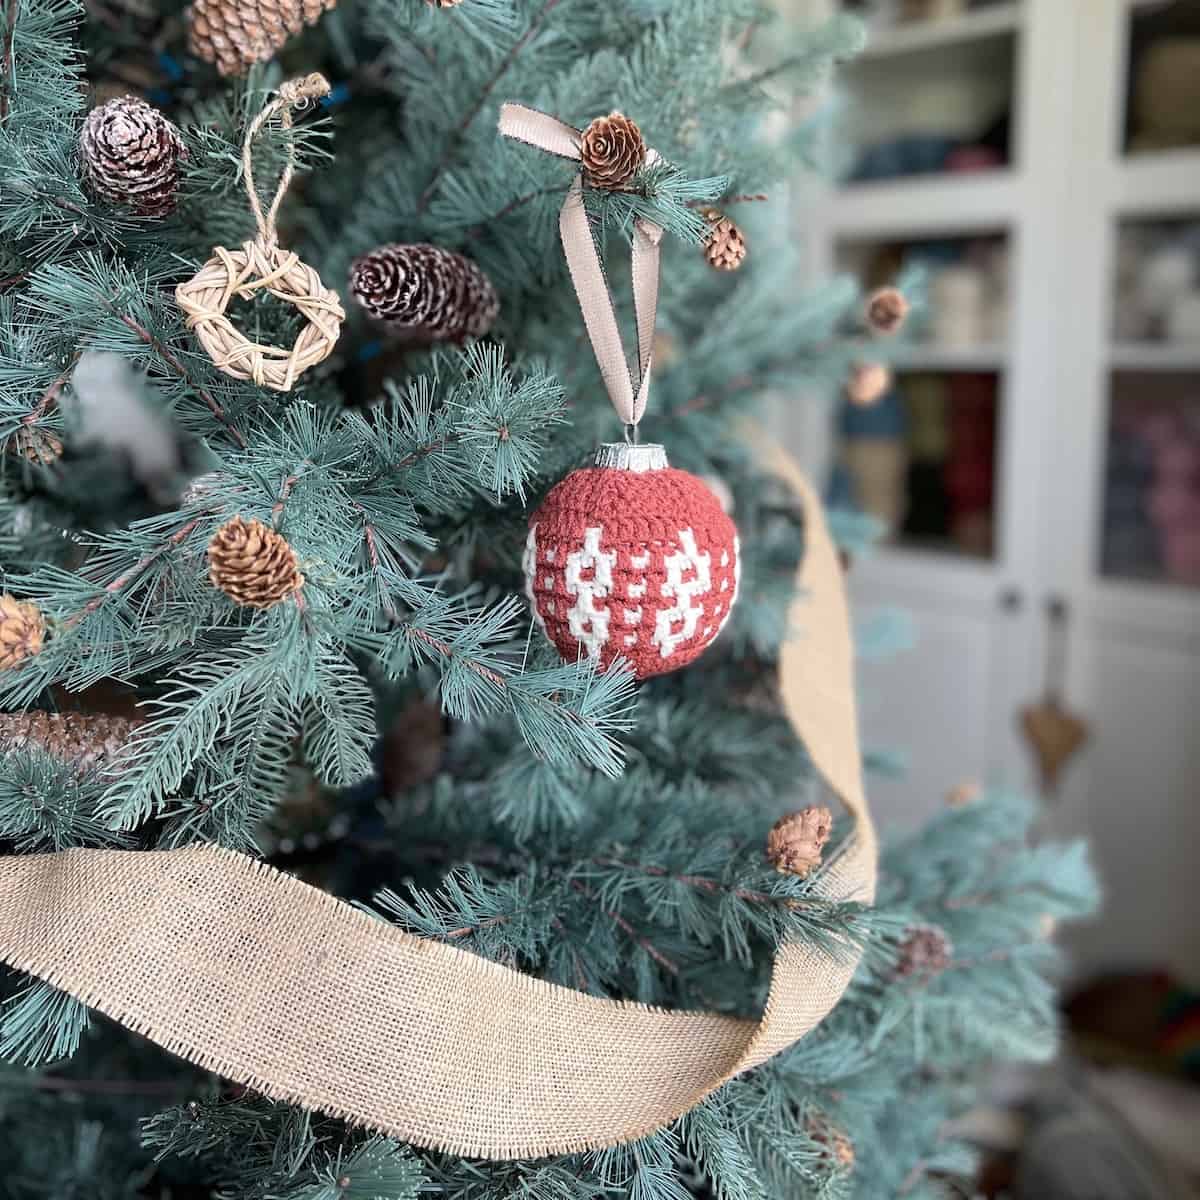
Make a statement this season with a crochet Christmas sweater pattern in baby and child sizes, featuring a stylish tree design for a timeless festive look.
Using just one colour per round it’s amazingly simple to crochet and so fun to wear on Christmas Day!
Inset Mosaic Crochet
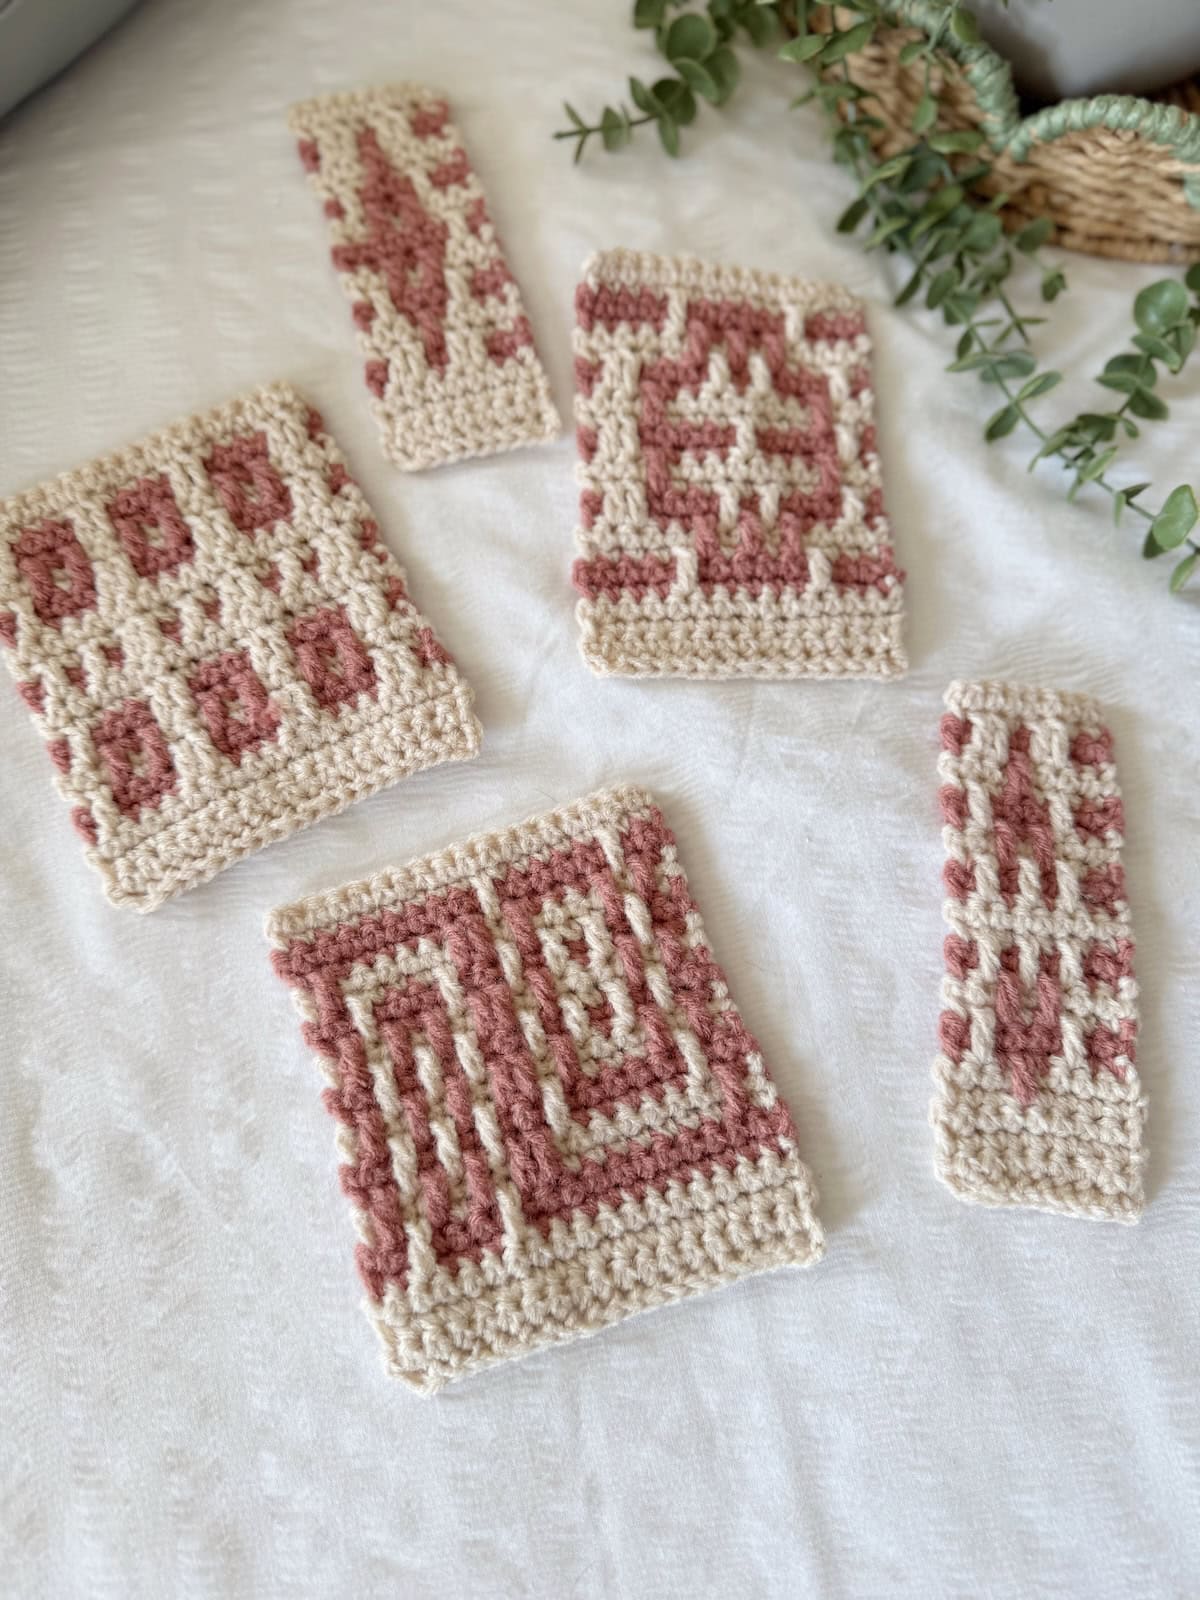
Inset mosaic crochet is worked in turned rows and we change colour every 2 rows. You can see an example of it in the Wildflower Mosaic Crochet Blanket Pattern. You work two rows of crochet in one colour leaving spaces wherever stated in the mosaic chart or pattern and then work a further two rows in another colour.
This second colour allows you to ‘fill in’ the spaces you left using a Mosaic Double Crochet to create the design whilst then also leaving new spaces for subsequent rows. You can see this in action in this free mosaic crochet pattern for a simple washcloth.
This means that you do not need to cut the yarn between pairs. You can simply float the new yarn up as required for each colour change.
For this technique we use a combination of single crochet (through the full part of the stitch), Mosaic double crochet, and chains.
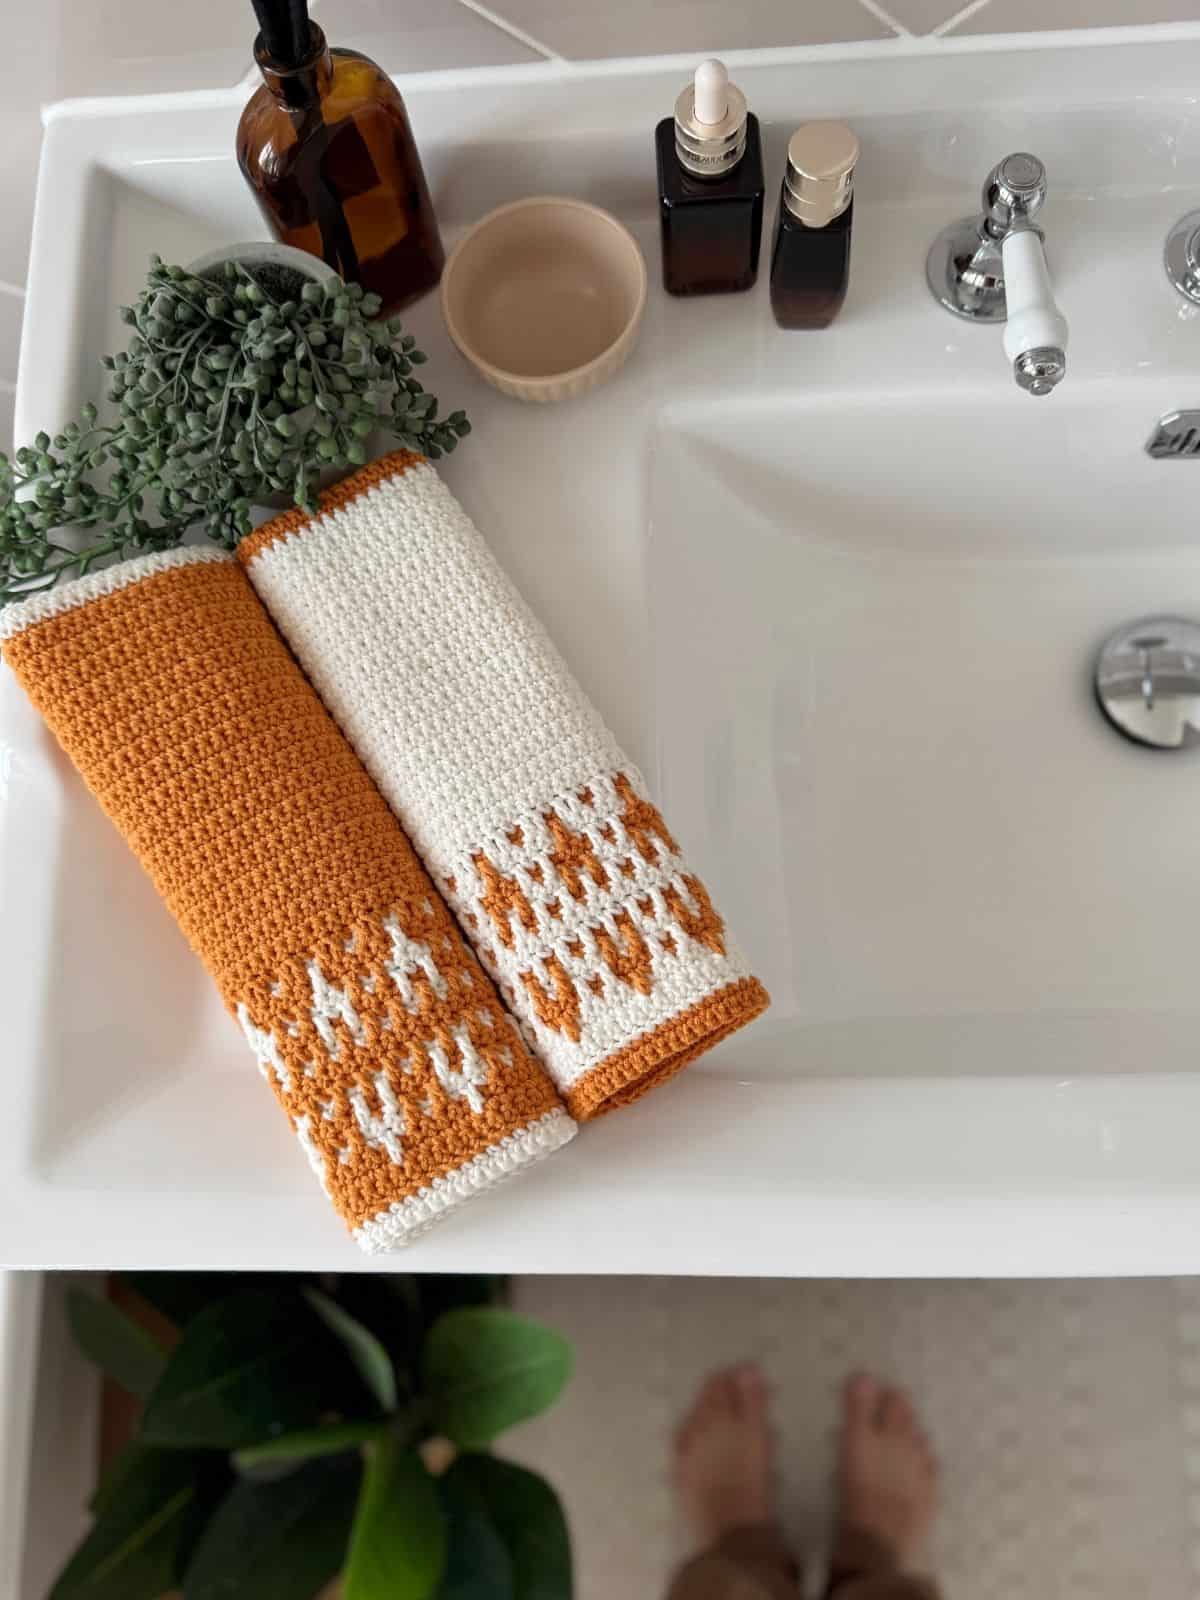
A great way to have a go and learn is by trying a small project like this washcloth!
You can have a try at the inset mosaic crochet pattern and then use it for a bigger project like a blanket or cardigan even!
Note: interlocking crochet is a separate technique that is often confused with mosaic crochet, but this is worked very differently.
Mosaic Crochet Tutorial Supplies
You can use any yarn weight from your stash for this tutorial, but be sure to choose 2 contrasting colours. The yarn you choose should be fairly smooth, and not too fussy for a good stitch definition. And probably steer clear of fingering weight yarn when learning!
If you’re starting by making a mosaic crochet blanket then be sure to have a read of my suggestions for the best yarn for crochet blankets!
You will also need:
- A crochet hook to match your yarn
- Scissors
- Tapestry needle
- Stitch markers can help when starting out
Overlay Mosaic Crochet Video Tutorial
Come along as I show you how to do overlay mosaic crochet and see just how easy it is in our step-by-step video tutorial.
SINGLE CROCHET (sc) always worked in back loop only (blo)
Insert hook from front to back through back loop of stitch to be worked. Yarn over and pull through stitch. Yarn over and pull through both loops on the hook.
MOSAIC DOUBLE CROCHET (Mdc)
A Mosaic double crochet stitch is worked in exactly the same way as a regular US double crochet (UK treble crochet) is. The only difference is where it is worked.
When you need to work a Mosaic double crochet you’ll need to find the front loop of the corresponding stitch 2 rows below. This is where you will work your stitch.
Top tip – it will be in the same colour of yarn as the one you are currently working in!
Yarn over and insert hook into front loop of stitch two rows below. Yarn over and pull through the stitch. Yarn over and pull through two loops on the hook. Yarn over and pull through remaining two loops on the hook.
The stitch behind the Mdc on the current row is left unworked.
Step by Step Tutorial
- Start your piece by making a row of single crochet. You can start with a foundation chain and then single crochet back, or you can use a foundation single crochet. At the end of the row, chain 1 and break your yarn.
- Do not turn, but join your contrasting yarn at the beginning of the row with a chain 1.
- Following your chart or instructions, work either a single crochet in the back loop only or a mosaic double crochet in the front loop of the stitch two rows below. Find a photo tutorial of the mosaic double crochet below.
- When you reach the end of the row, chain 1 and break your yarn.
- Continue repeating steps 2 to 4 as you follow your written instructions or stitch chart.
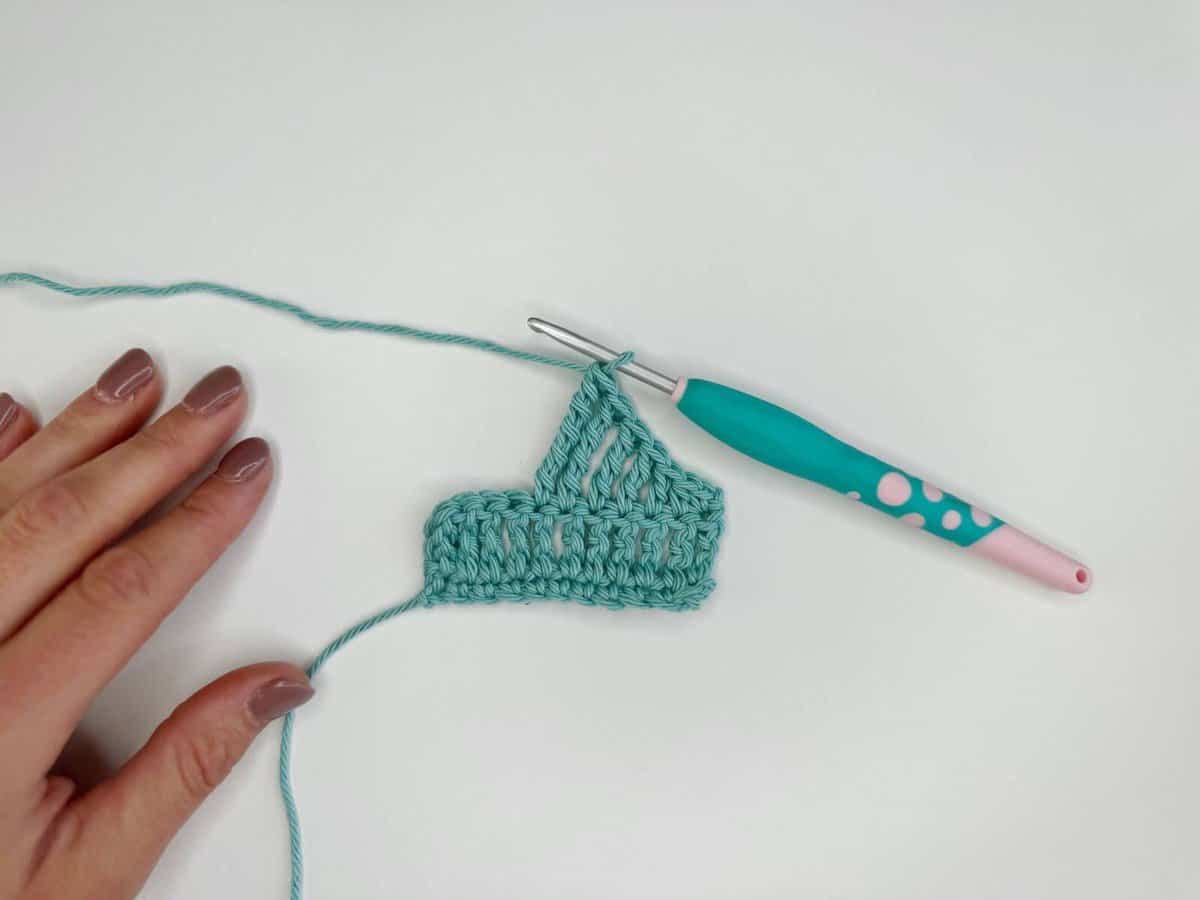
Overlay Mosaic Double Crochet Stitch Tutorial
When you need to work a Mosaic double crochet you’ll need to find the front loop of the corresponding stitch 2 rows below. This is where you will work your stitch.
Top tip – it will be in the same colour of yarn as the one you are currently working in!
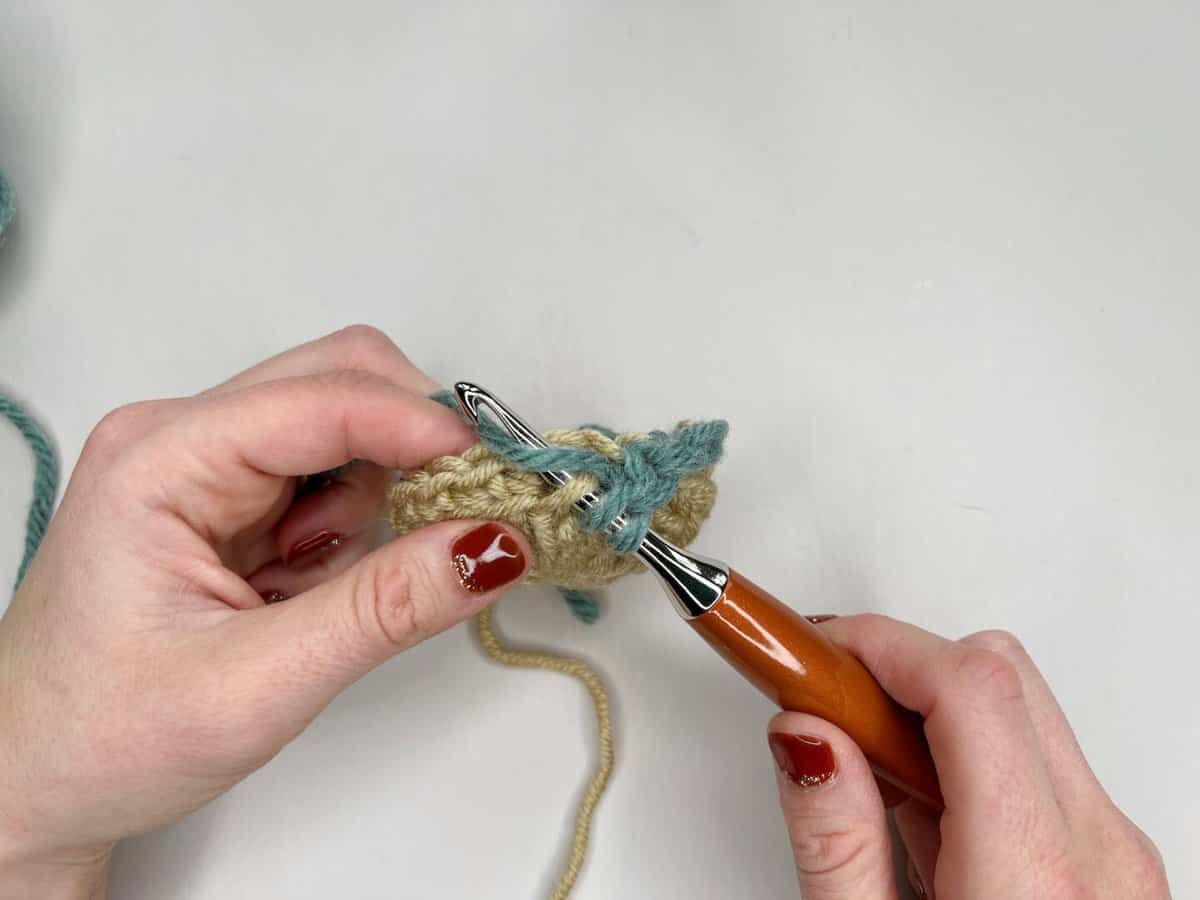
- Yarn over to begin the mosaic double crochet (Mdc)
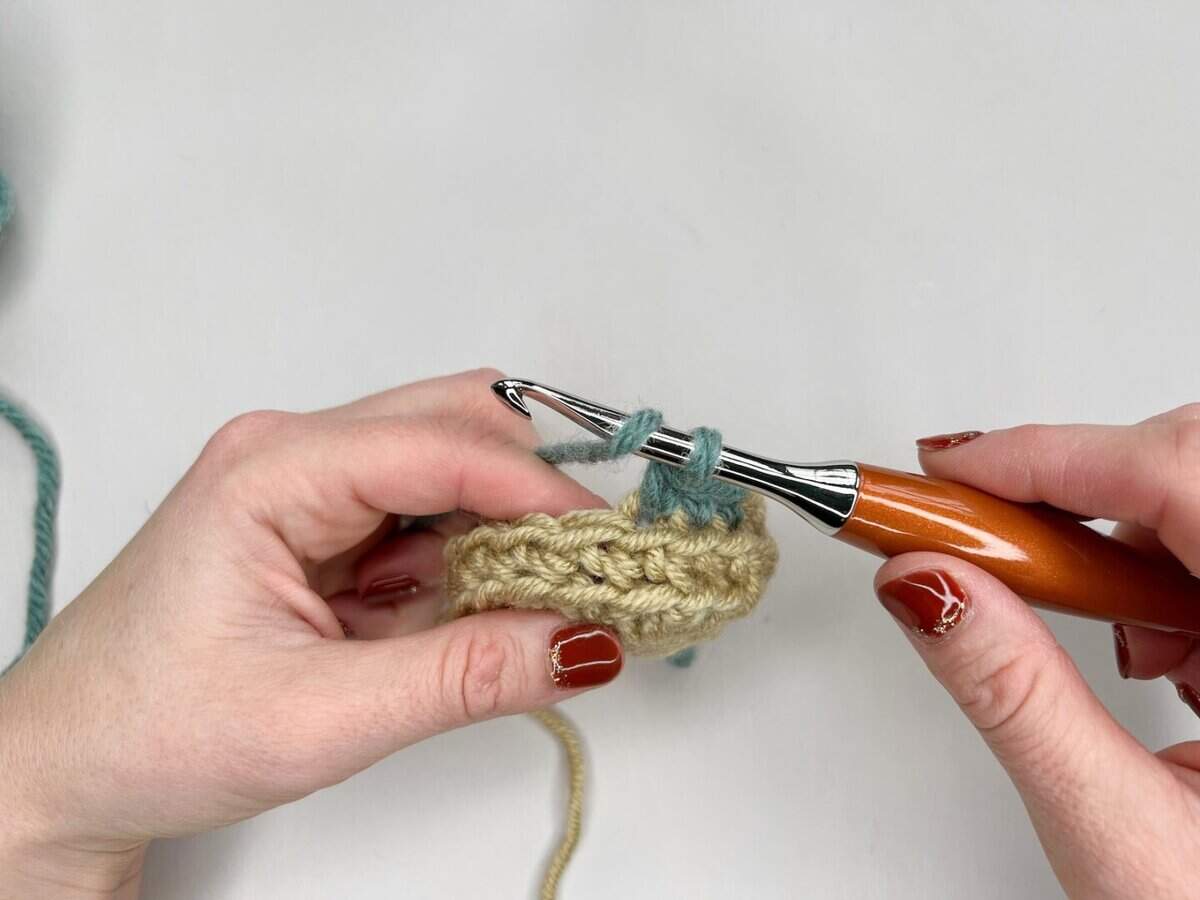
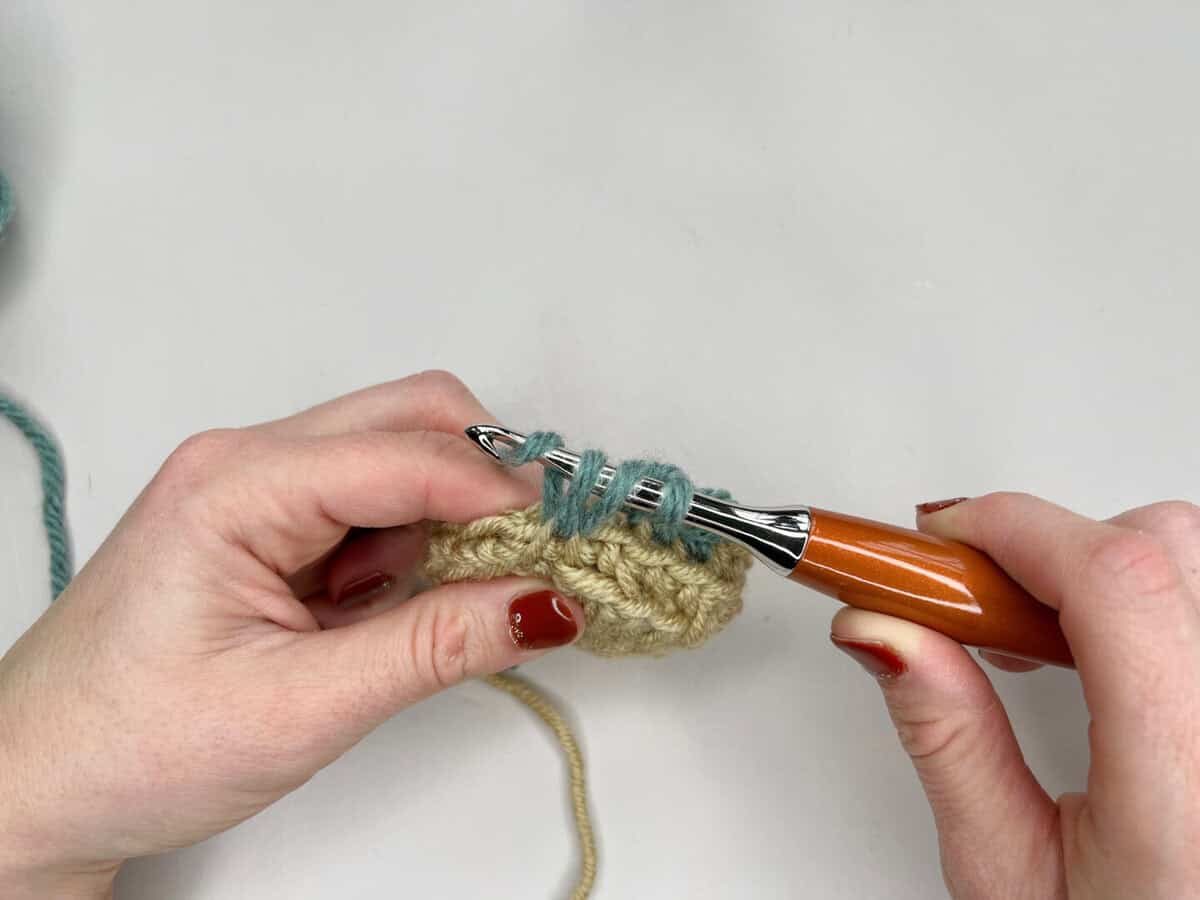
2. Insert hook into front loop of stitch 2 rows or rounds below
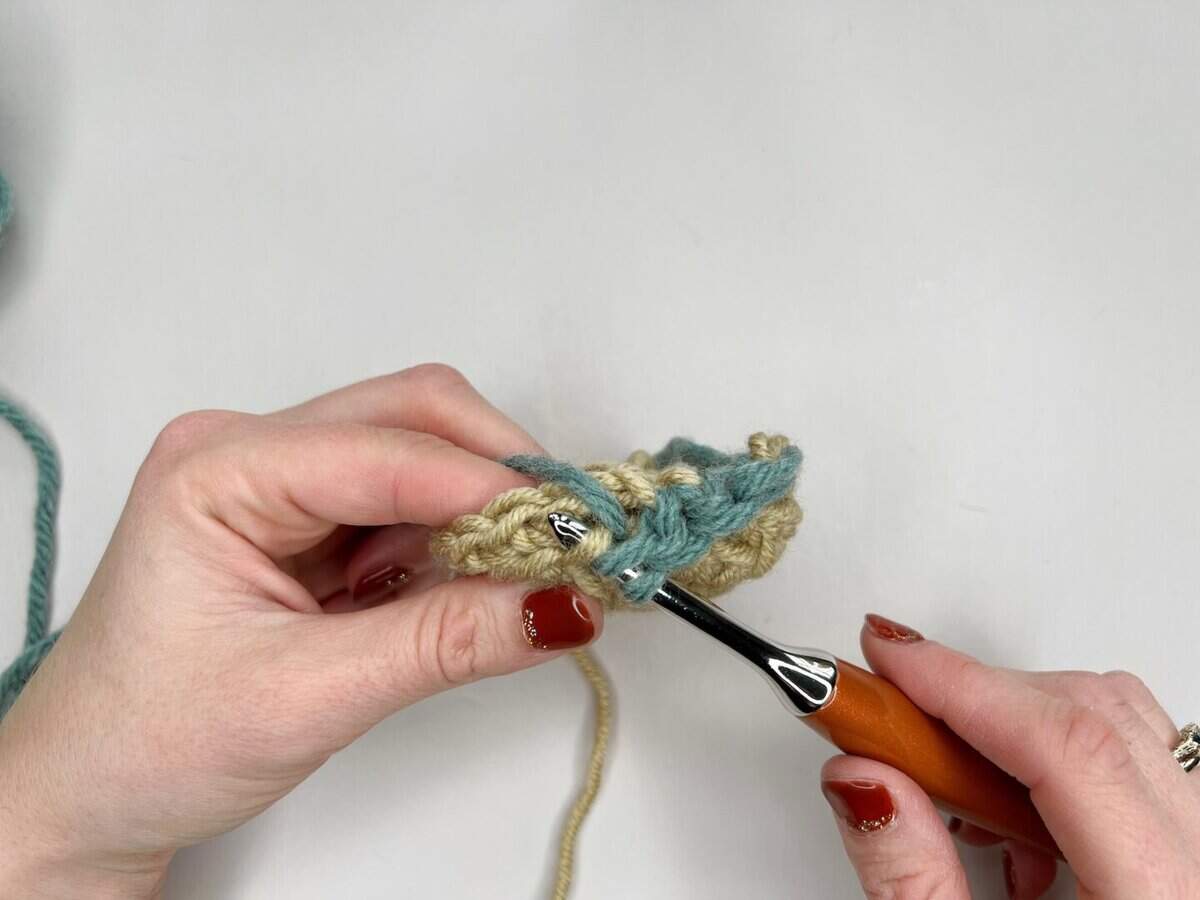
3. Yarn over and pull through
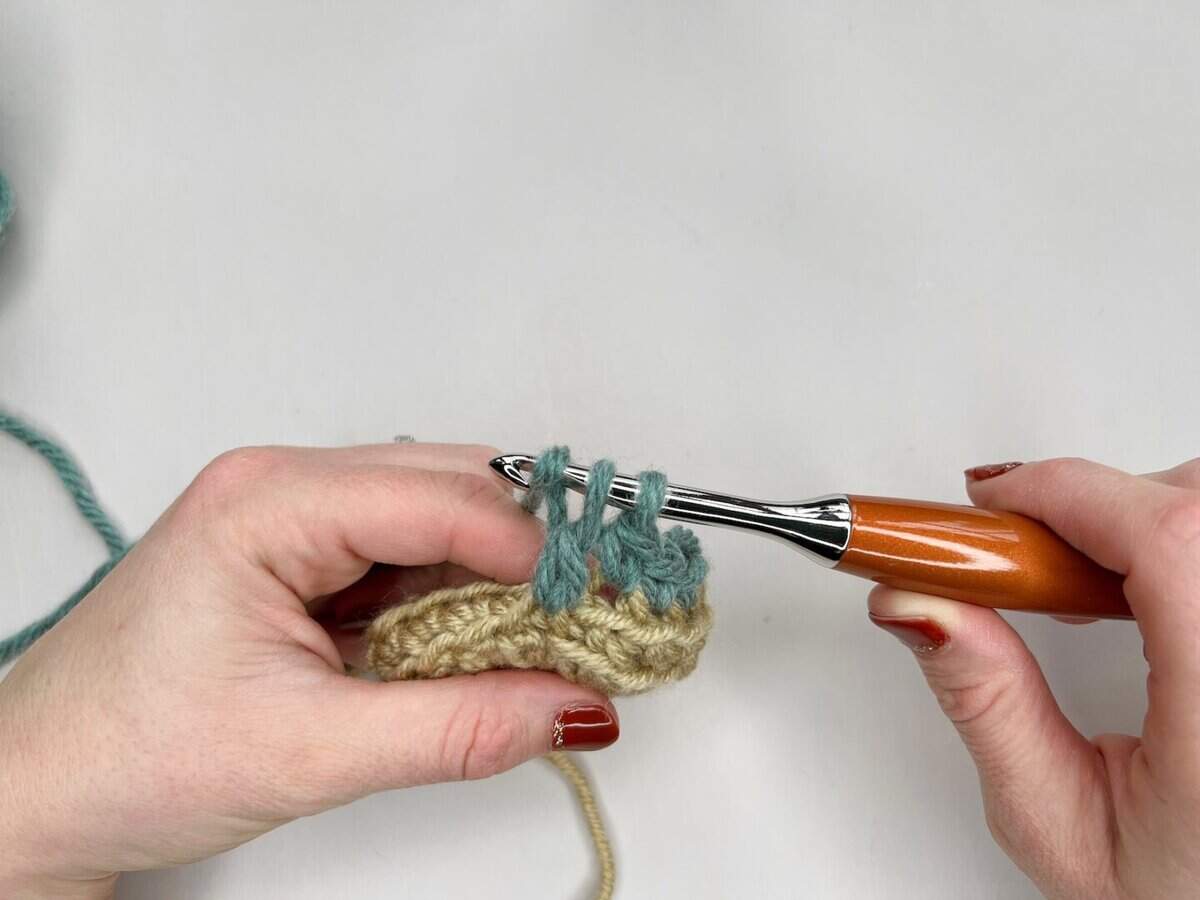
4. Yarn over and pull through 2 loops on the hook
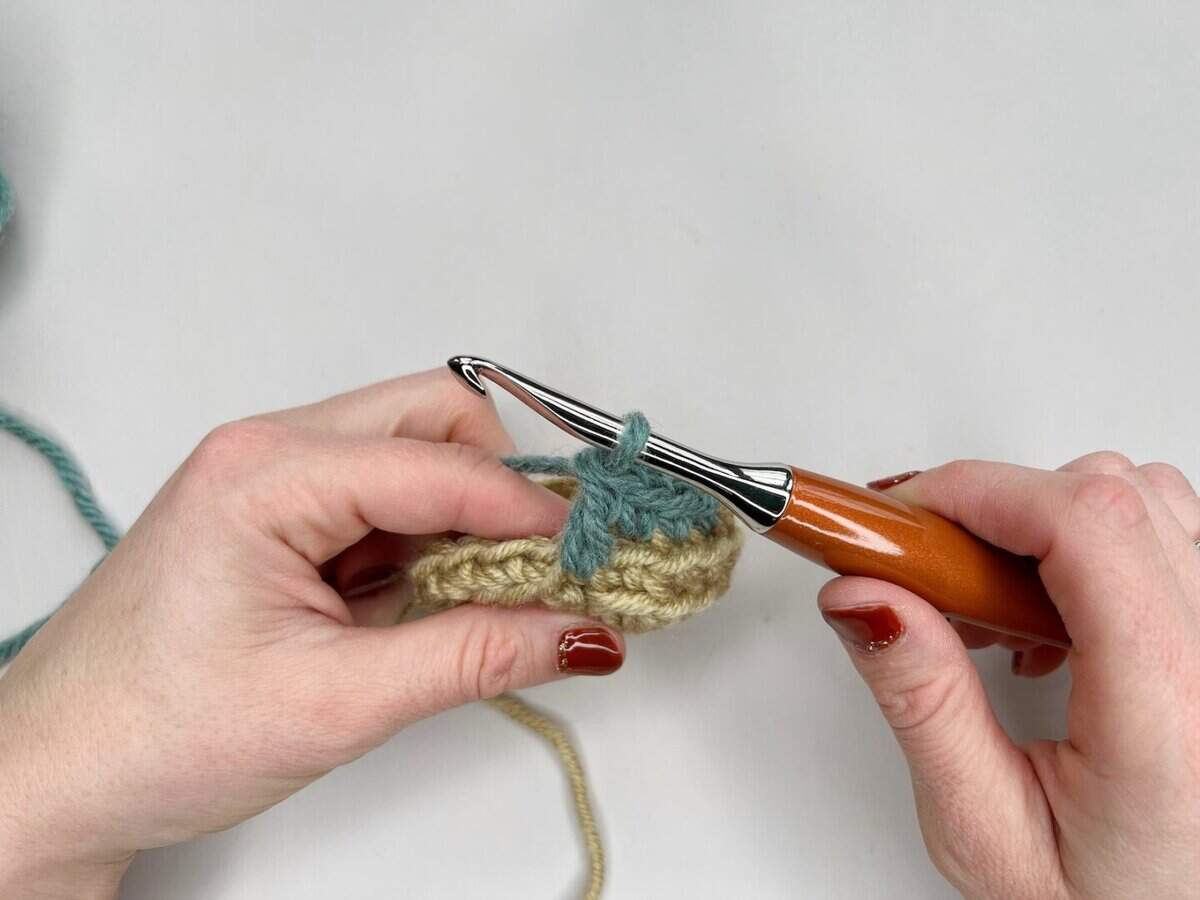
5. Yarn over and pull through remaining loops on the hook
A completed mosaic double crochet stitch (Mdc)
- I always like to start and end a row with a single crochet through both loops – this makes the edges a bit neater.
- Keep your tension nice and even, and be careful not to pull the double crochet stitches too hard, as this can over-extend the front loop it is worked into.
- Be careful that you skip the stitch directly behind a mosaic double crochet to avoid increasing stitches across your row.
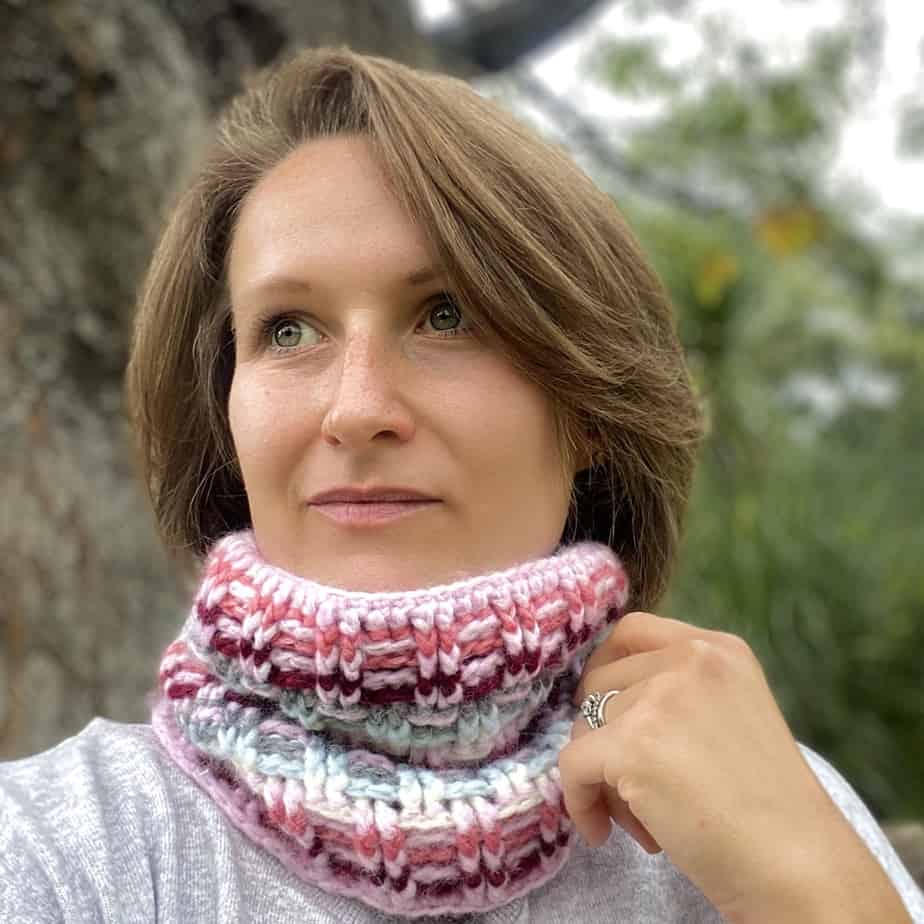
- Projects to try now: Labyrinth Mosaic Hat for a quick make or the Rainbow Splash Blanket for a great stash buster!
Inset Mosaic Crochet Video Tutorial
Come along as I show you how to do inset mosaic crochet and see just how easy it is in our step-by-step video tutorial.
The technique for inset mosaic crochet may look quite complicated and fiddly but I promise it isn’t once you get the hang of it!
In this version you work two rows of crochet in one colour leaving spaces wherever stated in the mosaic chart or pattern and then work a further two rows in another colour.
This second colour allows you to ‘fill in’ the spaces you left using a Mosaic Double Crochet to create the design whilst then also leaving new spaces for subsequent rows.
The Technique
With inset mosaic crochet, rows are worked as a pair e.g. Row 1a, Row 1b, Row 2a, Row 2b etc.
A row “a” will be on the right side of your work, a Row “b” will be on the wrong side.
You will always change colour after working a pair, and all rows start and end with a single crochet (sc).
This means that you do not need to cut the yarn between pairs. You can simply float the new yarn up as required for each colour change. Be sure to watch the video tutorial for how to do this!
Special Stitches
For “a” rows, there are 3 possible stitches to use:
- single crochet (sc)
- Mosaic double crochet (Mdc) worked into a skipped stitch 3 rows below
- chains; the number of chains will always match the number of stitches you need to skip
Each “b” row works almost the same as the previous “a” row in reverse apart from the Mdc:
- work sc in every stitch (it does not matter if you are working into sc or dc – you will always work sc on “b” rows).
- work chains wherever there are chains in the “a” row.
The written pattern will have all of the stitches written out for you in the stitch multiple for the row.
The charts show you each pair of rows compressed into one line.
Inset Mosaic Crochet Step by Step Tutorial
- Start your piece by making 2 rows of single crochet. You can start with a foundation chain and then single crochet back, or you can use a foundation single crochet. At the end of the first row, turn, chain 1 and single crochet back across. Note: this has created row 1a and row 1b.
- Join your second yarn, leaving the first colour hanging, ready to be picked up again when required.
- Following your chart or instructions, work either a single crochet, a mosaic double crochet in the skipped stitch three rows below, or skip a stitch and make a chain. This is your ‘a’ row.
- At the end of the row turn and continue onto your ‘b’ row. For ‘b’ rows, work a single crochet wherever you worked a single crochet or mosaic double crochet on the ‘a’ row, and work a chain and skip a stitch wherever you did that on the ‘a’ row.
- Switch over to your other colour at the end of each ‘b’ row, and then continue repeating steps 3 and 4.

- When you are making the Mosaic double crochet stitches, make sure to work in front of the chains and not around them.
- Check your work every 2 rows to make sure it matches the chart or instructions.
- When you are creating chains, be sure to skip the same number of stitches as the number of chains required.
What Projects Can I Use Mosaic Crochet For?
If you would like to try out some of the things you’ve learnt in the mosaic crochet tutorial, I would recommend having a look at my mosaic crochet patterns, which include both overlay and inset mosaic crochet patterns.
Inset Mosaic Crochet Patterns to Try
- Easy mosaic crochet pattern – a modern geometric pattern for a washcloth or blanket.
- Free mosaic crochet blanket pattern – featuring 5 different motifs to mix and match.
- Mosaic crochet blanket pattern – a stunning celebration of colour, texture and geometry.
Overlay Mosaic Crochet Patterns to Try
- Crochet Christmas stocking pattern – create unique heirloom stockings for everyone.
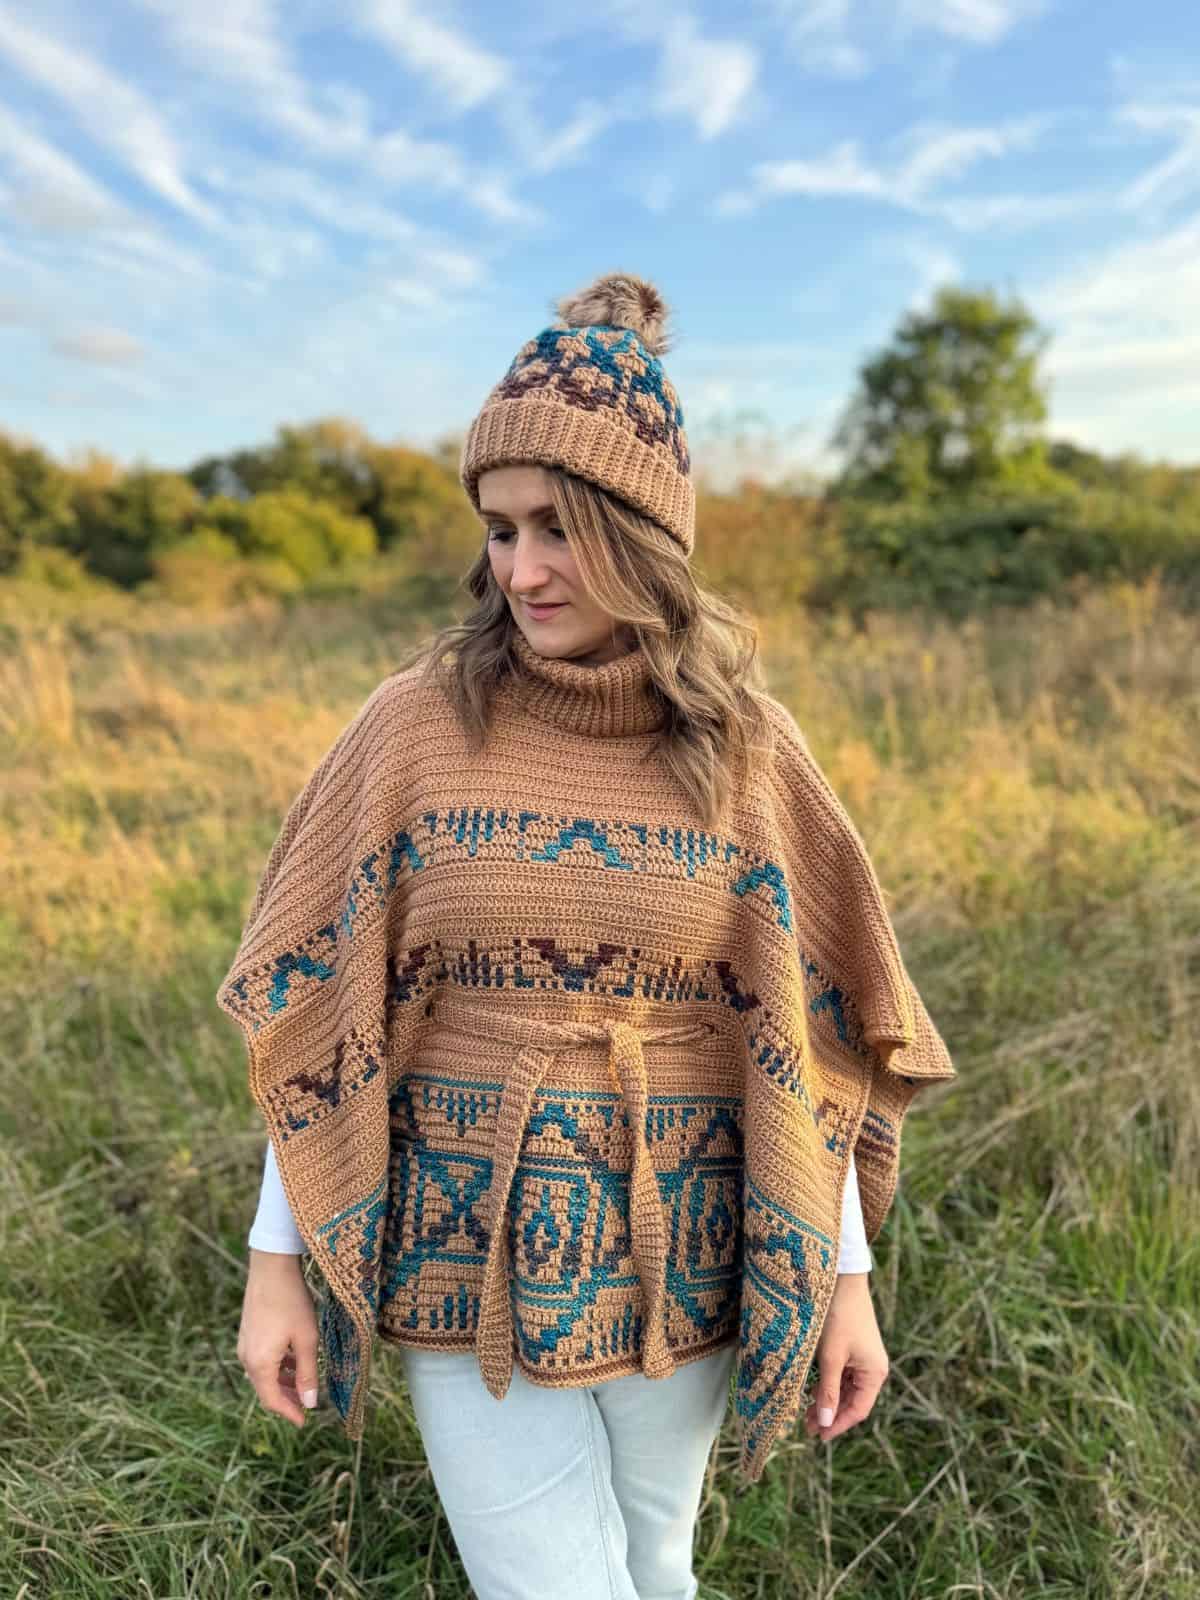
- Crochet poncho pattern – a simple poncho made of 2 rectangles.
- Crochet sock pattern – showstopper socks to wow everyone with!
- Mosaic crochet beanie – create a stunning hat in child and adult sizes.
- Heart crochet hat pattern – this one uses some mosaic shaping too!
I hope you’ve enjoyed learning all about overlay and inset mosaic crochet in this mosaic crochet tutorial! I’d love to know if you decide to make any of my patterns using these techniques or if you create your own! You can sign up to become a member of HanJan Crochet and I’ll let you know about all the fabulous crochet adventures, offers, lives and more too!
See you there!
Join our community group!
We’ve built an amazing community always ready to help each other. Join today!
Learn Some More Crochet Stitches With Me
If, like me, you’re eager to learn all the crochet stitches and techniques you possibly can then I’d love you to take a look at my crochet stitch tutorials – here are some of my favourites though:
- Herringbone Half Double Crochet Moss Stitch – great for cosy garments and accessories
- Twisted Cable Stitch – perfect for texture and has a slanted look like herringbone too.
- Double Crochet Moss Stitch – a great stitch for easy colour work
- Ripple Stitch – great fun for blankets espeically!
Pin It For Later